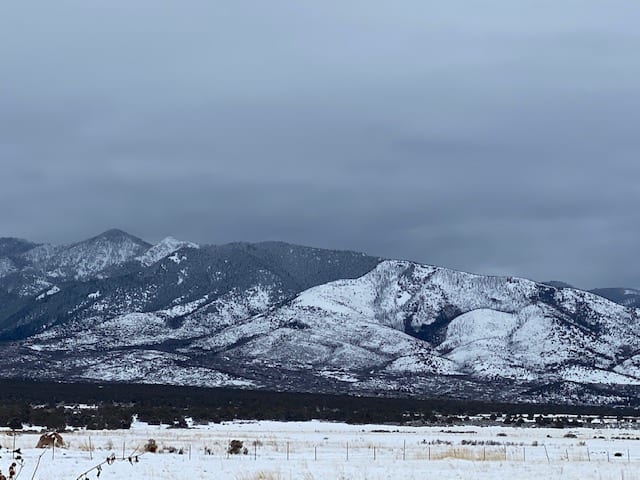
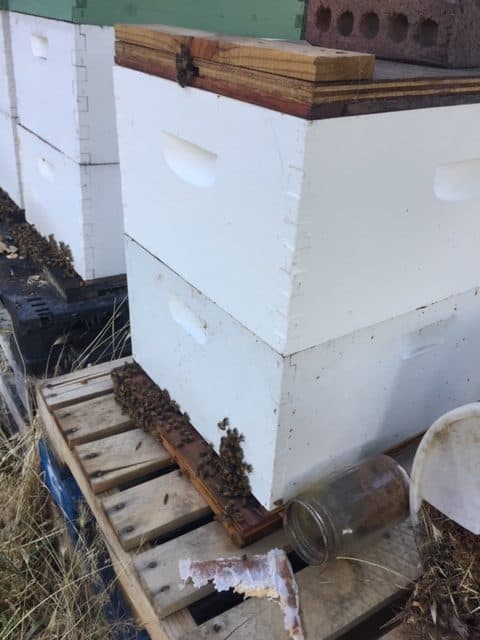
We live in the mountain west of the United States. The winters can get pretty severe and it’s common to have weeks where we have below zero Fahrenheit temperatures. We do keep bees and they generally make it through the winter to do their job of pollination and making honey the next spring.
What do the bees do to stay alive through the winter? Do they hibernate? Do they all die, and a new colony rise from eggs? Does the magic bee fairy come and create new colonies?
To survive the winter honeybees will have created winter stores of food. Honeybees also raise winter worker bees that are specifically adapted to keep the queen safe, fed, and warm. The bees also kick out the drone or male worker bees to save the honey and bee bread for the queen and winter workers. The worker bees then cluster around the queen and keep her warm and fed throughout the winter.
Honeybee preparation for winter
All throughout the spring, summer, and fall the honeybees work to gather nectar and pollen. The whole driving purpose of the honeybee is to raise more honeybees to gather more nectar and pollen. Surviving and thriving are the prime goal or objective of the honeybee.
The nectar is processed into honey. The pollen in processed into bee bread. Honey and bee bread are amazing substances. I have an article on bee bread here. The stores of food have all the nutrients the bees need to survive the winter.
The colony will work tirelessly to their death to gather resources. They work to grow the colony and to prepare the colony for the lean times. When there is a nectar flow the bees will be working like crazy to build up a cache of honey and bee bread so they can survive the absence of nectar and pollen, or a dearth of nectar and pollen.
The absence, or dearth, of resources for honeybees can come through the summer at different times but will most definitely occur in the winter. To prepare for the winter the colony will work like crazy. They will intelligently manage the colony to have enough resources to last anywhere from 3 to 8 months.
Bee hive in autumn
Managing the colony for the winter.
As winter approaches the nights get cooler, and the days get shorter. This triggers most of nature to prepare for the upcoming winter season. Honeybees are the same and take the signs of winter coming to prepare.
When winter is approaching the colony will change their method of management drastically. Instead of raising new workers to gather nectar and pollen they raise a different worker to survive the winter. Normal worker bees are raised during the spring and summer live 4-6 weeks at the most. They are a small efficient worker.
The new winter worker bees have larger fatter abdomens and have a much longer lifespan. Winter bees can live 4 to 8 months. This allows the workers to keep the queen alive throughout the cold winter months.
Male bees, drones.
When the days get shorter and nights get colder the winter workers take over the hive. The male bees, called drone bees, are kicked out of the hive. The drones don’t do any of the work of gathering pollen or nectar.
Drone bees are pretty much there for reproductive purposes. When winter comes, it’s time to rid the hive of the freeloaders and conserve the resources for the survival of the colony. The worker bees will kick out the drones leaving them to fend for themselves. This leaves the hard-earned honey and bee bread for use of the workers and especially the queen.
Winter worker bees
Winter worker bees are much heartier than the smaller more streamlined summer workers. The winter workers are, as I wrote before, larger through the abdomen. The winter bees have extra fatty cells added to their anatomy.
With the extra size it gives them the ability to survive much better throughout the winter. The winter workers have a much longer lifespan of 4 to 8 months. That’s amazingly longer than their summer counterparts.
The winter worker bees are built for survival and keeping the queen safe. They will sacrifice their wings and their selves to keep her alive.
Winter Cluster
The major goal and mindset of winter workers is to keep the queen bee alive and well. To do this they winter worker bees will surround the queen bee in a cluster. While they cluster around the queen bee they shiver and create heat.
When the temperature is consistently below 40 degrees Fahrenheit (4.4 degrees Celsius) the colony will go into cluster mode. The bees will ball or cluster up for the long haul. The cluster size will vary somewhat but is generally the size of a basketball.
During a cluster mode the outer layer of bees will detach their wings and vibrate their muscles creating heat. The detachment of their wings allows the worker bees to vibrate their muscles without creating a wind that could cool the cluster instead of creating heat. The friction of the bees vibrating their muscles creates the heat that keeps the queen toasty and warm.
The queen bee is protected and kept warm through this winter clustering. The outside of the cluster can be at 50 degrees Fahrenheit (10 degrees Celsius) and 90 degrees Fahrenheit (32 degrees Celsius) in the center.
The work required to keep shivering and vibrating to maintain the queen’s warmth takes a lot of food. The workers will go through the winter stores of honey just keeping the queen bee alive and well.
Some colonies can go through over 80 pounds of honey in a winter season. This is something all beekeepers need to keep in mind during the harvesting of honey in the fall.
As stores of honey get used throughout the winter, the cluster will move to different parts of the hive for unused reserves of honey. They do this on warmer days to keep less stress on the queen bee.
This is a fun animation that explains what bees do in the winter well.
Warm winter days.
On warm winter days the hive will take advantage of the warmth to do some maintenance. The bees will take what is called a cleansing flight where they can vacate their bowels, get a breath of fresh air and search for possible nectar and pollen sources. Honeybees will not defecate, or void their bowels, inside the hive. Honeybees are very hygienic and keep their place clean.
Late Winter/Early Spring
As the winter wears out the days get longer, and the temperature begins to get warmer. This triggers the colony to change back to a production mode. The queen will begin to lay eggs for spring and summer worker bees. The colony then will change from winter workers to spring/summer workers ready to go out gathering nectar and pollen when spring arrives.
Late winter and early spring can be the toughest time of year for a honeybee colony to survive. In order to raise the new spring/summer bees the brood nest needs to be warmer than throughout the winter. Through the winter they just needed to keep the queen alive which doesn’t take much honey. In the early spring they will need to keep more of the hive warm to raise the brood which requires a lot of honey and bee bread.
The tough part is when there is an inconsistent spring. If you get a cold snap in the spring the hive will expend a lot of energy keeping the brood warm and alive. Sometimes trying to keep the new brood warm and healthy will lead to the death of the entire colony.
We have had strong hives doing fine changing from winter cluster mode into spring mode. Then loose them with a short cold snap.
Warmer climate
In a warmer climate honeybee will not need to prepare as dramatically as in a colder climate. The temperature can be warm enough to let the bees survive without the rigors of going into an intense cluster mode.
Many warmer climates will allow several cleansing flights a week, whereas the colder climates it might be months before the bees get a break. There also may be sources of pollen and nectar available year round resulting in no real reason to change the colony behavior at all.
Honeybee winter behavior
Honeybees are fascinating, and like most of nature have a fascinating way to handle winter. The honeybees will:
Observe the change in light with shorter days.
Observe the change in consistent cooler temperatures
Store up honey reserves
Kick out the male, drone, bees.
Raise winter worker bees better suited to last the winter
Surround the queen and vibrate creating heat
Keep the queen safe and warm in a cluster through the cold winter months
When given the proper safeguards a beekeeper can have a honeybee colony survive and thrive through winter well.
Storing potatoes is important to consider when growing them, or just wanting to make the ones you buy last longer. Sometimes you can get great deals on potatoes if you buy them at harvest time or in bulk. With the correct techniques you can keep potatoes stored for a long time. We often have our spuds last from October until the following June. That is if I don’t eat them all by then.
To store potatoes, you need to keep the potatoes cool, out of light, well ventilated, and have the correct humidity.
What happens to the potato as it’s stored?
Potatoes themselves are a tuber. They are formed on the roots of the potato plants. Many people think that potatoes are a root vegetable, they are not. They are tubers that are formed on the roots during the growing life of the potato plant.
Many of the same methods used for storing root vegetables can be used with potatoes. However, you will want to keep root vegetables a little less ventilated than potatoes. Here is an article that can help you with storing root vegetables.
Potatoes are a living thing and storage is just slowing the growth process. As time goes on the potato will naturally change from starch to sugar and sprouts will grow from the eyes of the potato. When light hits the potato, it triggers this growth process as well. This can happen between 30-140 days after they are harvested. (Source)
Things to consider in potato storage.
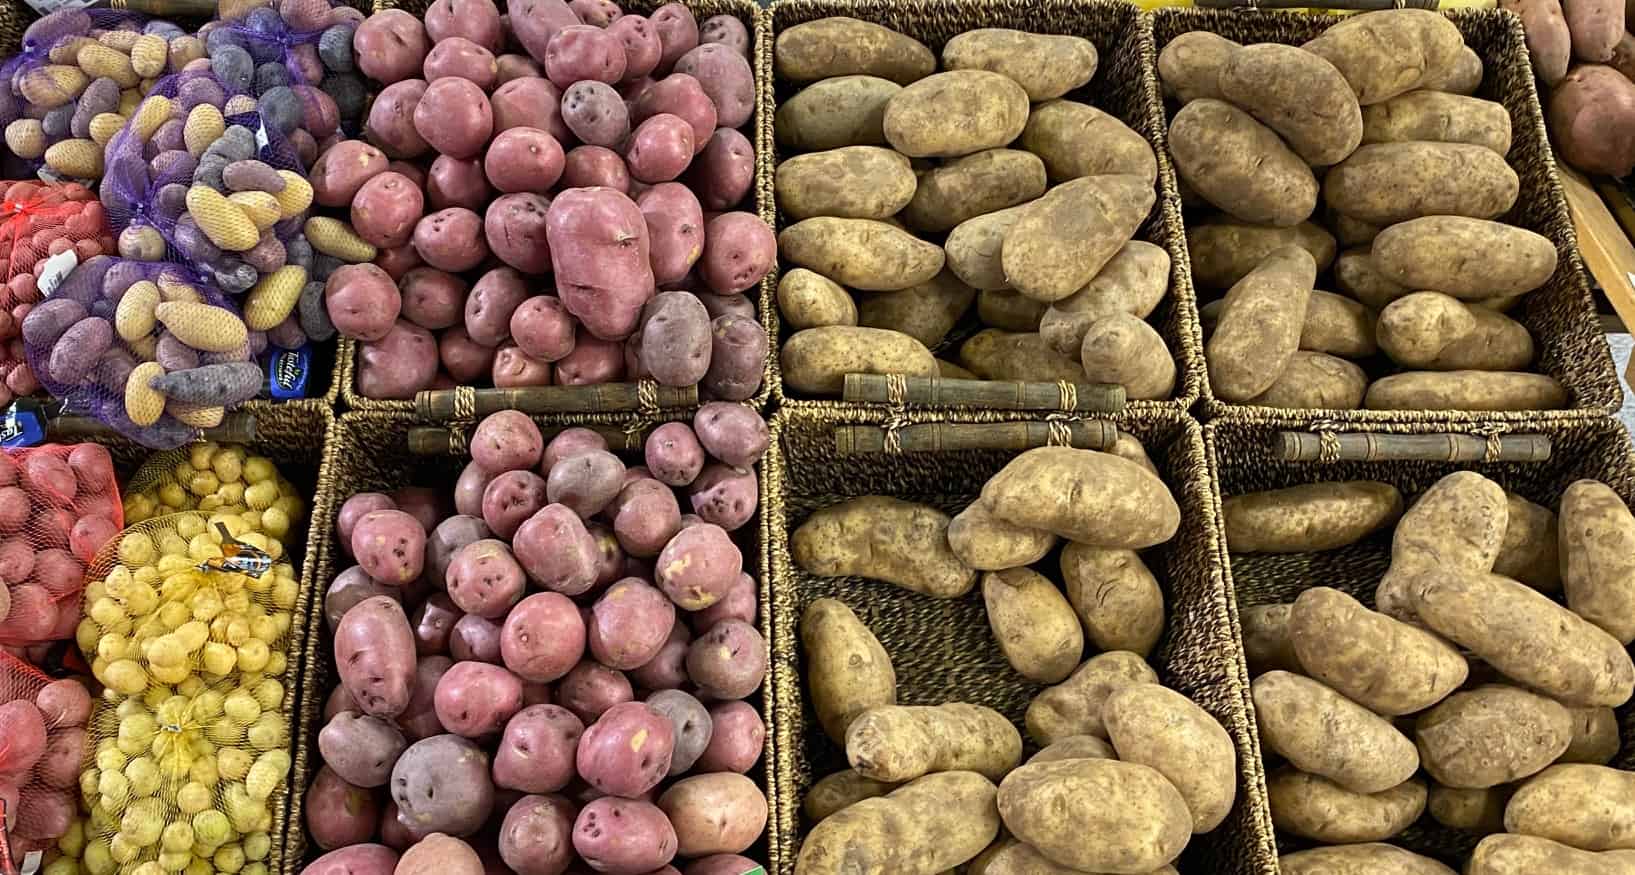
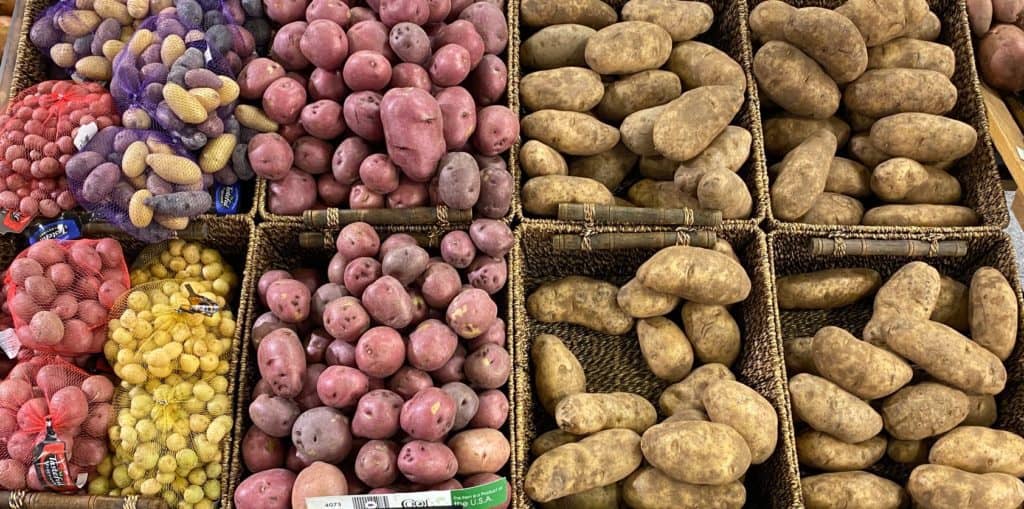
All kinds of potatoes.
Type of potato.
There are all kinds and types of potatoes that have been cultivated. You probably have seen them in the grocery store and seed catalogs. You may have even grown some in your own spud patch. White, red, purple, small, large, petite, bakers, fingers are all potatoes that are grown and sold. With all the different types of potatoes some will store better than others.
There are 7 basic types of potatoes and over 200 varieties with more seeming to show up every year.
The 7 basic types of potatoes are:
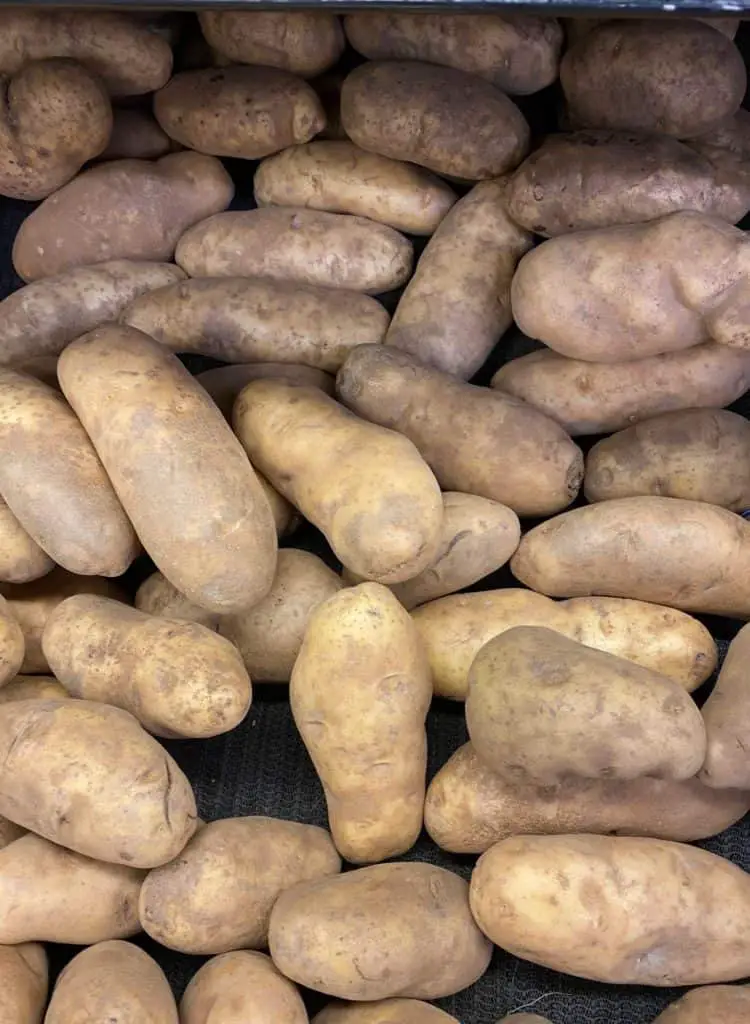
1-Russets- Russet potatoes are a medium to larger potato and are generally an oval or oblong shape. They are a brown color that can vary in shade from light to a medium brown. They have a light yellow or white flesh. They are excellent storage potatoes. If you grow them in your own garden, some of these potatoes become monstrous in size. One potato can feed your whole family.
2-Reds- Red potatoes are often harvested when they are small to medium and immature. They have a waxy, moist, and smooth flesh with a thin red skin. They are round or oblong in shape. However, if you grow them in your own garden you don’t have to harvest them early when they are immature. You can keep them growing and they can grow large and still keep the same characteristics as the small potato. With the proper care these potatoes will store well, but without the proper precaution they will rot, sprout, and spoil.
3-Whites- White potatoes are generally small to medium in size. They have a thin skin that looks white to light tan in color. The flesh is fairly dense and starchy. These potatoes will store well if you take the proper steps. As with most all the potatoes you can grow larger ones than typically found in the store.
4-Yellows– Yellow potatoes are anywhere from marble size to huge depending on when they are harvested. They have a light yellow/tan to golden skin. They have a waxy yellow flesh. These potatoes will store well and are becoming very popular to the home gardener and the homesteader looking for a cash crop.
5-Purple- Purple potatoes are a relatively new novel variety. They are small to medium sized round or oblong. Very distinctive with their dark purple to blue skin. The flesh is dense and firm. The flesh color can vary from pink to blue to purple. It also can vary from light to dark in color. These potatoes can also store fairly well. These varieties are often harvested when they are immature and do not store as well as if they had been harvested at maturity.
6-Fingerling- Fingerling potatoes are becoming very popular for a fun festive dish. Fingerling potatoes are small long or oblong in shape. They resemble fingers in shape, and can kind look knobby. They are all colors under the rainbow. The flesh can be red, purple, orange, white, yellow, and will sometimes have veins of color running throughout. These are heirloom potatoes and will store well depending on when you harvest them.
7-Petite- Petite potatoes are more of a size class than anything. They have been propagated from the original traditional potatoes to have a smaller size and somewhat more concentrated flavor. Most petite potatoes are potatoes that are harvested early in the season. These do not store well unless you are very careful in harvesting storage.
Most all potatoes will store well if the proper precaution is taken. However, russets, reds, and yellows have proven to be great for storing for long periods. The thicker the skins are the better they store.
Washing and handeling
Do not wash potatoes before storage. Washing can stimulate the growth process to begin. It also can thin the skin of the potato. Try not to handle and drop or bump the potatoes around when storing them. They are not as fragile as eggs, but try to be careful. Bruising and scratching or gouging can create premature rotting and spoilage.
If you find some soft potatoes while putting them into storage, or during your storage time. Take them out and discard them or put them into your compost pile. You should also separate potatoes that might have been cut during harvesting. They should be used as soon as you can, they will decompose fairly quickly.
Temperature
The temperature has a lot to do with the storage of the potato. You mainly want to keep between 42-50 degrees Fahrenheit, or 5.5-10 degrees Centigrade.
Careful consideration needs to be used when choosing a temperature. The cooler the potato is stored the longer you can store them without sprouting. The higher the temperature the more chance you will have the potato sprouting.
When you keep the potatoes stored cold it will change the starch of the potato into a sugar. If you fry these potatoes that have been stored in colder conditions, they will have a color change in the flesh when fried. The colder the potato is stored the browner the flesh will look when they are fried. You may want to consider storing your potatoes at a warmer temperature if you are going to fry them.
The colder stored potatoes remain white when boiled or baked. The flesh only turns darker and browner if they are fried. Some people even like a sweeter flavor to their baked and boiled potatoes.
Potatoes that are stored frozen need to be processed or cooked before you freeze them. Freezing a fresh raw potato will turn the flesh grey. The flavor can be affected as well as the look. It’s not recommended to freeze your raw spuds.
Storing potatoes at a warmer temperature will encourage them to sprout sooner. When the potato sprouts the potato begins to change. The potato will become soft especially around the eye of the potato. The eyes will sprout and use the potato as nutrients for the new growing plant. If the potato hasn’t sprouted too much or become too soft you can eat it just fine. The softer the potato and more sprouting the worse it tastes.
We have a couple of articles on potato sprouts on the blog. Here is one on how to keep you potatoes from sprouting, and here is one on questions that we answer about potato sprouts.
Sometimes you don’t have much of a choice with the temperature of your storage. If you do have some control or choice of the temperature of your storage you will want to consider how you will be eating your potatoes. The warmer the temperature the better the flesh for frying, the cooler the temperature the longer you will be able to store the potatoes.
Humidity
Potatoes are a living thing and are 80% water. They require humidity or moisture to store them well. If potatoes are stored too dry, they will shrivel up and wrinkle. The dryer the storage the more dehydrated potatoes get. You can still eat them if you would like or need to, but they won’t be very good table fare.
Commercial potato storage has the humidity set at around 90-95%. Not many homes are this high in humidity. If they are this high in humidity, they are usually too hot in temperature.
There are some techniques that you can use to regulate the humidity and get it higher if you need to.
If you have a root cellar you can put trays of water in front of the potatoes.
If you are using plastic bags or sacks you can make smaller holes for the ventilation.
You can cover the potatoes with a damp cloth or blanket.
You can also spray or poor water on a burlap cover or sack.
Light is also a concern.
Light is something to avoid when storing potatoes as well. Light triggers the chlorophyll in the potato to change chemically and turn green. It’s just mainly on the shin or surface of the potato.
Once the potato turns green it doesn’t turn back if you put the potato back into the dark. Once it’s happened it’s permanent. The greening of a potato doesn’t change the taste. You can cut off the green part and eat the rest of the potato.
It’s advised that you don’t eat a lot of the green part of the potato. When the chlorophyll reacts, it creates a chemical reaction in the potato. This is where there is a buildup of glycoalkaloids. The glycoalkaloids are a protein that will make the potato taste bitter. The glycoalkaloids are also toxic if you eat a too much of them. It does take quite a bit for it to be harmful. But it is something to think about for sure.
Unless you are wanting to use your potatoes for seed to grow potato plants. Potatoes need to be kept in the dark for storage. If you do want to use your potatoes for growing new plants read this article here and it will let you know all the ins and outs of growing potatoes.
Methods of potato storage
There are a few options for potato storage. The main things to think about are the temperature, humidity, and light. Other things to consider would be the convenience and cost of your storage.
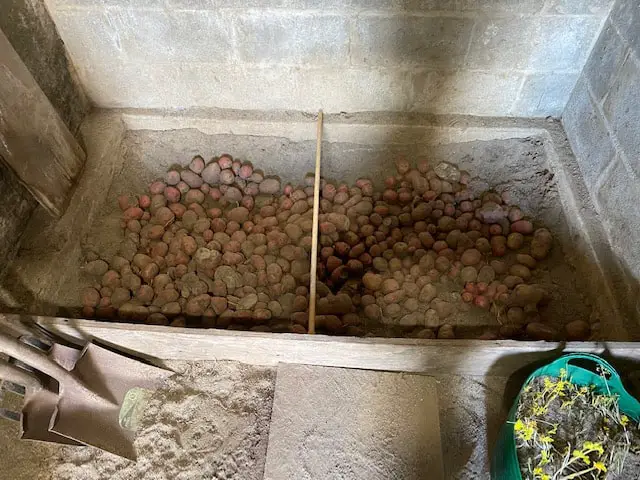
Our potato pit in the root cellar.
Dirt floor cellars are great for storing potatoes. This is my personal preference. Using sandy soil to line the bed of your potato pit in the cellar is recommended. This will allow for better ventilation and humidity control.
If you don’t have a cellar there are some other techniques for increasing the humidity of the stored potatoes.
A refrigerator set a higher temperature works well. I have seen a lot of smaller refrigerators available for a pretty reasonable price. You can also find some used refrigerators that might work for reasonable storage for your potatoes. You would be able to store most other root vegetables in there as well.
You can use a plastic bag or sack. This will allow you to keep the humidity higher. You will need to put some slits in the side to allow for ventilation. If there is no ventilation you will kill the potatoes and they will rot. This may take some trial and error to figure out how many cuts in the plastic bag, but it works.
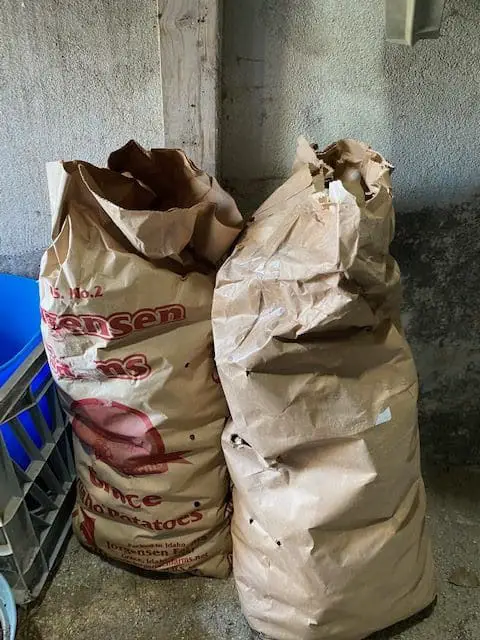
Potatoes stored in paper sacks.
Cardboard boxes and paper sacks can work well. Many potatoes are sold and transported in cardboard boxes and paper sacks. These can often work well in regulating the humidity of your potatoes.
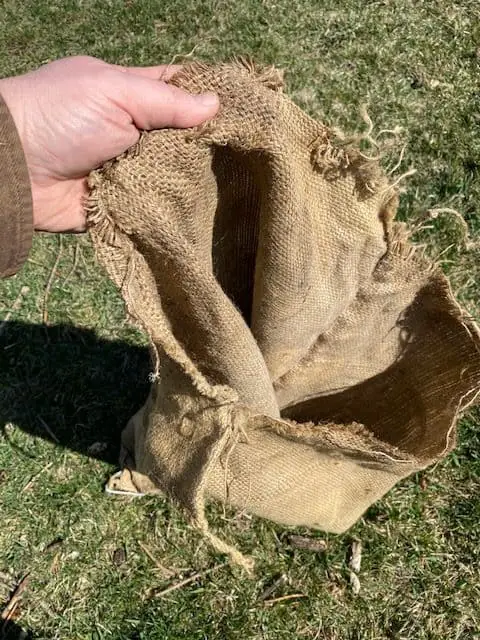
Burlap sack.
Burlap sacks have been a great option for potato storage for decades. Burlap is cheap and has good ventilation. Burlap can be useful with maintaining humidity as well. You can spray or pour water on the burlap sacks to keep the moisture higher as needed. Burlap will break down as time goes on, but it is a great proven method of potato storage.
Bins are also an option. Depending on how many potatoes you need to store and your storage space you can find a bin that will probably fit. You just need to remember to have ventilation and be able to keep it in the dark. Some bins that could be used are a laundry basket, milk crate, industrial storage bin, plastic bucket with holes drilled, just to name a few.
You can also repurpose things to create potato storage. Many containers can be found at a secondhand store, good will, freecycle, craigslist, etc. With minimal to no coast you could repurpose a chest of drawers, an old cooler, a cupboard, for some ideas. The main thing is to remember that you need ventilation,
How long can you store potatoes?
The question always comes up. How long can we actually store potatoes? When you take the proper precautions, you can store potatoes for months. At our place we use a root cellar for storage. We harvest our spuds in October and are eating them all through the winter and spring into May and sometimes June if they aren’t all consumed by then. That’s over 7 months. Commercial growers can keep potatoes in a dormant state for even longer.
Main points to consider in storing potatoes.
The main things to consider in potato storage are:
The type of potato Thicker skinned potatoes store longer
The temperature of the storage area The temperature needs to be between 42-50 degrees Fahrenheit, or 5.5-10 degrees Centigrade.
The humidity of the storage area The humidity needs to be as close to 90-95% as you can
The lightfastness of the storage area The potatoes need to be stored in the dark, or they will turn green and sprout.
We don’t live in Idaho, but we grow potatoes, and have for years. People have asked us, “Why are there so many potato farms in Idaho instead of all over the U.S.?”.
The quick answer is that potatoes are grown on farms outside of Idaho, but Idaho has some of the best conditions for growing potatoes. Idaho has some of the most experienced farmers to grow and store some of the best potatoes available.
What is it about Idaho that is so special to growing potatoes?
When you search around you can find that Idaho has pretty much perfect conditions to grow potatoes. Everything from climate conditions, to soil, to clean water, clean air, and experienced farmers. Potatoes are a major industry to the state and is a huge contributor to the economy, so potatoes are heavily supported statewide.
The Soil
At one point in Idaho’s history the state was covered with volcanoes. All the volcanic activity provided a lot of nutrient rich material, and brought it to the surface. As the volcanic rock, debris, and ash eroded and broke down it created some great well-draining soil that is perfect for agriculture, especially growing potatoes.
The soil itself is fertile and full of nutrients and trace minerals that aid in the growth of the spuds. The farmers work carefully to cultivate the soil and keep it producing quality potatoes year after year after year.
The Climate
The potato was originally discovered and cultivated in the mountains of Peru. The climate they were found in is very similar to the climate in Idaho. Idaho has a good long growing season. The days get hot with a lot of sunshine. The nights cool down offering the conditions for healthy potato plants.
Many assume that it would only take hot days to grow potato plants well. Idaho has some great hot sunny days, but the cool nights are important. The hot sunny days really get the green part of the potato plants growing. The hot sunny days allow the plants to utilize photosynthesis and transfer energy from the sun and the soil into the plant.
The cool nights are equally as important for the potato plant and production of good potatoes. After the long hot day, the leaves and the potato plant are full of nutrients. When the night cools down the nutrients created in the leaves of the plant get pumped down into the development of the tubers on the root of the plant. The tubers are the recipients of all the hard work of the leaves. The cool nights are one of the keys to the great quality of the Idaho potatoes.
The air
The clean, clear, dry air also contributes to the success of Idaho’s potato crop. The more humid and polluted the air is the more heat and toxins get trapped in it. With heat being trapped it keeps the night air from cooling down enough for the potato plants to produce good tubers.
Toxins in polluted air can hamper growth of the plant. Polluted air will also diffuse the sunlight and keep the plant from growing as well. Idaho has great air for growing potatoes.
The water
The water supply in Idaho comes mainly from snowfall and a little rain. They average snowfall is 38.9 inches, and 12.2 inches of rain a year. The majority of water used for irrigation comes as the snow melts throughout the growing season.
Idaho agriculture has had the need to develop the water resource to meet the demand. There are extensive systems of reservoirs, canals, pipes, and ditches to get the water to the fields. Much of the agriculture is pumped water as well.
Good management of the water resource is key to having a sustained crop year after year. The snow melt needs to be used for irrigation, replenishment of aquafers, and a flow needs to remain for the fish and wildlife.
There is still a lot of volcanic activity. The result is a lot of geothermal water to work with as well. This can complicate the issue of irrigation. The geothermal water sources are viewed as green energy and so the value of irrigation versus other uses for geothermal water can get complicated.
The resultant water used for potato growth is clean and free from pollution. Much of the water is fresh snowmelt from the mountains.
Awesome variety of potatoes.
The farmers
The farmers themselves are also key in Idaho being a great place to grow potatoes. Many of the farmers in Idaho have been potato farmers for generations. With generations comes rich strong knowledge and skill to grow great potatoes.
To be an Idaho potato farmer you need to produce, or you fail. If you fail, there is not much of a safety net to save the farm. It’s almost a “Be productive or die” scenario.
Due to this risk most farmers will help each other. When a new technology is invented or discovered they are willing to share information. When challenges in weather or equipment come in to play, the farmers will help each other.
One example was the fall of 2019. There was a late spring planting in 2019. This resulted in the hope of leaving the potatoes in the field a little longer in the fall. The fall had some early hard frosts. Many farmers were caught off guard and scrambled to get their crop in early. Some farmers could not get their cop in on their own quickly enough.
Many farmers banded together and were able to jointly get the crop in. When the unharvested fields of potatoes were worked by several machines and farmers the result was amazing. The spuds came in at record speed and with a smile. This resulted in good friendships, better supply of potatoes for the consumer, and a better economy for Idaho.
The farmers themselves are a tremendouse resource and are some of the biggest reason Idaho has great potatoes.
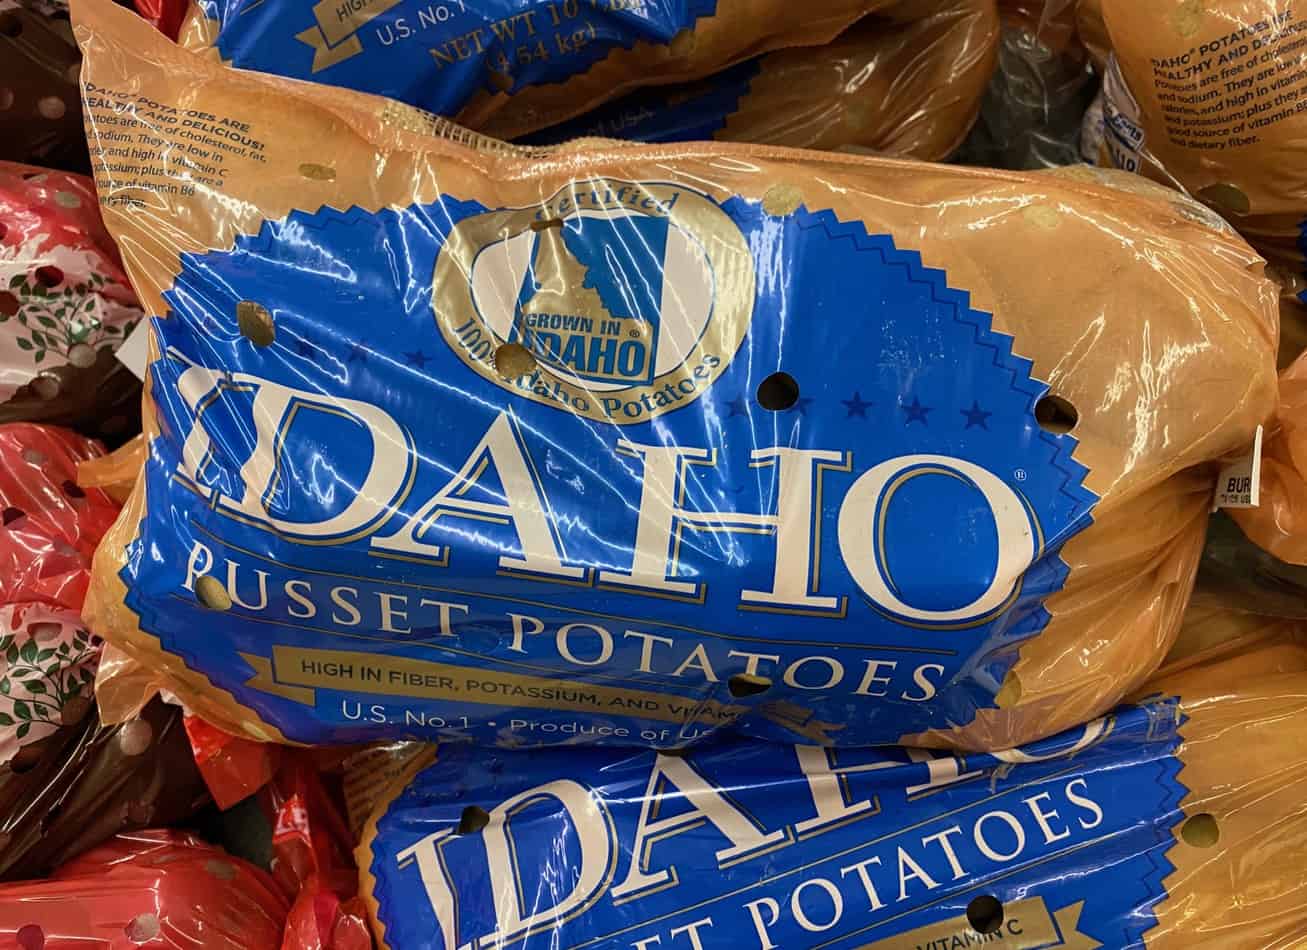
Idaho Russet Potatoes
The support as an industry
The potato industry in Idaho accounts for a large portion of Idaho’s gross product. The growing and harvesting of potatoes is only one part of the industry. The potato reaches far beyond the farm when it comes to the economic impact to Idaho.
According to the University of Idaho extension service. Idaho produces 30% of the U.S. potato crop. Idaho produces an amazing 40% of all the U.S. processed potato products. Idaho also packs and provides on third of the entire U.S. fresh potato shipments.
The industry of potato production, processing and packing ripples throughout the entire state. You will probably be hard pressed to find a job that isn’t affected by potatoes in Idaho.
Again, according to the Idaho State extension service, the potato industry provided:
15,500 jobs
$3.4 billion in sales of potatoes and potato products
$720 million in added value
$490 million in income.
The economic impact of Idaho’s potato industry reaches beyond the boarders of the state as well. Sales and potato products of Idaho’s potatoes outside of the state was $2.2 billion in one year.
The total impact of the Idaho potato industry in one year, according to the University of Idaho extension service included:
39,500 jobs
$6.7 billion in sales
$1.9 billion in value added
$1.3 billion in income
The potato has really been a boon to agriculture and agribusiness in Idaho. The development of the potato in Idaho has been a huge benefit for Idaho itself as well as the entire country. There are also a lot of Idaho spuds sent beyond the U.S. boarders. Many a potato chip and fry from Idaho have been eaten all over the world.
My family has been growing potatoes for generations. We have had some interesting questions about potato sprouts over the years. In this article I will answer some of the more common ones that people have asked us.
Here are some of the questions that we have had:
Why are my potatoes sprouting?
Are potato sprouts poisonous?
Are potato sprouts edible?
Can I eat a sprouted potato?
Should I break off the potato sprouts before planting them?
Will the sprout grow a potato plant?
Why are my potatoes sprouting?
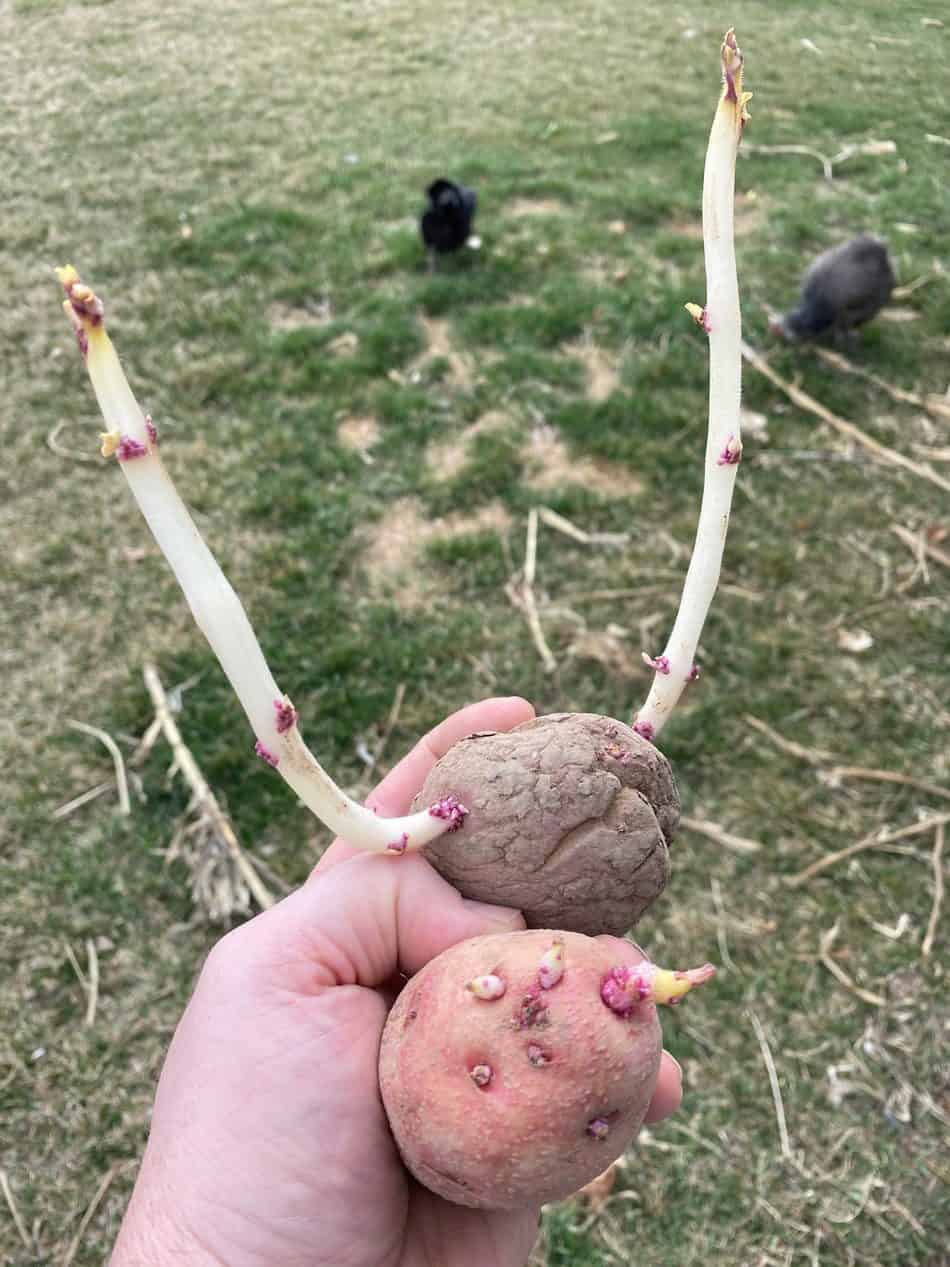
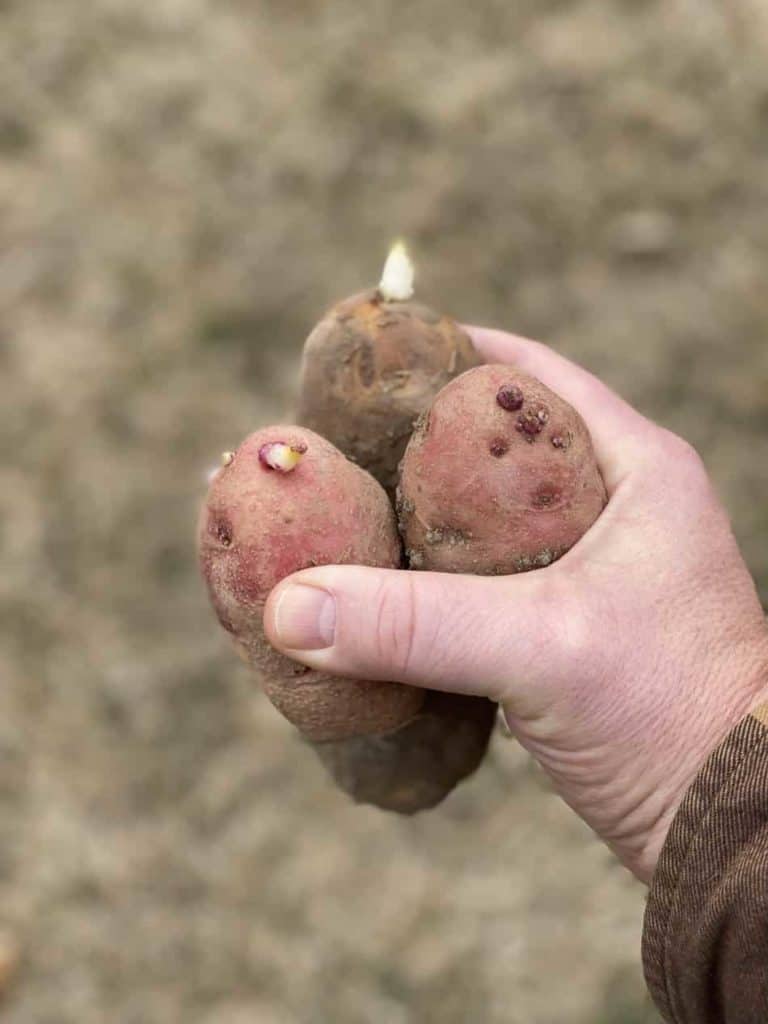
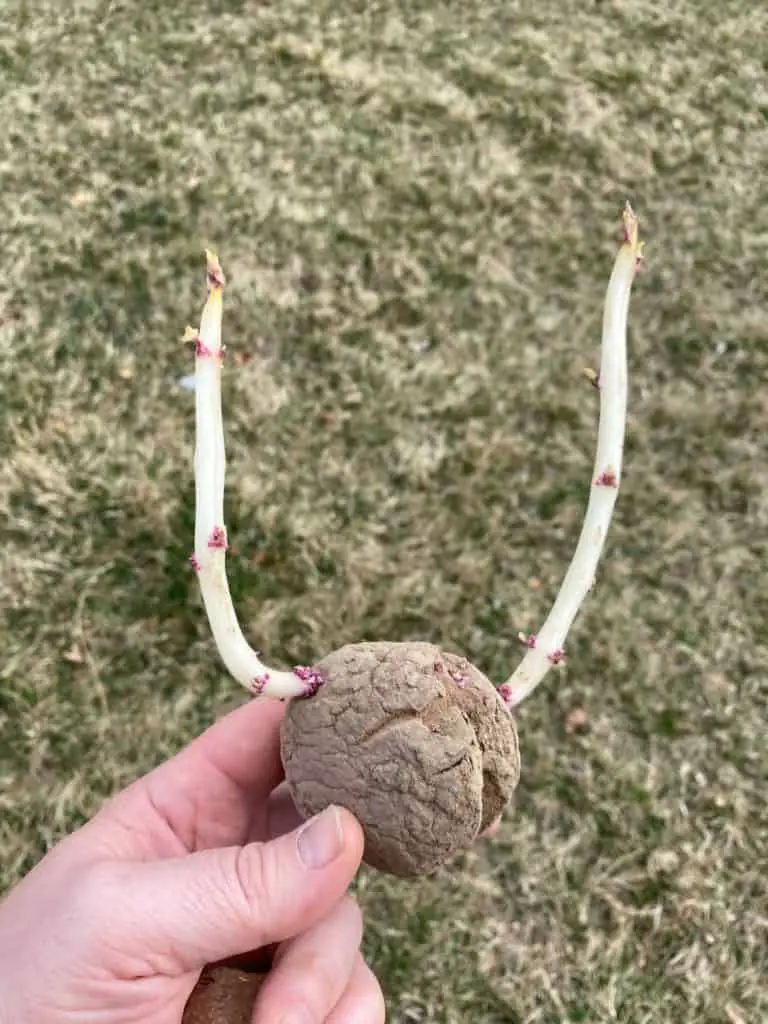
The potato is an interesting vegetable. It is a tuber that is formed on the roots of the potato plant. The potato itself has growth buds on it. These growth buds are called eyes.
When a potato senses warmth and moisture it triggers these eyes, or growth buds, to germinate and grow. The eyes use the potato itself as the source of energy to grow a new plant. The eye sprouts and can grow rather long.
What the sprouts are trying to do is to reach sunlight. If you have had some potatoes sprout in a cellar or cupboard you may have observed the sprouts growing towards a source of light.
When conditions are right with warm temperatures and enough moisture potatoes will naturally sprout.Here is an article telling you how to keep your potatoes from sprouting. Otherwise you can use the natural cycle of the potato and grow potatoes yourself. Here is an article about growing your own potatoes.
Potatoes beginning to sprout.
Are potato sprouts poisonous?
The potato sprouts, plant, stem, and leaves are all poisonous. They contain solanine and glycoalkaloids. These are poisonous and toxic to people. Solanine is more concentrated in the sprouts, eyes, and skin of the potato.
As the potatoes begin to sprout the potato goes through a chemical transformation. The starches of the potato will change into sugars. This is usually where you will find soft spots on the potato. The sugars are part of the nutrients that get pulled into the new sprouts. The sprouts themselves get a higher concentration of the toxin solanine.
The toxins in the sprouts can cause headache, stomachache, vomiting, and if in large enough quantity death. However, it would take a lot to make this happen. Most people could not eat enough to cause death.
On a side note: When a potato tuber is exposed to the sun while growing, the skin of the tuber will react and turn green. This changes the composition of the starches in the potato to toxic glycoalkaloids and solanine. If you eat enough of the green skin it can cause you to have headaches, stomachache, and vomiting just like eating sprouts. You can cut the green skin off of the tuber and the rest of the potato is fine to eat.
Are potato sprouts edible?
No potato sprouts are not edible. I mean you can physically eat them, but they are full of toxins that will make you sick. It is not a good idea to eat them.
Can I eat a sprouted potato?
Don’t let the sprouting of a potato discourage you from eating the potato itself. If you cut off the soft spots and the sprouts the potato is fine to eat.
The process of turning the potato into a new plant happens over time. Usually part of the potato around the eye will change composition from starch to sugar. This is where the toxins are introduced into the eyes and sprouts. This part of the potato becomes soft. The stronger the sprouts get, the more nutrients from the potato they will use; and the more part of the potato becomes inedible.
The easy way to determine what not to eat is finding the soft parts of the potato. Cut out the soft parts and the sprouts and the rest of the potato is good to eat.
Long Potato sprouts coming out of a shrivelled potato.
Should I break off the potato sprouts before planting them?
This is an interesting question. It doesn’t really deal with eating the potato but with the propagation of new potato plants. As you might already know the potato sprout is the beginning of a new potato plant. You can plant the part of the potato with the sprout and get a whole new plant.
I have an article on planting and growing potatoes here.
Sometimes when you get seed potatoes, or you leave your potatoes in storage the sprouts get long and are delicate. It’s really easy to damage or knock off the sprout. A damaged sprout is less likely to grow a strong healthy plant.
I have heard many gardeners say that they knock off the sprouts and their potatoes grow fine. In fact, we have experienced this in our patch. However, we have found that being careful with the sprouts results in stronger, healthier, more vigorous plants. Keeping the sprouts intact has also increased the yield.
Will just the sprout alone grow a potato plant?
When growing potatoes, you generally plant the entire potato, or a piece of potato with 1 or more eyes on it. The potato or piece of potato becomes the nutritional resource for the eye to grow into a sprout. The sprout will continue using the potato or piece of potato as nutrition until the roots are established and the sprout turns green and begins photosynthesis.
With the nutrients from the soil and the sunlight the plant will no longer need the potato or piece of potato as nutrient. Some people want to bypass the use of the potato itself as the nutrients and just use the sprout for propagation of a new potato plant.
You can plant the sprout and get a potato plant with some preparation. There is a process of preparing potatoes for growing it’s referred to as chitting. Chitting is the process of getting the potato sprouts awakened and growing.
The process involves putting the potato into a warm well-lit area. This triggers the eyes of the potato to sprout and grow. As the sprout grows it will respond to the light and turn green. The green color shows that photosynthesis is happening.
Once the sprout is growing and photosynthesis is happening you can plant the sprout. You will want to keep it a little shallower than normally planted potato seed to keep the photosynthesis working. Hill up the plant as it grows, and you can grow a good potato crop.
Chitting potato sprouts has been a technique used when people want to use more of the potato for eating. The risk of the plant dying is a bit higher when using this technique. Without the nutrition of the tuber or potato itself the plant can sometimes be too weak to grow directly from the soil.
These questions about potato sprouts seem to come up often. I hope that this article can help answer some queries about the sprouting spuds. I have really enjoyed growing and eating potatoes. They are one of my favorite vegetables. Please don’t let potato sprouts discourage you from eating them. Just learn to leave the sprouts out of your dining and you can use sprouting potatoes to grow more.
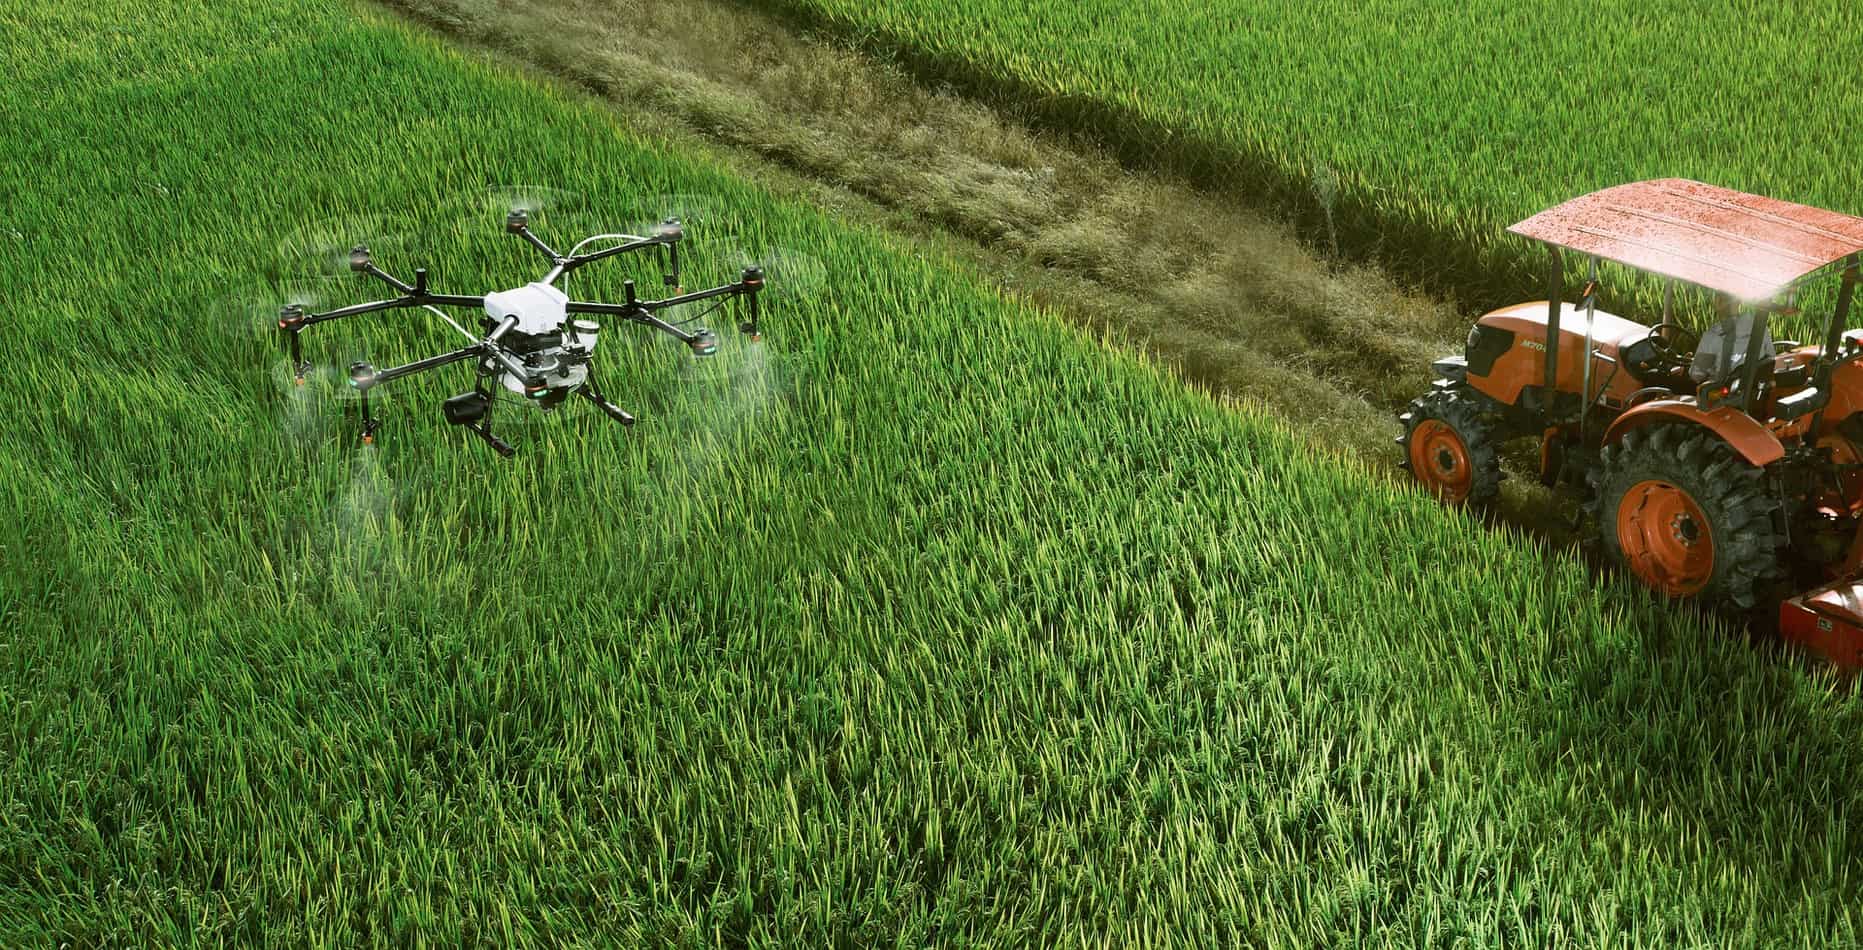
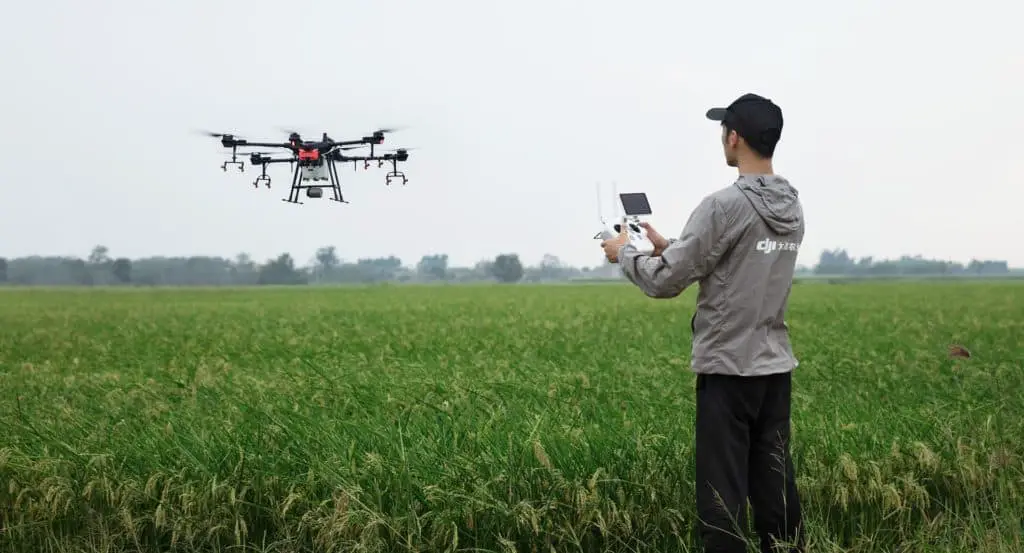
I read a Bloomberg article recently about the use of drones in China’s Guangxi region to fight the ravaging fall armyworm (Spodoptera Frugiperda). According to the article, the drones were loaded with low-toxicity insecticide, and used after sunset to cover vast regions of crops before the armyworm (actually a caterpillar that can fly up to 62 miles in a single night) could migrate. The armyworm has been wreaking havoc the world over, from the Americas, Africa, and Asia, devouring $13.3 billion in Africa’s crops over the past 3 years alone. The article proposes that the use of drones might be the answer to solve the armyworm epidemic.
I’ve
been curious about the use of drones on
our farm for
a few years now, since witnessing
a friend in Idaho use a drone to
do a simple visual inspection of
his alfalfa crop, and
was left
thinking
about the many ways agricultural operations can
benefit from the use of drones on both
a
large and
small scale basis. I
have since learned that
there are several companies worldwide that manufacture drones
specifically for agricultural
use.
Being
a small homesteader, I immediately
questioned
whether it would be worth it to invest in a drone, and how much we
would need to use it before it would actually be profitable to make
such an investment. Most of the homesteaders and farmers we associate
with have quite small operations, and require alternate income
sources to keep afloat. This
article briefly discusses the potential uses of drone technology in
an agricultural setting, sets forth a straightforward cost analysis
you can apply to your farm set-up, and will point you towards some
good resources if
you are questioning whether to
invest
in a drone for your own use.
So
how can I use a drone to help in my farming operation?
The
first question many farmers or homesteaders ask is “how can my
property benefit from drone usage?” Actually,
agriculture is one
of the fastest-growing
markets
for the continually expanding commercial drone industry. Drones, or
unmanned aerial vehicles (UAV’s), elevate
intelligence in agriculture by
allowing farmers
to be more efficient in the field, and make better informed
crop-management decisions.
One
company I
am familiar with touts
that drones
can
gather data on 500 to 1,000 acres in less than a day. That’s
a heck of a lot more than I could ever do on horseback, 4-wheeler, or
even from a high vantage point with a pair of binoculars.
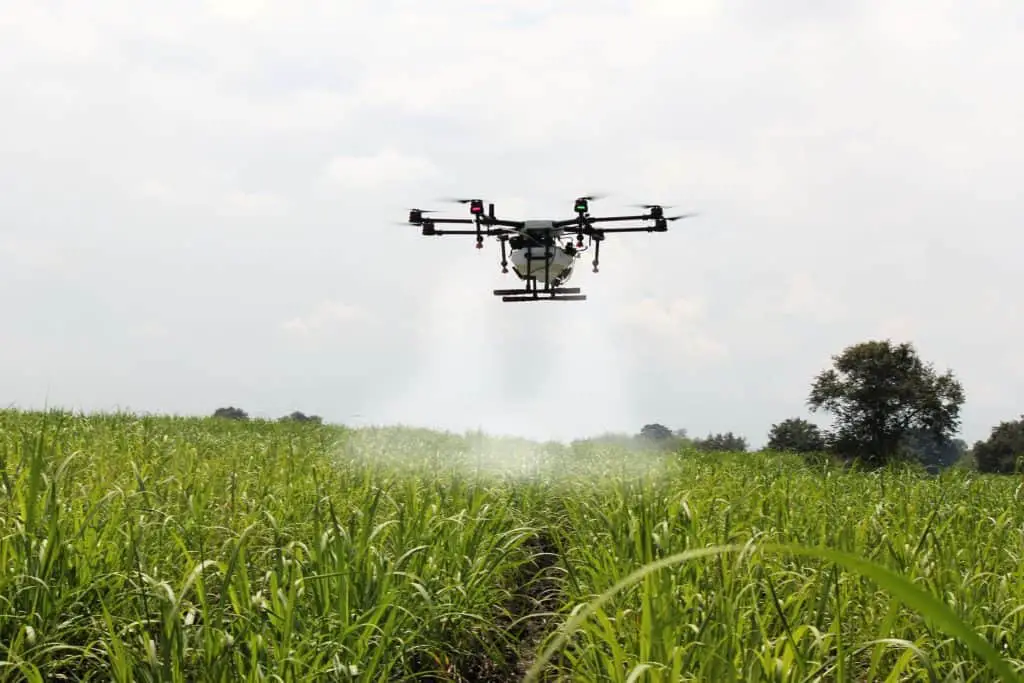
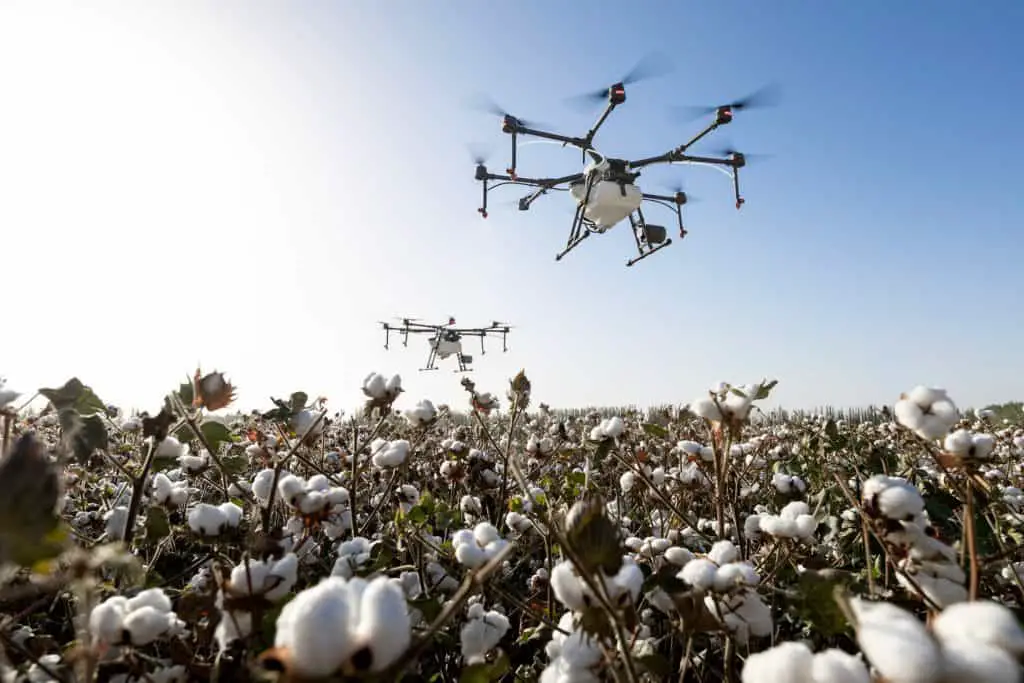
Drones
are currently being used for mapping, irrigation, spraying, and crop
management. My grandfather used to talk about how he wished there
were more hours in the day to get all of the work done on the farm.
Perhaps with the use of a drone, he could have saved a great deal of
time or even avoided engaging in some of the more dangerous chores
that farming required.
Because
a drone is unmanned, it can quickly
provide a
birds eye view and apply sensors for numerous purposes that
can be evaluated for better informed agricultural decision-making.
Today, more advanced drones provide exact orthomosaic (or a detailed
photo representations) of an area, and are commonly used by
engineers, developers and city planners to accurately measure land
plots. Drone
sensors can also create accurate elevation maps using
Lidar imaging technology to measure natural and man-made object
height. Additionally, drone sensors can employ
multispectral imaging using green, red, red-edge, and near infrared
wavebands to measure soil productivity and pant health not visible to
the naked eye. This type of measurement can help identify pests,
disease and weeds, and inform farmers as to how much (or how little)
insecticide might be needed to protect a crop. This same technology
also informs regarding soil nutrient deficiencies and what/how much
nutrient/fertilizer is needed to optimize crop yield. This
same technology can assist in locating areas where water stress is
suspected, allowing a farmer to irrigate efficiently. Additionally,
some drones have thermal sensors for livestock or predator tracking.
(I
read an article a few weeks back where drones were used in a search
for a missing hiker in Montana using thermal imaging). Some
agricultural drones are now equipped with technology to
use computer vision for stand count analysis during the early growing
season to help determine whether reseeding is needed, or to estimate
yield numbers.
Not
convinced drones can help yet. Take a look at this short list of how
some farms are currently using drone technology.
Measure
plant health details
Evaluate
topography for water flow patterns
Inspect
crops for damage (with color contrast sensors)
Measure
sunlight absorption or plant height on large scale
Generate
plant counts and forecast yield
Detect
plant health patterns early
on
Apply
pesticides or nutrient products in precise quantities
Assess
livestock health and weight gain
Look
for
damaged fencing
Find
potential crop yield limitations
Evaluate
storm damage
Assess
grove or
crop
maturity
Determine
ideal
foraging areas
Can
I afford a drone? The
type of drone you will want will depend on what kind of information
you need. The least expensive drones will have less sensory
capabilities, but may still provide very helpful data. The least
expensive sensors carried by UAV’s today are visual devices such as
cameras capable of taking pictures or recording videos
Who
can fly a drone?
If
you’re thinking about getting a drone, you may be wondering if you
can fly it, or instead, if you will need to hire someone else to come
and use their drone on your farm to gather information. Know before
you buy, that depending on the type of drone you choose, and the
purposes for which you are using it, you may be required to get a
drone license. The personal drone industry has grown exponentially
over the last decade, with literally thousands of drones for both
personal and commercial purposes making their maiden flights each
day.
Whether
of not you will need a license to fly a drone is not a question that
can be answered with a simple “yes” or “no”. Drone
regulations and requirements vary depending on the purposes for the
drone’s use, as well as the location in which the drown will be
flown. The Federal Aviation Administration (FAA) has set forth clear
guidelines regarding pilot drone license requirements for both
recreational use, and commercially.
First,
you’ll have to determine whether using a drone on your farm is
recreational or commercial. In our case, because we were seeking to
buy a drone simply to help us view our fence line, and keep an eye on
our alfalfa crop, we knew we wouldn’t be using it for commercial
purposes. However, if you are looking into using your drone for any
type of commercial purpose, (renting it for neighboring farms, you
are more than just a hobby farmer) different laws will apply. For
recreational purposes, you will need to register any drone device
that weighs more than 55 lbs. For commercial purposes, you are likely
going to want to hire a professional pilot.
The bottom line,
after having done a lot of research, is that you will want to do your
homework before investing in agricultural drone services. When it
comes to using drones for agricultural, other than simple crop or
fence line inspections, we recommend you seek professional
assistance.
Prices
for complete, ready-to-fly agricultural
drone systems range from $1,500 to more
than
$25,000.
Rather
than attempting to inform you on a very expensive topic Here
are a few sites that we recommend for you if you are highly
interested in the use of agricultural drones, and are more than just
a hobby farmer:
We have been growing potatoes on our place for generations. My grandfather and great grandfather grew potatoes as a cash crop for many years. Here is a guide on how to plant and grow potatoes.
The basic things that you need to remember in planting and growing potatoes are:
1. Plan ahead
2. Prepare the soil
3. Choose what kind of seed
4. Prepare the seed
5. Irrigate properly
6. Fertilize properly
7. Keep the potatoes weeded
8. Hill up the plants
9. Let the skins set before storage.
10. Store the potatoes properly
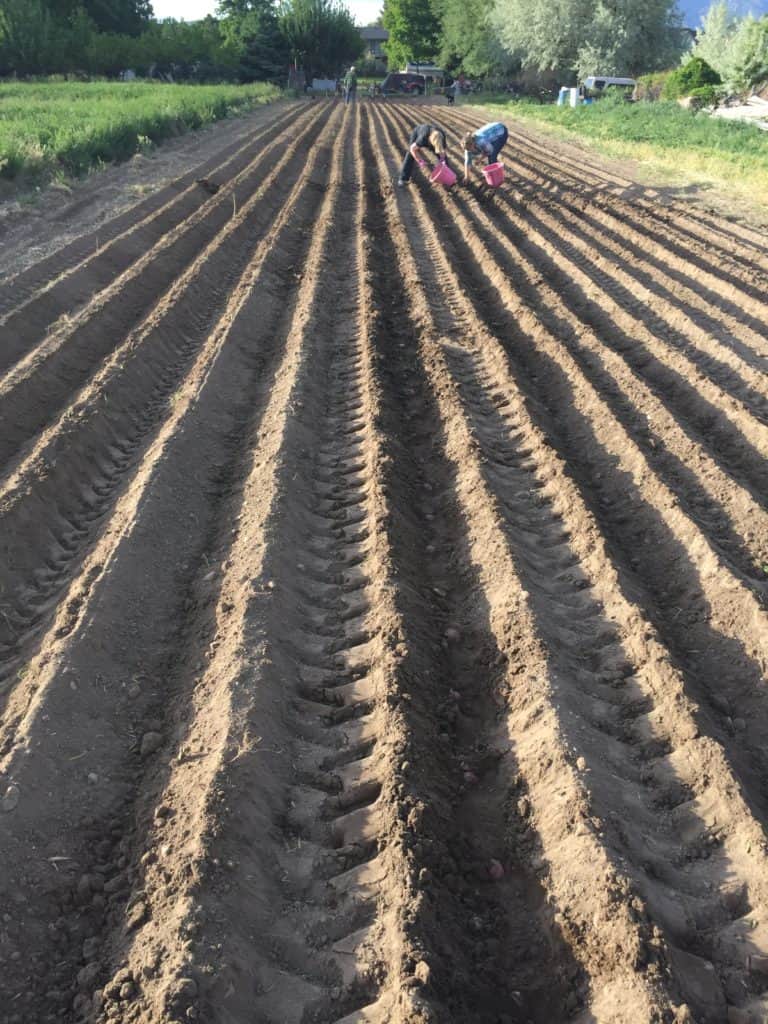
Furrows for planting potatoes
Here is how we plant and grow our potatoes.
There are some tips and tricks to help you have a good time and great harvest.
Before you plant
Soil prep
Before planting anything you need to plan ahead and prepare the spot where you are going to grow your potatoes. Potatoes themselves need as full sunlight as they can get. They also need loose well-draining soil. In choosing where you plant your potatoes keep this in mind.
You will also want to keep plant rotation in mind when choosing your garden plot as well. Potatoes will need to be rotated on new ground as much as possible. Choose a new patch of ground that hasn’t had potatoes on it for 3-4 years if you can.
Potatoes are part of the nightshade family as are tomatoes, so you will want to keep that in mind with crop rotation. You will not want to plant potatoes on the same ground that had tomatoes on it the previous year if possible.
The reason you need to keep crop rotation in mind is that potatoes are really susceptible to viruses. The viruses can build up in the soil and create a lot of problems with your plants both potato and tomato. This is often the cause of the harvested potatoes getting smaller and smaller every year.
Fertile soil is great, but potatoes are a fairly tolerant plant and can handle a little less than perfect soil.
The acidity of the soil will also help with potato growth. Potato plants do well with slightly acidic soil. In my area we have somewhat alkali soil and have had good results with adding a Sulphur supplement.
I wrote an article on soil ph here. The article has some good information on how to find out if your soil is more acidic or alkali and how to correct it.
Getting seed
It is advised to get certified potato seed every year. Many backyard growers will use potatoes from the store, or potatoes that they grew for years as their seed stock. This may work and give you some crop to harvest, but there are some downfalls to going this route.
It is great to be able to perpetuate your potatoes from your own garden. You may find that the size and yield of the potatoes will decrease as the years go on. Similarly to not rotating your crop, using the same potatoes as your seed stock can build up fungus, bacteria, and viruses. The result is smaller and lower production potatoes.
As I wrote before it is advisable to use USDA certified potato seed. The certified seed will be more guaranteed to germinate and give better production. The strict inspections and measures taken from certified seed growers ensures good seed to work with.
If you can try to get seed from a seed grower or supplier that can get seed that is geographically far away from you. For example, if you live in Utah you should try to get seed from Minnesota. If you live in Minnesota you should try to get seed from Idaho.
The reasoning behind this is that the fungi, bacteria, and viruses or defects from a geographic area can be avoided by using seed from a different area. We have grown potatoes from the neighboring state and have just done fine, but it’s just another easy precaution that can aid in a healthy crop of potatoes.
Using heirloom seed
There is a strong movement for using heirloom seeds of all kinds in gardening including potatoes. This is a fun way to add a different crop to your garden. The thing to remember is that the resultant crop may be a bit smaller and a bit less in production.
Potatoes known as finger potatoes are what most heirloom potatoes look and taste like. They do indeed look like small knobby fingers. You can also get heirloom potatoes that are oblong and more round like the more modern varieties.
The finger potatoes come from South America. They come in all kinds of colors. They are small and have great nutritional value. They also have thin skins and do not need to be peeled.
You plant and grow these heirloom potatoes just like every other potato. The caution with finger potatoes is that they do not store well. You really need to be careful with the thin skins when handling them and be gentle when putting them into storage.
Location rotation
When planning out your potato patch you need to keep rotation of your crop in mind. It is advisable to rotate your crop as often as you can. Try not to grow potatoes in the same spot every 3-4 years.
The reason you need to rotate potatoes is that potatoes are very susceptible to fungus, bacteria and viruses. The viruses, fungus, and bacteria can get built up into the soil if you keep planting the in the same spot year after year.
With this buildup of bad stuff, you may notice that your potatoes will decrease in size and yield. You may also notice that your potatoes may not grow at all due to the buildup of potato viruses, bad fungus and bacteria in the soil.
One way to deal with the buildup of bad bacteria and viruses is soil solarization. I wrote an article here about it. Its a unique way of using the sun to take care of the bad stuff in the dirt.
Tomatoes and Potatoes
Tomatoes and potatoes are from the same family, the solanum or nightshade family. They are both susceptible to the same or similar fungi, bacteria, and viruses.
Planning and caution needs to be used with planting tomatoes and potatoes in the same garden. Plan to rotate these crops and not plant them on the same ground for every 3-4 years. So you will need to keep both crops off the ground every 3-4 years.
Deciding what kind of potatos you want to grow.
There are several varieties of potatoes that are available for cultivation. I believe the list of potato seeds available for planting are up into the hundreds. Here is an article on kinds of potatoes are available.
Needless to say, choosing what kind may be a difficult thing. Many of the varieties have been cultivated for taste or shape and size, or color, or production. It may take some trial and testing to see what you will like best, but there are many fun varieties to try.
My personal favorite for storage, production, and mainly flavor are Pontiac reds. I am also somewhat partial to the original Burbank russet.
Preparing the seed potatoes
Preparation of the potato seed is fairly simple. The basic concept it to have the potato plant grow from the eye of the potato. The eye of the potato is the little indentation with a small nub. This is where the new potato plant will grow from.
Often the seed potatoes will be stored in large cellars at a constant temperature in darkness. This will render the seeds dormant until they are triggered into sprouting and growing.
If you get your seed potatoes from a seed grower you will need to allow time for the seed to be stimulated into sprouting and growing. This can be easily done by letting the seeds stay at a warmer temperature. When you see the eyes of the potatoes begin to sprout you know that the potatoes are ready to prepare and plant.
If you are buying seed from a store you will probably already see the seeds beginning to sprout. If they are sprouting, then they are ready to plant. If you are planting potatoes from your own supply just make sure that they are beginning to sprout.
Care and caution should be used when handling the sprouted spuds. The sprout will become the actual potato plant. The sprout feeds off of the potato flesh until it gets established roots going. You need to make sure not to break off the sprouts.
You can just put the entire seed potato into the ground and have it grow a new plant. A more efficient way to use the potato seed is to cut up the seed and use one potato for several plants.
The general rule of thumb is to have at least 2 eyes pet each cut chunk of potato. What you do is get your seed potato and cut it into chunks that are about 2×2 inches or so. The chunks of potatoes are referred to as potato sets.
Again, you need to make sure you have 2 eyes per chunk, or set. You can have some grow just fine from one eye per piece, but it’s a little more insurance of a plant growing if you have 2 or 3 eyes per piece.
My cousin had a bumper crop of just one tiny piece of potato and one eye per potato set. He swears by one eye, but I still believe 2 or more is a better plan.
As the roots grow the potatoes develop on the roots of the potato plant. Where the root taps into the potato can sometimes look like an eye. So be a bit discerning and careful to see if you have potato eyes or the root that the potato developed from.
Once you have your potatoes cut you need to let the cut part dry and harden up. This is where you set the cut seed aside in a cool dry place.
The time it takes to harden up your seeds varies due to the humidity. We live in the mountain west and it’s pretty dry. We can usually cut the potato seed in the morning and plant it in the evening. However, there have been some more humid times where we have let the seed dry overnight and they worked out well.
I have read on some extension service sites that you should let your potato seed dry for 2-3 days to have them harden or cure for planting. The main idea of curing your potato seed is to have the cut skin become a barrier for the moisture of the seed to stay with the eye of the potato feeding the eye to help it to grow.
You can have a successful crop by just dropping in the wet cut potato seed, but you may find that the soil will absorb all the moisture from the seed and dry out the eye and kill your plant before it has a chance to grow.
Planting the potato seed.
The basic idea of planting potatoes is to get the eye of the potato in the ground.
It’s best to plant the seed under 3-6 inches of soil, optimally being 4 inches.
The seeds should be 8-12 inches apart.
If you are growing the potatoes in rows the rows need to be 24-36 inches apart.
When to plant potatoes
You should be able to plant the potatoes after the last frost. You need to plan ahead when you plant and grow your potatoes.
Don’t plant your potatoes too early. Some potatoes will go through their plant lifecycle and will grow, die, and begin to start growing again if left too long in the ground.
Growing potatoes
Watering/Irrigating
Growing the potatoes is not that difficult. You will need to keep them watered but not constantly wet. Potatoes are a tuber and can have rot issues if you keep them too wet.
We generally water about every 5-9 days depending on the temperature.
Fertilizing
Fertilizing potatoes can help you get a better yield. The potatoes will use nitrogen to get the plant above ground growing well. A good garden mix will be good for this stage.
The better you can get the green part of the plant growing above ground the more resources the tubers will have when they start growing. You can overdo nitrogen however and get great green leafy tops with no tubers at all, so stick with a good balanced garden mix to begin with.
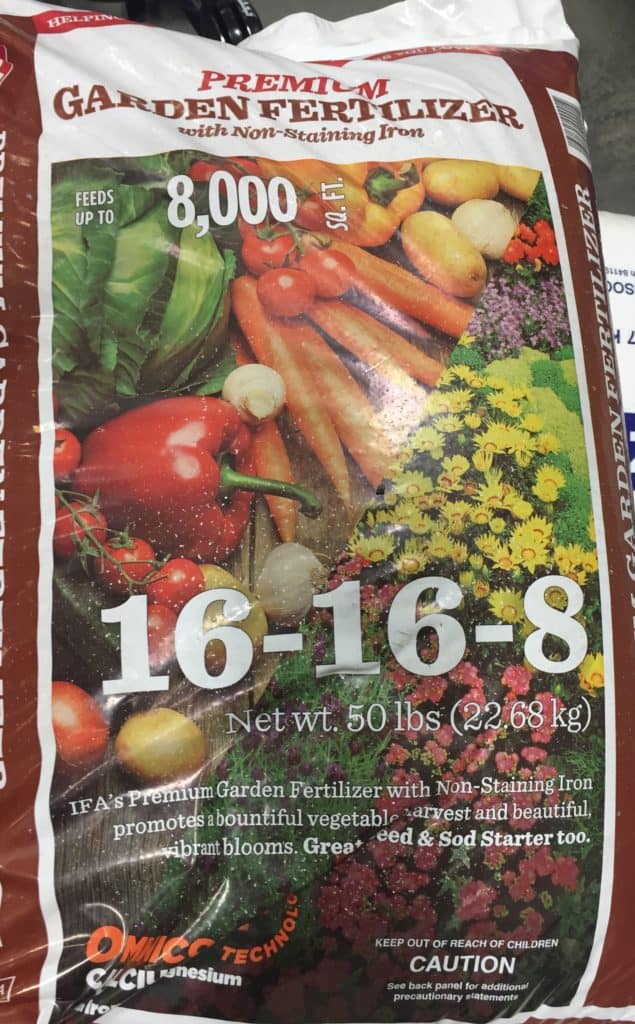
Once the plants start to have blossoms you need to fertilize for the tubers, or the potatoes you are going to harvest. The tubers are formed on the roots, so you will want to fertilize for the roots. If you are using commercial fertilizer you will want the last 2 numbers on the bag to be larger than the first.
Commercial garden fertilizer
Here is an article I wrote on fertilizer. This will explain it if you want more information.
The root fertilizer will be potassium and potash. You can also use some tried and tested natural amendments like bone meal and Epsom salt. The bone meal adds potassium which helps flowers and roots to grow. Epsom salts add magnesium and will help with cell wall growth of the potatoes.
Weeding
Keeping the potatoes weed free is helpful in having the plants thrive and the nutrients going to your plants instead of the weeds. Caution should be used when weeding potatoes. The tubers are located fairly close to the surface and can sometimes be pulled out with the weeds.
I have often had the opportunity to weed potato patches that seemed doomed to being overgrown with weeds. Once we got the weeds out the potatoes thrived and produced well. So, don’t give up on your potatoes if the weeds get the upper hand during the growing process.
Hilling the potatoes
A common practice when growing potatoes is hilling the plants. I have heard arguments for and against hilling the potatoes. I practice hilling and have had good results.
What “hilling” potatoes is, is piling more dirt around the base of the plant and hilling up dirt around the plant. What this does is create more room for the tubers, or potatoes, to grow. This will often result in a better yield and will protect the potatoes from getting green skins on the tubers.
The argument I have heard against hilling potatoes is that it will stunt the plant, create rot, and kill the plant. I have not experienced these negative effects, but I do live in a dryer climate. Perhaps in a wetter garden plot these problems could arise.
If you decide to hill up the potato plants, you need to hill them up after the plants have grown 6-12 inches tall. Then you can hill up dirt around them, leaving the top 4-6 inches above the dirt. This will allow the plants to grow and add more tubers to the roots.
Some will only hill up the plants once in a season. During the major growth time of the plant above the ground you can hill them up 2-3 times. You can hill them up until they begin to flower. After they flower you want to encourage the growth of the tubers on the roots.
Harvesting potatoes
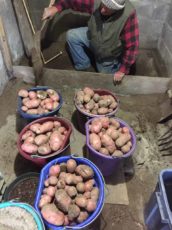
Once you have taken the time to plant, fertilize, water, weed, hill, and maintain the potatoes it is time to harvest. This is one of my favorite things to harvest in the fall. Potatoes were a cash crop for my family for generations. Bringing in a good potato harvest meant food storage for the winter and money in the bank.
When you decide to harvest your potatoes is up to you somewhat. You can begin to rob some of the small potatoes about 60 days after you plant. These will be small tender gems. If you time it right, you can have some of these small potatoes with fresh sweet peas and that is a treasure. You need to realize that when you rob them that takes away from your fall harvest, so don’t get too greedy too early.
We plant our potatoes after or around Mother’s Day. That gives time for the potatoes to get good growth and go through their natural cycle where the plants will die off in late September or early October. Don’t be alarmed when the plant dies later in the season. This is natural and signals the time for harvest is soon at hand.
Hardening the skins
Once the plant has died you need to let the potatoes sit in the grown for 2-3 weeks. This will allow the skins of the potato to harden off.
If you harvest the potatoes with soft skins you need to eat them soon. Soft skin potatoes do not store very well. They are prone to going rotten.
One test you can have to see if the skins are hardened enough is to dig up a few from a plant of two. Rub the potato with your fingers or thumb and see if the skin will rub off easily. If the skin just slips off, they need to harden a bit longer. If the skins hang on then you can harvest and the potatoes will store well.
Harvest by shovel
You can use a shovel to dig up the potatoes. This works well, but you need to be careful not to cut the potatoes with the sharp edge of the shovel. Dig 12-18 inches out from the center of the plant to avoid cutting the tubers you worked to grow.
Make sure you dig deep enough 8-14 inches deep. You will also need to sift through the dirt well. Potatoes will look similar to dirt clods and hide from you.
Harvest by fork
There is a potato fork available to use for harvesting. A potato fork can be used for many purposes beyond potatoes, but does work great for potatoes. You use it like a shovel and dig around the plant. As you pull up the dirt the dirt will sift through the tines and leave the potato. It is a bit more efficient than a regular shovel.
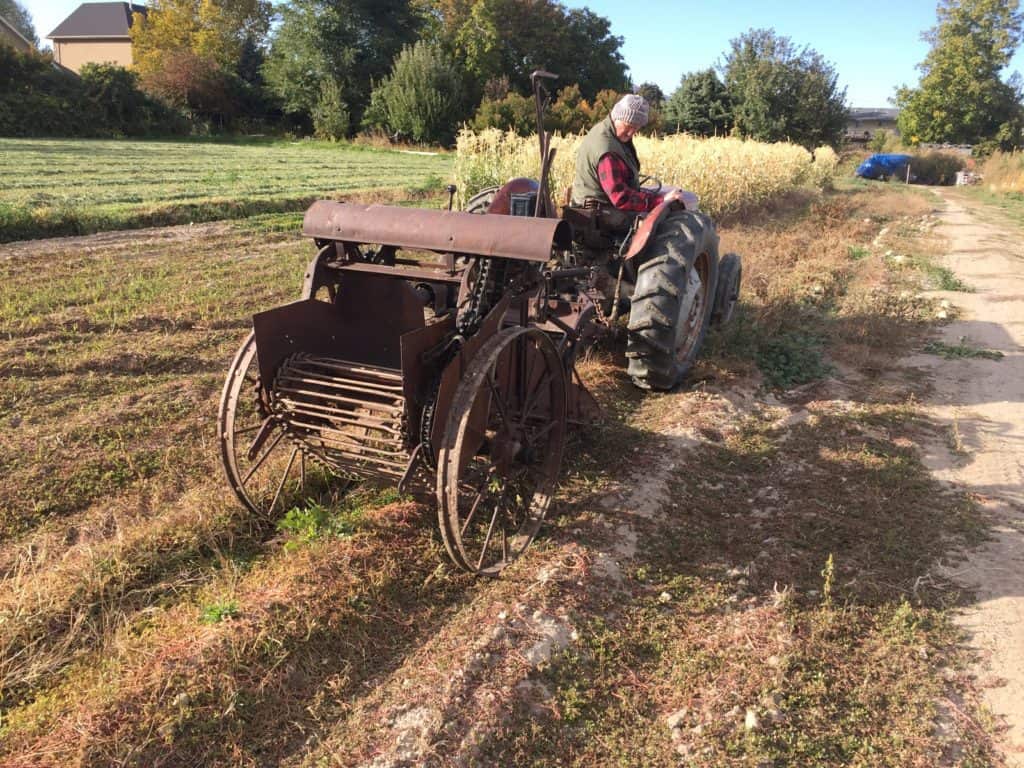
Antique potato plow
Harvest by machine
Using a tractor and a potato plow is my favorite. I really enjoy seeing the old farm machinery work. There are many older farm implements and tractors that are still in use for harvesting smaller plots and gardens. This is something that you might want to consider if you are going to be harvesting more potatoes than you would want to dig up by hand.
Here is a short video showing a potato plow that has been used by my family for generations.
There are some modern potato plows available and might be worth considering depending on your budget for equipment. I will list some of these on our resource page.
I would encourage looking into the older farm machinery if you are concerned about budget and have more potatoes than you want to dig by hand. Some people almost give the implements away, but most understand the value and will charge a fair price.
Storage
Once you have harvested the potatoes you need to eat them, sell them, store them, or all of the afore mentioned. When stored properly you can keep potatoes for months.
The main things to remember about storing potatoes are to keep them in a dark, humid, and cool place.
When exposed to light potatoes get triggered to begin to sprout and grow. Keeping them in a dark cellar or a box or sack will prevent the light from triggering the sprouting response. They will need airflow, so plastic sacks and containers won’t work unless they have plenty of air holes or mesh to allow for the air to flow.
The temperature should be between 42-50 degrees Fahrenheit for optimal storage. When you keep potatoes too cold it will turn the flesh darker tan or brown. If the potatoes freeze it will turn the flesh gray.
The humidity is important as well. If potatoes are stored in a dry environment, they will shrivel and become rubbery. Keeping the storage area humid will help keep the potatoes good to use.
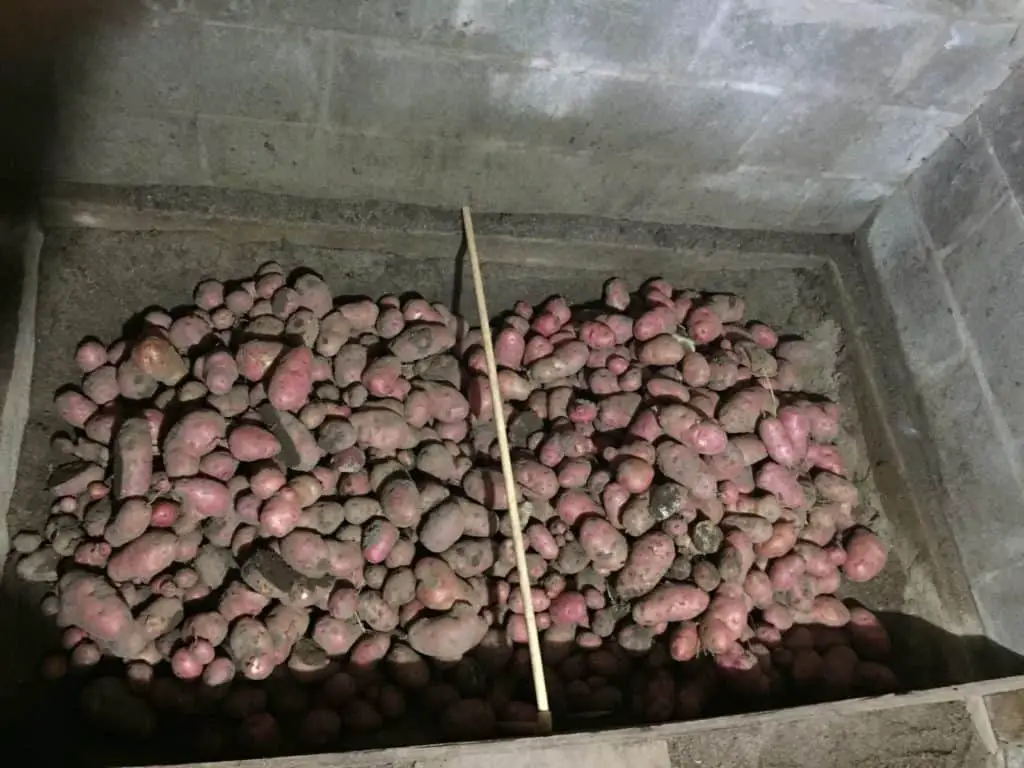
Spud pit
A dirt floor in a cellar is a perfect place for potato storage. The temperature remains fairly consistent and the humidity usually is good. The airflow can be a little tricky with a cellar. We accomplish airflow on our cellar with an adjustable vent on the door and a vent pipe out the top.
Conclusion
Potatoes are some of my favorite plants to grow and harvest. I hope this guide will help in your quest of gardening and growing your own food.
With a few steps you can have great success in growing some spuds for your table.