Sometimes you may find yourself with a. patch of ground that is just more problematic with weeds, or fungus, or bad nematodes, or blight, etc. You have tried everything to fix the problem and nothing seems to work. Or you need to kill off a patch of grass and don’t want to use a chemical to kill the lawn. You can use the sun to sterilize the soil. The process is referred to as soil solarization. It is kind of a natural laser beam to sterilize the soil.
The concept is pretty simple. You put down clear plastic and over time the sun will heat up the ground and kill everything in the soil beneath the plastic. There are some techniques that I will discuss in the following article to use to make it effective. The process works well and doesn’t use any chemicals that could be harmful to other plants, animals, or organisms.
How does soil solarization work?
The concept of soil solarization is that you use the heat from the sun to superheat the soil. The clear plastic seals in the heat and cooks whatever is beneath. When the soil is heated for a few weeks most plants, weeds, fungus, and pests are “managed”.

Steps for soil solarization.
1-Plan ahead. The peak times for soil solarization to work is when the sun is out the longest and provides the greatest amount of sunlight and heat. This depends on where you live. I live in the western united states, so June through August is the best time to use this technique.
2-Be observant for shadows from trees, buildings, hillsides, etc. Soil solarization may not be as effective on North facing slopes. You want open unshaded areas if possible.
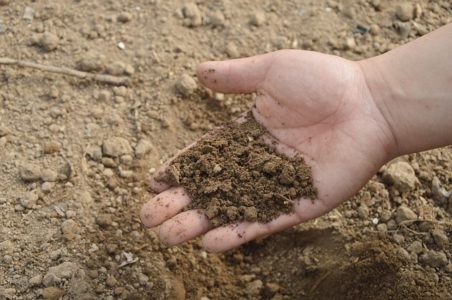
3-Clear the area of plant debris, rocks, sticks, etc. You want to clear anything that will interfere with the heat production or puncture the clear plastic sheeting.
4-Rototill the area 6 inches deep if possible, this will improve heat penetration into the soil.
5-if the soil is dry you need to moisten it with water. This is a tricky part. You need to have the soil wet enough to conduct the heat down into the soil, but dry enough to not get mud all over the plastic. The cleaner the plastic the more effective it is at trapping heat inside. If you live in a dryer climate like I do it might even need to have a soaker hose or drip line to keep the soil moist throughout the process.
6-Cover the desired area with clear plastic strips or sheets. The plastic should be 2-4 mil thick. Clear plastic is the best. Colored plastic will lose some of the sunlight transmission.
7-Stretch the plastic tight and seal the edges with soil. This step is important. There needs to be a tight seal to keep in the heat and to keep out wind. Some people will dig a trench around the edge and bury the edge to keep the wind from blowing off the plastic as well as for sure keeping a tight seal.
7-A trick that some farmers have used it to double layer the plastic. This results in higher temperatures in the soil. If you decide to do a double layer the bottom layer can be colored and the top needs to be clear. To make this technique most effective you need to have a space of air between the bottom and top layer. This can be accomplished with strips of styrofoam, or an old garden hose, or plastic pipe; just something that will keep the space of air without sharp edges that can wear on the plastic sheeting.
8-You need to leave the plastic in place for 4-8 weeks. It isn’t a quick fix per se but is effective without using harmful chemicals.
9-You need to keep the clear plastic clean. This will include wiping or brushing the dust and dirt off. Water will generally accumulate on top of the plastic. Water isn’t a problem if it is clear, it is a problem if the water is muddy. Light passes through the clear water just fine, but the muddy water will reduce the heat.
10-Remove the plastic and the plot is ready for planting. You shouldn’t leave the plastic on into the fall and through the winter. Leaving the plastic down will actually encourage growth of surviving pests.
To increase the effectiveness of the soil solarization process is to let the weeds grow and water them and incorporate them into the soil. Adding animal manure at this point is also very beneficial. The soil solarization will unlock many nutrients from the weeds and manure through the superheating.
Another great technique to use is adding organic matter like straw, leaves, hay, etc. as well as adding fertilizer such as, animal manure, ammonia-based fertilizer, both organic and inorganic. This really boosts the effectiveness of soil solarization. The addition of these soil amendments increases the rate of decomposition and addition of nutrients. It also increases the heat carrying capacity of the soil itself. The addition of organic material protects some of the beneficial microbes.
The effect of Soil Solarization on weeds.
You will begin to see the effects within a few days. According to the Colorado Extension Service, solarization for 2-4 weeks will prevent the emergence of most annual weeds. The longer you can do it the deeper the heat penetrates, and the more weeds are managed. There are some weeds that seem to survive, but many are taken care of.
The effect of Soil Solarization on Pathogens.
A study of soil solarization by the Colorado Extension service shows that many fungi, microbes, and bacteria are killed through the process. The soil changes composition as it heats and becomes a toxic environment for fugus that is already weakened by the heat.
Some of the fungi that are killed by soil solarization are:
Verticillium Wilt, Fusarium diseases, Phytophthora root rot, Streptomyces scabies- potato scab, Agrobacterium tumefaciens crown gall, and Clavibacter michiganensis tomato canker. It also reduces soil populations of different plant parasitic nematodes, especially Meloidogyne spp. root-knot and Pratylenchus thornei root lesion, Pratylenchus root lesion and Xiphinema dagger nematodes.
The effects of soil solarization on beneficial microbes.
The heat isn’t discriminatory. The good microbes are killed as well as the bad microbes. According the Colorado Extension Service, the beneficial microbes do return fairly quickly. However, the nitrogen fixing plants like peas, beans, alfalfa, etc. will have difficulty developing the nitrogen nodules without the presence of beneficial bacteria and may need to be amended to establish the good bacteria.
The effects of soil solarization on the nutrients for the plants.
According to the studies by the Colorado Extension service the nutrients available for plant growth are increased through soil solarization. Soil solarization increases available nitrogen, calcium, magnesium, extractable phosphorus and potassium. Minerals tied up in organic matter get broken down and become available for plants to utilize as well.
Soil Solarization is great if you have the time.
Soil solarization is a very effective treatment. It does take up to 6-8 weeks of prime summer growing season. If you do want to try soil solarization you will need to plan on a fall garden and plants that would grow well in the fall. Soil solarization has proven to be effective on some of the most damaging conditions of the soil including harmful nematodes, bad bacteria, and harmful fugus, as well as great weed suppression.
The downside is that the procedure does require a long-time commitment with no crop during some of the prime growing season. There is also a minor investment into plastic sheeting. There is also damage to good microbes in the soil, so the beneficial microbes will take time to return into your soil. You may have to wait for a while until you plant certain varieties of crops such as potatoes. It will also take some time for the beneficial bacteria that works with nitrogen fixing plants such as legumes like beans, and peas to return and be effective.
The benefit of soil solarization without the cost and hazards of fumigating the soil is amazing. Soil solarization has proven to be an effective treatment for disease, fungus and bacteria where nothing else would work. If you can allow your plot to be treated for 4-8 weeks you will have some amazing results and benefits to your soil.
Some areas do not have the option of rotating crops. Soil solarization allows the same crop to be planted on the same ground without the buildup of toxins and possible disease. Growers are able to grow tomatoes on the same ground and kill off diseases such as crown rot and timber rot.