All chickens take dust baths, and for good reason. Dust baths are an essential and hygenic part of a chicken’s daily, or weekly (if possible) ritual. They do this to kill mites and lice, do lessen oil build up, and because to them, it simply feels good. Here, we explain in detail why each of these purposes is essential for good chicken health, and how you can provide a good environment for your chickens to “bathe” all year long regardless of the climate in which you live.
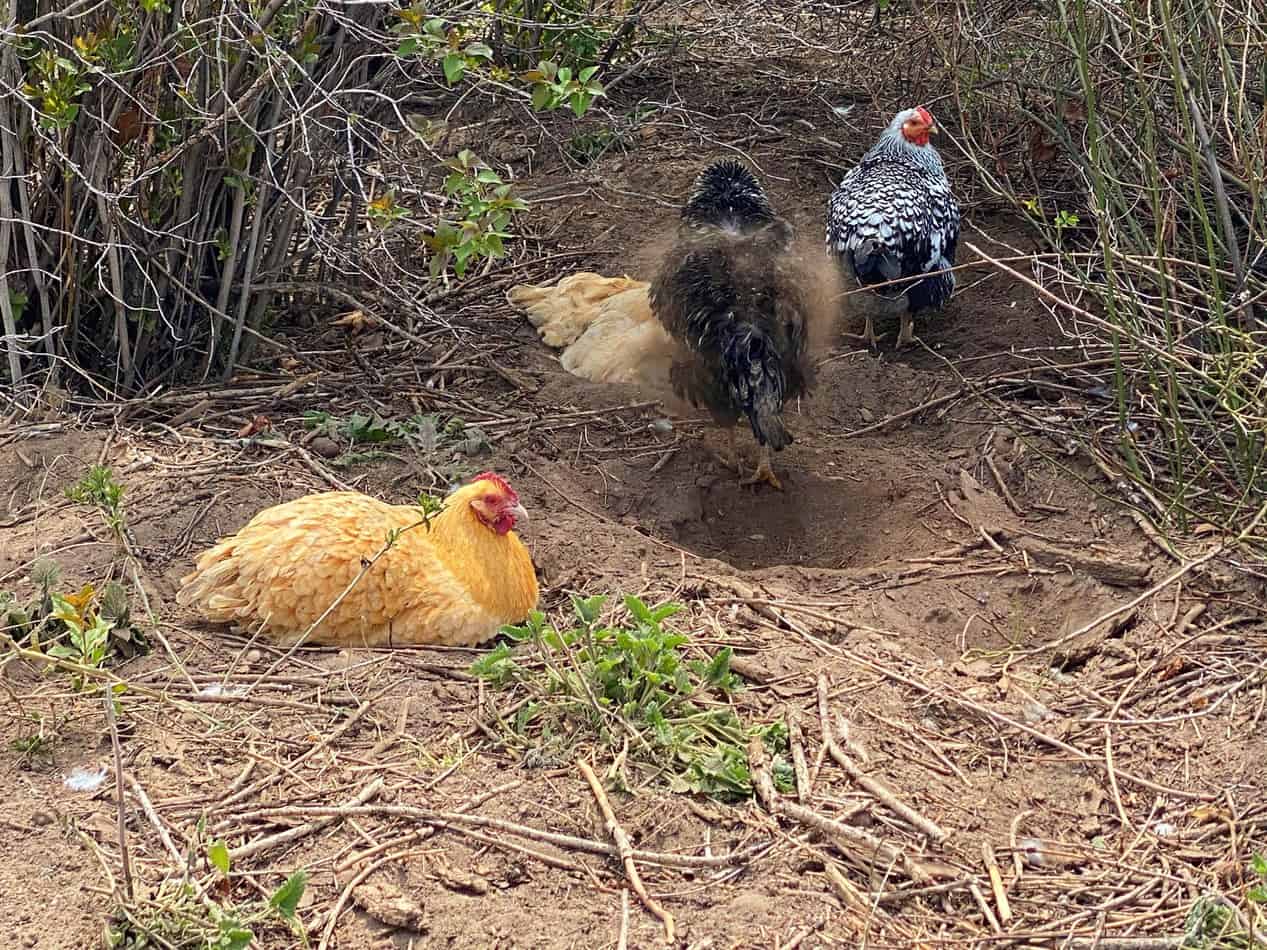
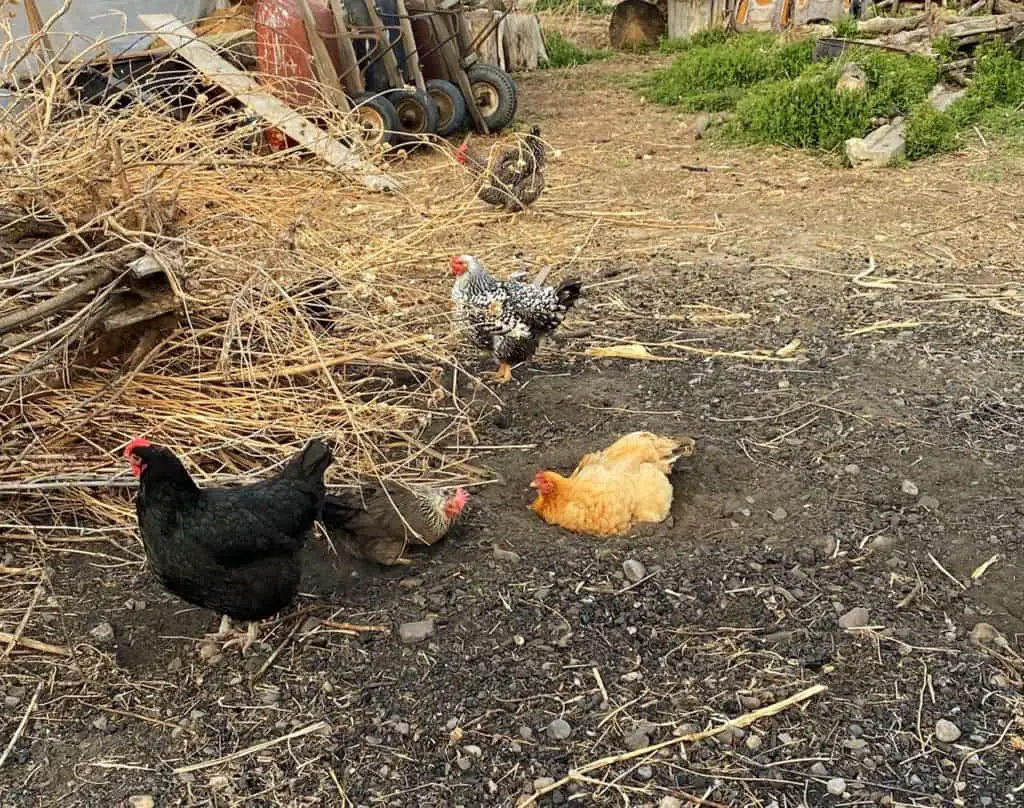
I’ll never forget the first time I saw one our chickens taking a dust bath. It looked like she was an ice cube melting in the sun. I immediately thought we had experienced a predator attack, or that she had killed over dead, laying on her side, covered in dirt. As I ran over to her however, I noticed that she was busily extending to reach more dust to throw over herself, much like I have seen sparrows do with birdbaths.
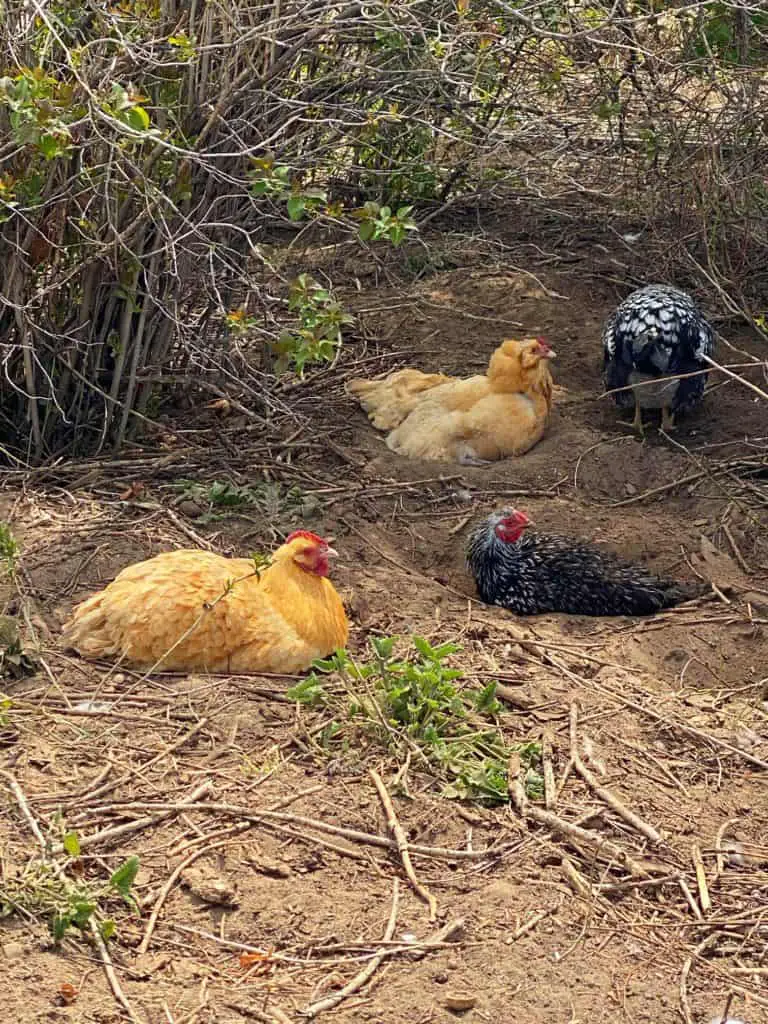
Feather maintenance is important. And a dust bath is as good as it gets if your a chicken. Our chickens have very specific places in the yard where they choose to bathe. Thy typically dig or scratch a small ditch, or oval shape in a place that has soft, finer, dirt, or ash, (loose material) and burrow and thrash to toss dirt over their entire body. They will continue this motion until their feathers are coated with dust, and then even shake and shimmy until the dirt and dust settles on their skin. After some time of twisting and dusting, the chicken will stand, and shake herself off.
1. To Kill Lice and Mites
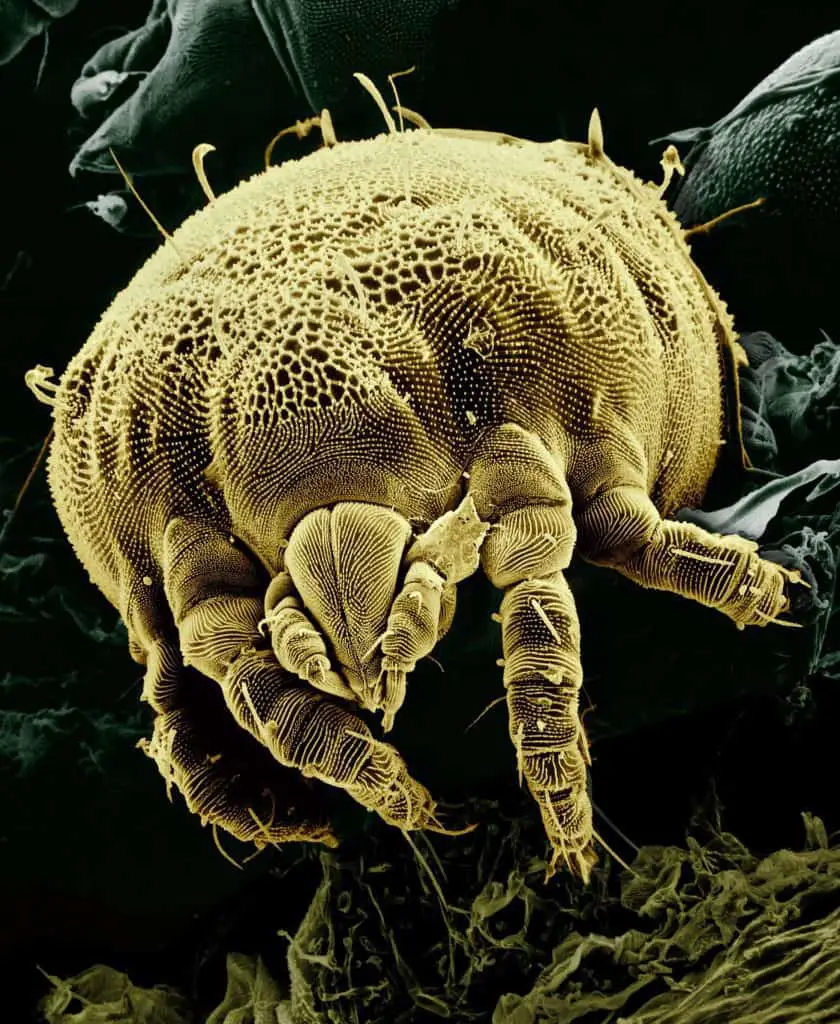
The most important purpose for dust bathing is rather hygienic. Chickens and other fowl will use dust baths as a natural deterrent to parasites that can bring sickness and unpleasantness. Even the cleanest backyard chicken coops can suffer from lice or mite infestations from time to time. Mites and lice are very small (even microscopic) flat insects that feed on the blood, feathers, skin, and scales of the bird and can result in loss of nutrient, anemia, poor egg production and even death. Lice are ectoparasites and can spend their entire lifetime on a host chicken, or other mammal. The louse’s eggs (nits) attach to feathers, and cannot transfer to humans, as they are host specific. Mites on the other hand, are arachnids, and generally have a rounded body, and sucks a chicken’s blood during the night, and can effect sleep. Mites therefore commonly hang out in the nesting boxes, or hide during the day.
Chickens are notorious self groomers, and do a good deal on their own to combat mites and lice, such as pecking with their beaks, taking regular dust baths, and even molting. Most of these processes will allow your chickens to control any mild infestations.
The purpose of the dust bath in this regard, is that when the dust covers the chickens skin, it clogs the breathing pores of any parasites that may be hiding, or who are using the chicken as a host. Many have recommended locating where your chickens like to dust bathe, and add a small mix of Diatomaceous Earth to the dirt. Diatomacious Earth is the sworn enemy of pests such as ticks, lice and mites, as its superfine particles get to the base of the bird’s feathers and kill the pests. You’ll want to be careful how much Diatomaceous Earth you use, however, and you can read more here.
2. To Absord Excess Oil and Moisture on the Chicken’s body
Another reason dust bathing is helpful and hygienic for your flock is that it helped your birds keep oil and other material from building up. Chickens have an uropygial gland, or oil gland at the base of their tail on their lower back that come in useful when preening. Birds distribute these oils throughout their feathers as they preen, but when oil production comes in excess, dust bathing is a good way to keep the excess oil at bay.
3. Its a Social Experience
Anyone who has raised backyard chickens will testify that their birds are extremely sensitive. They form bonds with each other, with their care taker, or even other family pets. After thunderstorms or the fireworks on the 4th of July, the stress my affect their egg production levels. Similarly, if one chicken dies, you will note that her “friends” will go through a mourning period of isolation and even broodiness.
Similarly, chickens use their bathing time as a good opportunity to gather. Often, we will find 5-6 chickens bathing in their little baths near one another, clucking and “melting”, as though they had official gossip they needed to get through. I’ve watched a group of 7-8 sit beneath our bull tree out back and dust bathe for hours at a time. They thoroughly seem to be enjoying the experience, and from what I know of chicken personalities, I think their time for dust bathing is important to their social structure and “pecking order”.
Make A Dust Bath for your Backyard Flock
Depending on your coop setup, you may find it necessary to provide a homemade dust bath for your chickens to use throughout the year. Because our flock is a free range flock, they have no problem finding various locations to bathe during the spring and summer. During the winter however, most of their favorite dust bath spots are covered with ice and snow. And though mite and lice populations typically slow or die down during colder months, your birds will still want to bathe whenever they have the opportunity.
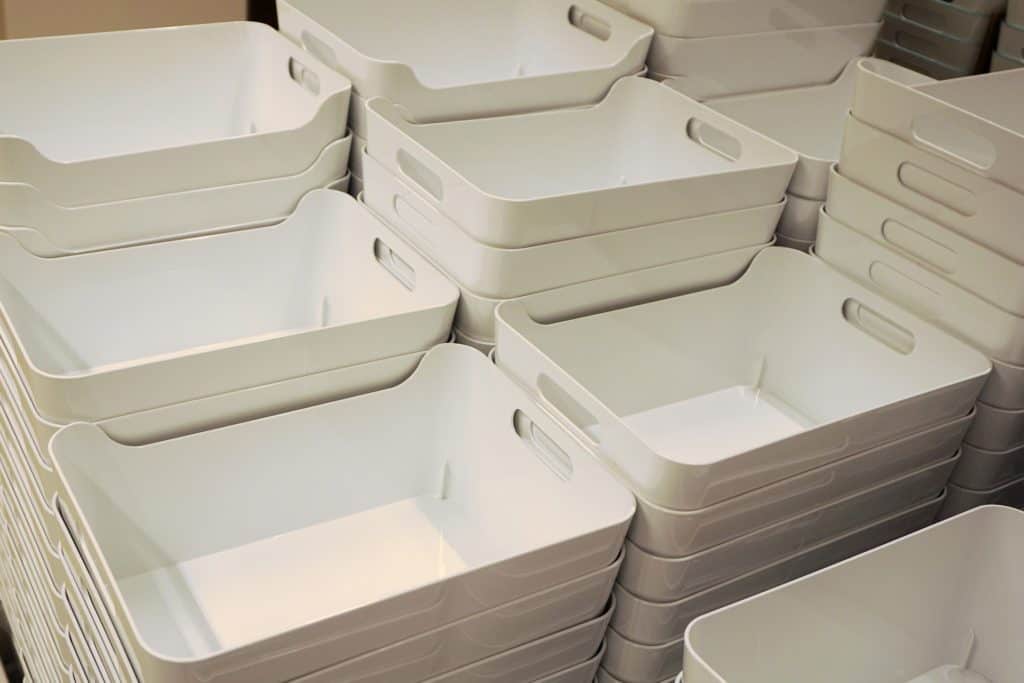
You can use any container, or wood box that is 1.5-2 square feet in size. You will want the height to be 4-8 inches, to keep the dust/dirt contained, but no too high for the chickens to enter. It is very handy to use 6 inch plastic storage bins that can be purchased at any Wal Mart or hardware store. The most important aspect of a homemade dust bath will be what you fill it with. We use fine beach sand and ash to fill our winter dust baths. It is also recommended that you add 1-2 cups of Diatomaceous earth to help kill pests and parasites that may infest your birds. We do not use Diatomaceous earth for our birds, simply because we also have beehives nearby, and do not wish to cause any potential harm to the bees.
You will find that your chickens will line up to take turns in their winter dust baths, and it may even be helpful to place two or three baths to allow for more chickens to utilize them. We change our dirt out during the winter once per month just to freshen things up for the ladies, and to be sure to remove fecal matter than can gather within the bath boxes.
Having dust baths available for your birds is just one aspect of maintaining a happy and healthy coop. I have found that the more time and love I spend caring for our girls, the better they do at taking care for themselves and each other, producing eggs, and being genuinely happy.
Log structures are being used more and more for both a primary residence and second home in the country. Many log homes/cabins are used as hunting/fishing/vacation cabins in remote areas of the U.S., and the care of these rustic beauties is important for long lasting durability. But numerous log homes are becoming primary residences that incorporate historic beauty, rustic charm and efficient heating and cooling advantages. They are also often built where land is much less expensive than urban or suburban residential developments. And, they give greater flexibility to design options, remodel possibilities, and can incorporate solar advantages and aesthetic enhancements with decks, windows, roofs and foundations.
Many log homes call for rescue and restoration. My experience with a log cabin came with my two brothers. We built a 30 foot X 30 foot, two-story log cabin from a “kit” in the mountains of Southern Utah. We built it as a “spec” home to make money for needed living expenses in the late 70’s. We sold it and made a few bucks but wished we could have kept it for ourselves. When the buyers moved to Idaho a few years later, they called my wife and me and asked if we were interested in buying it back from them. “Sure,” I said with enthusiasm, since my wife and I had good jobs with a combined income that gave us the ability to buy a perfect little cabin just 40 miles from our small city residence.
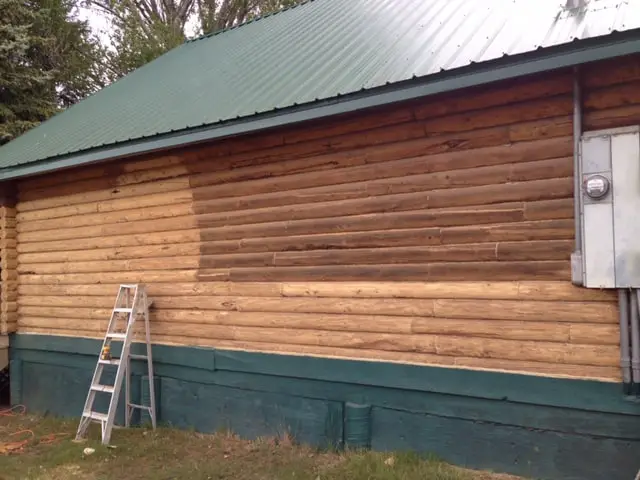
The price was reasonable and we made the purchase, despite the fact that in just a few years, the logs had been neglected and desperately need some attention. When I carefully inspected the little mountain beauty, it had some early signs of sun rot, and there had been “a little” termite damage. I soon took care of all wood restoration issues and put a wood sealing finish on the logs that lasted several years. By sanding the entire cabin again in 1998, and applying a commercial grade sealer, I enjoyed the mountain valley cabin without worrying too much about the maintenance of the pine logs for nearly 20 years, which was too long for the finish to last without damage. Once again, I was faced with some sun rot and termite concerns in 2017.
I will list the steps I took to stabilize the wood, apply textured caulking, eradicate the termites and put a restorative sealant on the 40 – year old logs of my cabin.
Pine (and cedar) logs are often porous. To prevent both water damage and sun damage (rot), joint caulk, and a water repellent/sealing finish must be applied when first constructed or when restoration occurs. My project was a restoration task. I had one grandson to help me, and plenty of advice via the internet, as well as local supply stores with quality products. My caulking material came from Perma Chink Inc. in Rifle, Colorado. My daughter lived in Denver and I passed through Rifle often. When I stopped to purchase the caulk, I was treated with enthusiasm and competent professional advice …. and the prices were fair. I told them the size of my cabin and they calculated the quantity of caulk I needed and recommended a good sealant. They also sold me the tools I needed for application. As I left the store, the sweet cashier said….”I hope you have a good ladder and some strong arms!”
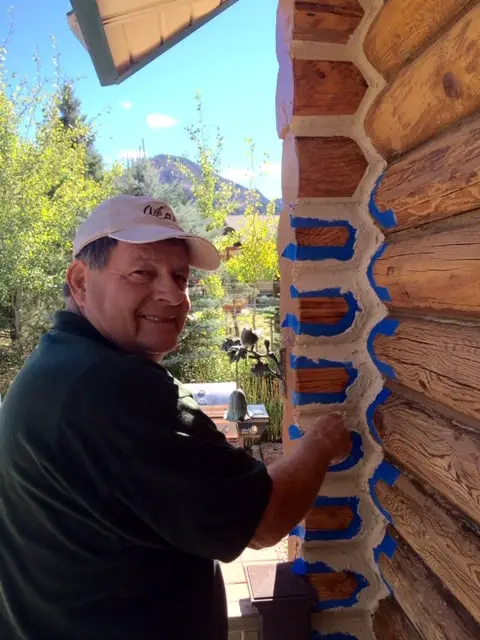
Because the natural beauty of raw, dried and treated logs when first sanded, pealed or scraped is desired, the weather in a harsh environment (where I live) can claim the new beauty look on most south and east facing sides of wood in the northern hemisphere. Such was the case with my cabin. I took a claw hammer to the minimal sun rot on the south side of my cabin then chiseled out about fifteen pounds of rotted wood. I located all the termite damaged areas as well, and had to remove some areas of the logs that had termite issues. I then treated the wood with FiPro Foaming Aerosol (be sure to wear a good mask – N95 or better). I let the aerosol seep into the wood and sprayed liberally around the foundation for ground termites, then waited two days to begin applying some filler caulk (DAP acrylic latex – cedar tan). It took 20 cartridges of caulk to completely fill in the lost wood areas of my logs. The latex caulk costs less than $3 per tube and worked well. I would use 3-4 tubes at a time and let them set-up for 3-4 days before applying more filler until the shape and look of the restored log was achieved.
I then hired my grandson to help me sand the entire cabin with Black and Decker Orbital sanders. The curved logs required the versatility of an orbital sander. The manual labor was extensive, but cheaper than having it sand-blasted (yes, I got a bid). The sanding project took three days (two laborers) and cost about $400. We sanded the entire cabin (photo’s attached), and the natural color and texture of the wood was totally restored.
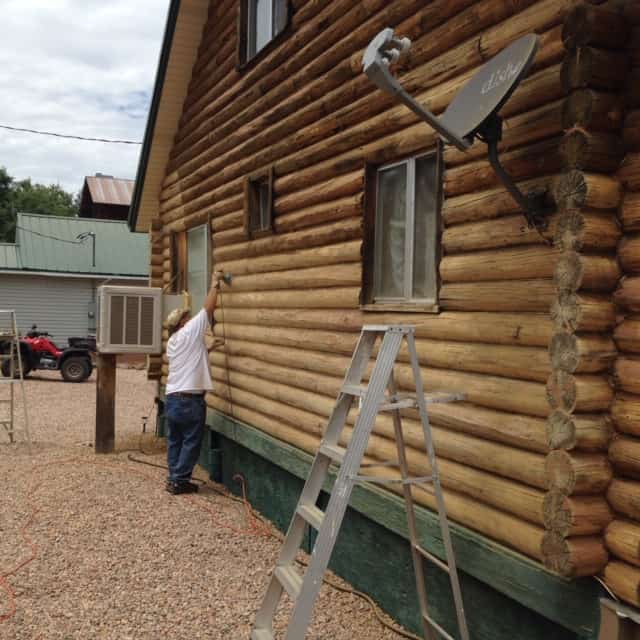
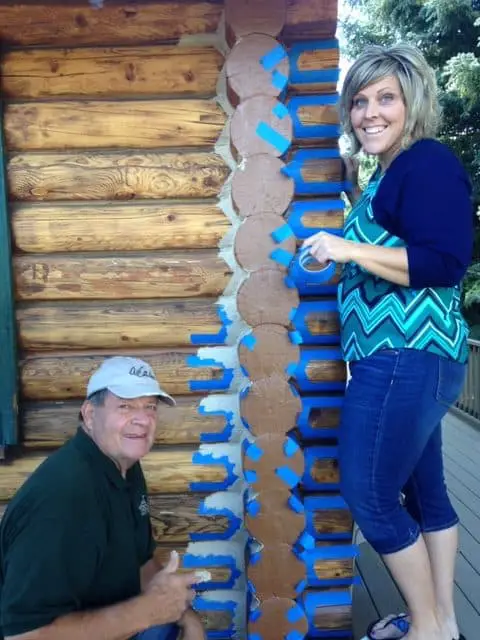
Before applying the joint caulk, I removed the old caulk, which came out in chunks and strips. That took two days and was not a very difficult task as I used a pointed “v” shaped cement trowel, and a sharp knife to slice out the old caulk. I removed all surplus dirt and cleaned the crevices carefully with a wire brush in preparation for new caulk joint compound (Perma-Chink caulk). The color I selected was “Sandstone #215. I used a cake decorating offset wood handled icing kitchen spatula for a trowel (my wife about killed me) and used blue painter’s tape for the notched corners (see photo) to make sure they were symmetrical. My sweet daughter helped with this chore. The caulk has a rubbery texture that binds to the wood and lasts indefinitely. It also has insect resistant properties. Note: This Perma Chink caulk must be applied at a thickness of at least a quarter inch. Otherwise, if thinly applied, it will crack as it dries.
After letting the caulk firm-up for a few days (4), I began to apply the wood sealant to the logs. I decided to use a stiff bristled 5” painter’s brush and do it by hand since my sprayer seemed to be dripping and wasting expensive sealant. I decided on “Messmer’s” Timberflex, Alaskan Log Home Formula (photo). It was somewhat expensive but came highly recommended by a Hurst Ace Hardware wood specialist whose 20 year experience included a testimonial from a cabin owner who told him that his sealant looked great, had UV resistance and had lasted ten years. He suggested I put on two coats, which I did.
I want to explain that I am not a professional log cabin builder nor wood specialist. I am a DIY guy, who does not mind rolling up his sleeves and attacking any job that requires matter over mind. I have discovered that owning a mountain cabin requires regular maintenance, but if I were to match great family gatherings, fireplace chats and yummy BBQ’s, beautiful crisp starry nights with laughter and great memories, the maintenance has been a small chore with lotsa good returns. I have also come to realize that wood preservation practices for logs usually come best with good product usage and the right tools. I also learned what I needed to know and do with log preservation techniques and products on the internet. If you have a homestead worth protecting, this formula, which does call for some hard work with your precious logs, will work for you.
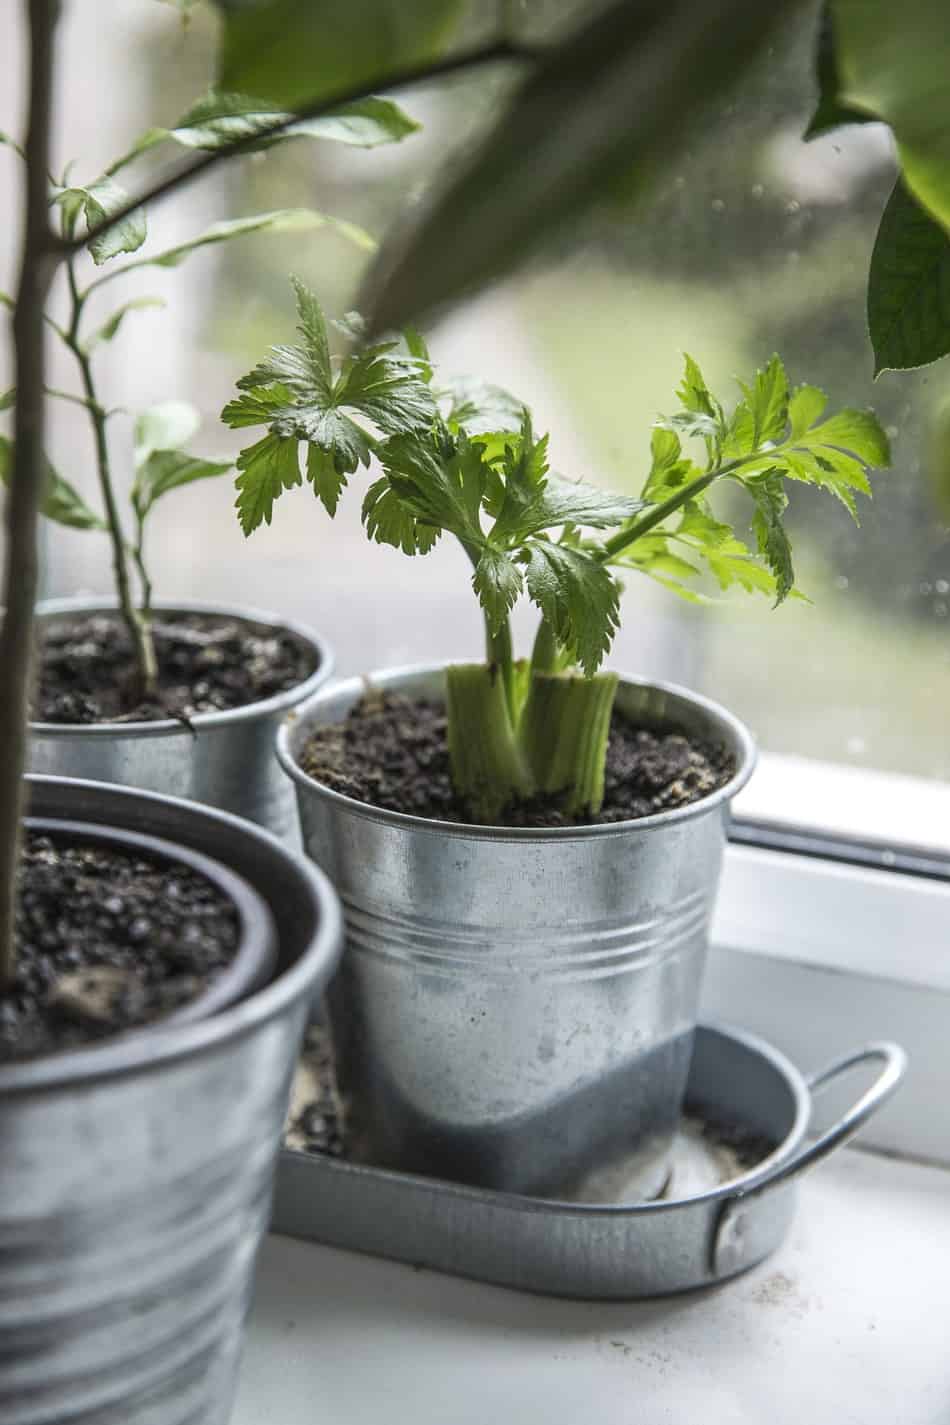
With little maintenance, you can grow an indoor herb garden that will keep your kitchen supplied with fresh ingredients year round. There are several varieties of herbs that thrive in an indoor setting such as a kitchen windowsill, or under a shelf grow light. Additionally, many can be started with a simple seed pack, or purchased as small plants from a local nursery.
Which herbs grow best?
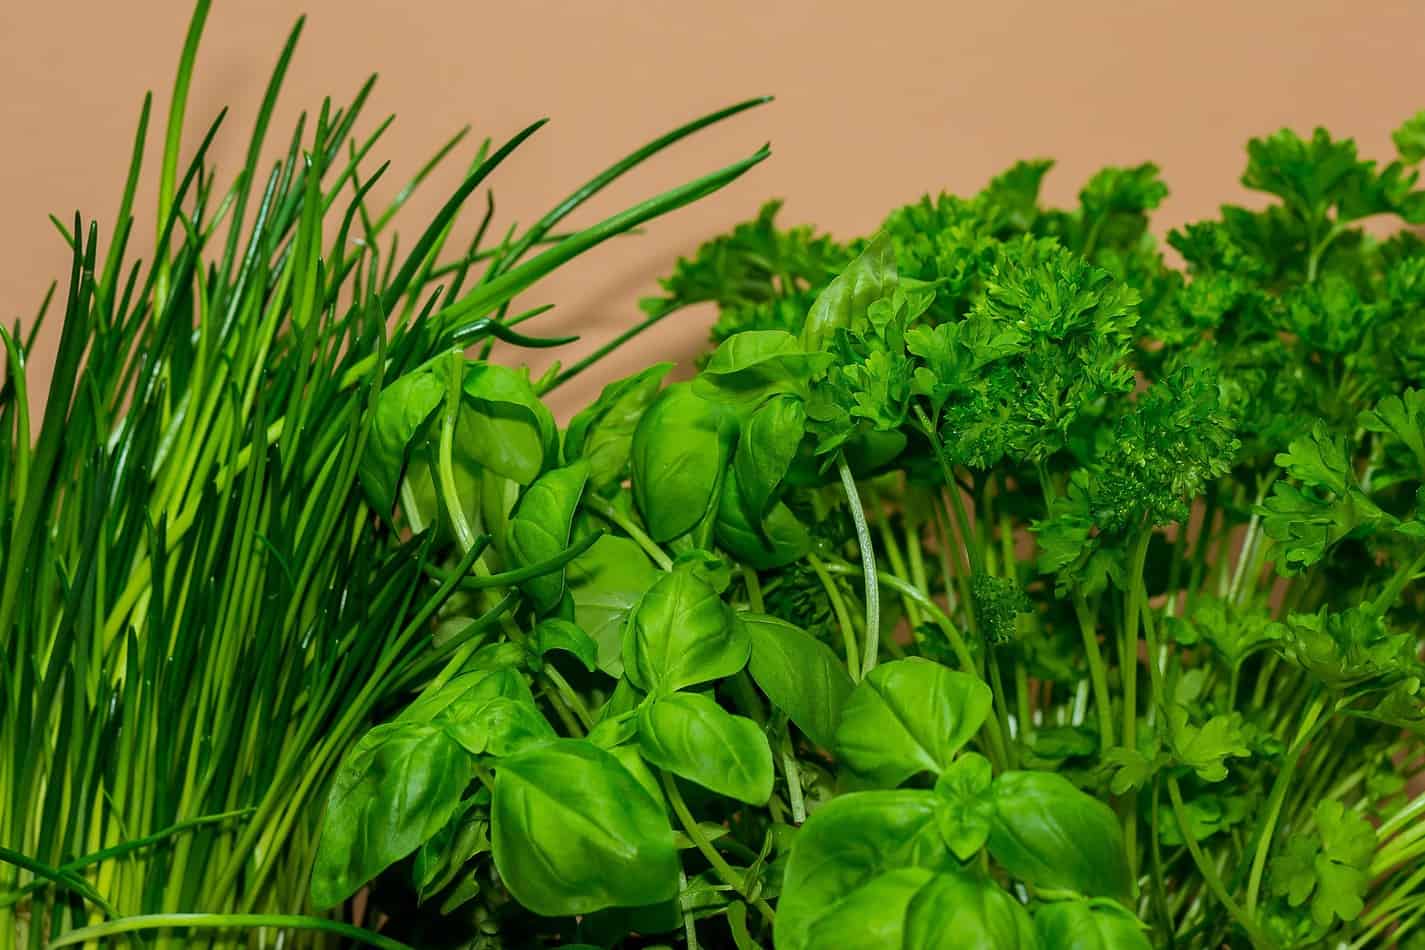
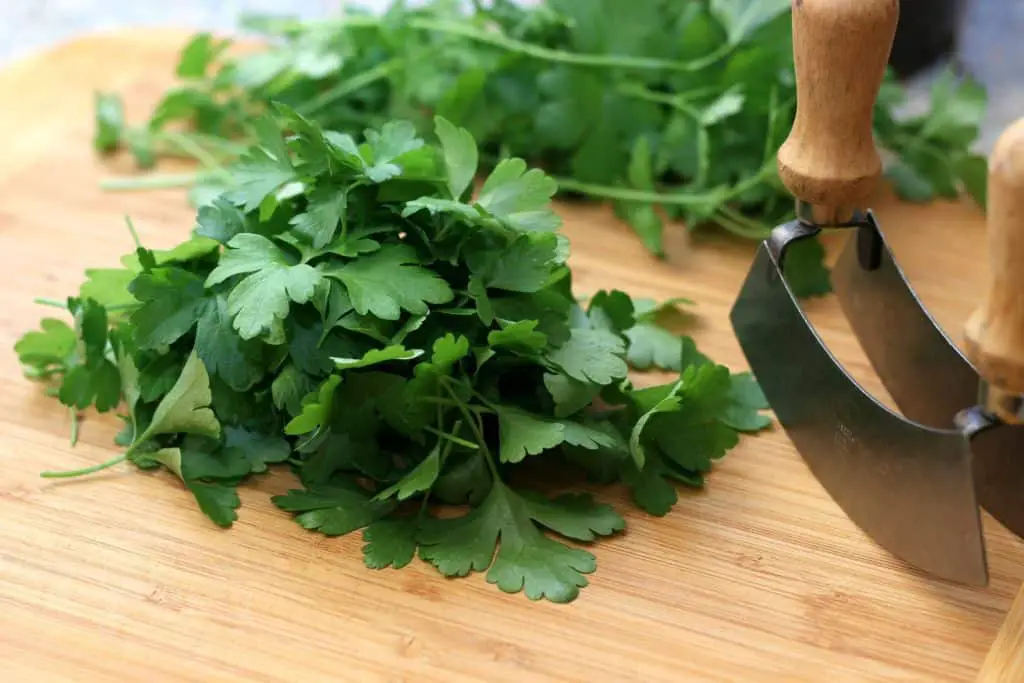
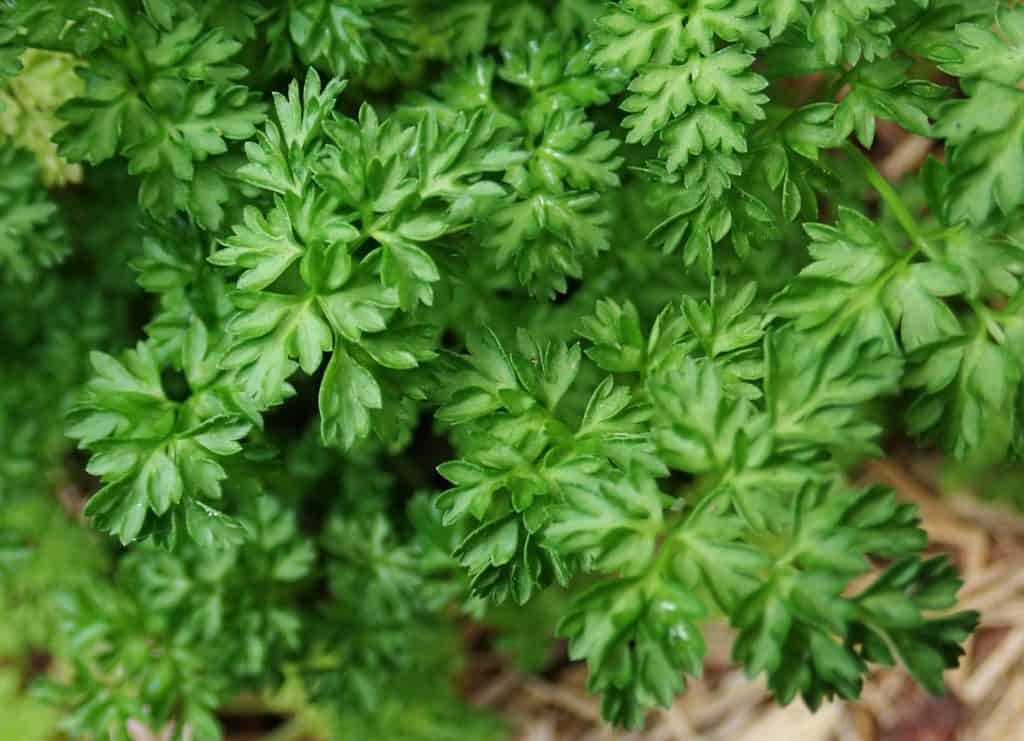
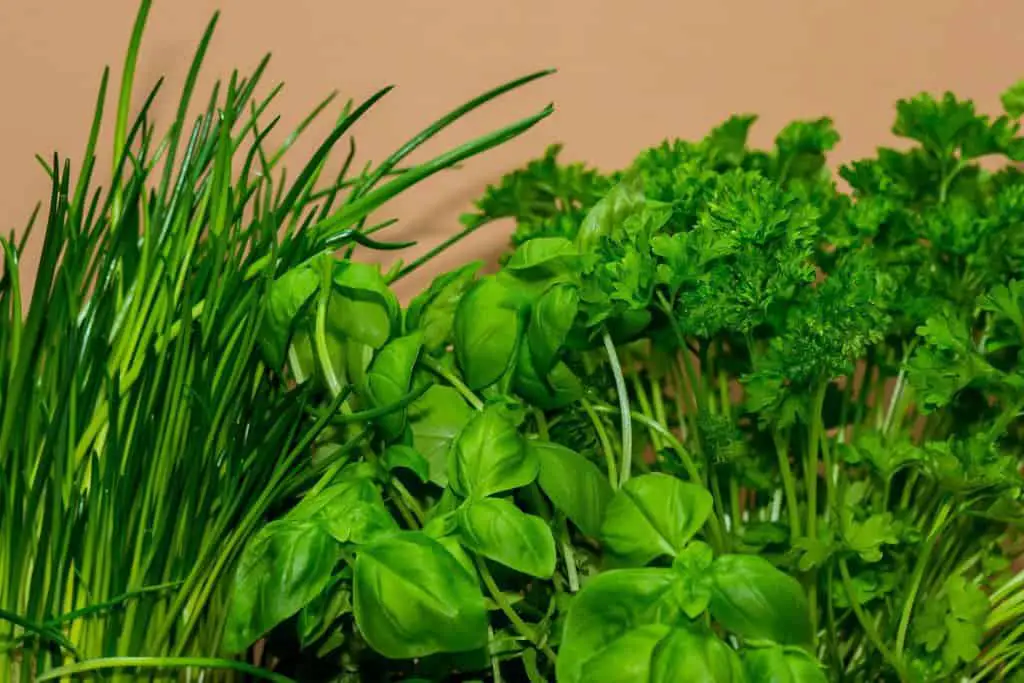
If you are just starting out with an herb garden, I would suggest starting with Basil, Chives, Oregano, Rosemary, Thyme, and Parsley. Other favorites include Mint, Chrvil, and Bay Laurel.
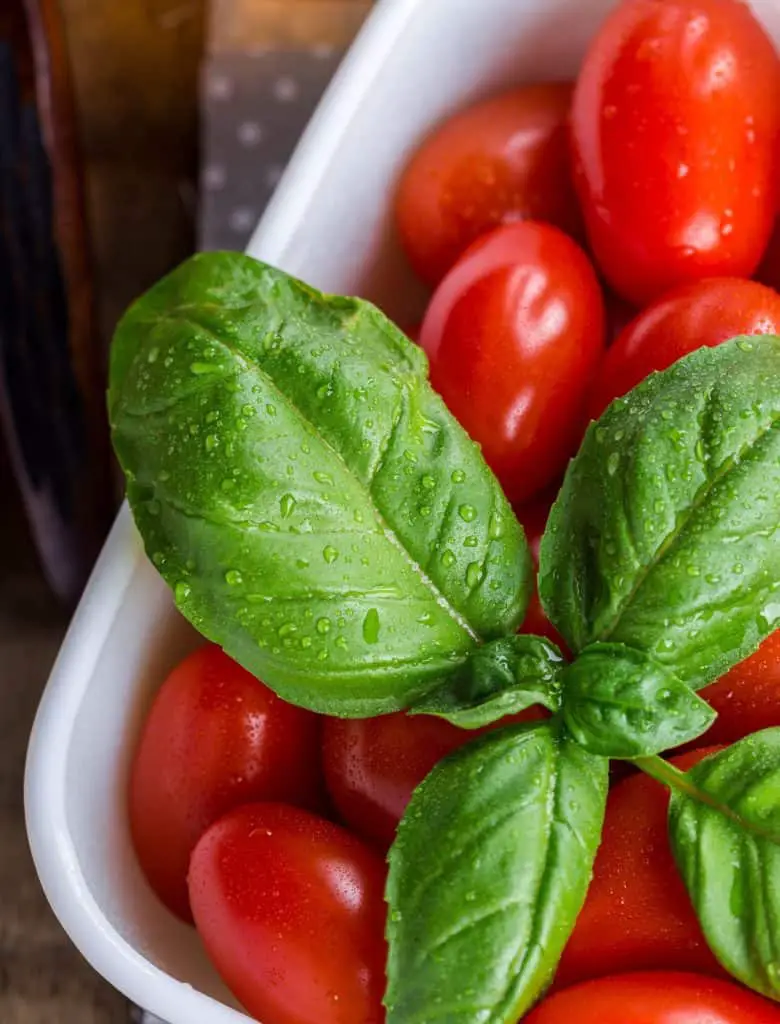
Basil: Basil typically requires six to eight hours of sunlight daily to reach maturity, and grows fantastically indoors. It can be started from seeds or transplants, but will need warm soil in order to grow. We typically plant our basil from seed, and start six weeks before the last predicted Spring frost. For transplanting, we wait until the temperature of the outside soil has warmed to at least 50ºF, or 60ºF for best growth.
Basil seeds should be planted in moist warm soil about ¼ to 1 inch deep.
A basil plant will grow to 24 inches at maturity. You will want to plant them 12-16 inches apart to allow for optimal growth. (or two plants per square foot).
Allow for good drainage, as this poor drainage (too much water) is one of the greatest threats to basil.
About six weeks after planting, you may want to pinch off the center shoot to prevent early flowering.
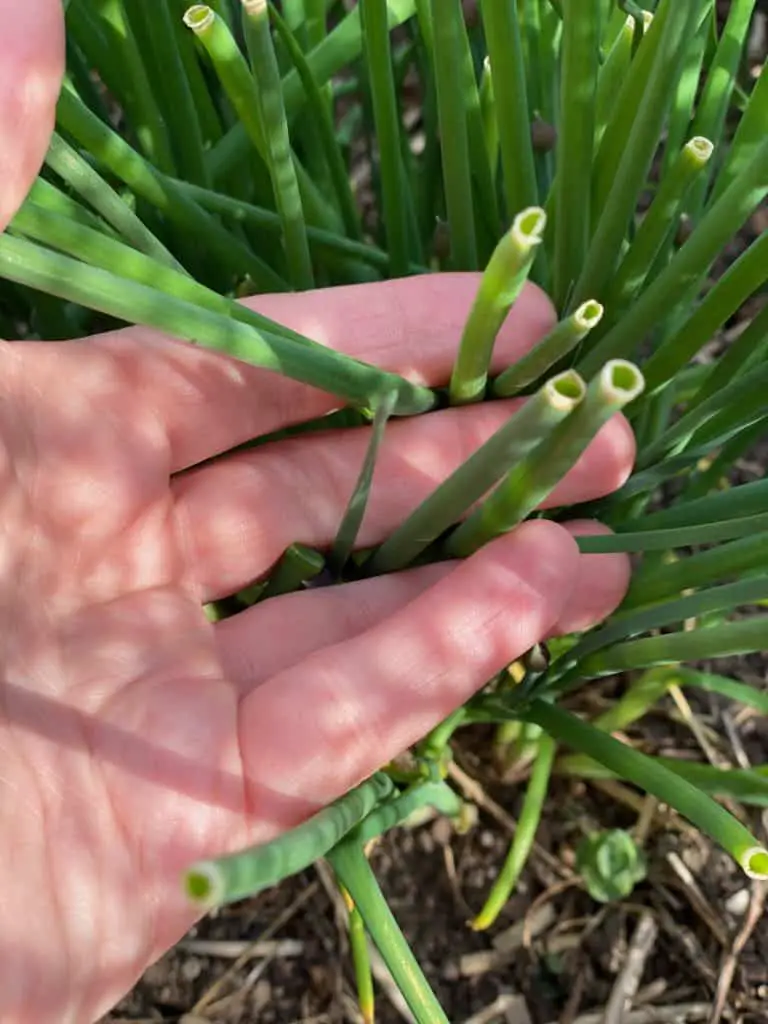
Chives: Chives are a cold tolerant perennial that belongs to the onion family. They require six to eight hours of sunlight daily for optimal growth. Like basil, they grow fantastically indoors, and a south facing windowsill will provide plenty of sunlight. Chives are best grown from seeds, in pr-moistened soil, broadcast generously and then covered with ¼ inch of moist soil.
Chives will germinate within two weeks
For indoor planting, use at last six inches of sterile, moist soil. We use six inch clay pots, and keep one chive plant in our kitchen windowsill, and also have it growing annually in our raised garden on the back porch.
Chives require good drainage, but you will not want the soil to be too wet.
To harvest chives, use a sharp pair of shears and snip the leaves from the base of the plant to within one-2 inches of the soil.
If you find that your windowsill chives are “leaning” towards the sun, be sure to rotate them.
Plan on harvesting 3-4 times per year.
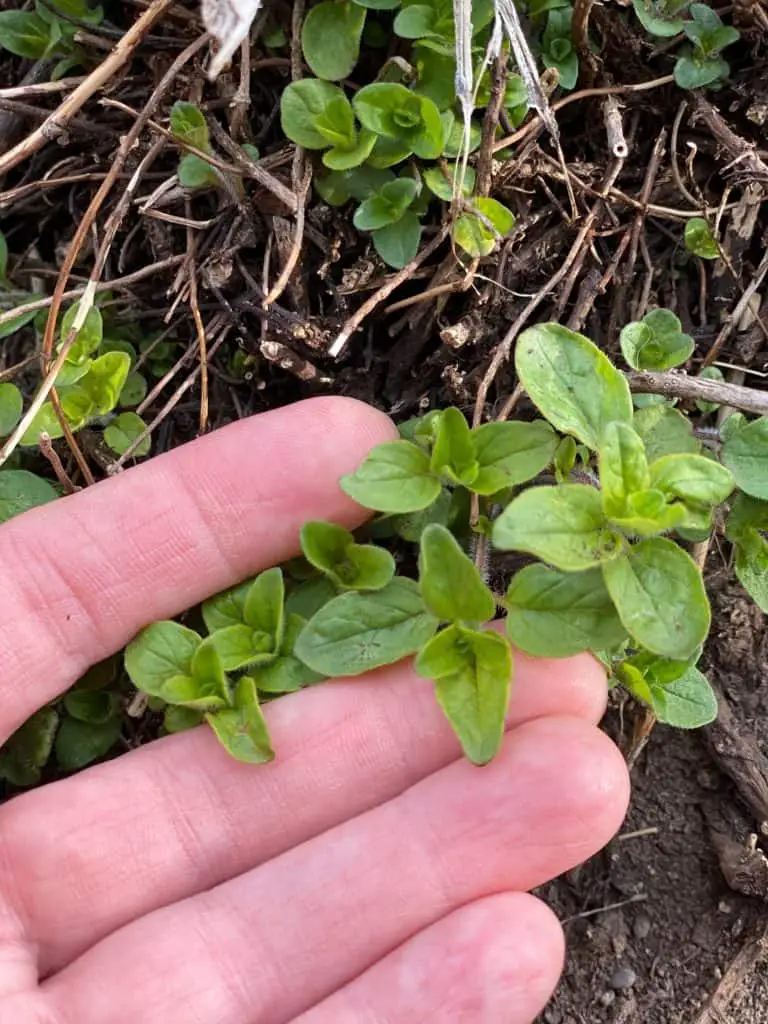
Oregano: Oregano is a perennial plant that requires plenty of warmth and sunlight to reach maturity. For indoor growth, oregano will need at a minimum, six to eight hours of full sunlight daily, or optimally, an indoor grow light. Oregano can be grown from either seeds or cuttings from an established plant. You will you want to plant the seeds or cutting in well drained.
Oregano plants can reach up to two feet at maturity, so give them 18 inches to grow between seedlings if possible.
Regular trimming after about four inches of growth) will encourage your oregano plant to grow bushy and dense, and avoid legginess.
Don’t over-water. Oregano requires good drainage, so only water the plants when the soil begins to feel dry to the touch. This will also help you avoid root and stem rot.
Thin oregano plants every two to three years. They are self-seeding, so will easily grow back.
Consider picking off any browning or spotted foliage to help protect from disease and prevent unwanted spread.
Also consider trimming or cutting the stems just above the plants lowest set of leaves to encourage new growth for the next cutting.
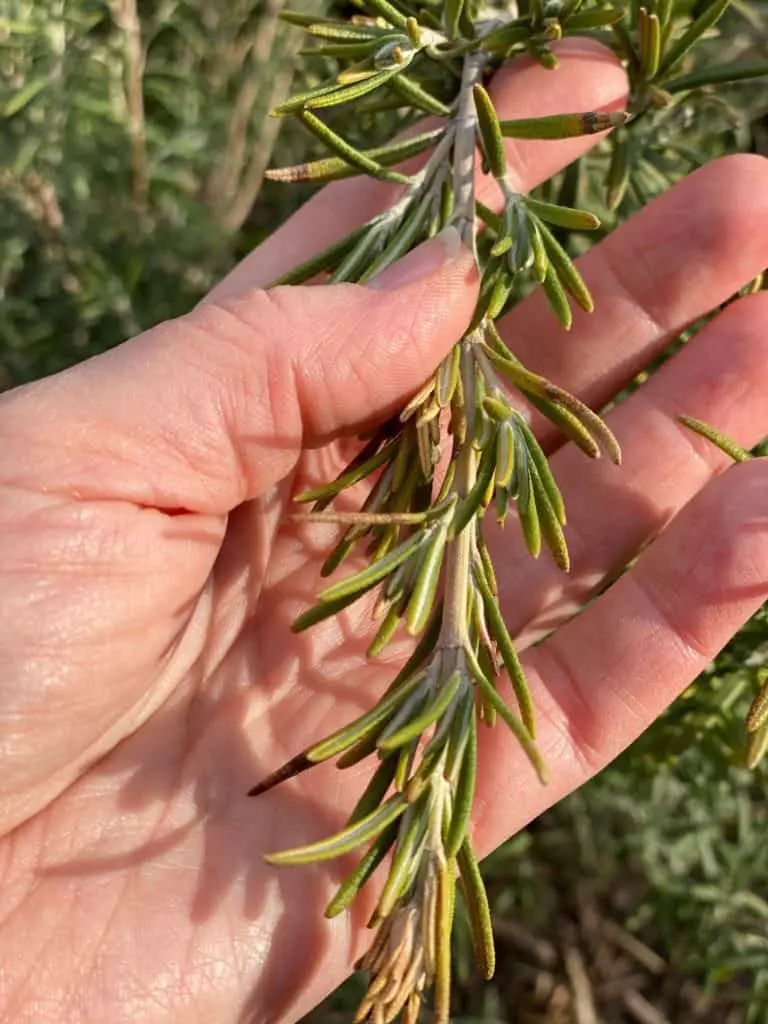
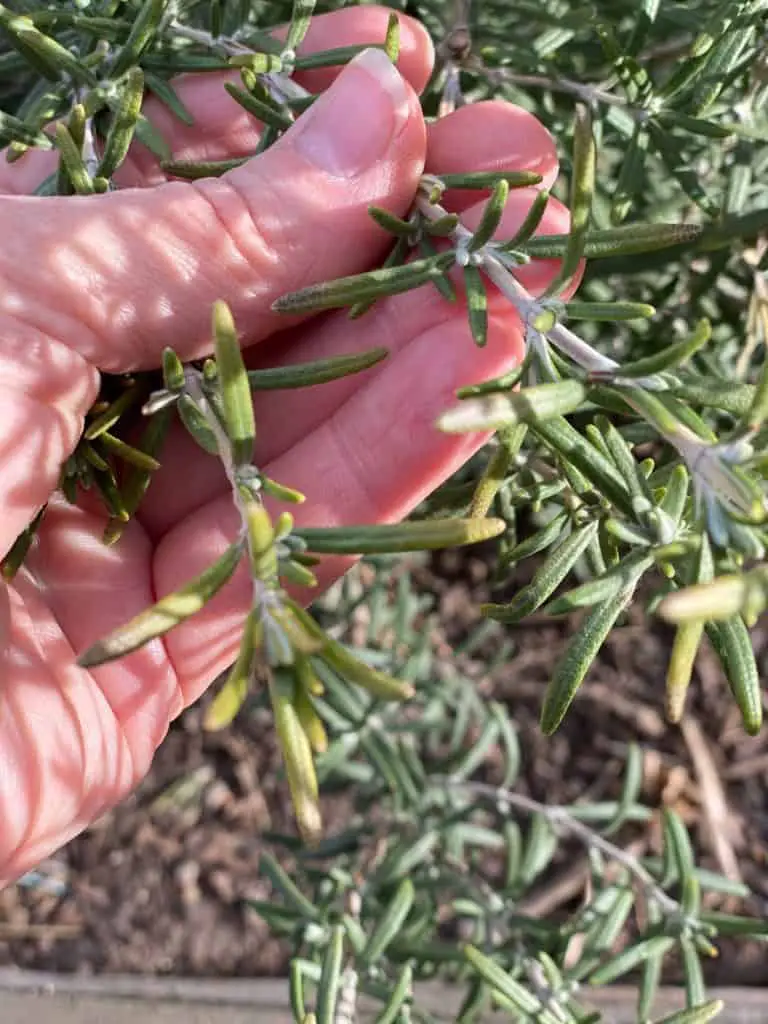
Rosemary: Rosemary is a perennial evergreen shrub with aromatic and distinctive sprigs that add a resinous flavor to many poultry and meat dishes. Rosemary grows well in drier or rocky terrain, and can grow to up to four feet in height and width at full maturity. Rosemary will need well draining soil, and does not do well in humid, or consistently wet soil.
Rosemary can be harvested at any time once the plant has been established. Just trim off springs as needed.
Because it is perennial, rosemary will grow more vigorously after the initial growing season.
Rosemary can be dried and stored if you have an excess harvest.
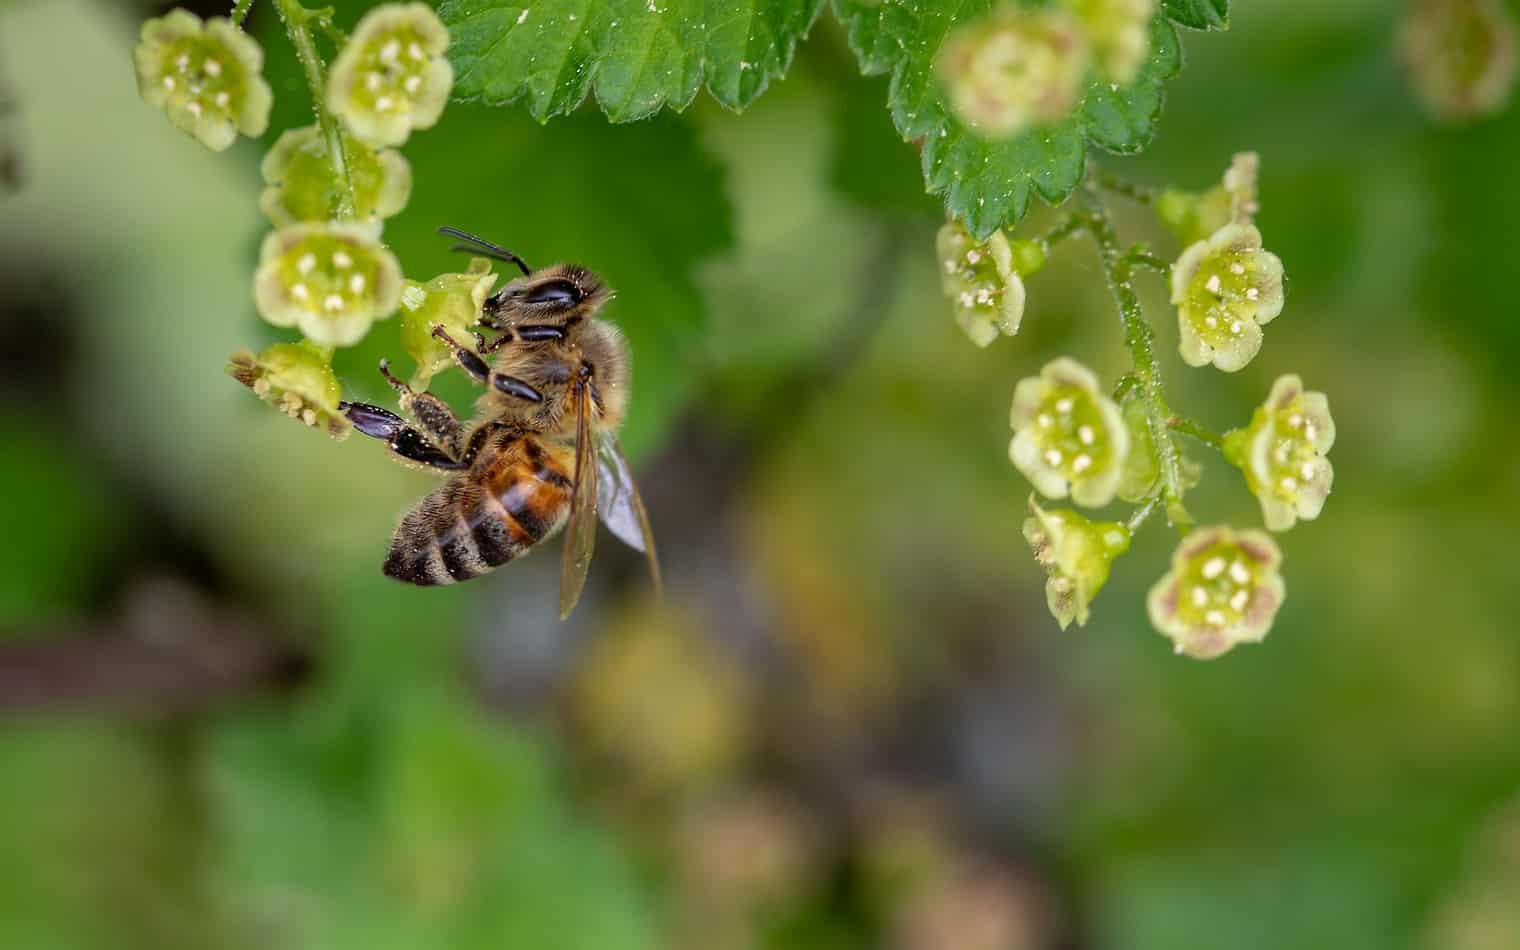
Thyme: Thyme is a low growing hearty perennial with fragrant leaves that add a gentle clover-like and woody flavor to dishes sch as pilafs, soups, or grilled meats. You may be surprised to know that there are over 50 varieties of thyme, each of which carries a differing flavor and fragrance. Thyme blossoms are also a fantastic attractant for bees and other pollinators. For this reason, we always have some growing in our outdoor herb garden. Often thyme is confused with rosemary, as their flavors both add a warmth and peppery undertone to dishes. Thyme is a Mediterranian plant that does well in more arid climates, and requires little maintenance.
Thyme thrives in full sunlight and warm temperatures, and grows fantastically under heat/grow lights.
Thyme plants need good drainage, so roots will have a chance to dry. No “wet feet” or root rot. Then, only water when the soil feels completely dry again.
It is best to start thyme from cuttings or as a small plant bought from a nursery because seeds have slow and uneven germination periods.
Plant cuttings in six inches of moist warm soil (approximately 70ºF) and 12-42 inches apart.
Thyme plants can grow to 12 inches in maturity.
Cut thyme back by 1/3 of an inch in the spring as needed once the plant has started to produce new growth, and strip the leaves from the woody stem before using.
Parsley: Parsley is a thin biennial herb plant that grows easily indoors from seed. A member of the dill family, parsley is popular in sauces, soups, and salads because it brings a brightness to other flavors. It can have a mild bitterness depending on when picked, and its delicate leaves make a beautiful garnish. Parsley seeds should be started about ¼ of an inch into moist soil, and take 75 days to reach full maturity.
Parsley seeds should be planted 6-8 inches apart from each other, and take 3-4 weeks to germinate. In colder temperatures, they can take up to 3 weeks to sprout.
To harvest Parsley, consider cutting off the outer stalks closer to the ground, using scissors rather than plucking off upper leaves and leaving bare stalks.
Parsley can be transplanted to an outdoor garden three to four weeks before the last expected frost.
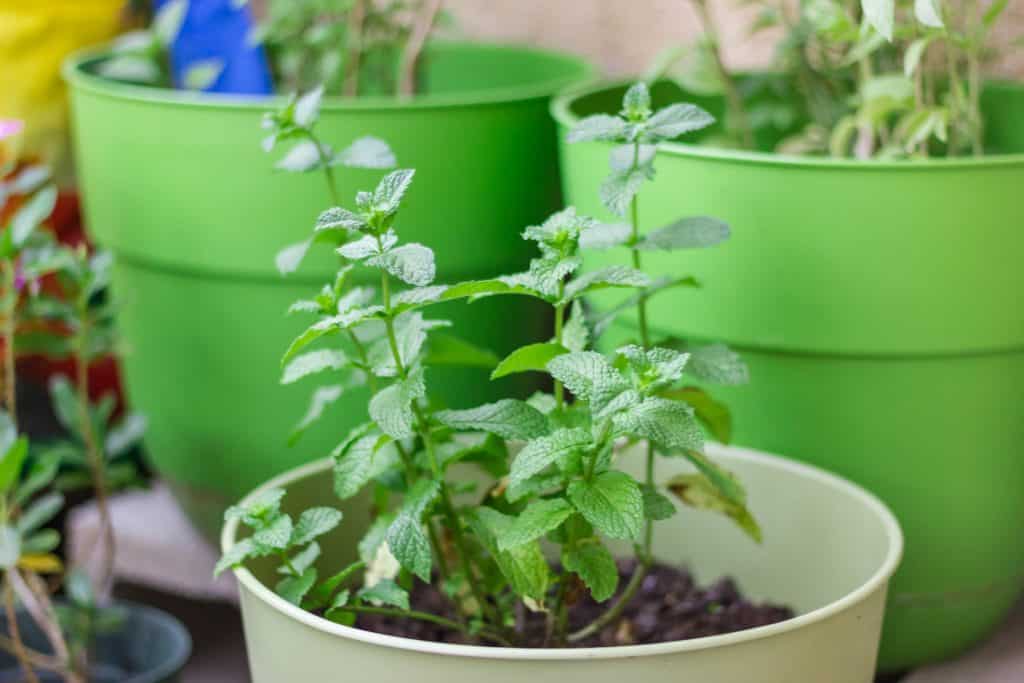
Mint: Mint is a vigorous perennial plant with jagged toothed leaves, and a very fragrant, aromatic taste. There are numerous varieties of mint, and it is used not only has an herb for flavor, but also for ground cover, tabletop accent plants, and air fresheners just to name a few. Mint can be grown from seed, in moist warm soil, planted about ¼ inch down, or from cuttings. We have always used cuttings from fresh top growth put in a cup of water in our south facing windowsill until the stems take root. From there, we transplant the entire plant to a windowsill (or desktop) clay pot for growth.
Mint plants can also be planted from root cuttings
Mint plants need good drainage, but will prefer a moist (but well-drained) container.
Mint can grow to be 12-24 inches in height at maturity, and are best if planted in a separate pot, or 1-2 feet apart when outdoors.
Mint plants require minimal care, so long as the soil is kept minimally moist.
Beware, some mint plants have a mind of their own, and if left unattended, will take over a four to six foot garden area. Roots are shallow however, so the plants are typically easily to maintain.
Chervil: Chervil is a cool season annual plant that has an appearance similar to parsley. Its leaves have a mild aniseed taste and is used often in French cuisine, or in combination with other herbs to create “herbs de provence”. Chervil grows well indoors, and can be planted from seed, in containers, or large tubs. Seedlings are known to be quite fragile, so should not be transplanted. Instead, sow a cluster of chervil seeds a 1-2 inches inches below the ground in moist warm soil, with light, in order to germinate.
Chervil can be harvested year round, and does well in full sunlight.
It is best to harvest chervil before flowering for best flavor. Simply cut off chervil leaves whenever needed.
It is recommended to snip the leaves at the base of the stem because this will allow new shoots to grow.
Chervil can grow to a height of 1-2 feet at maturity.
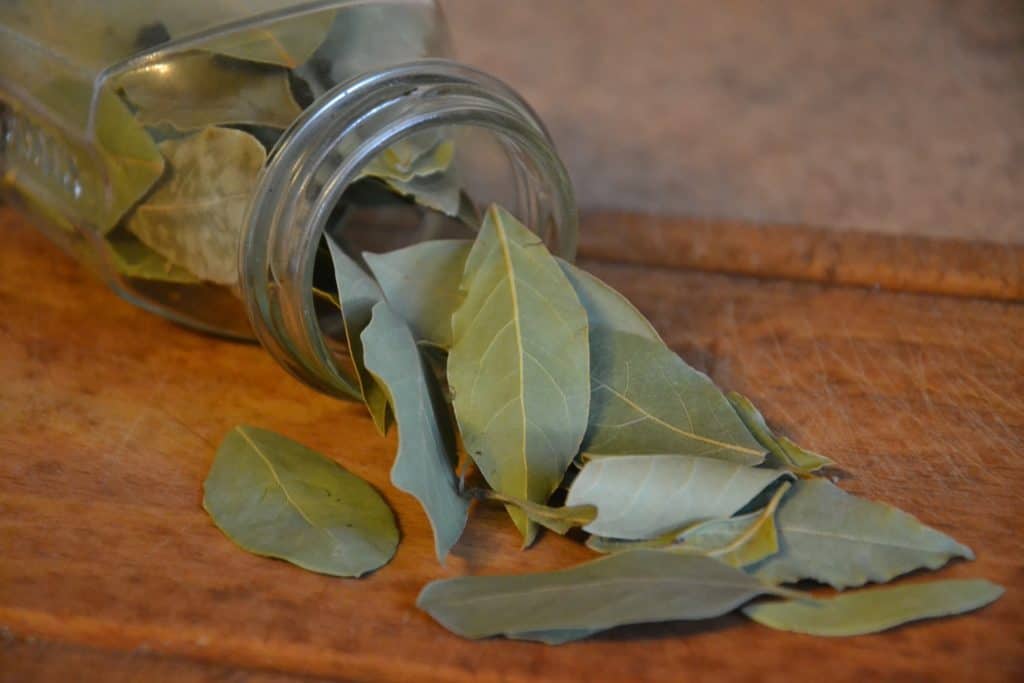
Bay Laurel: Bay Laurel is an aromatic evergreen tree, or shrub that is native to the Mediterranean region. These plants can grow several feet high, so for indoor use, we recommend its own pot that will allow for optimal growth or eventual outdoor transplantation. When dried, Bay Laurel is most noticeable for its fragrance than taste, but will add a slight floral and herbal flavor similar to thyme. We use bay laurel very sparingly in soups or wet dishes to keep heavy flavors a bit lighter.
Bay Laurel plants are more popular for being ornamental, and are easily shaped to fit any garden or room space. Its leaves are also popular additions to flower bouquets and seasonal wreaths.
Bay Laurel plants do best in full sunlight, and good drainage. We also re-pot our every few years to add nutrient to the soil. We do this by adding several rocks to the bottom of the pot, covered with a good potting soil.
Though there are literally thousands of herbs and plants that can grow well in an indoor setting. This is the list that we find most helpful for last minute dishes, and adding freshness to our most common kitchen recipes, without requiring too much upkeep. We hope you enjoy growing your own indoor garden as much as our family has.
A Beginners Guide to Indoor Gardening. Grow Healthy Plants Indoors All Year Long
With the ongoing rise in home and land prices, more families are choosing smaller home sites, condos, or higher density/lower ground space, or even retirement style community housing options. Many of these home styles do not include garden space, which has led to a surging interest in box planting or other types of indoor gardening. In addition to the smaller space argument, there are many other reasons to try indoor gardening.
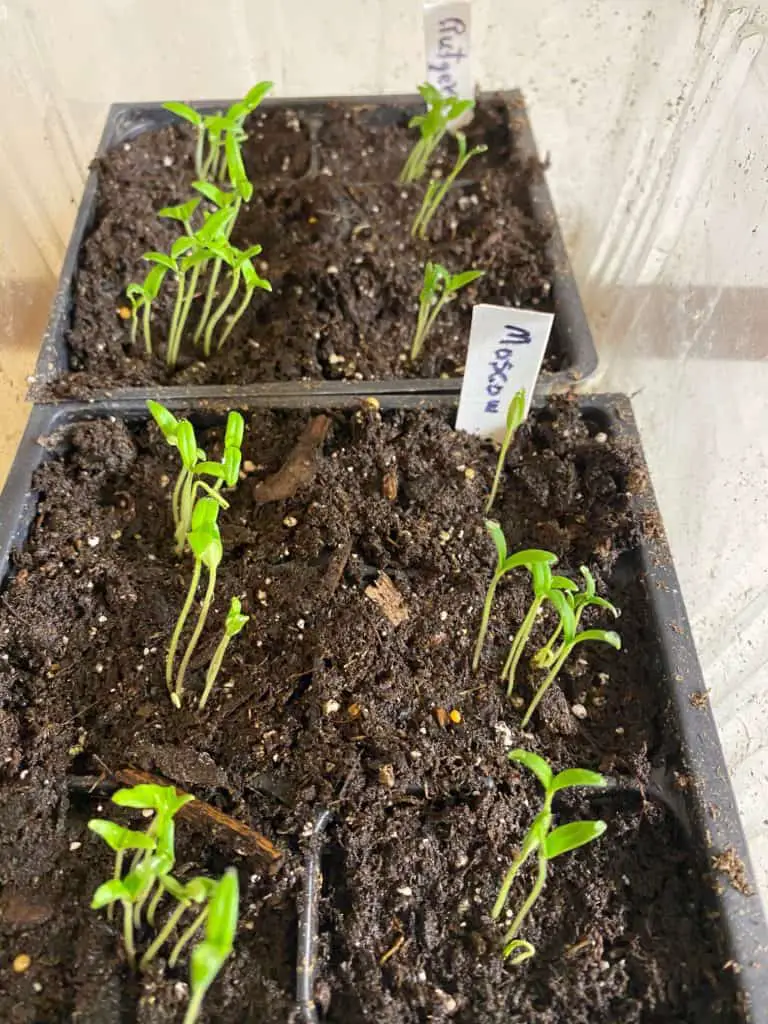
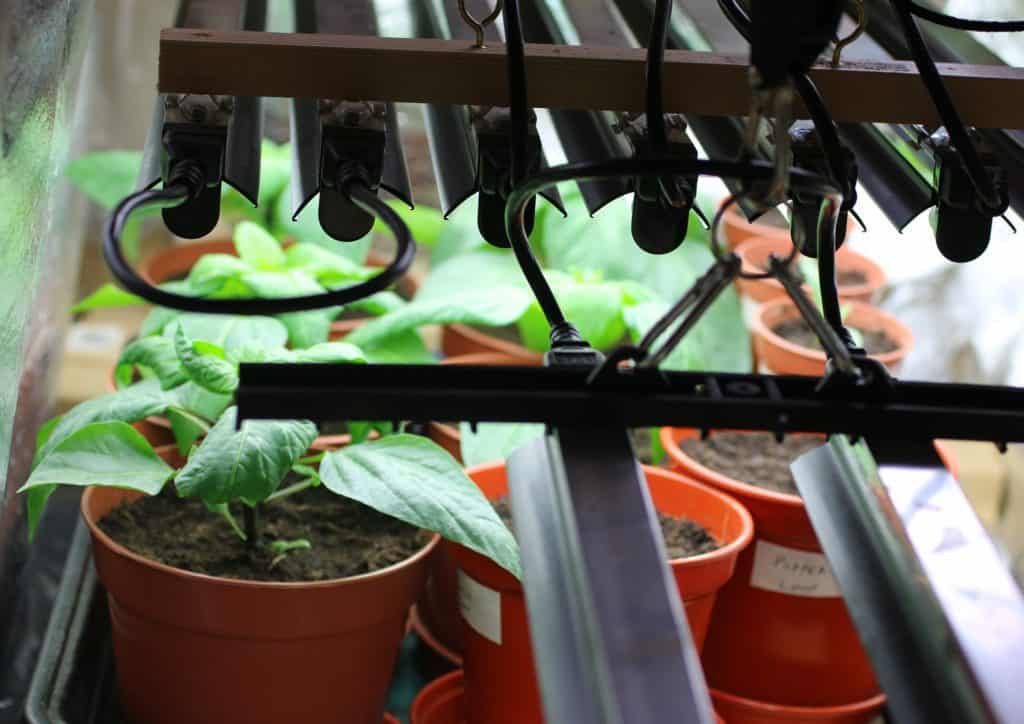
On our farm, we have used indoor planting and transplanting methods for years because we live in a semi-mountain climate, and our spring can hit a little late. Additionally we see bitter spring cold snaps that can kill young seedlings. For this reason, we start all of our pepper and tomato plants indoors under a sun lamp, and transplant them to an outdoor garden once the threat of cold weather has passed.
Moscow tomato seedlings after one week of indoor germination under fluorescent lighting
Why Should I consider Indoor Gardening?
Whether you are like us, and simply wish to extend your growing season, or you are interested in having fresh leafy greens or vegetables year round, this article will discuss the basics of starting your own indoor garden. There are numerous healthy and positive reasons to keeps plants in your home. Consider this brief list:
Asthetics – a healthy green plant can liven up any living space
Clean Air – plants are a natural air filter. They use CO2 and release fresh Oxygen.
Fresh Herbs and Veggies During the Winter – Imagine the aroma of your own thyme, basil, or parsley, in fresh made meals during the cold winter months, as well as the summer.
Save Space – Indoor gardening is an excellent alternative if you don’t have a large yard or garden spot. As stated above, you don’t need a large parcel of ground to grow herbs and vegetables. (Think window box)
Health Benefits – Recent health studies suggest that gardening and horticultural therapy can reduce symptoms of anxiety and depression
A good place to start your garden early – As mentioned above, if you live in an area with a short growing season, you can extend plant growth time, by starting seedlings indoors.
Do I Need a Special Light to Grow an Indoor Garden
Plants need light for photosynthesis. (The process of converting Carbon Dioxide and water into food/energy, or glucose). Plants use their chlorophyll to trap and convert sunlight into their food. Without proper light therefore, a plant cannot grow appropriately.
Plants have photoreceptors that absorb specific wavelengths of light. Any grow light needs to have the same wavelengths as the sun, which is why a regular light bulb doesn’t work.
How much light/sunlight do plants need to grow? Depending on the type of plants you are hoping to grow, you may need to provide artificial light. Most edible plant types require 14-18 hours of light per day in order to grow. Though south facing windows may provide enough sunlight for seedlings, you will likely need artificial light in order to grow vegetables to maturity.
Types of Artificial Light
The typical lighting found in homes or buildings does little to assist with indoor plant growth. This is because traditional incandescent bulbs do not create light at the same color spectrum or intensity as the sun. There are three major or common grow lights to consider when beginning your indoor garden or grow box. 1. Flourescent grow lights; 2. LED grow lights; and 3. HID grow lights. For an in depth discussion regarding the differences in specific grow lights, read THIS article. For the purpose of this current article, however, just know that unless you have a large south-facing window that can provide direct light for at east 13 hours per day, you will not be able to produce flowers or fruit yielding plants.
Fluorescent Grow Lights: Perhaps the most readily available for indoor gardening, are fluorescent grow lights. Florescent bulbs are typically denoted T12, and will be fine for starting seeds, however, because they have a weak intensity level will need to be placed within a few inches of the foliage you are growing in order to have any effect.
LED Grow Lights (Light Emitting Diode): LED grow lights are quite a bit more expensive than fluorescent bulbs, however they use half the electricity. The typical LED light you will find at the local hardware store is not sufficient in intensity to assist plant growth, however they do make special LED grow bulbs. LED grow lights are actually a grid of many (hundred or thouasand) smaller light emitting diode chips that can produce narrow ranges of color, or wavelengths. Typically LED light chips are combined to maximize the spectrum of light desired. They produce a less intense light, and operate at a lower temperature than fluorescent or HID lights.
HID Lights (High Intensity Discharge): HID lights are known for their high light output and brightness as well as cost-efficiency. Though some argue they are not as effective as LED grow lights, they are significantly cheaper, and thus may help cut your bottom line. That being said, because HID lights burn hotter, you may end up paying more in air conditioning to keep your grow operation from overheating.
What can I Grow Indoors?
There are a variety of plants that can be grown indoors, and will thrive and mature under artificial light. Additionally, if you have a small space, there are various plants that can mature犀利士 in small spaces or containers. Planning what to grow and how you will grow it is almost as fun as watching your plants sprout and mature.
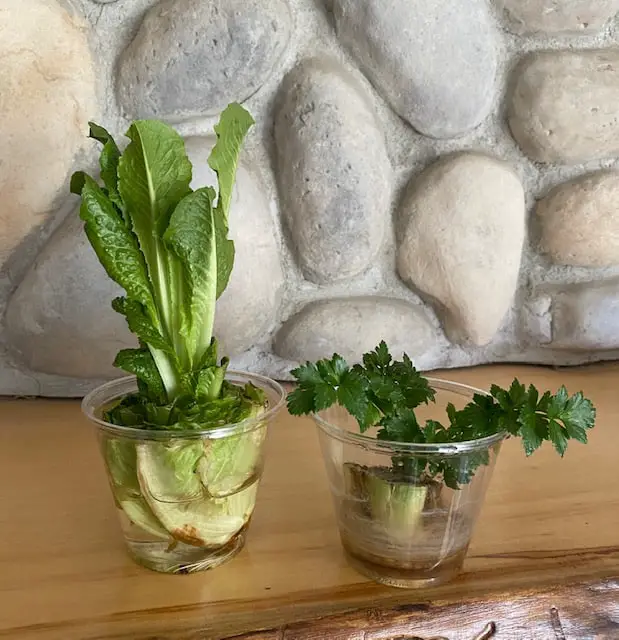
Romaine lettuce and celery sprout growing from stock remains in simple water cups
Leafy greens, and herbs, are a fantastic choice for growing indoors, or for windowsill gardening. Some of my favorite herbs to grow in small spaces include chives, oregano, rosemary, thyme, parsley, mint, basil, and sage. Several of these herbs will grow well from seeds, while others will grow from cuttings. For more information regarding my favorite herbs for indoor planting, read HERE.
Remember, different plants have different lighting needs. For example, succulents, cacti, and herbs have less of a need for sunshine than chives or peppermint. Some vegetables are popular with indoor growers because they don’t require full sunlight. (or can grow in the shade). These include beets, carrots, beans, Chinese cabbage, spinach, potatoes, broccoli, cauliflower, asparagus, peas, celery, and mustard greens, just to name a few.
Additionally, don’t forget that seeds are now widely available online. A lot of lesser known, and less popular plants will not be available in stores, so you will need to start with seeds. It is worth taking advantage of online or mail order seed catalogs.
What Kind of Soil Should I use?
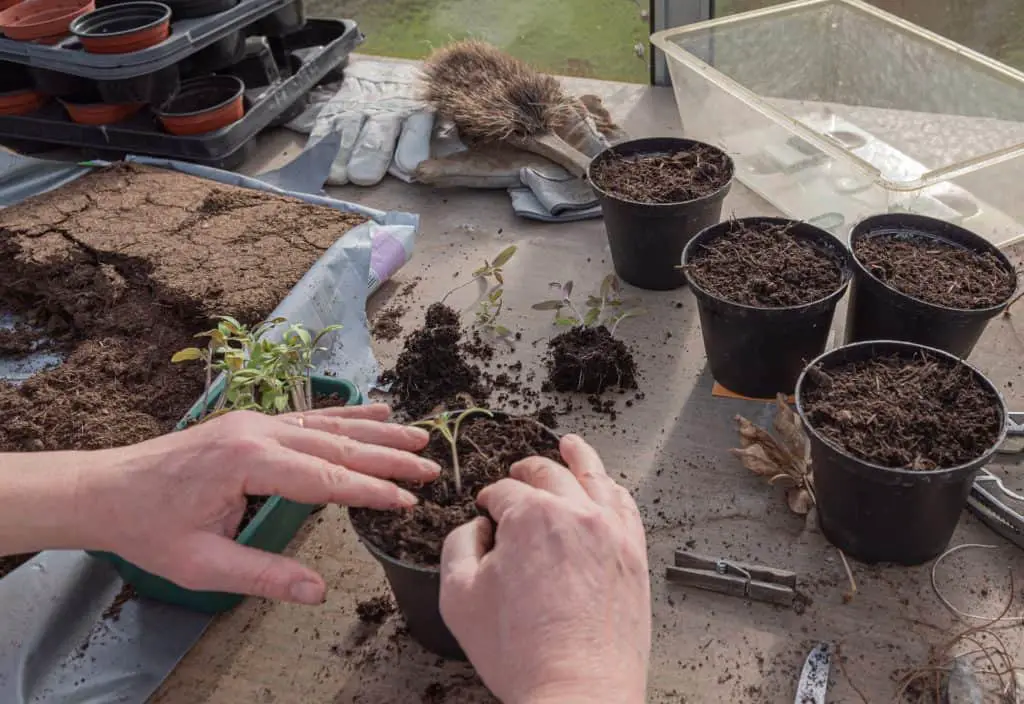
Transplanting tomato plants with mix of potting soil
Pepping the soil for indoor gardening is often much easier than preparing an outdoor garden simply because of the amount of space you will be dealing with. Additionally, with indoor gardening, it is up to you give your plants everything they need, including nourishment, as well as water and sunlight. Just as important as with outdoor gardens, soil is critical to the success of indoor plants as well. You will want to choose a growing medium that holds water, allows root growth and provides nutrients needed for plant growth.
You will also want to ensure that your growing containers have good drainage availability, and will allow enough room for root growth. We recommend starting your indoor garden with a good quality sterile potting mix, as opposed to garden or outdoor soil. Starting with a new mix will help avoid the transmission of pests or diseases from other plants. We recommend using Organic potting mix such as Espoma Organic Potting Mix HERE or Miracle Grow Expand n’ Grow Mix HERE.
These mixes can be used for indoor plants, and then outdoors if you choose to transplant, and can hold up to 50% more water than basic potting soil. These potting mixes will also expand ina manner that allows for oxygenation of your plant’s the root system.
How Big Should My Grow Box Be? What can I use to Plant in?
When you begin your indoor garden, you will want to group your plants together according to their light needs, and mature plant size. This information is typically found on seed packets or plant tage is purchased from a nursery. Your indoor plants will need growth containers that allow room for root growth as well as drainage holes. The size will differ with each plant you choose to grow. For example, with our tomato plants, we typically begin with the garden or nursery beginner 2×3 inch soil packs. After a few weeks of growth however, we transplant each tomato plant into its own plastic “solo” cup for a few more weeks, before eventual transplantation into the garden.
For our leafy greens, we use 8-10 inch plastic window boxes, like THESE, but really, any box with a deep enough base and drainage allowance will be fine. We also keep each plant in its own container , so we can move the plants if needed for better light, or simply for accessibility.
What kind of Space are you working with?
A lot the questions regarding how much soil, or what type of box you will use will be determined as you decide how big your grow area will be. My husband and I have a windowsill garden that we have maintained for years, as well as a raised garden for herbs on our back porch. As mentioned above, we also use plastic tubs and cups for transplanting tomatoes and peppers during the spring.
There are many wonderful windowsill garden starter packets available online, and several like THIS ONE, that include seed packets of herbs, potting soil, sheering tools, and planting box. Others, like THIS ONE, may even include the grow light.
We’re pretty old fashioned at our place however, and have simple window boxes, and our own set up for fluorescent lights. No matter how you choose to proceed, we recommend just getting started. Once you have your space set up, you will be amazed at how much your entire family will enjoy watching your plants grow from day to day, and year to year. The benefits of indoor gardening, whether for leafy greens, vegetables, or herbs is incredibly rich and rewarding.
An easy and great crop to grow in your garden is carrots. Carrots are an easy crop to grow in your garden and have great health benefits for your diet. They are also easy to market if you choose to sell them. There are some interesting varieties to try. With the current cullinary trends of colorful vegetables, there are some very colorful and interesting varieties of carrots to grow besides the traditional orange ones.
Basic fundamentals of planting carrots
Planting carrots is fairly straightforward and simple. When planting most seeds, you want to plant the seed 4 times eh diameter of the seed in depth. Carrot seeds are really small, so you will need to plant them ¼-1/2 inch (.6-1.27 centimeters) deep.
If you plant carrot seeds too deep, they will have a difficult time germinating and making it to the surface. If you just put them on the surface they may germinate, but they will have a difficult time surviving.
You will want to plant the seeds about 1/8- ½ inches (.31-1.27 centimeters) apart. You can plant them in a row, but they also will grow well in a wide width row, or a patch as long as you can weed and water them well.
Germination of the carrot seed takes a while. The carrot seeds will germinate from 12-16 days. It can vary due to the variety of seed, temperature, how old the seed is, and the moisture content of the soil. You will want the soil to be moist, not soaked, and not dry.
Biennial plant
Carrots are a biennial plant. This means that the first year of growth the plant is developing the root. If left to grow for a second year the carrot will grow again and produce a seedstem. This will take all of the nutrient of the root and use it to create seeds. The root of the carrot becomes tough and fibrous and really yucky to eat.
If the carrots are grown in hot conditions, they can sometimes produce the seedstem in the first year of growth. To avoid the seedstem forming in your new carrot crop you will want to grow it during the colder part of the season if you live in a hot climate. You can also avoid the carrot from forming a first year seedstem by watering it well.
Tap root system
Carrots grow with a taproot system. This means that there is one main root to this plant with smaller roots growing out from the side of the main root.
Taproot crops are interesting and can be of more benefit than just a crop for eating. A tap root grows down deep into the soil. As it grows down the plant will bring up nutrients from deeper in the soil to the surface.
Taproots plants are also good for breaking up hardened soil. The taproot will grow deep and expand the main root. This expansion breaks up hardened soil. With carrots the hardened soil will make the taproot become irregular shaped so you may not want to grow carrots in hardened soil for marketing.
The alternative characteristics of a taproot crop are discussed in an article on our site here. It’s an interesting way of using the natural characteristics of plants to improve your soil and farm or garden plots.
Soil for growing carrots
The perfectsoil for carrots is a loose sandy fertile soil with good drainage. You also want to have a lot of good loam with well composted organic matter. We have an article about getting good loamy soil here.
Most people do not have the perfect soil for carrots but can still grow good carrots anyway. In my region we have rocky clay soil with slightly basic ph. That could spell disaster for growing carrots, but with a few preparations, we have been able to grow a fantastic crop of carrots year after year.
Soil issues
Some issues to consider when growing carrots include how fertile the soil is, the ph of the soil, how sandy it is, how much clay content it has, how rocky it is, and how compact the soil is.
Soil ph
The soil ph has a lot to do with the flavor and growth of the carrot. Carrots prefer a slightly more acidic ph of 6.0-6.8. However, you can grow good tasting carrots in slightly more acidic or slightly more alkali soil from 5.5-7.5 ph.
Here is an article discussing soil ph. I would encourage everyone to get their soil tested by their local extension service. We have links to all of the United states extension services here.
Clay soil
Clay soil can provide some challenges for growing carrots. Most of these challenges can be handled, and you can get a good crop of carrots from clay soil.
The first challenge is with germination of the carrot seed and growth of the carrot seedling. Clay soil will harden after it gets wet. If you don’t keep clay soil damp the surface will form a hardened crust. The carrot seeds will not be able to push through the hardened surface. When growing carrots in clay soil you need to remember to keep the soil moist, especially when first germinating the seed and growing the seedlings.
Clay can become compacted and can make the roots of the carrots get twisted and bent. Some carrots can look like they have legs. There are all kinds of Instagram photos of crazy looking carrots grown in home gardens. Often a compacted clay soil is the cause of these crazy carrots. The carrots are still good to eat and have great nutrition. They can be a challenge to market to people, so care should be taken if you are growing your carrot crop for a market.
The way to remedy compact clay soil is to turn it over a couple of times or more to loosen it up. You can also add some good composted organic matter to increase the loam of the soil. The looser the clay soil the better.
Another solution for growing carrots in clay soil is the type of carrot you choose to grow. Some varieties of carrots are smaller. The smaller and more ball type of carrots will have less of a chance to grow crazy when they are short and round. These smaller varieties can mature faster than the longer rooted varieties, so you might even be able to get more carrot crops throughout the season.
Rocky soil
Rocky soil can be good and bad for growing carrots as well. Remember that carrots are a root crop. Where the root grows is an important thing to consider.
If the soil is rocky with small gravel and is loose, then the carrots will probably grow well if you keep them moist. If the soil has larger rocks the carrot root will have to adapt to the rocks. The taproot will probably twist and turn as it grow. Similarly, to compacted clay soil, the carrots can grow crazy extensions and extra roots. They taste good and are nutritious but might be difficult to market.
You can also try cultivating the smaller round type of carrot in this soil as well. The shorter length of the carrot the less chance it has to grow differently than desired.
Debris in the soil
Debris in the soil has similar disadvantages as rocky soil. The carrots will have to adapt to whatever is pushing against the root as it grows down. The crazy carrots will result from growing around, over, and through the debris in the soil. The best treatment of debris in the soil is to get rid of the debris if you can.
Soil solutions
Solutions for your soil will most often involve creating a loose well drained soil with a lot of well composted organic matter.
I would suggest turning over the soil a couple of times to loosen it up. Depending on the size of the area you want to grow carrots in you could just use a shovel, or a tiller. Our carrot crop is fairly large, so we use a tractor and plow to turn over the soil. The tractor we use for plowing is a 1952 Ferguson TO-30. These older workhorses just keep going if you maintain them well.
Make sure the organic matter you add to the soil is well composted and broken down. If the organic matter that you add to your soil isn’t broken down well it can add debris. This added debris can create strange shaped carrots.
Tips and tricks to planting carrots
Planting carrots is pretty straight forward. You will want to put the seeds about ¼-1/2 inches deep in the soil. The trick is to keep the soil moist, but not too wet so that the seeds will germinate and push through the surface.
Germination of carrot seeds is not immediate, it takes anywhere from 10-16 days for the carrot seeds to germinate and start growing. You will need to make sure the soil os moist and the the surface isn’t too hard for the seedling to push through.
Irrigation
Irrigation is important for your carrot crop. The seeds and seedlings need constant moisture to begin growing. You don’t want to waterlog or drown your seedlings, but they will need enough moisture to keep them going. Pay close attention to the seedlings as they get growing.
Once you get the seedlings established with a few true leaves they may not need as much attention, but you still need to keep them moist.
As the carrots grow the carrot tops will grow outward shading the ground. This can aid in keeping moisture on the plants, as well as keeping weeds from growing. You may not need to water them as often as the younger plants.
You should avoid letting the carrots dry out too much. Problems can happen when carrots get dry then watered heavily. The cells of the carrot shrink with the absence of water. When the carrot receives water after being dry the cells will become engorged with water. If this is done too much the carrot root will crack and split. Cracked split carrots can invite all kinds of pests, disease, and bacteria. You could end up getting rotten carrots, so be attentive.
Fertilization
Carrots are fairly tolerant of less fertile soil. You can get a crop of carrots without much fertilization. However, if you want a good yield you will want to fertilize. It’s recommended to fertilize the carrots with nitrogen. If you are using commercial fertilizer the 21-0-0 is recommended. Use ¼ of a cup (.06 liters) per 10 feet of row.
We recommend side dressing the fertilizer. This is where you put the fertilizer to the side of the plant and water it into the soil. This will keep the fertilizer from chemically burning the plant.
We have had good results with a basic garden mix fertilizer as well. If you have questions about fertilizer, here is an article that will help.
Weeds
Carrots do not compete well with weeds. To have a good yield you will need to keep the carrots weeded. Weeding carrots is pretty easy when the plants are larger, but it’s difficult when they are just small fingerlings popping through the surface.
We run a traditional garden with rows in the dirt. We have not used raised beds to grow our crops. This provides ample opportunity for weeds and weeds seeds to flourish. It can be mind-numbing to pick through the tiny carrots and the tiny weeds. It’s worth it in the end, but the first weeding or two can be terrible.
Some alternatives that might work better for weed control are raised beds or covering the planted carrots with something like plywood or carpet until the carrots germinate. Another option would be to start your carrots and transplant them. Carrots don’t respond well to transplanting, but there it might be worth a try.
Thinning
When the carrots get growing you will need to thin them. This is when you make room for the carrots to grow larger instead of bunched together stunting the growth. Carrots that grow too close together or are touching each other can develop soft or rotten spots. Thinning your carrots is a necessary thing if you want a good crop.
Thinning carrots isn’t that difficult. You pull out some carrots to give other carrots room to grow. The spacing depends on the variety of carrot you are growing. Smaller varieties don’t need as much room so you can leave more per inch.
Don’t throw the small immature carrots away. These small carrots can be very tasty. Often you can time thinning the carrots with fresh grown sweet peas. Fresh sweet peas and young carrots are a treat.
Harvesting
Harvesting carrots is rather simple. The basic concept is to pull the carrots from the ground. This can be a little more complicated than you might first think. If your soil gets compacted throughout the growing season, then you can risk breaking the carrot off and leaving part in the ground. You also can pull on the tops just to have the tops break off leaving the carrot in the ground.
We have found that digging the carrots out is the simplest thing to do. I know that’s not rocket science or anything, but if you dig incorrectly you will end up chopping the carrot root off.
Water or moisten the soil before you dig them up. This will help loosen the soil and make it easier for digging and pulling the carrots. Again, you don’t want to overdo it or you will end up shoveling mud.
Use a shovel or a gardening fork to loosen the ground around the carrots. This is where you need to use caution. You can angle the shovel or fork too steeply and end up cutting the carrot root.
You might be surprised at how easily you can misjudge and slice right through your carrot. It’s not the end of the world, you can still eat a carrot cut by a shovel. The downfall is that cut carrots don’t store very well, so you will need to eat them soon.
Carrot tops
If you are going to store your carrots, you need to take the tops off about ½ inch above the top of the carrot.
Carrot tops themselves are edible. They generally have a mild flavor. Depending on how old they are they can become a bit bitter if you eat them raw. You can use carrot tops in salads, soups, sautéed, steamed, or blanched. They are really worth a try if you have never eaten them.
You can dry carrot tops for use as well. Dried carrot tops can be stored for a long time. Dry them in a food dryer, or solar dryer, or hang them in bunches with the leaves hanging down until they are dry and brittle. You can add carrot tops as a spice to all kinds of recipes.
Carrot tops are also a great treat for pets. Rabbits, guinea pigs, and small pets love carrot tops. Horses, goats, pigs, and cows also love carrot tops as a treat.
Don’t just through the tops away, there are many great uses for them.
Storing carrots
Storing carrots depends on how soon you want to use them. If you are going to use the carrots relatively soon you will want to wash off the dirt and dry them. Store them in an airtight plastic bag in the refrigerator. Try to monitor the moisture content. If it gets too wet the carrots can develop rot. If it is too dry the carrots can wither.
If you are planning on storing carrots through the winter, you take a little different take than short term storage. Cut the tops ½ inch above the top of the carrot. Brush off the dirt and store them in damp sand, or sawdust. We have had good success with carrot storage in damp sand that covers the carrots completely. If the carrots stick out of the sand, they will wither and dry out.
Leave carrots in the garden
The easiest storage is to leave the carrots in the ground and just harvest what you want to use as you go through the winter. This can be an effective way to store your carrots. Once the carrots have experienced a frost or two the starches change to sugars and the carrots will taste sweeter.
Dehydrate the carrots
Another storage method is dehydrating or drying the carrots. This does have mixed results meaning that the taste may suffer with this process if done incorrectly. Carrots contain a lot of water. If you don’t have enough heat or airflow drying the carrots can result in mold or rot on the carrots themselves.
A good food dehydrator should be used. Here is a good beginning inexpensive dehydrator that does a good job. Dehydrators can range from under $50 to over $500. We have used an inexpensive model for years and done fine. The advantage of the more expensive food dehydrators is that they can dehydrate a larger volume and can be somewhat faster. A little more expensive one that works well is here.
Canning carrots
Canning carrots is a great way to store them as well. There is minimal loss of flavor and nutrients and they will last for a long time. Caution should be used when canning carrots. Carrots do not have any acid like tomatoes, you will need to pressure can them in a pressure cooker. You can use an instant pot pressure cooker. Here is a link to a good basic traditional pressure cooker for canning. Here is a link to a canning pressure cooker with all the bells and whistles. Not all instant pot pressure cookers will work for canning. Here is a model that specifies that it can be used for canning.
Pickling
Pickling is another method of storing carrots. You can do a refrigerator version of pickling which will allow you to keep the carrots good for up to 3 months. You can also hot water bath pickle them and can store them on the shelf for a long time.
Freeze drying
Freeze drying is a process that is available for the home food producer now. Freeze dried carrots can last for 25 years on the shelf. This is a relatively newer option for the basic homeowner. Generally, a freeze dryer was too expensive and too large to use. There are some freeze dryer options that are affordable and small enough for home use.
Danvers carrots were developed in Massachusetts. They are long and thinner than other types. Danvers carrots are usually orange in color. There have been a lot of different colors varieties available. You can get yellow, red, white, and purple Danvers carrots. There seems to be a new color every year.
Danvers carrots grow well and tolerate poor soil. The carrot will develop to harvest stage from 65-85 days. It is recommended to harvest them a little on the early side. They can develop a more fibrous tap root. The earlier they are harvested the sweeter they taste.
Nantes carrots
Nantes carrots are a sweet tender type of carrot. They have a more uniform rounded cylindrical tap root. Nantes carrots are named after the French city where it was developed. the city of Nantes had excellent conditions for cultivating carrots.
Nantes carrots mature in 55-65 days. They are very tender and sweet. They can prove to be a little temperamental for storage. Nantes carrots range from an orange to a red. There are several varieties available and new varieties seem to be available every year.
Imperator carrots
Imperator carrots are the most common carrots sold in supermarkets. They a long straight and are sometimes referred to as the “perfect” carrot. The small carrots sold in bags as a healthy snack are imperator carrots.
Imperator carrots were developed from a cross between Nantes and Chantenay carrots. This cross provided a great carrot that had less sugar than other types and was a little less tender. Imperator carrots store better than the other types. They also have thin skins for easy peeling.
Chantenay carrots
Chantenay carrots are shorter and stockier. They can be a good choice for growing in heavy clay or rocky soil. Chantenay carrots are high yielding and do well with processing. They are a sweet hearty carrot that is widely grown commercially. They store well canned and frozen.
These are a cool weather carrot. Chantenay carrots mature in 65-75 days. They are at their best when they are harvested when they are 4-5 inches (5-6.4) inches in length. If you let them grow larger and into the summer heat, they will get very fibrous and loose some of their sweet flavor. We have let them grow until they were huge. They began to split and were tough.
Ball or mini carrots (Daucus carota)
These mini or ball carrots have become very popular for homegrowers. These little carrots are 3-4 inches long, or the size of radishes. They are smaller or round and sweeter than normal carrots. These small carrots do well in rocky heavy soil. They mature in 60-70 days. A great choice for a container or raised bed crop.
Originally the cultivated Daucus carota were found in several colors, red, purple, white, and orange. The orange varieties have become favored, but you can still find other colorful varieties available.
When searching for seeds to grow in your own garden you will need to look for mini or ball carrots. The Daucus carota is the original wild carrot and is often marketed as a decorative flower to grow.
Some varieties of the mini or ball carrots that are recommended for growing are: Paris Market, Romeo, and Babette.
Consider the type of carrot for what you want or need
You will want to consider what type and variety of carrot you grow. If you want a good storing carrot you may want to choose an Imperator. If you have rocky soil you may want to grow the mini or ball carrots. Chantenay carrots are great for canning and freezing.
I would encourage growing a variety of carrots and see what works best for you. They all are very nutritious and fairly easily cultivated.
Tricks to growing carrots
There are a few tricks you can use in growing carrots. I am sure every grower has them. These are a few that I have picked up over the years.
Use Carpet
An old piece of carpet or mat is a good tool for carrot seed germination. Often times the surface of the soil can get hard and makes it difficult for the germinated carrot seed to push through. Carrot seeds need to remain moist to germinate. The soil needs to be loose for the seed to push through.
The method is to plant the carrots as you would normally. Water the seeds well and put a piece of carpet over the top of them. Water the carpet down after putting over the carrot bed. Keep the carpet moist. In 10 days begin looking under the carpet to see if the seeds have germinated. Carrots take a long time to germinate anywhere from 10-16 days.
When you see that the seeds are germinated lift off the carpet in the evening. That will give the seedling carrots some time to harden and adapt to the regular environment before the sun could make them wilt and die.
People will also use plywood or boards to cover the carrot seeds until they sprout though the soil surface. The method is similar to the carpet concept. You will need to be careful to maintain moisture to sprout the carrots.
Seed tape
Using seed tape for smaller seeds has been a mainstay for gardeners for years. You can purchase carrots that are already spaced on seed tape. The benefit of using seed tape is that the seed spacing stays consistent ant the seeds don’t get pushed around with watering the carrot bed.
Seed tape with carrot seeds are available for purchase, or you can make your own seed tape easily. You just need some flower and water or Elmers glue to act as an adhesive for the seeds, some tissue or toilet paper, and the seeds you want to plant.
Cut the tissue or toilet paper into 1-1.5 inches (2.8-3.5 centimeter) strips.
Mark off the spacing of the carrot seeds, generally from 1/8-1/2 inch (.4-1.27 centimeters) apart.
Mix up the flour and water. You will want to create a thick consistency, or use Elmers glue.
Get the seeds and one by one dip part of the seed into the flour water mixture and stick them onto the paper on the marks you made. If you are using Elmers glue, just put a small dot where you want to have the seed placed. You may want to use a toothpick or pencil for this part. The carrot seeds are small and difficult to handle with your hands.
Let the seed tape dry for 2-4 hours, or when the flour glue or Elmers glue is dry.
Lay the tape down where you want your carrots to be grown. Make sure the seeds are facing up.
Bury the tape with ¼ of an inch (.6 centimeters) of soil.
This method can be useful if you are planting shorter rows or smaller areas of carrots. The idea is to use a half of a PVC pipe cut lengthwise. You fill it with potting soil and plant carrots along the pipe. When the carrots begin to grow you then dig a small furrow in the garden and slip the entire contents of the sprouted carrots in the furrow.
The intriguing thing with this method is that you won’t need to do the first most difficult weeding until the carrots are well developed. You can also keep the carrot seeds safe and more consistently watered.
This method can work, but many carrot growers believe that the tap root system won’t allow you to start your carrots and plant them one they have germinated.
Summary
Carrots are some of the more rewarding vegetables to grow in your garden. They are a cold weather crop, so you can usually plant a double crop through the season beginning in spring and planting again in July or August.
There are some great types of carrots to try and grow. The main types of carrots that we cultivate are;
Imperator, Danvers, Nante, Chantenay, and mini or small. All types have different advantages. I would suggest that you get several varieties and see what carrots you prefer.
We have been raising honeybees for a few years now and a question that a lot of people ask is, “How long does a honeybee live?”.
The easy answer is, “As long as it can!”. The more complicated answer is that there are 3 main types or castes of bees in a honeybee hive and each caste will live a different length of time. The three types of bees are the queen bee, the worker bee, and the drone bee.
Queen honeybees will live generally 2-3 years. Some have been recorded as living up to 5-7 years.
Worker honeybees will live 5-6 weeks in the spring and summer, and 5-6 months in the winter.
Drone honeybees will live on average 8 weeks.
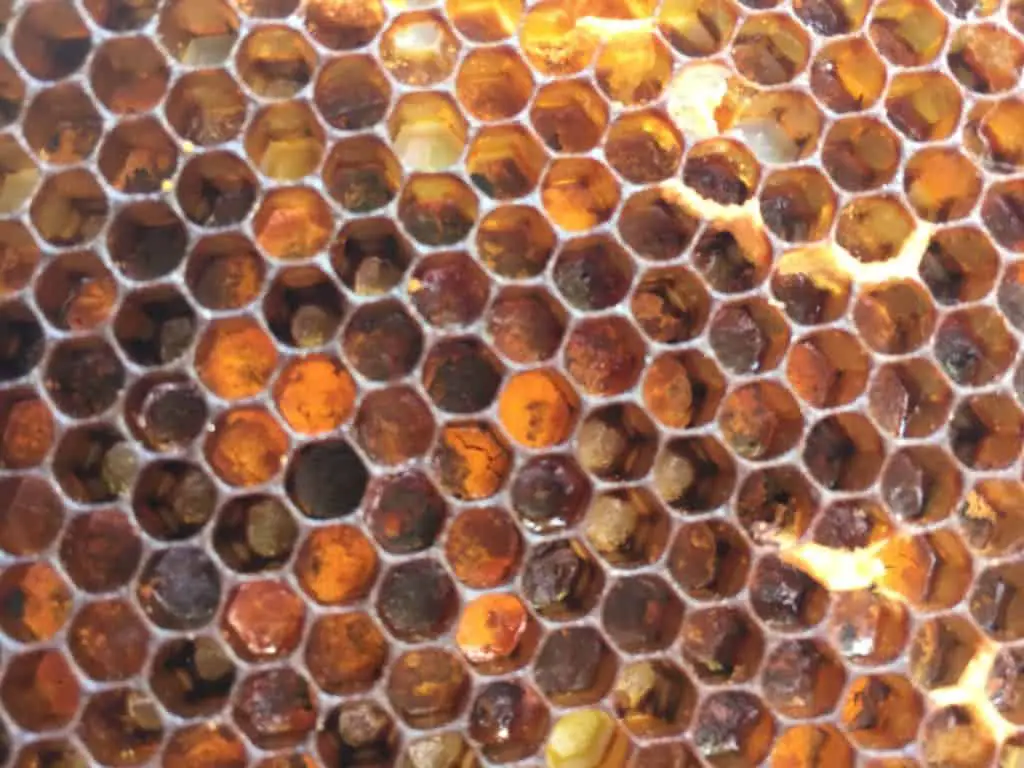
Honeycomb cells
Honeybee beginning, larva.
All honeybees begin as an egg. Each egg is laid in a cell in the hive. The eggs hatch into larva. This is the stage where all honeybee larva are given royal jelly as food. Royal jelly is super nutritious and is secreted by nurse bees.
The length of time and how much royal jelly the larva get depends on what type or caste of bee they are. The queen larva is fed more royal jelly for longer. Worker and drone bees are fed royal jelly for the first few days only.
The queen honeybee gets fed royal jelly throughout the larval stage. The queen will get a little added honey to the royal jelly at the end of the larval stage.
After a few days of royal jelly for food, the worker bees are then fed worker jelly. The worker jelly is sometimes known as brood food. Worker jelly is less nutritious than royal jelly and can be produced in larger quantities to feed the majority of the larva in the colony.
Drone bees are fed royal jelly to begin with like all the other larva. The drones are then fed a supped-up version of the worker jelly. The drone worker food will have extra pollen and honey added.
Honeybee pupal stage
The pupal stage is where bees transform from grub looking things into looking like bees. The bees will form the legs, wings, internal organs and fat cells. This is where they develop into the adult bees that will serve the colony.
The total time it takes to go from larva to pupae to adult again depends on what caste or type of bee.
The time it takes to mature to an adult bee:
Queen honeybee-16 days.
Worker honeybee- 21 days.
Drone honeybee- 24 days.
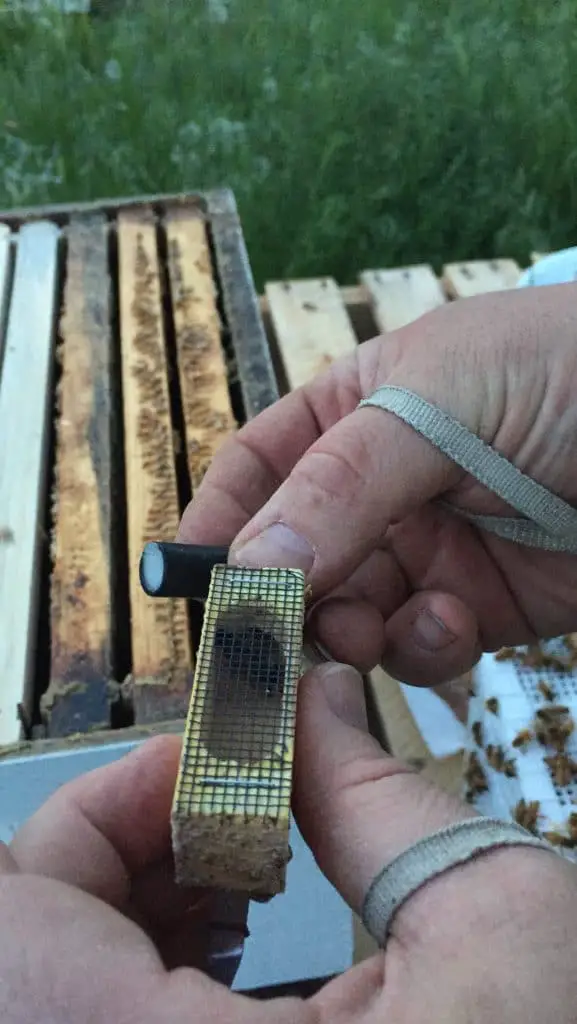
Installing a queen honeybee
Queen honeybee
The queen honeybee is the largest member of the honeybee colony. They are around 2 cm or just under an inch long. There is only one queen bee per colony. When you inspect a hive, you can detect a queen usually due to her size and how all the other bees are acting around her. Sometimes people get confused and think drone honeybees are the queen due to their size, but the queen is even larger than the drones.
The queen honeybee lives the longest in a colony. As stated above a queen usually lives 2-3 years. Sometimes the lifespan is cut short due to illness, predators, poor beekeeping, or mites. Another thing that a lot of beekeepers do is to requeen a hive and kill the old queen. But if a queen is left to live out her normal lifespan it would be 2-3 years. Some queens have lives up to 7 or 8 years, but this is super rare.
The queen honeybee will need to do her part, or she will get taken out and her lifespan will be shorter. A honeybee queen will lay 1,000-2,000 eggs a day in the hive. If the queen doesn’t keep up her duties and becomes old and weak the workers will raise a new queen giving her all the attention and food. The old queen will die, and the new queen will take over.
Worker honeybee
There are thousands of worker bees in a honeybee colony. The worker honeybee makes up the bulk of the colony and does the bulk of the work. Worker bees are female bees like the queen.
Worker bees will spend the first part of their life inside the hive. They have duties ranging from cleaning, feeding brood, nursing, cooling, and arranging the hive resources.
Worker bees live only 5-6 weeks during the production phase of the year. They basically wear themselves out. Working to death so to speak.
Winter worker honeybee
When winter comes the worker honeybee, is different than the summer worker bee. The composition of a winter worker has more fat cells and is larger through the abdomen. The winter worker lives a lot longer than the normal summer worker. Winter worker bees can live from 4-6 months.
The duties of the winter worker are a lot different than the summer worker. The primary purpose of the winter worker is to keep the queen alive and healthy. They do any and everything they can to do this. We have an article here explaining what happens in a beehive through the winter.
Drone honeybee
The drone honeybee is an interesting part of the hive. Drones are the male part of the colony. Drones are a bit larger than the worker honeybee but smaller than the queen. Drones have no stinging mechanism. The drones also have larger eyes on the tops of their heads.
Drone honeybees will leave the hive about 6 days after hatching into an adult honeybee. They will congregate in search of a queen. One queen will mate with up to 20 different drones to give her enough sperm to fertilize her eggs for the next few years. So there is a fighting chance for the drone to serve his purpose.
If a drone is successful in mating with a queen honeybee, he will die minutes or a few hours after. If the drone strikes out and is not successful in finding and mating with a queen, he will come back to the hive.
Without anything really to do drones will just get in the way and eat. Drones will try to stay as long as they can freeloading. Usually the efficiency of the hive will rule, and the drones will be kicked out. Once the drones get kicked out, they will have to fend for themselves. The drones will generally end up dead due to starvation or the cold.
The average lifespan of the drone is 8 weeks. This can vary if the hive is low on resources they will kill or kick out the drones and they live shorter than 8 weeks for sure. When winter comes the colony will kick out the drones as well, leaving the resources for the winter workers and queen to survive the winter.
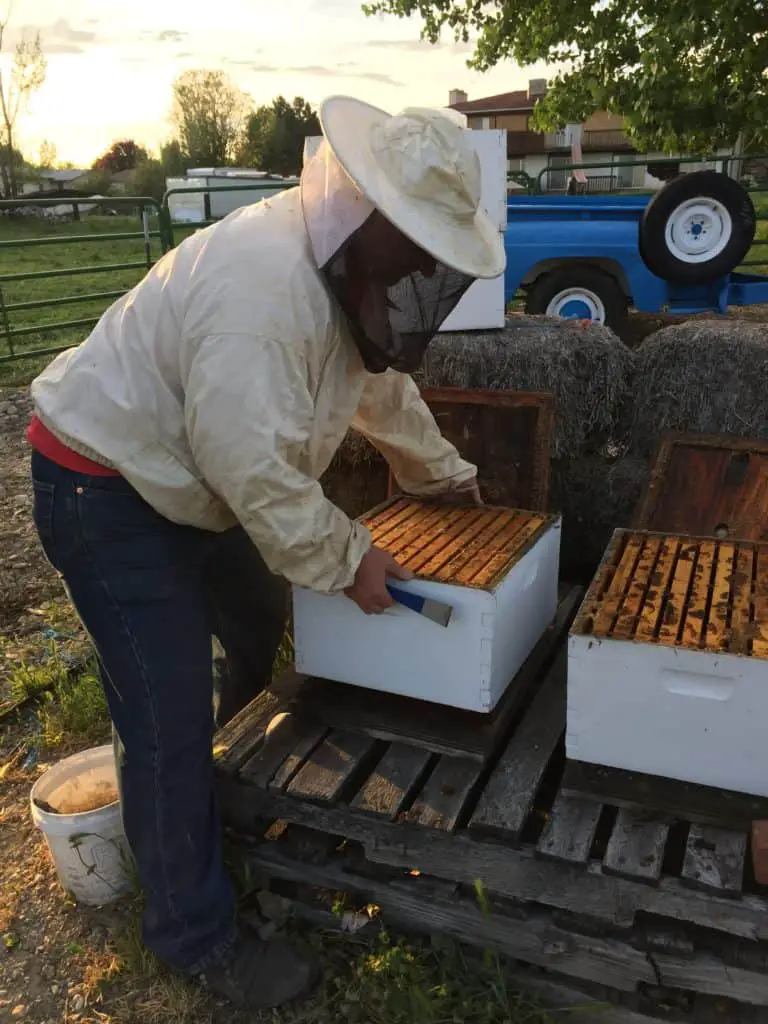
Inspecting a honeybee hive
Things that will shorten the lifespan of a honeybee
In a perfect world, honeybees will live for the maximum time that is expected. Queens living 3-7 years, worker bees 5-6 weeks, drones 8 weeks, winter workers 5-6 months. However, there are a lot of things that can happen that really shorten the lifespan of a honeybee.
Honey is well sought after by a lot of predators. Bears, racoons, mice, and other animals love honey and will do whatever they can to get it including tearing apart a hive to get it.
Other bees, wasps, and hornets will rob the honey from a hive and kill bees to get it. These robbers can decimate a colony’s stores quickly. Unless you inspect the hive frequently you may not even be aware of this. The hive will have honeybees, flying in and out looking normal. What will be happening is that a competing hive is flying in and robbing the honey leaving the original colony starving.
Poor beekeeping habits can shorten the lifespan of a honeybee. If a beekeeper takes too much honey the colony will starve. If a colony isn’t cared for it can become honey bound and will not have the room to grow and survive. Often if this happens the colony will swarm to find a new place to live with more room. These are just 2 of the many ways bad beekeeping can kill a honeybee.
The biggest problem that honeybee colonies face are disease and mites. Disease and mites seem to work hand in hand to weaken and destroy a colony. Some good beekeeping habits and care can aid in the fight against disease and mites. I have a few resources in our beekeeping section that might help with this.
Summary
In summary honeybees can live for quite a long time depending on their place in the colony. The type or caste of honeybee really determine the opportunity on who lives the longest. As it goes the queen bee lives the longest, and the drone bee that successfully mates lives the shortest.