Helpful Hints for Growing Homesteads

Recent Posts

Stop stored potatoes from sprouting

Potatoes beginning to sprout

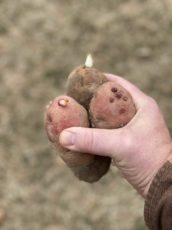
If you have ever stored potatoes for any length of time you have probably experienced the potato itself beginning to sprout.  A sprouted potato doesn’t taste the same at all.  It changes from a starch into a sugar and becomes shriveled and mushy.  The sprouts themselves can be toxic to eat.

Stopping your potatoes from sprouting is nearly impossible.  There are some simple and easy practices that can slow the sprouting process down and you can keep your spuds for a bit longer and enjoy them for months. 

The major things that need consideration are:

  1. The type or variety of potato.
  2. Light
  3. Storage temperature and humidity
  4. Container of the potato
  5. The use of essential oils to slow sprouting

The type or variety of potato

The first thing to consider is what potatoes to store.  Not all potatoes are equal when it comes to storage.  Some just store better than others.  The potatoes with thicker skins will store for longer, but with some care and a few tricks you can keep most all potatoes for a good long time.

There are 7 basic types of potatoes and over 200 varieties with more seeming to show up every year.  

The 7 basic types of potatoes are:

1- Russets

Russet potatoes are a medium to larger potato and are generally an oval or oblong shape.  They are a brown color that can vary in shade from light to a medium brown.  They have a light yellow or white flesh.  They are excellent storage potatoes.  If you grow them in your own garden, some of these potatoes become monstrous in size.  One potato can feed your whole family.

2-Reds

Red potatoes are often harvested when they are small to medium and immature.  They have a waxy, moist, and smooth flesh with a thin red skin.  They are round or oblong in shape.  However, if you grow them in your own garden you don’t have to harvest them early when they are immature.  You can keep them growing and they can grow large and still keep the same characteristics as the small potato.  With the proper care these potatoes will store well, but without the proper precaution they will rot, sprout, and spoil.

3-Whites

White potatoes are generally small to medium in size.  They have a thin skin that looks white to light tan in color.  The flesh is fairly dense and starchy.  These potatoes will store well if you take the proper steps.  As with most all the potatoes you can grow larger ones than typically found in the store.

4-Yellows

Yellow potatoes are anywhere from marble size to huge depending on when they are harvested. They have a light yellow/tan to golden skin.  They have a waxy yellow flesh.  These potatoes will store well and are becoming very popular to the home gardener and the homesteader looking for a cash crop.

5-Purple

Purple potatoes are a relatively new novel variety.  They are small to medium sized round or oblong.  Very distinctive with their dark purple to blue skin.  The flesh is dense and firm.  The flesh color can vary from pink to blue to purple.  It also can vary from light to dark in color.  These potatoes can also store fairly well.  These varieties are often harvested when they are immature and do not store as well as if they had been harvested at maturity.

6-Fingerling

Fingerling potatoes are becoming very popular for a fun festive dish.  Fingerling potatoes are small long or oblong in shape.  They resemble fingers in shape, and can kind look knobby.  They are all colors under the rainbow.  The flesh can be red, purple, orange, white, yellow, and will sometimes have veins of color running throughout.  These are heirloom potatoes and will store well depending on when you harvest them.

7-Petite

Petite potatoes are more of a size class than anything.  They have been propagated from the original traditional potatoes to have a smaller size and somewhat more concentrated flavor.  Most petite potatoes are potatoes that are harvested early in the season.  These do not store well unless you are very careful in harvesting storage. 

Most all potatoes will store well if the proper precaution is taken.  However, russets, reds, and yellows have proven to be great for storing for long periods.

Potato cellar
Spud pit

Storage temperature and humidity.

The temperature and humidity you store potatoes at will greatly affect the sprouting of potatoes.   Most homes are much warmer than the optimal storage temperature.  You will probably need to find an alternative other than the traditional storage under the sink. It’s usually just the right temperature to encourage sprouting.  

The optimal temperature for storing potatoes is 42-50 degrees Fahrenheit.  Some research has been done to show that 38 degrees Fahrenheit will deter sprouting, but you start to risk changing the starch of the potato into sugar at that temperature.  The colder you store the potato the browner the flesh is when cooked.  If you freeze the potato the flesh will turn grey.

The humidity is also important to consider.  A potato is about 80% water.  Potatoes need to be stored in a humid location to prevent them from drying out.  Commercially potatoes are stored at 90-95% humidity.  Most homes are not this humid, but humidity can be increased with a cellar or storage pit.  Also the container used could help regulate the humidity.  Plastic for instance could hold in more humidity, but it also will not allow for the potato to breathe. Tis can result in spoiled potatoes.  I talk a little more about containers later in the article.

Light

You need to store potatoes in a dark place without light.  Potatoes are a plant and they do respond to light.  The more light the more chance of the potato reacting and sprouting.  The dimmer the better.

Containers

Potatoes will store better with air circulation.  This will help regulate both temperature and humidity.  The better regulated these things are the less sprouting you will have.  You will need to consider what kind of container to store your spuds in.

Potatoes in plastic buckets

Often you will find potatoes in plastic bags when you buy them from the store.  Plastic bags or buckets will increase the humidity and not allow for airflow.  This can induce stress and trigger the potatoes to sprout, or rot.  

A better idea would be to use paper sacks, cardboard boxes, perforated sacks, gunny or burlap sacks, or piled on sandy soil.  If you are using a really dry storage area you can use plastic to your benefit to keep the storage more humid and not dry out the potatoes.

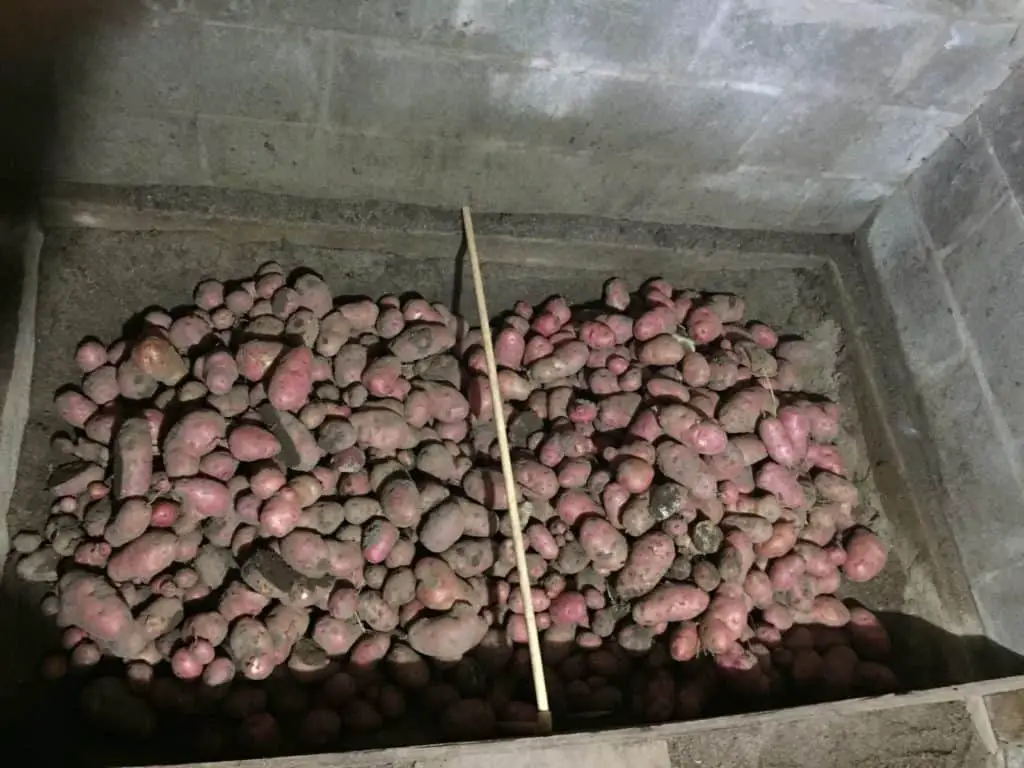
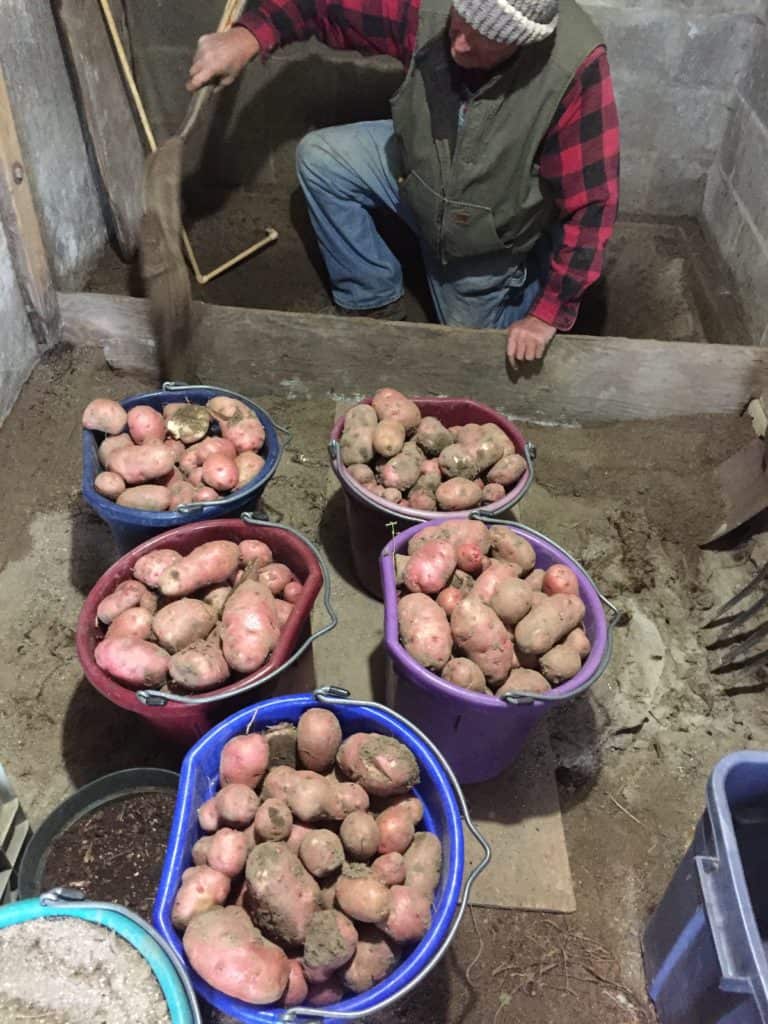
We personally use a well-ventilated root cellar.  We grow and harvest our own potatoes and store them in a pit lined with sandy soil.  This has worked well to keep the sprouting from happening.  When spring hits and the cellar warms up due to the ambient temperature the potatoes will sprout, but as long as its cool the potatoes store very well without sprouting.

We purchased some russet and lasota potatoes from some local growers.  They sold the potatoes in paper sacks.  We store them in the paper sacks they came in alongside the potatoes in our pit.  The paper sacks stored in the root cellar has worked well in hampering sprouting.

Lesser known anti sprouting hack

A lesser known anti sprouting hack is to use some essential oils.  This technique has been used by a few potato growers and researchers from the University of Idaho.  The essential oils used that proved to be the most effective were clove, peppermint, and spearmint oil.

All these essential oils have been approved by the FDA to be safe.  This is proving to be a safe organic option to control potato sprouting.  These oils were found to damage rapidly dividing cells in the sprouts and prevented the potatoes from sprouting.

The research was done for big commercial growers, but the home gardener and small homesteader can use this as well.  The method for home gardeners and homesteaders is a wick method.  This is where you use blotter paper or unprinted newsprint soaked with the oil and put it into the box with the potatoes.  You will need to reapply the oil at two to three week intervals to keep the potatoes from sprouting.

Clove, spearmint, and peppermint, oils were all found to be effective.  They were also found to flavor the potatoes as well.  The one that was found to leave little to no flavor to the potato was peppermint oil.  The others would add flavor to the potatoes. So you may want to stay away from clove and spearmint oil unless you want clove and spearmint tasting spuds.

If you try this technique timing is important.  You need to begin the process before the potatoes begin to sprout. This will stop the whole sprouting process before it begins. 

Can you Freeze Chicken Eggs?

Can You Freeze Chicken Eggs?

Yes! Freezing extra chicken eggs is a fantastic way to preserve those extra eggs your backyard flock gives you, when you have too many to give away, sell, or use for immediate baking.

Flock of our chickens enjoying some wheat by the old barn

We’ve got a fantastic and fruitful backyard flock that have been good egg producers for several years. There is always a time during the summer months when their production peaks for several weeks, and we end up with more eggs than we need. Though we have a regular route of friends, family, and neighbors that we deliver to, we always seem to end up with an abundance of healthy fresh eggs. (And that’s after we have eaten omelets every morning and done all of the baking we can think of). When we get to this point, I have found that freezing the eggs is a good method of preserving them until I can use them. It’s simple, straightforward, and it works! Here is how you can freeze eggs for storage and future use.

First, gather the materials you will need.

1. Eggs (of course) just make sure you wash them first and that they are clean.

2. 2-3 standard ice trays (depending on how many eggs you plan on freezing).

3. Freezer storage bags or freezer storage containers.

4. Salt – for savory use

5. Sugar or corn syrup (for sweet use).

Step 1

Egg shells are porous and will crack open and introduce bacteria if you attempt to freeze an entire egg. So, the first step you will want to do, is wash, and dry, then crack open your eggs.

Step 2

Next, use your fingers, or an egg separator to separate the yolk from the whites. The yolks must be separated from the whites completely, as (unless treated properly) the yolks will thicken into a gelatinous substance that will not be usable for baking. To retard the yolk from becoming gelatinous, you should beat 4 egg yolks together with either 1/8 of a teaspoon of salt (for use in main dishes), or 1 and ½ sugar per ¼ cup of yolk (for sweet dessert dishes).

  • In other words, for every half cup of yolks for savory foods, stir in ¼ teaspoon of salt.
  • For every half cup of yolks for sweet foods, stir in ¾ teaspoon of sugar.

Remember to freeze the eggs in quantities that you will use for future baking/cooking

Step 3

I like to use a standard ice cube tray, and freeze each egg white in its own cube compartment. Once frozen, I transfer the frozen whites to a sealed and labeled freezer bag or container. I have heard of others using muffin tins for the same purpose. You get the idea.

Thawing

Side by side pasture egg versus commercially produced egg

When it is time to use the eggs, just let them thaw overnight. Or, place them in a container that is resting in warm water. Much the same way you would heat a baby bottle. The eggs will thaw quickly. Be sure to use them immediately.

This same concept applies to dough made with eggs, such as cookie dough or pie crust. Just make your cookie dough, and roll out the size of cookie ball you want to cook, and instead of baking, place them on parchment paper and freeze them. Once frozen, you can place all of the frozen cookie dough balls into a freezer bag or freezer storage container and keep frozen until use. When it’s tie to bake, just take out the dough balls, let them thaw, and cook.

Can I Raise Quail with Chickens?

In a nutshell, you can keep both quail and chickens in the same backyard, but you probably ought to keep them separated. On our own homestead, we allow our chickens to free range the entire property, but we keep our quail in a specified run for their own protection.

Quail are a fantastic addition to any homestead for numerous reasons, mainly because compared to chickens, they require much less space and less maintenance. Because of this, you may not be surprised to learn that the popularity of backyard quail raising has grown extensively worldwide over the past five years. It is estimated by the US Department of Agriculture that the number of backyard quail owners has increased by 40% in the past 7 years. The most popular breeds of quail in both the US and the UK are the King Quail (also known as Asian Blue Quail or Chinese painted quail), and the Japanese quail (or Coturnix Quail).

Many backyard chicken keepers have switched to quail due to city or county regulatory impositions on chickens.

An additional reason raising quail may be a good alternative to traditional poultry for many homesteaders is because many residential or city ordinances restrict or outlaw raising chickens, but do not restrict raising quail.

Differences Between Quail and Chickens

First and foremost, both chickens and quail can be fantastic backyard pets. Though quail are more nervous than chickens by nature, and don’t like being handled like some other poultry breeds, they will warm up to you as their familiarity with you grows. Keep this in mind is you attempt to handle your quail, as they may attempt to get away from you by flying. Quail can fly vertical, and can injure themselves by flying into the netting or top of their enclosure.

As mentioned above, quail require smaller housing than chickens. Quail are much more like pheasants, and enjoy ground shelter, thus rather than roosting above ground at night, will seek cover under bushes or hides. Additionally, although quail prefer dark or discreet places to lay eggs, they won’t need a nesting box like chickens. Often, you will find your quail’s eggs hidden in their bedding.

Building a Quail Run

Quail take up little space, making them a good choice for the backyard breeder. They’re also quiet and calm.

When it comes to building your quail a run to keep them separated from your chickens, keep in mind that you should allow six square feet per 6 quail. (Hint, that doesn’t mean 1 foot per square foot per bird, but instead, the smallest enclosure you should use for a quail is four to six square feet). Chickens, by comparison, require about 4 square feet per bird). When raising a small brood, (six quail or less) many people have used a rabbit hutch to convert into a quail run. Also like pheasants, quail are ground dwellers, and will not use a ramp to enter a coop or run like chickens will. Therefore, unless you utilize a hanging cage (discussed below) quail runs should be kept close to the ground. For this reason, one of the biggest predators for quail include rats, and house cats especially because many quail raisers are urban dwellers. If you use a ground-based quail run, you will want to place footers around the run (about 5-6 inches high) to keep rodents and other predators from reaching or grasping the quail.

Quail cages or runs can also be hung above ground. If you choose to go with this method of quail run, be sure to choose somewhere that has access to light, but is blocked from strong winds. Most quail cages are built of open mesh wire, since the birds need shelter, but plenty of air.

Often, quail breeders house their birds in outbuildings or garages. This is fine, just be sure that such rooms are well insulated, with good ventilation and free from drafts. Quail housing should be comfortable for your birds, with food and water readily accessible (though not too deep fro chicks) and allow for easy removal of droppings.

Additionally, though quail and chickens share some common predators, you will need to take extra precautions to secure your quail. Because rats (and other rodents) are capable of burrowing, if you use a ground-based run, you will want to build your quail run on a cement pad, or other firm and solid surface. Additionally, unlike chickens, quail can fly vertically, for this reason, you will need to ensure that your quail run is covered in order to contain them. Because quail startle easily, you can expect that your quail at some point will fly into or bump into the cover. To prevent injury therefore, you may want to use fruit netting or other soft material for the cover.

Chickens May Kill Quail

Though typically passive unless threatened, chickens are voracious eaters, including meat and other protein sources. Have you ever seen chickens attack a mouse? How about chickens attacking another, weaker, or injured chicken? The pecking order is real, and chickens, because of their size, will claim a higher place in the pecking order than quail if housed together. While I have never had a problem with my chickens attacking a quail, I would not allow them the opportunity to establish dominance via fighting and pecking.

Quail chicks resemble baby chickens though newly hatched quail are about the size of a US dime. Quail chicks are covered in a golden tan down with black or dark brown stripes down the back.

Additionally, chickens are notorious carriers of illness and diseases, many of which they can be inoculated against, or develop resistance to; Quail however, have not been domesticated as long as chickens have been, and for that and other reasons, quail do not have strong immune systems to protect them from many of the common fowl illnesses that chickens may carry. (Hint: The Japanese quail is a recommended breed because they have stronger immune systems than many other quail breeds).

Dietary Needs

One other major difference between quail and chicken are their vastly different dietary needs. Quail and chickens have very different dietary requirements, and thus have different feed needs. Adult quail eat around 15 g. of food per day. Additionally, they require higher levels of protein (approximately 18-20%). Chickens on the other hand, require 14-16% protein when laying eggs.

Additionally, chickens will eat quail food, although it is not necessarily healthy for them. If kept in the same run, it is likely that the chickens would eat the quail food, and the quail may starve become undernourished, as quail do not typically like to eat chicken feed.

Because of their variation in diet, the nutritional value of quail eggs is also different than the nutritional value of chicken eggs. Quail eggs are much smaller than chicken eggs, but have nutritional and medicinal values that are not found in other fowl eggs. One serving of quail eggs actually has much more vitamin B2 and iron than a serving of chicken eggs. Quail eggs have a variety of vitamins and minerals including Vitamins A, B2, B5, B9, and B12, as well as thiamin and niacin, and minerals such as iron, Phosporus, Zinc, and Selenium, as well as small amounts of calcium, magnesium, potassium, copper and manganese in each serving. Quail eggs also contain healthy essential fatty acids, like omega-3 and omega-6. Each serving of quail eggs provides you with 13 percent of your DV for protein.

Compared to chicken eggs, quail eggs have six times more vitamin B1 and fifteen times more B2 vitamin. The ovomucoid protein, present in these eggs, is highly nutritious and helps increase immunity.

The shell of quail eggs is much thicker than regular chicken eggs, and may require the use of a quail eggshell cutter. Four quail eggs are roughly the same as a chicken egg, although they have a slightly higher quantity of yolk to white in an egg. Quail start laying eggs in 6-8 weeks, whereas chickens won’t start laying for typically five or six months. Additionally, given the proper conditions, quail can lay up to 300 eggs per year. As a side note, another reason to avoid combining quail with chickens is the simple reason that chickens will eat quail eggs.

Common Quail Breeds

There are six native species of quail found in North America.

  • The Bobwhite Quail is the most common species of quail and is knows as the most common game bird in the Eastern and Southern United States. It is easily identifiable by its whistling call, and male plumage of white throat and brow stripes.
  • The California Quail is very popular on the Western United States, most easily identified by their sweeping, comma-shaped, forward facing crest plume (of six crest feathers), fine black and white markings on the neck. The Mountain Quail is the largest quail species in the US, and have two unique straight feathers that arch above their back.
  • The Gambel’s Quail, or desert quail are located in drier regions of the United States and are comonly confused with California Quail due to their markings. They are most easily identified by their gray plumage, and unique head top knot with copper cover (in males), and scaly plumage on their undersides.
  • Scaled Quail, or blue quail, also known as the “cotton-top” quail, have distinctive scaly markings on their breast and back feathers and white crest plumage that looks like a tuft of cotton.
  • The Mearns Quail, or Montezuma Quail is a smaller bird, with a shorter tail than other breeds, not as prevalent as other breeds, found in south Texas, New Mexico, Arizona, and southern Utah in areas with juniper and oak trees. Males of this breed have a distinctive swirling black and white face patters, with blue gray sides and bold spots.

An Update About our Saskatraz Bees. They’re Doing Incredible!

I have had a lot of interest from readers and friends about our experience with Saskatraz bees. I wrote an article here about my experience with this new race of bee after we had raised them for one year, and it has generated a lot of interest and questions. Right off the bat, I will tell you that Saskatraz bees have done better than any race I have raised thus far.

As you may know from my previous posts, I have had experience raising several bee races, including Carnolioan, Russian, Italian, and Saskatraz, most recently however, I had switched to solely Russian and Saskatraz. This article is an update regarding how these bees have done this past year, now that I am two years in.

Both my Russian and Saskatraz colonies were doing fine until we had a cold snap in early Spring. The temperatures had warmed up for a good week or two, but then plummeted overnight to below freezing, and stayed that way for about a week. Sadly, the Russians died, which surprised me because they had done really well all winter long. This happened with both of our hive locations, and upon investigation I believe they froze.

Within a few weeks of the Russian hives dying however, the Saskatraz bees at one location had split, and taken over the previous Russian hive.

Meanwhile, a close friend had requested that I establish an apiary on his property, so I had ordered additional bee packages for him. From the previous Fall’s harvest, and because of how well they were doing during the winter, I had ordered both Russian and Saskatraz races again. So, now, I have multiple Saskatraz and Russian hives.

It has been illuminating to observe and compare the development of both Russians and Saskatraz colonies side by side, and compare the two. I will be equally interested to see which hives will produce the most, and best quality of honey this Fall……I will definitely keep you posted as this happens.

We installed our additional bee packages (bought from a local distributor of Olivarez Honey Bees) in early spring, and are about 6 weeks in. Thus far, the comparison of the Russians and Saskatraz has been fascinating, and the Saskatraz have by far outperformed the Russians.

We have used Langford-style hives with ten frames in each deep super, and the frames of the Saskatraz bees were filled out with combs and several frames even had capped honey. The Russians hives however, though healthy, had only filled out 6 ½ -7 frames per super with comb.

You can watch a video of one of our early summer hive inspections to see whether we needed to add another super here (video will be uploaded later this week). (To establish a strong hive, it is always recommended that you use at least two deep supers to support the colony). As you can see in the video, both the Russian and the Saskatraz bees were ready for additional supers, however, the Saskatraz hives were outperforming the Russians.

The Saskatraz bees were more active. They had built out more comb, more bees were noticable, and the energy level of the hive was visibly higher than the Russians. Interestingly, both hives have acted similarly gentle in temperament as we have checked on them during the summer. (We’ll see if this continues when it comes time to harvest).

(Photo credit Donna Silva)

One thing to learn from our inspection, and you will want to be aware of, is that your hives may become honey bound. Which means, that your hives will grow out of room to store honey, brood, bee bread, or to expand the colony. If this happens, it can hamper the health of your hive. Some races will swarm, and some colonies will be lost or become overly aggressive. This will also limit your productivity. To avoid this problem, or treat a honey bound hive, you can expand it, add a super, or pull honey early.

If you have the time and resources, I would recommend you pull the honey when you can. We actually will add another deep super to give the colony more room to grow as needed. With an initial colony, you will generally only need to inspect them every 11-14 days, but with the Saskatraz race, it may warrant checking weekly, because they seem to be very productive. (If you are using medium supers you may need to check more often, as medium supers are smaller, and will fill up faster). We have written another article about honey bound hives “here”.

If you are going to start with a Saskatraz hive, I would recommend using deep supers because of their productivity. If you are using medium supers, you may be more likely to find your colonies becoming honeybound.

The second thing I am going to recommend with Saskatraz bees is that you inspect them more often. As mentioned above, because your supers may fill up faster, you will want to stay on top of where your hives are production-wise.

I would also note that the energy level of the Saskatraz bees is visibly higher than other breeds I’ve worked with, so you will want to keep this in mind as you decide where to establish a hive. Though not overly aggressive, this energy and excess movement may spook livestock or larger animals. Additionally, your human neighbors are more likely to notice these bees than other breeds. The Saskatraz colony seems to have a higher traffic rate, and will attract more attention.

Because of this energy level, I think that the Saskatraz race would be exceptional solution to use as contract pollinators. (Bees that are rented out by farms and food growers to pollinate their crop) such as the almond and blueberry farmers in California and other locations.) You can read more about contract pollination here in this forum from beemaster.com.

One other thing I think is worth mentioning, is that I was warned when I purchased the Saskatraz bees that they were prone to swarming, and I was going to take precautions against this. I had planned on inpesecting them early in the Spring to guard against this, but as I mentioned, my Saskatraz colony had already split and taken over the old Russian hive. I wonder, if they hadn’t had access to the Russian hive, if they would have swarmed. And I would have lost them. It is worth noting, as you will want to take your own measures to prevent swarming if this truly is something in the Saskatraz nature. You can read about swarm prevention in this article.

Getting back to my bees…..upon our initial inspection, just like the previous year, the Saskatraz bees had built more propolis in the hive itself, (as compared to the Russians and any other race I’ve worked with, including Italian and Carnolian) and according to this article, propolis is essential to hive health and resistance to bacteria, viruses, mites and other things that may harm bees.

Another question we have been asked, has been regarding how our Saskatraz bees did during the winter. From our experience, the Saskatraz did well. They covered the upper hive entrance with propolis entirely. Whereas, our Russian hive only half covered the top entrance with propolis. The Saskatraz bees appeared to be more proactive in protecting and preserving their hive. All outward inspections revealed a healthy buzz throughout the winter, and I checked them (exteriorly) every week.

This winter on our homestead was exceptionally cold and wet, with some sub-zero days, and warm days interspersed. It was a heavier precipitation (snow year) than we’ve had in years. We also experienced a great deal of inversion, or air trappage, which I think can affect bees as well.

When it was warm enough, (above 42 degrees) I also observed the Saskatraz bees making various cleansing flights as expected. Incredibly, I actually watched them gathering what appeared to be pollen from unknown sources (perhaps a greenhouse or evergreen trees) during the warm winter days as well. Perhaps this was fungus, or tree sap, but they were actively gathering something.

We have talked a lot about the new packages of Saskatraz bees I installed this spring, but as I spoke of earlier, I installed new packages because I was impressed with the colonies that I started over a year ago. Of the two hives I started over a year ago, both are thriving. Their energy levels are high. They are incredibly resourceful, and I have observed these bees taking many gathering flights in and out of their respective hives. They aren’t aggressive towards others, or defensively, but they are aggressive workers. As mentioned above, when my Russian hives died after a cold snap, the Saskatraz bees took over their supers within a matter or weeks. You can watch a video here (video will be uploaded this week), of one of my inspections of the older Saskatraz hives and see for yourself how well they are doing.

Regardless, I hope this information is helpful to you as you continue your own adventures in beekeeping, and look into trying the Saskatraz race. Please feel free to contact me if you have any questions about them.

How to Know if Expired Eggs are Still Good. Use the Egg Float Test

Fresh brown pasture raised eggs

Have you ever been midway through a recipe and reached to use the eggs in your refrigerator only to notice that the date on the box has expired and wondered if the eggs were still okay to use? Where does that date come from anyway? Is that the date you should use them by, is that the date they were shipped, or the date before which you should buy them? You’ve been told the date on the side of the box it’s not an accurate method for knowing an egg’s freshness, and you’re likely correct.

Most often, eggs are just fine for baking purposes even well after the date on the box. This article explains how to understand the date on the egg carton, as well as two other simple methods you can use to check your eggs freshness before cooking with them.

Though our homestead chickens typically lay one egg a day in their nesting boxes, every now and then we find an egg tucked into an odd corner of the nesting box, or the chickens will lay an abundance of eggs (more than we have need for) and our egg supply can pile up in the refrigerator.

We have a regular weekly “egg-route” we deliver to friends and neighbors, so our freshest eggs always go first, and our personal household egg supply can pile up. When this happens, I always use the newest eggs first for baking, as fresh eggs almost always bake better. I wrote an article about the benefits of cooking with fresh eggs here. Sometimes, however, I will use the float test to determine which eggs are freshest and the best to use. I will describe this test below. Most folks however, use store bought eggs and will need to know how to decipher the date on the side of the box.

What is that date on the side of the egg carton?

When you have bought eggs at a store, you may have noticed the numbers and date printed on the side of the carton. Typically, most people only pay attention to the top, right date, or “best before” date. The numbers on the side of the carton tell a bit more than simply when the eggs are “best used by” however.

Specifically, the bottom right series of numbers is indicative of the packing plant number. The first two or thee digits of the bottom line refer to a date in the Julian calendar (from Julius Caesar) out of 365 days when the eggs were packaged. For example, the picture below shows digits 171, which corresponds to June 20th, or the 171st day of the year. (on a non leap year). So, the eggs in the picture above were packed on June 20th. The “sell by date” at the top right is the date by which the seller recommends you buy them (here, July 26th). The number on the bottom right corresponds to the packing plant code, P1111.

If you are interested in looking up the plant, simply click here and enter the plant code. The code for the plant in this photo is Oakdell Egg Farm in Pasco, Washington. The plant code lookup is a service provided by the United States Department of Agriculture Poultry and Egg Grading Program.

Leave the Bloom on the Egg

A collection of pasture raised eggs from various breeds, with bloom.

If you have your own backyard chicken flock, you may be tempted to wash them as soon as you gather them. DON’T DO THIS. When you wash a fresh chicken egg, you remove the microscopic “bloom” or cuticle from the egg which is a natural coating on the eggshell that seals the shell’s pores, and keeps bacteria out. It’s the egg’s pores that will help you to determine whether the egg is old or not. We explain below.

Ever Heard of the Egg Float Test?

If you can’t remember when you bought your eggs, or are uncertain whether or not you should use them, don’t worry. All you need is a bowl of cold water. You may have heard of the famous “float test” to determine whether eggs are still good. We use this method if we happen to find an old cache of eggs hidden in the yard, an egg hidden somewhere in the nesting box, or simply can’t remember when we put the last carton on our shelf in the kitchen refrigerator.

Two extremely fresh eggs. Note how they have both sunk to the bottom of the glass and are laying on their side.

If you’re worried about the age of some eggs you may have in your refrigerator, just drop them gently in a bowl of cold water. (Use cold water so you don’t cook the eggs). Old eggs have had more time to allow air to be absorbed through the porous shell, thus giving the egg white and yolk a runnier consistency, and causing the egg to float. The eggshell becomes more porous as it ages, allowing more air to flow through. The more air that seeps through the shell, the larger the air cell or air sack (the small pocket of air between the egg membrane and the shell) inside becomes. Once the air cell is large enough, the egg will float.

Fresh eggs will sink to the bottom because the porous shell hasn’t allowed much air to penetrate yet.

One fresh egg (left), and one old egg (right). Note how the older egg is floating to the top.

If your eggs sink to the bottom and lay on their side, they’re extremely fresh. If your eggs sink to the bottom but stand on one end they’re a few weeks old but still good to eat. If the eggs float to the surface, they’re no longer fresh, and I recommend you discard them.

Candling Method

Similarly, some people use a method called candling to determine the age of an egg, or whether an egg has a viable embryo for hatching. Candling is most typically performed when determining the growth and development of an embryo inside of an egg. Candling will allow you to determine the condition of the air cell, yolk, and white of an egg. It is done by simply holding a bright light source behind the egg that will show details through the shell.

Simple egg candling method with flashlight held under fresh egg. Note the small air sack at the top.

I will never forget doing this during my second grade class in elementary school. We had an incubator in our classroom full of eggs that were hatching out baby chicks. Every day for three weeks, my classmates and I would run in to the classroom and check the eggs to see if anything had begun to hatch. One day, about nine days into the incubation period, my teacher taught us about candling. We darkened the classroom and covered the windows, and then took turns looking at the eggs as she held them close to a very bright flashlight turning them from right to left. I remember seeing the dark spot at the center of the egg that was the baby chick’s eye, and later, being able to see blood vessels branching out from the center, and even little chicken feet, before the spot that was the chicken grew too big to see through.

Even a novice will be able to distinguish a fresh egg from a stale egg or detect abnormalities caused by incubation, such as blood spot, or a developing embryo. A fresh egg will show little to no air in the air sack between the shell and the egg membrane. An older egg will reveal an opaque larger air sack at the top of the egg.

Older Eggs are Best for Hard Boiling

If you conduct the float test and find that your eggs are not as fresh as you desire for baking (because fresh eggs are definitely best for baking), you may want to hard boil them. Old eggs are much easier to peel than fresh eggs once they are hard boiled, because the larger air sack between the shell and membrane of an older egg allow the shell to separate from the egg much easier.

Don’t Eat Bad Eggs!

If you’re not certain whether or not an egg has gone bad, you can always crack it open in a bowl and smell it. If you get any whiff of staleness, or that rancid sulferish aroma, discard it! Due to risks of Salmonella and other pathogenic bacteria present in eggs, it is always wise to err on the safe side. It is also always recommended to cook your eggs fully. I always cringe when watching the 80’s boxing movie Rocky when he drinks raw eggs during his training regimen. Not recommended! I highly doubt a Salmonella ridden Rocky Balboa could have withstood one round in the ring with Apollo Creed.

Raw eggs? Yuck!

Though most eggs are not contaminated with salmonella, it is not worth the risk, as Salmonella can make you VERY sick. Be sure to cook your eggs to at least 165º F or until they are completely firm before eating.

And there you have it! All you need to know to test your own eggs for freshness at home.

Hummingbird Hacks. How to Attract Hummingbirds and Other Pollinators to Your Yard

Use these easy tips to attract more hummingbirds and other pollinators to your backyard. Every gardener or homesteader knows the value of having good pollinators visit your plants. Pollination is critically important in the production of the fruits and vegetables we eat, as well as in the production of seeds that will create more plants. This article gives several tips on how to attract more hummingbirds, and other good pollinating insects such as bees and butterflies, to your yard or garden.

Why Pollination Matters

Pollination begins with the flower, or blossom of any plant, which contains stamen (the male part of the flower) that produce pollen, and a female part called the pistil. For pollination to occur, the stamen must be transferred to the pistil (containing the stigma, style, and ovary). In other words, pollination is the process by which pollen is transferred to the female reproductive organs of a plant and enables fertilization.

Did you know that 1/3 of all agriculture in the United States is dependent upon pollinators?

Hummingbirds flap their small wings about 80 times per second. They can also can fly right, left, up, down, backwards, and even upside down.
Photo credit Donna Silva

Hummingbirds are excellent pollinators

As hummingbirds feed on the nectar of a flower, their little forehead rubs against the stamens and pistils of the flower, and collects pollen. Then, as the hummingbird moves on from flower to flower, it pollinates as it goes.

There are over 300 different species of hummingbirds in the world, most of which are located in the western hemisphere. The bee hummingbird, at about 2.25 inches long, and weighing .07 ounces, is the smallest bird in the world.

Hummingbirds feed during the daylight hours on the nectar of flowers, (including perennials, annuals, shrubs, and trees). They can eat the nectar from a perched position or while hovering mid-air. Hummingbirds also eat insects, such as gnats or small flies, like fruit flies, and will also eat tree sap when they can find it. They obtain tree sap from sap wells drilled in trees by hole-drilling birds and insects.

Hummingbirds will eat nectar as well as insects, spiders and insect eggs on the ground and in trees. They use their bill and not their tongue to catch insects.
Photo credit Donna Silva

Is it okay to feed hummingbirds sugar?

Some folks argue that feeding hummingbirds interrupts the natural balance of the ecosystem and alters the environment, allowing more aggressive feeders to thrive. We do not share this mindset. And, while our first recommendation to bring pollinators to your yard or garden involves planting flowers that will provide good natural nectar sources, we also feel strongly that these birds can benefit from having a nectar substitute provided through the use of hummingbird feeders.

Here are a few ideas you can easily implement in your own yard to attract more pollinators, and especially hummingbirds.

1. Keep plant species that that have different blooming periods.

By keeping a good variety of plants in your garden and greenhouse that will bloom at different times of the year, you will ensure a good nectar source for pollinators year round. For example, You can keep window baskets of early bloom flowers such as Pansies, Snapdragons, or Violets that will pop out in early spring, as well as pots of fast growing Shasta Daisy’s Lavender, or Black-eyed Susan’s for more mid-summer flowers. Then, keep a spot in your yard filled with Chrysanthemum’s, Pansies, Aster, or Celosia for fall bloom. And, believe it or not, depending on your climate, there are even some flowers that you may be able to get to bloom during the winter—especially if you have a greenhouse. Try some English primrose, Winter Jasmine, or Hellebore. By having flowers in bloom all year, you will have a food source available for local or migrating hummingbirds.

Photo credit Donna Silva

2. Tie bright colored orange, red, or yellow ribbon to your fence or trees.

When migrating hummingbirds pass over your yard and see the bright colors, they will drop in for a closer look. Once there, they will view your assortment of planted flowers and stay for a meal. Better yet, they may decide to stay for the season.

3. Buy good quality hummingbird feeders, and get rid of broken or dilapidated ones.

There are plenty of choices when it comes to buying bird feeders. If you are interested in creating an environment that consistently attracts hummingbirds, you will want a sturdy model that is designed to withstand easy and often filling and cleaning. The substitute hummingbird feeder water will attract other bugs and insects, so you will want to keep it clean, often requiring daily or alternate day cleaning. We particularly prefer a feeder style that has the nectar ports above the liquid reservoir. This will avoid dripping, which attracts bugs and ants. We recommend the Perky Pet feeder, found here. We highly recommend this model, or a similar make, as it has a moat that keeps ants out, holds up to 30 ounces of nectar, and is easy to fill and clean.

4. Use a good Hummingbird food recipe.

Do not use the red-dye hummingbird “food” sold in some lawn and garden stores! Studies done at Utah State University in Logan Utah, have suggested that these types of products can cause harm to the birds.

Instead, use a simple mix of sugar and water. We use refined white sugar and well water for our hummingbird feeders. We simply mix 1 part sugar with 4 parts water (for example, 1 cup sugar with 4 cups water), and stir until the sugar is dissolved. Then, fill your feeder and set it outside in your chosen location. There is no need to put food coloring in the water, as the feeders themselves are already attractive to the birds. Also, if your solution is attracting too many bees, simply dilute the sugar with another cup of water, at a 1:5 ratio. Also, use cane sugar if possible, although beet sugar is fine as well. DO NOT USE RAW, POWDERED, OR ORGANIC SUGAR. These sugars contain starches, and unrefined molasses/iron which is toxic to hummingbirds. Similarly, DO NOT USE HONEY in your hummingbird feeders, as raw honey (unpasteurized) will ferment when mixed with water and can cause yeast to grow, and then a bacteria that is deadly to hummingbirds.

Hummingbirds learn to associate flower colors, like red, with food. It is not an innate preference. They primarily feed from red flowers followed by shades of orange and yellow and then shades of purple/blue.
Photo credit Donna Silva

5. Place the hummingbird feeders in a safe and strategic location.

You will want to hang your hummingbird feeder in a place where cats or other predators will not be able to reach. Even if you do not have a cat, be aware that feral or other outdoor cats will hunt near your bird feeders. I’ll never forget the day we were sitting on the back deck of our family mountain cabin watching the hummingbirds enjoying a meal at the feeder we had placed near the edge of our garden. The feeder was hanging from a low lying ornamental bird feeder pole we had purchased the week prior. Without warning, a feral cat who had been hiding in the bushes jumped out and snatched a humming bird from her perch while she was feeding. We felt horrible! Needless to say, we relocated our hummingbird feeder to a much safer location.

If you happen to have a controlling and bullying male hummingbird who monopolizes your hummingbird feeder, you can avoid this issue by hanging several feeders in the vicinity of the first feeder. This will attract multiple hummingbirds, and decrease instances of territorial bullies.

6. Add a mister or misting sprinklers to your yard.

Butterflies, bees, and hummingbirds all love misters. While bees and butterflies will appreciate the light water it will leave on plants, hummingbirds love to fly straight through the fine mist created by a mister or misting sprinkler. They do this in much the same way other bird species will use a bird bath. As a child, I remember watching hummingbirds fly through the underside of our family’s mist sprinkler on the side of our home. The mist sprinklers would come on each evening at about five or six o’clock, and almost instantaneously, the hummingbirds would start dipping and flying through the mist. I took great delight in watching this behavior as a child.

Hummingbirds bathe in shallow water sources like natural pools or dishes, and enjoy “showering” in sprinklers and misters. They also bathe by fluttering against leaves made wet from a mister.

We highly recommend just buying a simple mister like this one that will attach to your standard garden hose, and is made of brass, so it will not rust or break easily. That way, you can use it to mist your delicate spring or mid-summer flowers as well as attract bees, butterflies, and hummingbirds, and simply remove it when you need the hose for other projects.

7. Provide a water source other than a hummingbird feeder

All living creatures, including bees, hummingbirds, butterflies, and need water to survive. By creating a shallow bath, or pool in your yard. Other pollinators bumblebees, ladybugs, wasps, and butterflies will have a source to sip from.

8. Allow your herb garden to bloom

Once you have harvested your herb garden, allow them to keep growing and bloom. The pollinators on our homestead absolutely mob our basil, dill, and rosemary blooms. By allowing your herb garden to continue growing, it will take on a second life for hungry bees, butterflies, and hummingbirds.

9. Need to keep other birds off of your feeders?

Tired of having other birds steal from your hummingbird feeder? Just clip off the perches. While hummingbirds can feed while hovering, other birds can’t. So, by eliminating their seat, the other birds won’t be able to sit and steal the sweet sugar water from your hummingbirds.

10. Use beneficial insects instead of pesticides.

We have touted the benefits of natural pest control such as ladybugs, praying mantis, or predator wasps before, and we will do it again here. Unless your use of pesticides is done very carefully, you risk hurting your most precious pollinators. So, if you are worried about insect pests and or weeds, look into options other than pesticides. Also, read this helpful article I wrote about alternatives to pesticides.

In summary, there are several easy measures you can use to attract pollinators to your yard. By taking a few simple but thoughtful steps, you can make your yard a bountiful haven for precious pollinators, and do mother nature a great favor. At the same time, you will enjoy watching these pollinators harvest food from your backyard landscape.