Helpful Hints for Growing Homesteads

Recent Posts

Should I get a Barn Cat?

Wondering if you should adopt a barn or homestead cat? The answer is absolutely! The benefits of having a feline friend on the homestead are many. This article discusses some of the reasons why adopting a barn cat (or two) for your farm or homestead is a great idea. We also list some tips and recommendations for raising barn cats successfully and healthily.

Perhaps the most obvious reason for bringing a barn cat to your homestead is because they are fun companions and make for some lively entertainment, but those reasons aside, there are actual health benefits and scientifically based health related reasons for keeping a barn cat.

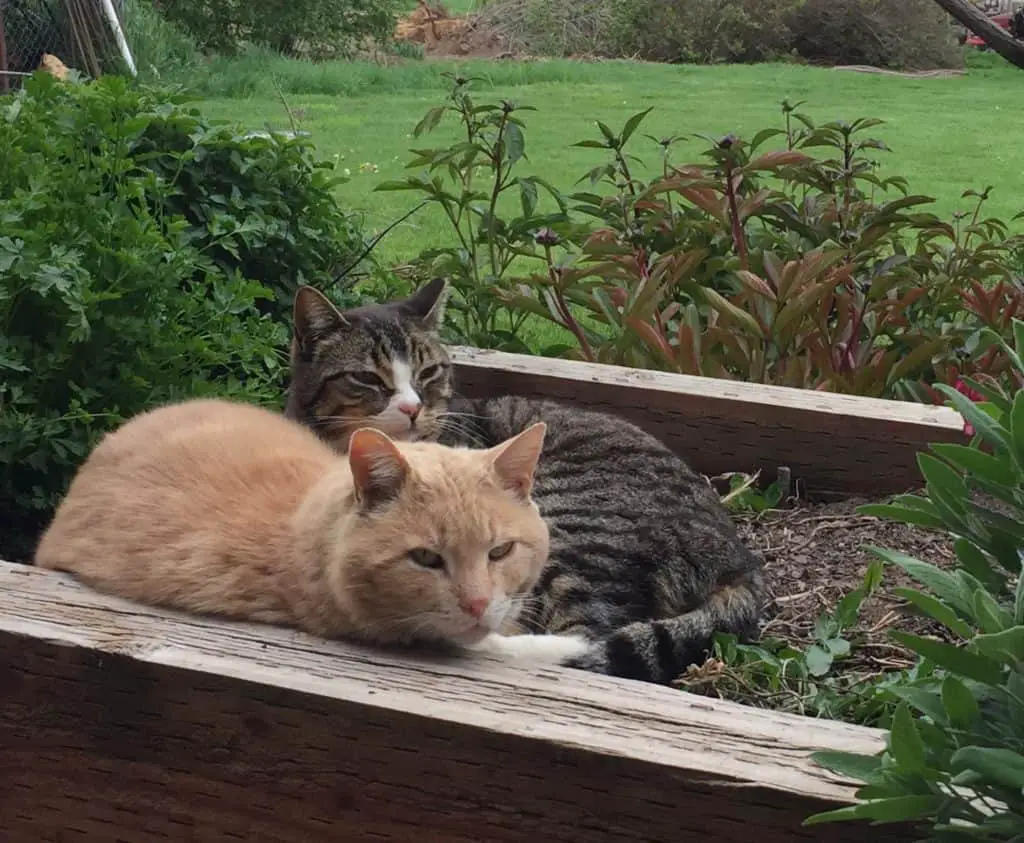
We have 8 barn cats that live on our property, and one very entitled house cat (an abandoned kitten from one of the barn cats). Though we started with 2, the numbers grew as neighbors failed to take care of their own animals, and kittens “happened” or “strays” ended up living on our property. I don’t blame the cats though. We take good care of them, and we have ample room for them to hunt and wander.

What is the difference between a house cat and a barn cat? If you live on a homestead or farm environment, a barn cat is a cat that spends the majority of its time outdoors. Technically, a barn cat will not be allowed to sleep in the house, but by definition, has a domiciliary location in a barn or out-structure of the farm. Ironically, although we have provided shelter for our barn cats, they typically end up sleeping wherever they want.

Because barn cats spend so much time outside, they are susceptible to illness, pathogens, and predators that the typical house cat won’t be exposed to. For this reason, it is wise to have your barn cats vaccinated, including the rabies vaccine, the FVRCP (Feline Viral Rhinotracheitis, Calici virus and Panleukopenia) vaccine, and the FELV (Feline Leukemia vaccine). But we’ll cover vaccines later.

1. Keep vermin and rodent numbers in check

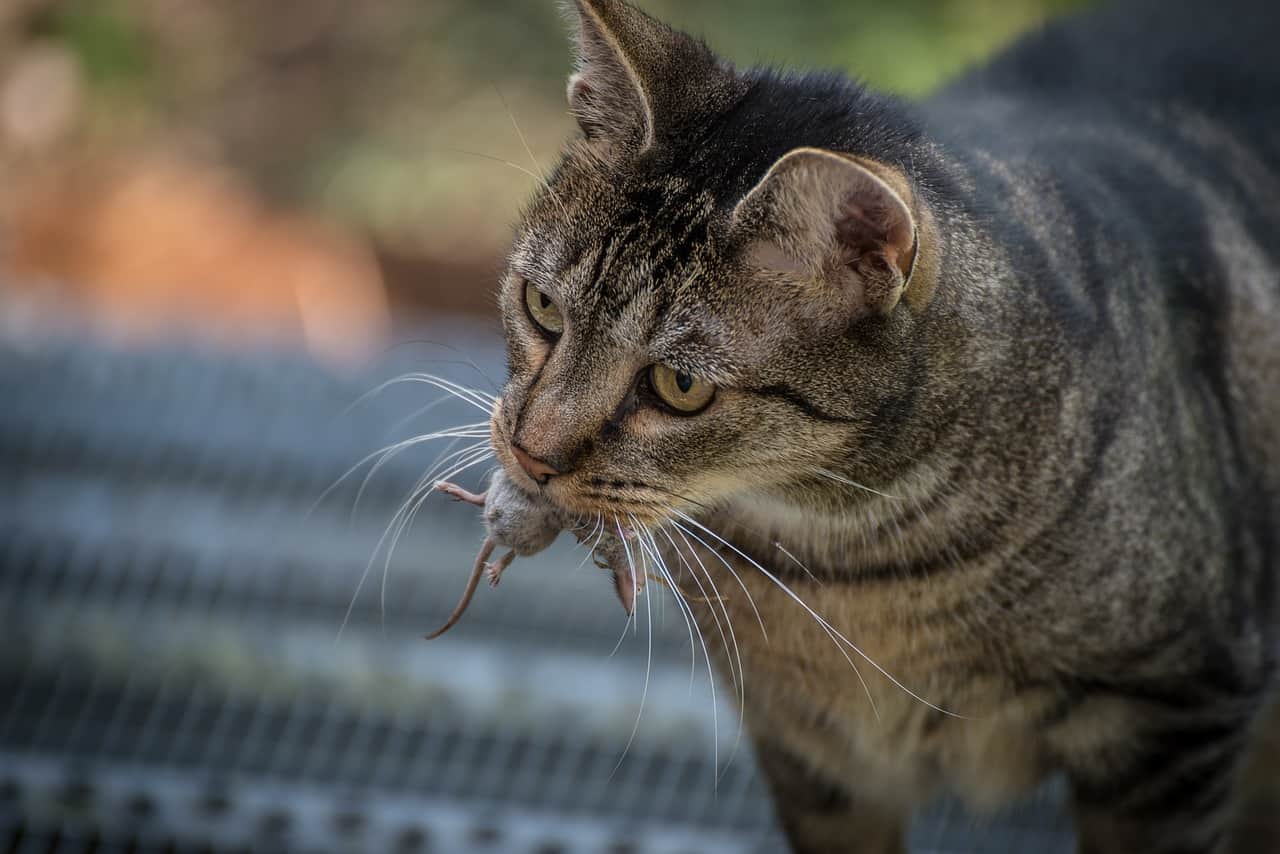
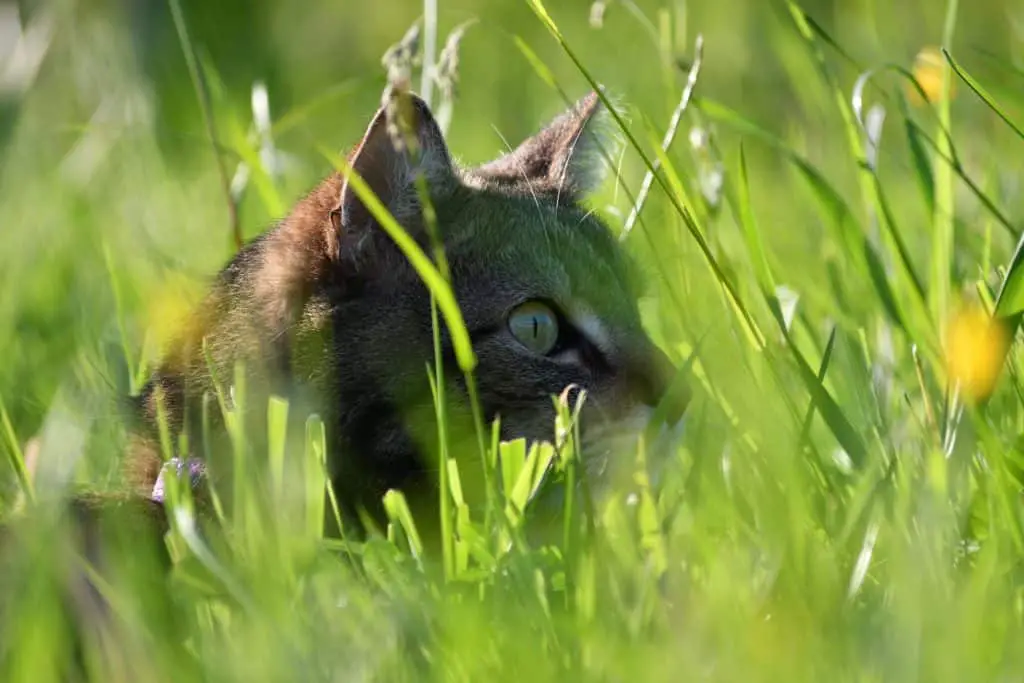
The most popular reason most farmers, homesteaders and ranchers keep barn cats, is to control the vermin or rodent population, including rats, mice, moles, voles, and gophers. Cats are excellent hunters, and a great natural mouse deterrent. Often, just the presence of a cat will keep mice away. Mice typically only build their nests and homes where they feel safe. If they smell or see a cat, they will seek another location. Though a cat won’t keep all mice away (as mice will nest in hidden places such as walls or crevices), it is certainly helpful.

Though cats will kill and eat rodents, recent studies demonstrate they actually hunt as an instinctual habit.

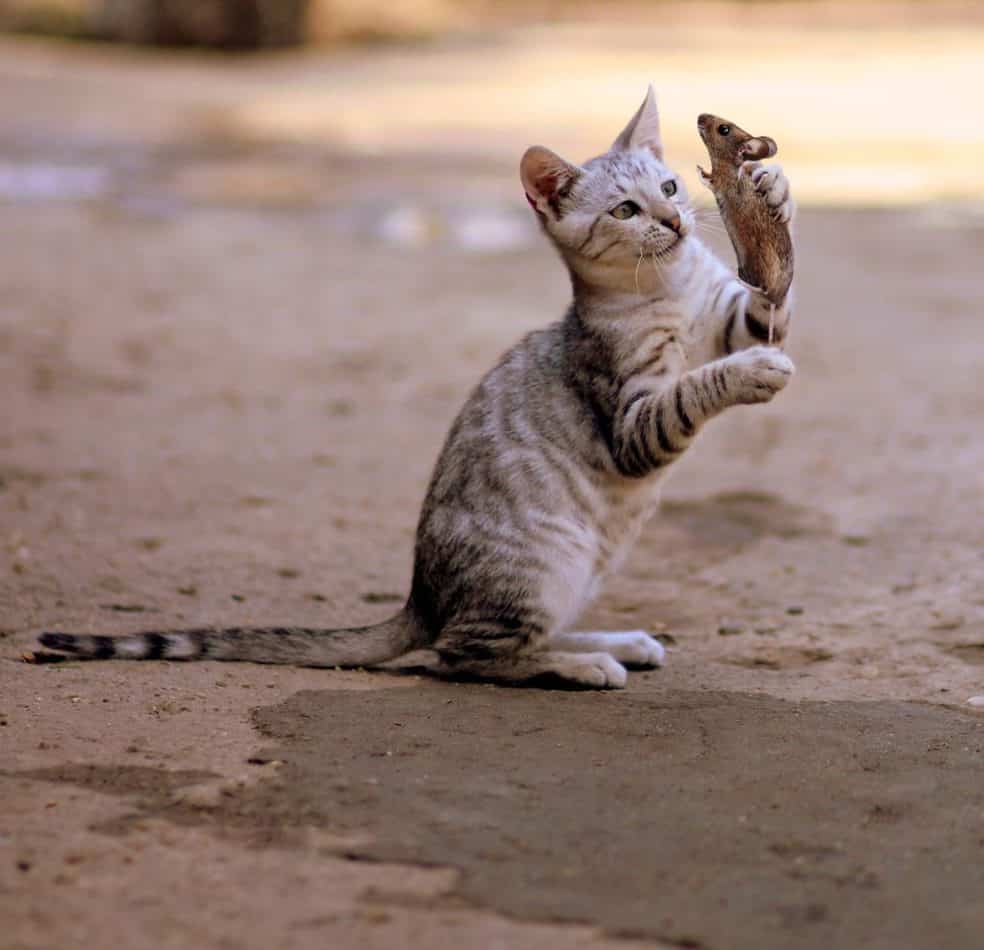
If you have studied history you know that rats and mice are disease carriers. (Think the middle ages and the black death). Though the black plague is controlled now, rats are still known to carry diseases such as antibiotic-resistant E. Coli and C.Diff. If that wasn’t bad enough, you are just as likely to get sick from contact with a rat or mouse’s droppings or urine as you are with touching the varmint itself. So, having a cat around the farm to keep the rodent population at bay is definitely a plus. (Did you know that they use cats at Disneyland to control rodents? They also kept them on ships during World War II.)

2. Low maintenance

Barn cats are also extremely low maintenance companions. Though they will not always be the friendliest, they also won’t require all of your attention as a house cat might. Most barn cats are completely content spending their time outside, laying in the sun, hunting, sleeping, or foraging. Additionally, once spayed or neutere犀利士 d, it takes a few vaccinations, and barn cats are pretty much good to go.

Sometimes we will not see one of our barn cats for days, as they like to keep to themselves, and are content in their own environment.

3. Kill insects and bugs

Though it is well known that cats are excellent at rodent control, many people don’t realize that cats are also excellent insect exterminators. It is believed that cats hunt and kill insects such as cockroaches and grasshoppers because it is their natural instinct. As a matter of fact, according to Dr. Meghan Herron, veterinarian and clinical assistant professor of behavioral medicine at Ohio State University, the act of insect hunting that cats participate in often has little to do with hunger, but is more because it is fun and instinctual.

4. Companion animals for other farm life – including chickens cows and horses

Not only can a barn cat be a fun human companion, but your outdoor felines may also befriend your livestock or chickens. Remember how the wise horse trainer Tom Smith surrounded his champion racehorse Seabiscuit with an old mare, and a stray dog to calm him down and help him settle in?

Even some of the shyest cats have been known to befriend other farm animals.

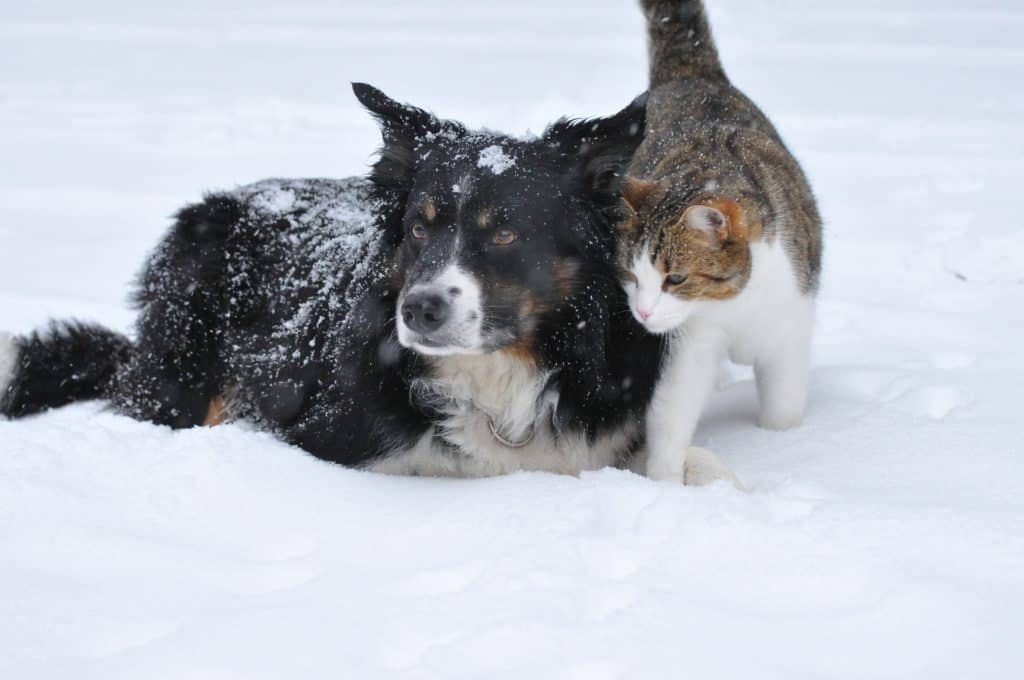
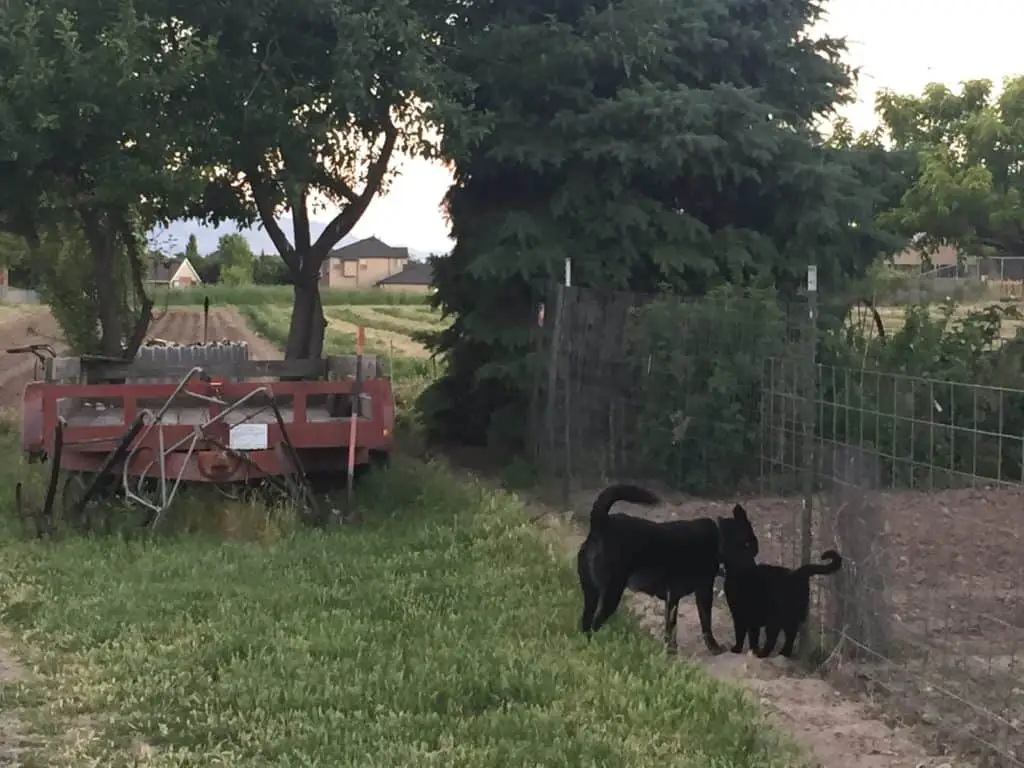
It’s a known fact that many animals thrive from, and actually prefer the companionship of other species. On our homestead, the rescue pup, Layla has now become the guardian of the chickens, including alerting us to the little Rhode Island Red that accidentally gets locked outside of the coop from time to time. And, believe it or not, our once fierce pup has even been befriended by several of the barn cats. It has been remarkable to watch them slowly earn her trust, and vise versa. Now, the nightly routine involves Layla touching noses with Pretty Girl, Big Kitty, and Zero before heading to bed for the night.

5. Companion animal for humans

Additionally, even though a barn cat isn’t going to be the type to climb onto your lap in the evening, there is something remarkable when these otherwise free roaming souls let you into their heart. We have one barn cat, affectionately named roly-poly (after her quirky behavior of rolling on the ground while playing with sticks or other objects), who always follows me at a distance of about 10-15 feet, hiding in the shadows, and watching what I’m up to. Sometimes, when working in the garden, or on other outdoor projects, Roly Poly will surprise me with a small greeting, and let me pet her briefly. Likewise, I often find myself watching her closely as he hunts mice or insects near the chicken coop or storage barns. She’s quite the mouser, and has brought great joy albeit subtly.

In this way, I find all of the personalities on our homestead seem to have their place, and add to the flavor and harmony of our little home. Of course we are the kind of folks that name each of the chickens, and just can’t bring ourselves to do anything other than let our hens grow old (even when they are long past their egg-laying prime).

6. Save you money (pest control), keep rodents and bugs from eating feed.

Having a few good mousers around can save you hundreds of dollars a year in lost or spoiled animal feed. Not only do rodents eat your horse, cow, or poultry feed, but their urine, fur, and feces are capable of ruining 10 times as much food they eat, through contamination. If you’re wondering how big the problem is, the US Department of Agriculture estimates that more than $2 billion dollars worth of feed is destroyed by rodents each year.

7. Rescue an orphaned animal

Probably the most passionate reason I believe you should get a barn cat is because you can give an orphaned or abandoned cat a good home. There are folks who will tell you that certain breeds are better mousers than others, but I am a fan of rescuing cats that wouldn’t otherwise have a home. Now I’m not saying that any old cat should be left out in the barn, or expected to be an outdoor enthusiast, but if you follow the recommendations set forth below, you can easily find a shelter cat or two that will do perfectly well in a homestead or farm environment without needing too much work or care. We recommend the best friends league bestfriends.org, whose motto “no homeless pets” is a motto we firmly believe in. They can help you locate a shelter near you, or you can choose to adopt directly from their facility.

Five essentials to raising healthy barn cats

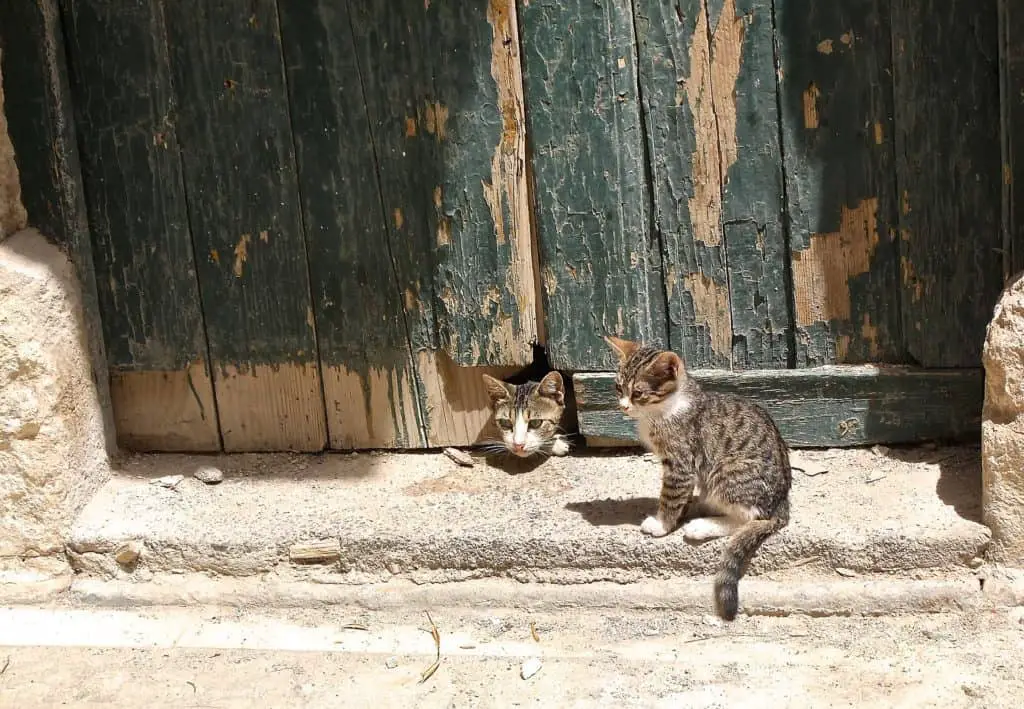
1. First, it is easiest to start with kittens if possible. And, especially kittens that have come from another farm or homestead, or are at least accustomed to living outside.

It is best to find kittens that have come from another farm or homestead, or are at least accustomed to living outside. We see ads for these types of kittens all of the time at our local farm supply store and grain supplier store. It is quite typical for someones farm or barn cat to have a litter of kittens before they have spayed the cat. These litters are perfect for starting your own barn cat crew.

2. Lock them in a barn or shed, tack room, or other outbuilding at night, at least for the first two months. This will help them learn where they will be fed, and will keep them safe from coyotes, night hawks, or other predators while they are young. It also creates a sense of “home” and security for them while they are learning their new lifestyle.

3. Get your cats spayed or neutered! Non-spayed females wander when in heat, or attract males, and ultimately bring more kittens. Un-neutered male cats will leave your property to look for a mate, and will fight with other cats, which can bring about serious injury or death.

4. Vaccinate. First things first, sometimes you may have a challenge catching a barn cat in order to have it spayed, neutered, or vaccinated. When we have had feral cats show up on our homestead and hang around, my husband has used a raccoon trap to catch them and have them neutered or spayed. Typically, the cats become “tamer” much faster once they have been neutered or spayed.

Additionally, you may need to take your cats to the veterinarian to have them vaccinated. Many farmers vaccinate their own cats with vaccines purchased at the tack store. Most tack store will have vaccines available in their cooler section with all kinds of refrigerated medications and vaccinations.

By keeping your barn cats fed, they are less likely to fight with other animals for food and territory.

5. Feed them good food. If you want your barn cats to stay healthy, and to stick around, feed them decent quality food. If you don’t, they are likely to wander to a neighboring homestead or farm where the food might taste better. Now, I’m not saying that you need to go out and purchase the best quality, expensive food out there. I am however, saying that you ought to avoid the really cheap stuff with corn filler and by-products. It will pay off to feed your cats with a decent quality food. It will not deter them from hunting, but will ensure they stick around.

And there you have it. We absolutely love having our feline friends around the homestead, and have had a substantial decline in rodent numbers since making efforts to keep barn cats around and healthy. We imagine you will have a similar experience if you decide to invest a little extra time to barn cat adoption and upkeep.

Garden Pests: How to Get Rid of Cabbage Worms in your Garden

Anyone who has raised cabbage, broccoli, cauliflower, bok choy, rutabaga, kohlrabi, kale, turnips, or mustard plants (all memebers of the Brassica family) has no doubt encountered the cabbage worm. Sadly, by the time many may notice the presence of cabbage worms in their garden, the pests may have already decimated the majority of the crop.

Habits and Growth

The adult female cabbage worm butterfly will emerge in early spring after over wintering as green pupae. The cabbage worm itself, hatches from the egg (usually found on the undersides of leaves) of the cabbage worm butterfly after an incubation of only 1-2 weeks. Though the cabbage worm butterfly is native to Europe and Asia, it has become proliferate in the United States, and can be found abundantly in all 50 states. Typically, an adult female will lay up to 200 minuscule yellow eggs on a host plant at a time.

Cabbage white butterflies are native to Europe and Asia, but they are extremely common throughout the United States

Once the larvae hatch, they feed on cruciferous plants, chewing up leaves or the heads of cabbages. These little pests, if not deterred, will eat away at the bases and leaves of cabbage, cauliflower, or broccoli with vigor over a 15 day period, leaving nothing but the foliage stems. After feeding for 15 days, the worm will pupate for 10 days before emerging as a new butterfly.

The best way to prevent cabbage worm damage in your garden is to prevent the cabbage white butterflies from laying their eggs in the first place. Once the eggs have been laid, they are difficult to spot, and are often overlooked because they are typically found on the underside of leaves. Often, gardeners do not even know that they have a cabbage worm problem until their entire crop has been damaged.

Don’t despair if you haven’t taken measures to dissuade the cabbage butterfly, and have already planted your garden, there is still plenty you can do to protect your crop. This article will first discuss cabbage worm prevention, and second, treatment or management of cabbage worms once you find them in your garden.

Identification

The white cabbage butterfly is easily identifiable by their white wings and black dots. Male cabbage butterflies have one black spot, while females have two black spots. Adult butterflies have a wing span between 1-2 inches. Though you might enjoy seeing butterflies in your garden, if you see one of these, it has probably already layed eggs on the underside of your cabbage, cauliflower, or broccoli leaves.

The cabbage worm butterfly feeds on nectar from flowers, but its larvae seek other food such as cruciferous plants, chewing holes in leaves and boring into cabbages and ruining entire heads.

The cabbage worm is a velvety soft green larvae with faint yellow stripes down its side and back. The caterpillar has five sets of prolegs on the ventral surface of its body or abdomen. They are typically about 1 inch long with small hairs which give them the velvety appearance.

Prevention

Row Covers: Butterfly barriers or row covers. One method for preventing cabbage worms is simply to create a barrier or row cover over or around your cruciferous vegetable plants as soon as you plant them. You can read a great article about floating row covers here. We highly recommend floating row covers, as they not only protect against cabbage worms, but they also protect against frost, (or for cool weather crops, will protect against the hot sun). Keep in mind that cruciferous vegetables such as cabbage and broccoli will need pollination, so it will be essential to open up your row covers from time to time to allow for pollinators to enter. Similarly, you will need to be aware of insects or pests that may overwinter in the soil. Keep a lookout for these types, such as the cutworm. You will likely need to make your row covers moveable, so you can weed from time to time.

Soil management: Another method that is often overlooked, is to turn over garden soil in the fall, exposing any chrysalises to winter freeze or predators such as birds or chickens.

Management

As soon as spring hits, keep an eye out for the white cabbage butterflies in your garden. If you haven’t installed row covers, but have sighted a wh壯陽藥 ite cabbage butterfly, you will need to check your plants copiously, as she has likely already laid her eggs. You can still install row covers, but first you will want to inspect the underside of all of the leaves for eggs, or simply inspect for cabbage worm damage. Then, once you have installed row covers, you will need to remove the cover and check for eggs and damage from time to time. If you do find eggs, foliage damage, or the worm’s dark green feces that contaminate leaves and heads you will want to remove them by hand. To remove the eggs, simply brush the eggs off into a discard bucket. Note: do not just brush them to the ground, as some may survive to find your plants upon hatching. Additionally, just remove any worms you find by hand. We feed any caterpillars, grubs, or pests we find to our chickens. They absolutely love them!

To prevent cabbage worms it is best to protect from the butterfly

If you do discover crop damage, such as ragged holes in the foliage, you may choose to treat your Brassica vegetables with a preventative or insect killer. The farmers almanac recommends treatment with liquid Sevin pesticides which are touted as friendly to beneficial butterflies, bees, and birds, any can be used right up until the day before your harvest. We do not recommend the use of Sevin products however, as it is suggested that any product containing the neurotoxin Carbaryl may be detrimental to non-targeted insects and pollinators such as honeybees (in dust formulations).

Alternatives to Insecticides

Pheromone Traps: We recommend the use of pheromone traps to deter flight paths of cabbage butterflies.

Predatory Wasps: Another fantastic guard against cabbage worms and cabbage loopers is the use of predatory wasps. Specifically, Trichogrammatids, scelionids and mymarids are no bigger than the tip of a ballpoint pen, are non-stinging, and fantastic pollinators. You can order Trichogramma wasps online at Natures Good Guys. The wasps will be shipped as pupae in host eggs, (usually10,000 pupae), glued to a small paper square, or hanging card, and are ready to hatch. The Trichogrammatids wasps will attack over 150 species of caterpillars and moths, including Including cut worms, cabbage worms, cabbage loopers, web worms, and leaf worms. They don’t feed on their prey, but paralyze and lay their eggs either on or inside of a host insect. We highly recommend you buy your parasitic wasps from this company, as their products are well maintained, ship quickly, and are very reasonably priced. You can also attract predatory and other pollinating wasps to your garden by planting high-quality sugar producing plants such as marigolds or white clover, or fennel, rosemary, or dill.

Botanical or Natural Insecticides: Another more eco-friendly method for treating cabbage worms is to use botanical insecticides, which are naturally occurring, as they are derived from plants or minerals with insecticidal properties, and break down faster than synthetic chemicals. Additionally, botanical insecticides generally act quickly, degrade rapidly and have, low mammalian toxicity

Additional measures: Sprinkle plants with corn meal or rye flour. The worms will eat it, bloat, and die. Additionally, botanical herbalists claim that citrus oils, cayenne, and peppermint essential oil sprays will kill or deter cabbage worms.

Grow a Superfood Garden to Fight Diabetes

There is a good reason why your mother always told you to eat your veggies!

My husband’s family has a genetic propensity for Type II Diabetes. Because of this, we take measures to fortify against acquiring it, by growing and eating lots of healthy (and very specific) vegetables, as well as spending time outside being active in the garden. This article lists the best vegetables to plant in your own garden to lower blood sugars, boost healthy antioxidants, and fight chronic illnesses such as diabetes.

Currently, more than 25 million Americans battle diabetes, which occurs when your blood glucose (or blood sugar) is too high, or your body does not properly process food for use as energy. Your blood glucose is your body’s main source of energy, and comes from the food you eat. Insulin, which is a hormone created by your pancreas helps glucose from food get into your cells to be used for energy. When your body either doesn’t make enough insulin, or doesn’t use it’s own insulin properly, it causes sugars in the blood to build up. When blood sugars reach certain levels, this is known as diabetes.

With the proper combination of diet and lifestyle choices, type 2 diabetes can go into remission, but it requires commitment to healthy eating, meal planning, and regular exercise. If an individual can apply these principles and control their weight, they may be able reverse type II diabetes and its potential complications.

Mother nature has created a perfect remedy for Diabetes available right at our fingertips.

The first harvest of Spring from grandpa’s garden in sunny southern Utah. The cap full of peas is always a welcomed sign.

By eating specific vegetables, with high fiber, minimal carbohydrate levels, and low glycemic index scores, you can not only stave off chronic illness, but you can prevent other diabetes-related complications like heart disease, blindness, kidney failure, neuropathy, and other chronic diseases for good!

Not all veggies are created equal.

Some vegetables are just flat out better for you than others when it comes to blood sugar. Vegetables and produce contain vitamins, nutrients, carotenoids and antioxidants that can significantly reduce inflammation and assist in the production of anti-aging and revitalizing energies. Other vegetables, such as bitter melon (technically a fruit) can actually lower blood sugar levels.

So, how will you know which vegetables are best?

Pick some that are low on the glycemic index (GI) scale, rich in fiber, or high in nitrates that reduce blood pressure. What does it mean to be low on the glycemic index you ask? The GI ranking of a food shows how quickly the body absorbs glucose from that food. The human body absorbs blood sugar from high-GI foods much faster than low-GI foods. If you have diabetes, you will want to eat foods and vegetables with a low GI score in order to avoid blood sugar spikes. The glycemic index is a scale from 1 to 100, with high numbers indicating foods that raise your blood sugar faster. If a food has a GI score of 55 or less, it is considered to have a low GI score. Food that ranks between 56- 69 is a medium score, and food that ranks with a score of 70 or higher is considered a high, or bad GI score.

Additionally, glycemic load (GL) estimates the impact of carbohydrate consumption using the glycemic index while taking into account the amount of carbohydrates that are consumed in a serving. Thus, GL is a GI-weighted measure of carbohydrate content.

Below is a table of various vegetables you can grow in your garden that will help in your battle to stay healthy and control or stave off chronic illnesses such as diabetes.

In the battle against diabetes, leafy greens are your best friend. They are extremely nutritious, low in calories, and low in digestible carbs (which can raise blood sugar levels). Additionally, you will want to intake numerous vitamins and minerals, especially vitamin C, that has been proven to reduce inflammatory markers for fasting blood sugar levels.

It is also important to know that the method in which you prepare a food, as well as it’s ripeness can affect it’s glycemic load, or GI score. Did you know that fruits and vegetables become higher on the GI scale as they ripen (and sugars develop). Additionally, the more a food is processed, the higher the GI score raises. For example, mashed potatoes have a higher GI than a whole baked potato, and quick oats have a higher GI score than steel cut oats. Additionally, the method in which a food is cooked or prepared will affect it’s GI score as starches are restructured in the cooking process. (Al dente pasta is has a lower GI score than fully cooked soft pasta). Typically, the longer a food is cooked, the higher GI score it will have because its sugars will be digested and absorbed faster.

Vegetables are important part of healthy eating and provide a source of many nutrients, including potassium, fiber, folate (folic acid) and vitamins A, E and C.

The following vegetables are fantastic at fighting diabetes because they have a score of 20 or less on the GI scale.

These vegetables are also easy to grow in your garden: asparagus, avocados, beet greens, bell peppers, bok choy, broccoli, brussels sprouts, cabbage, cauliflower, celery, collard greens, cucumbers, fennel, green beans, kale, mushrooms, mustard greens, olives, romaine lettuce (and other lettuce), spinach, summer squash, Swiss chard, tomatoes, turnip greens.

(Pumpkin 75, parsnips 97, spinach 15, bell peppers 40, broccoli 10, strawberries 41, pears 38, tomatoes 15, sweet potatoes (boiled 46, baked 94 ), carrot 35, brussels sprouts 6, cauliflower 32, cucumbers 15, eggplant 15, sweet corn 55, green beans 15, kale 9, strawberries 40, avocado 15, apple 38, grapes 53, Chinese cabbage 2, grapefruit 25, blueberries 53, oranges 48, peaches 42, squash 51, banana 52, bitter melon, celery, onions 10, and beans, artichoke 7, asparagus 8, soybeans 14, peas 22, lentils 28, zucchini 15, lettuce 15, bell peppers 40, snow peas 22, tomato 13, watermelon 72

A few family favorites:

The following are some of our family garden favorites and tips on planting and harvesting.

The health benefits of eating spinach include improving blood glucose, lowering the risk of cancer, and improving bone health, as well as supplying critical minerals and vitamins.

1. Spinach

As with most non-starchy vegetables, you will need to eat a large amount of spinach to have enough carbohydrate intake to measure on the glycemic scale. In general, the lower the amount of carbohydrate in a vegetable and the more fiber it has, the less the rise in blood sugar will be. Spinach has very low glycemic index and glycemic load values. On the other hand, it is high in fiber.

It is best to plant spinach in the early spring, as long hot days will cause the plant to bolt (send up a seed stalk), and make small frequent plantings again during the late spring and summer. It will grow best in nigh-nitrogen and moist soil. Tip: Plant spinach in the shade of other tall plants, such as corn, so the young plants will be spared the hottest sun.

Broccoli is a great source of vitamins K and C, a good source of folic acid and also provides potassium, fiber. and Vitamin C.

2. Broccoli

Broccoli is another superfood that is high in vitamins and nutrients, but low on the glycemic index. Broccoli loves sunlight, and cooler temperatures, and will germinate in soil as low as 40° F. Many gardeners will either plant their broccoli in the fall, or begin their broccoli indoors during winter or early spring for later transplanting outdoors.

Depending on your local frost dates, you will sow seeds or place transplants into your outdoor garden 2 to 3 weeks prior to the last spring frost. Broccoli will need moist and fertile soil that is slighty acidic. We amend our broccoli rows with rich compost before planting, and place each plant 12-24 inches away from it’s neighbor plant.

3. Cabbage

Cabbage is rich in vitamin B6 and folate, both of which are essential for many important processes in the body, including energy metabolism and the nervous system.

Our family also love cabbage, and has had great success growing it in our garden. Cabbage is another superfood that scores extremely low on the glycemic index. Cabbage can be tricky to grow, as it does best in cooler temperatures, and can be an attractant to several garden pests, such as cabbage worms, cutworms, and diamondback moth. Many gardeners and farmers start their cabbage plants indoors 6-8 weeks before they anticipate the last spring frost. Then, before transplanting the cabbage outdoors, “harden off” the plants by transitioning them from the protective indoor environment to the harsher conditions outside. Tip: Plant your cabbage on a cloudy day, so it will not be exposed to harsh sunlight immediately.

4. Zucchini

Zucchini contains a variety of vitamins, minerals, and beneficial plant compounds, and is particularly good at lowering cholesterol levels.

Zucchini is another superfood that scores less than twenty on the glycemin index, and is high in folates and carotenes, as well as vitamins A and C. Zucchini’s are a full sun plant that requires a mound or well drained soil to grow, as overly-wet soil may cause early rot. Zucchini grows best in warm soil and air, and can also be started indoors 2-4 weeks prior to your last spring frost an hardened off before transplanting. Unlike Broccoli, zucchini will not germinate in cold soil, and also requires a a good deal of space to grow. Tip: Be sure to give your zucchini 2-4 feet between plants to allow for good air circulation around each plant, as well as maximum production per plant.

There you have it. A few of our family favorites when it comes to diabetes-fighting super veggies. We also have an orchard as well as an herb garden that both produce extremely beneficial and nutritious produce when it comes to putting healthy foods on our kitchen table. We also work very hard to preserve our produce at harvest time to allow for consumption all year long. You can find links toour canning, bottling, and fermenting tips here.

Improve the fruit from your orchard and garden.

There is an age-old technique that will help your fruit trees to yield a more consistent crop from year to year. The technique will also aid in producing a better tasting and dependable crop.  The technique is thinning the young fruit.

The technique sounds simple and it is.  There are however a few guidelines and tricks that can help with thinning young fruit. For years, I have wanted to aid my fruit trees to bear better fruit and to equalize the heavy producing years with the low producing years.  Thinning fruit is an exceptional time-tested method that works great.

Continue reading for tips and techniques for thinning your fruit trees.  

Beautiful pink apple blossom with a honey bee gathering nectar and pollen.
(Photo credit Donna Silva)

Why do we need to thin fruit on a tree?

Every spring I get excited to see all the blossoms show up on the fruit trees in my garden orchard. The first to bloom always seems to be the apricot trees.  I learned a song when I was young about “looking out the window and what did I see, popcorn popping on the aprico犀利士 t tree”.

It sometimes actually looks like popcorn on the apricot tree.  There are so many blossoms clustered thickly together it often appears as though there is one large blossoming branch.  This clustering is a mechanism of nature to ensure there are some surviving fruit, so the trees produce more blossoms than needed.

With this overabundance of blossoms comes an overabundance of fruit production.  The extra fruit puts a great deal of stress on the fruit tree itself, requiring extensive energy and resources to grow.  When the fruit isn’t thinned the tree can become overtaxed, weakened, and susceptible to disease, pests, and sunburn.

The surviving blossoms grow into fruit and compete for resources needed from the tree. If the fruit isn’t thinned, the remaining fruit will get stunted and not grow as well.  The size, color, and quality of the fruit will be compromised resulting in a sub-par product.

Fruit that is bunched up and laying on top of each other on the tree can promote diseases.  Brown rot is often passed from one fruit to another when touching.  Additionally, pests can easily traverse from fruit to fruit and do damage when the fruit is touching.

Have you ever noticed that one year you will get a bumper crop and the next year you get nothing?  The bumper crop heavily stresses the tree and it requires a year to recoup.

A plethora of fruit on the tree, (especially near the ends of the branches) will result in branches cracking or breaking. The weakened state of the tree together with the stress of production, as well as the weight of the fruit itself can overburden the branches.  I have often propped up limbs with boards and stakes to keep branches from breaking under the weight of fruit.  Our Peach and apple trees seem to be especially susceptible to this.

Thinning the fruit on your tree is a good thing

Thinning the fruit at the correct time will aid your crop and tree.  With the proper amount of thinning you will greatly reduce the stress on the tree and the fruit will be able to develop to its biggest size and best flavor.  Without having to compete for sunlight the fruit will get the best color and look.

Good pruning practices and thinning the fruit will also help regulate the tree.  The training of the tree through thinning and pruning will help get the tree to bear fruit every year instead of every alternate year. You can train your tree to actually produce high quality fruit every year.

Good pruning and fruit thinning will also help with the structural strength of the fruit tree.  With thinning the fruit. Particularly towards the ends of the branches, it reduces the weight on the tree branches.  When the wind blows, and the fruit matures the thinned fruit branches will be able to withstand a lot more wind and the weight of the fruit is not as much an issue.

The thinned fruit tree branches also will allow for air to get around the fruit.  The transition of disease and pests are lowered.  The fruit will be able to dry out after rain or irrigation and the growth of fungus or mildew will be greatly diminished.  The shape of the fruit will also be more optimal and look good.

Example fo apple tree that. has not been thinned.

Nature already thins the fruit to a point.

The blossoms and fruit will naturally thin themselves to a point.  Blossoms that are not pollinated will turn yellow and drop off just after flowering early in the season.  We have installed beehives into our garden orchard and so many if not all of the blossoms are pollinated resulting in a lot of fruit.

In June, or late spring, many small immature fruits will naturally drop.  This drop of immature fruit is often known as the “June drop”.  This natural drop will vary depending on your location and geography.  For instance, it happens in May in California. I would think that on the other side of the equator it would be more of the November drop.

Sometimes fruit that is diseased will drop.  Fruit that is infested with insects may drop.  Apples and pears can get infested with codling moths and drop prematurely.

For some types of trees, the natural thinning is all that is needed. Some of the naturally thinning fruit trees are:

  • Cherries
  • Bartlet Pear
  • Persimmons
  • Pomegranates
  • Nut
  • Apricot

Branches of persimmon and apricot trees may need to be thinned on particularly heavy years.

The Specific trees the need thinning

There are species of trees that as a general rule will need thinning of the immature fruit.  These include:

Stone Fruit Trees:

  • Peach
  • Apricot (this can vary from year to year)
  • Nectarine
  • Cherry (depends on variety and will vary from year to year)
  • Plum (depends on variety)

Pome Fruit Trees:

  • Apple
  • Asian Pear
  • Most European Pear

It is often a standard practice to remove all fruit from small young trees.  This allows the tree to focus on growth of the tree itself instead of being utilized by the fruit.  Once the tree is established then fruit can be allowed to grow, but you will need to use caution and thin the fruit to keep from breaking small weak branches.

Cluster of immature fruit needing to be thinned.

When to thin the fruit.

Timing is important when thinning fruit.  You need to thin the fruit when they are immature and small.   This is typically from early to mid-spring.  In the United States generally from early April for early-ripening fruit like apricots, and up to mid-May for late-ripening fruit like apples.

Stone fruits should be thinned when the fruit is ¾ to one inch, or 1.9-2.5 centimeters.  Pome fruits should be thinned when the fruit is ½ to 1 inch, or 1.3 to 2.5 centimeters.  Generally, this occurs about 30-45 days after bloom.

Caution needs to be used on the timing of the thinning.  If you thin the fruit too early you can put the tree into stress.  The stress can result in slit pits in stone fruits, especially peaches.  If the fruit is thinned too late the remaining fruit might not increase in size and be stunted.

How much fruit to thin.

In deciding how much fruit to thin, it really depends on the species of tree and how loaded the tree is. For example plums, apricots and cherries are smaller fruit, so you can thin them to 2 to 4 inches apart, 5-10 centimeters.  Heavier fruit such as peaches and nectarines will need to be thinned a little further apart due to the weight of the fruit.  The heavier fruit should be thinned to 3 to 5 inches apart, or 7.7 to 12.5 centimeters.

How much to thin also depends on how much fruit has set on the tree.  Sometimes the fruit will only set on one or two branches.  Because the total number of fruit is down you will need to leave a little more fruit on the tree to ripen.

Stone fruit will produce one fruit per bud.  Pome fruits will produce a cluster of blossoms and fruit from each bud.  When thinning these clusters, you need to thin to one or two per cluster.  This will depend on the total number of fruit and the growing conditions.  Always try to keep the largest fruit when possible. These pome fruits should be thinned 6 to 8 inches, or 15 to 20.5 centimeters apart.

Different ways to thin the fruit

An effective way to thin fruit on a tree is by hand.  You can be really accurate and precise leaving the best fruit.  When hand thinning you can insect more closely and remove fruit that is damaged, misshapen, or small.  You will be able to use alternate sides of a branch to leave more fruit to ripen. On long branches you will want to remove the heavy fruit on the terminal end to lessen the chance of the branch breaking.

Another effective way of thinning is by using a pole.  The pole method is a lot faster, but accuracy isn’t as good and hand thinning.  When thinning with a pole you will want to attach something softer to the end.  People will use a piece of a garden hose, or cloth, or tape up the end to lessen the chance of damage to the tree.

The pole thinning technique is to strike the clusters of fruit and remove the fruit with the force of the blow.  It can be a little difficult to get this technique down, but practice makes perfect. With a little time you will be able to know how much force to use when hitting the clusters of fruit.  When you understand what you are doing it will get to where one hit or two will get the cluster of fruit thinned well. 

Final word.

Thinning fruit from your fruit trees can be a little disconcerting.  When you consider that the idea of more fruit is what you want, thinning the fruit seems counterintuitive.  Thinning the fruit will result in better quality fruit, as well as healthier fruit trees.  In combination of good pruning practices will result in a more consistent crop instead of being loaded with fruit one year and none the next.

Source.

How Much does it Cost to Start Beekeeping?

It’ll likely cost you about $350 to get a hive up and thriving from scratch. If you are thinking about raising bees, it is important to know how much time and money it will take to get a hive up and thriving. This article sets out the bare minimum in both time and money you should expect to spend to get things started and running smoothly.

First off, beekeeping is obviously not free. There are several basic tools you will need to purchase, as well as the bees themselves. You are always welcome to attempt catching a swarm, or building your own hives, but this article will not cover either of those topics. Rather, this article explains in detail the costs you should expect to incur to purchase a bee package, hive, and tools to get started. Choosing all of the cheapest options, you should expect to pay approximately $350 for your hive, bee package, and beekeeping and honey harvesting tools. That said, our recommendations may call for a little bit better quality than the “cheapest” sources. Read on for more details on prices.

Do Your Homework

It will pay off to do your homework when it comes to bee keeping. Bees are incredible specimens, with numerous characteristics and communication methods not yet fully understood by scientists.

The first thing we recommend (before you buy anything else) is that you do your homework! There are numerous fantastic resources you can use to learn the ins and outs of bee keeping. You can take classes offered by your neighboring college, university, or state extension services.

Sometimes, the broker who sells bees will offer a discount on bee packages for those who enroll in a class. We highly recommend this option, as you will not only get fantastic knowledge from those who likely have raised bees in your geographic area, but you will also save a bundle on the tools you will need to start your own hive.

Another good option for learning about bees is to visit the local library. For beginning apiarists, we suggest you read “The Backyard Beekeeper” by Kim Flottum or “First Lessons in Beekeeping” by C.P. Dadant. You can also subscribe to one of the magazines geared towards beekeeping. We like “The American Bee Journal” or “Bee Culture”. Additionally, you may have access to a local Beekeeping Association. If so, these associations can be an invaluable resource for local information, and getting in on group orders of bees and equipment, or for borrowing equipment (like an extractor). You can find local Beekeeping organizations here.

Check Codes and Ordinances

Next, you will need to decide which kind of hive you want to use. Before you do this, you will want to check with your local city codes and ordinances.

You may find that there are certain areas not zoned for beekeeping, or that there is a limit to the number of hives you may be allowed to keep in a certain area. Don’t worry if your own housing zone doesn’t allow bees, often this obstacle can be avoided by keeping your bees on the property or pasture of a friend or relative.

Pick a good location

Finding the best beehive location may seem a daunting task. However with a few key considerations, almost everyone can find a good place to put a couple of beehives.
Beehive placement plays a large role in beekeeping success. Having your colony in a bad location can affect the health of the bees.

You will need to pick a good location for your beehive. Once you are aware of city ordinances and codes, you will also want to find a location that will allow the bees optimal gathering potential, with bountiful food and water sources nearby.

You will also need to keep in mind that the bees will want a clear flight path that is free of obstacles and constant human interruption. For instance, having your hives in a garden or small backyard is not ideal when it comes time to weed or harvest. We typically recommend that your hive has at least 25 feet of clearance from human or animal traffic on all sides.

Wait until Spring

The best time to start a new hive, or install a new bee package is early spring. Keep in mind that you may not want to start too early, as the risk of cold snaps can kill off your new hive before they have a chance to build up their stores and defenses. Spring is best because this is when bees are at their peak, collecting pollen and working hard to build a brood. This is also the time of year when blossoms open, offering the bees a fantastic source of food.

Provide Water

Bees will also need a good source of water. Bees need water to dilute their honey stores that may have crystallized (when honey becomes too high in glucose). Without water, bees will not be able to access sugar crystals as a food source. Additionally, bees need water to keep their hive cool and control the humidity of the hive environment.

Controlling the temperature inside the hive is critically important when raising a brood. Similar to human-designed air conditioning systems, bees place a thin layer of water above (or on the rim) of the sealed cell of the brood (baby bee cells) and other workers fan vigorously to create air flow and keep the larvae of the brood cool during the hot summer months.

Water is also important for the queen bee as she produces larvae, as well as the “nursing bees” who keep the larvae fed as they grow. So, as you choose a location for your hive be sure to set it up in a place that is within close proximity to water. Additionally, make sure that the bees have a way to escape the water should they fall in, such as sticks or floating twigs, string, or leaves.

The Langstroth hive is They are named by their inventor, a Reverend L.L. Langstroth
The beehive is where bee comfort and human convenience meet. This is why most hive types mimic a natural occurring situation and are made of wood.

Choose your Hive Style

Next, you will need to choose the type of hive you would like to use. There are three major hive types, and depending on how you choose to harvest, how much you can lift, the number of hives you wish to keep, your climate, and what kind of time you would like to invest in the process, not just any hive will do.

The three types of hive include the Langstroth Hive, the Warré Hive, and the Top-Bar Hive.

We highly recommend a Langstroth Hive for anyone beginning beekeeping, who isn’t particularly wanting one of the other types for a specific purpose. We recommend this because of the utility of the hive. The Langstroth is the most iconic or popular (the simple bee box), and the equipment is very standard. All of the components come in a standard size and shape, which means that you can find parts when you need them, and there are a plethra of tools and equipment available. Additionally, the Langstroth Hive is easy to harvest, with straightforward assembly and accessibility for harvesting.

Langstroth hives are also designed to maximize honey production, and allow you to move frames from one hive to another should you choose to do so. If you would like to compare the different aspects of Warré Hives, and Top-Bar Hives with Langstroth Hives, we recommend you read this article by Hobbyfarms.com.

Buy a Hive Kit

Regardless of the type of hive you choose, you can buy a hive kit, and we highly recommend this option as it is the least expensive and most straightforward option.

Though you can buy materials separately, you will save a good deal of money by buying the kit to begin with and supplementing your tools as you need them in the future. A Langstroth Hive will likely cost you $50-$70 depending on whether you choose a deep super (short for superstructure) or a medium super.

When beginning beekeeping, we recommend starting with a deep super. A deep super is a (9 5/8 inch tall box) used on the bottom of the hive. (On top of the foundation). You may be able to add medium supers (6 5/8 inches tall) on top of a deep super, but not vice versa. For this reason, we recommend you start with a deep super.

We buy our hives and bee packages through Olivarez honey bees (OHB) or one of their licensed brokers, and have also bought from Mann Lake, or Dadant but have bought most of our early hives as part of a package to get cheaper rates. If you don’t like these options you can purchase a deep super with frames from Home Depot for $59.87, or if you do some looking around (online or otherwise) you may find them for as low as $20. Keep in mind that it is a lot cheaper to buy the naked hive and paint it yourself with white paint or Tung oil before use. (Note: you paint the hive to protect it from the elements).

  • You can check price and availability of a Langstroth deep super hive kit here.

It is important to note that beekeeping is different than harvesting from your bees. The kits for beekeeping will include only the tools needed to get the hive up and running as well as maintenance. You will need to purchase the tools for harvesting honey and or wax from your bees separately. We will set out the prices for each operation below.

Bee keeping tools and kits: If you were to buy a beekeeping tool kit set, you would likely get the following tools: (an uncapping fork, a hive brush, frame grip, hive entrance feeder, gloves, jacket, and veil, as well as a hive smoker).

These kits can usually be purchased for $30-$40 on Amazon if you shop around. However, we recommend you look at a complete hive set.

  • You can check price and availability of a complete hive and tool set here.

With a complete hive kit, you not only get the super, but you also get the hive top, and hive foundation, as well as the tools you will need to maintain the hive throughout the summer, including the smoker, bee brush, hive tool, and frame feeder.

Typically, a kit like this will cost you $250-$275. On their own, each of these tools cost much more (and won’t include the hive, top, or foundation pieces). We have set forth the approximate costs in a table below:

Beekeeping ToolsCost Low / CheapestCost High End / Better Quality
Uncapping fork$4$29
Hive brush$7$12
Frame grip$3$9
Beehive entrance feeder$3$8
Gloves$10$23
Jacket and veil$40$100
Hive smoker$20$65
Queen excluder$3$7
Total:$90$245

When it comes to harvesting a product from your bees, obviously, honey is the most popular product harvested. Many apiarists also harvest capping wax, propalis, pollen, and bee bread from their bees. To learn more about bee bread, click here. To learn more about propalis, click here. To harvest any of these products you will need harvesting tools. Keep in mind that there are basic startup tools, and more advanced tools for the more serious harvester.

Some of the more expensive tools make harvesting much more convenient, and with experience you may choose to upgrade. For example, for your first harvest, you may choose to use nothing more than buckets, gate valves and strainers.

Later, you may want to upgrade to a honey extractor which can range anywhere from 2-frame hand crank extractors that typically cost $200 to electric 4-frame extractors that will cost you anywhere from $500-$800 depending on quality. We will set forth the prices of harvest tools below.

Honey Harvesting ToolsCost Low / CheapestCost High End / Better Quality
Honey strainer$14$42
Frame holder$10$26
Beehive brush$5$8
Uncapping knife$8$30
Uncapping fork$4$30
Draining bucket$4$4
Totals$45$140
Hand Crank Extractors
2 frame$84$199
4 frame$191$799
Electric Extractors
2 frame$230$510
4 frame$284$955

Which Bee Should I Buy?

Once you have done a good amount of research, assuming you are starting from scratch, you will want to decide which honey bee you should buy.

Read this extremely helpful article about the different characteristics of bee races. We highly recommend you read it before ordering your bee package. After reading it, you will see why we recommend you buy Saskatraz bees. They are a new bee breed, but they are proving to be more hearty, less aggressive, and better producers than the more common Russian, Italian, and Carniolian breeds.

Deciding which bee breed to buy can be daunting. But don’t get discouraged. Most breeds are quite hearty and will thrive with just a little coaxing.
(Photo credit Donna Silva)

Finally, you will want to buy your bee package from a reputable seller. Again, we recommend Olivarez Honey Bees, or OHB. You can link to their website here. If you don’t live near Northern California, you can buy through one of their regional sources. We buy through a regional dealer in northern Utah, and have had great success with them.

Installing your Bee Package

Finally, once you have your hive set up, and have bought your bee suit, tools, and bee package, you will be ready to install your package. For basic instructions regarding bee package installation, you can read this article, or watch this video.

Summary

Overall, you can expect to pay around $250-$350 to get a good productive hive up and going. Though you may choose to upgrade to more expensive tools, especially when it comes to honey harvesting. More than that however beekeeping is a hugely satisfying hobby. You will know you are doing your part to save the bees. (#savethebees). Additionally, your local flowers, garden, and foliage will do better as well with the increase of pollinators.

Soil solarization, natures laser beam to help your garden.

Sometimes you may find yourself with a. patch of ground that is just more problematic with weeds, or fungus, or bad nematodes, or blight, etc.  You have tried everything to fix the problem and nothing seems to work. Or you need to kill off a patch of grass and don’t want to use a chemical to kill the lawn.  You can use the sun to sterilize the soil.  The process is referred to as soil solarization.  It is kind of a natural laser beam to sterilize the soil.

The concept is pretty simple.  You put down clear plastic and over time the sun will heat up the ground and kill everything in the soil beneath the plastic.  There are some techniques that I will discuss in the following article to use to make it effective.  The process works well and doesn’t use any chemicals that could be harmful to other plants, animals, or organisms.

How does soil solarization work?

The concept of soil solarization is that you use the heat from the sun to superheat the soil.  The clear plastic seals in the heat and cooks whatever is beneath.  When the soil is heated for a few weeks most plants, weeds, fungus, and pests are “managed”.

Worked and planted farm ground field.
Worked farm ground.

Steps for soil solarization.

1-Plan ahead.  The peak times for soil solarization to work is when the sun is out the longest and provides the greatest amount of sunlight and heat.  This depends on where you live.  I live in the western united states, so June through August is the best time to use this technique.  

2-Be observant for shadows from trees, buildings, hillsides, etc.  Soil solarization may not be as effective on North facing slopes.  You want open unshaded areas if possible. 

3-Clear the area of plant debris, rocks, sticks, etc.  You want to clear anything that will interfere with the heat production or puncture the clear plastic sheeting.

4-Rototill the area 6 inches deep if possible, this will improve heat penetration into the soil.

5-if the soil is dry you need to moisten it with water.  This is a tricky part.  You need to have the soil wet enough to conduct the heat down into the soil, but dry enough to not get mud all over the plastic.  The cleaner the plastic the more effective it is at trapping heat inside. If you live in a dryer climate like I do it might even need to have a soaker hose or drip line to keep the soil moist throughout the process.

6-Cover the desired area with clear plastic strips or sheets.  The plastic should be 2-4 mil thick.  Clear plastic is the best.  Colored plastic will lose some of the sunlight transmission.

7-Stretch the plastic tight and seal the edges with soil.  This step is important.  There needs to be a tight seal to keep in the heat and to keep out wind.  Some people will dig a trench around the edge and bury the edge to keep the wind from blowing off the plastic as well as for sure keeping a tight seal.

7-A trick that some farmers have used it to double layer the plastic.  This results in higher temperatures in the soil.  If you decide to do a double layer the bottom layer can be colored and the top needs to be clear.  To make this technique most effective you need to have a space of air between the bottom and top layer.  This can be accomplished with strips of styrofoam, or an old garden hose, or plastic pipe; just something that will keep the space of air without sharp edges that can wear on the plastic sheeting.  

8-You need to leave the plastic in place for 4-8 weeks.  It isn’t a quick fix per se but is effective without using harmful chemicals.

9-You need to keep the clear plastic clean.  This will include wiping or brushing the dust and dirt off.  Water will generally accumulate on top of the plastic.  Water isn’t a problem if it is clear, it is a problem if the water is muddy.  Light passes through the clear water just fine, but the muddy water will reduce the heat.

10-Remove the plastic and the plot is ready for planting.  You shouldn’t leave the plastic on into the fall and through the winter.  Leaving the plastic down will actually encourage growth of surviving pests.

To increase the effectiveness of the soil solarization process is to let the weeds grow and water them and incorporate them into the soil.  Adding animal manure at this point is also very beneficial.  The soil solarization will unlock many nutrients from the weeds and manure through the superheating.

Another great technique to use is adding organic matter like straw, leaves, hay, etc. as well as adding fertilizer such as, animal manure, ammonia-based fertilizer, both organic and inorganic. This really boosts the effectiveness of soil solarization.  The addition of these soil amendments increases the rate of decomposition and addition of nutrients. It also increases the heat carrying capacity of the soil itself.  The addition of organic material protects some of the beneficial microbes. 

The effect of Soil Solarization on weeds.

You will begin to see the effects within a few days.  According to the Colorado Extension Service, solarization for 2-4 weeks will prevent the emergence of most annual weeds.  The longer you can do it the deeper the heat penetrates, and the more weeds are managed.  There are some weeds that seem to survive, but many are taken care of.

The effect of Soil Solarization on Pathogens.

A study of soil solarization by the Colorado Extension service shows that many fungi, microbes, and bacteria are killed through the process.  The soil changes composition as it heats and becomes a toxic environment for fugus that is already weakened by the heat.  

Some of the fungi that are killed by soil solarization are: 

Verticillium Wilt, Fusarium diseases, Phytophthora root rot, Streptomyces scabies- potato scab, Agrobacterium tumefaciens crown gall, and Clavibacter michiganensis tomato canker. It also reduces soil populations of different plant parasitic nematodes, especially Meloidogyne spp. root-knot and Pratylenchus thornei root lesion, Pratylenchus root lesion and Xiphinema dagger nematodes.

The effects of soil solarization on beneficial microbes.

The heat isn’t discriminatory.  The good microbes are killed as well as the bad microbes.  According the Colorado Extension Service, the beneficial microbes do return fairly quickly.  However, the nitrogen fixing plants like peas, beans, alfalfa, etc. will have difficulty developing the nitrogen nodules without the presence of beneficial bacteria and may need to be amended to establish the good bacteria.

The effects of soil solarization on the nutrients for the plants.

According to the studies by the Colorado Extension service the nutrients available for plant growth are increased through soil solarization.  Soil solarization increases available nitrogen, calcium, magnesium, extractable phosphorus and potassium.  Minerals tied up in organic matter get broken down and become available for plants to utilize as well.  

Soil Solarization is great if you have the time.

Soil solarization is a very effective treatment.  It does take up to 6-8 weeks of prime summer growing season. If you do want to try soil solarization you will need to plan on a fall garden and plants that would grow well in the fall.  Soil solarization has proven to be effective on some of the most damaging conditions of the soil including harmful nematodes, bad bacteria, and harmful fugus, as well as great weed suppression.  

The downside is that the procedure does require a long-time commitment with no crop during some of the prime growing season.  There is also a minor investment into plastic sheeting.  There is also damage to good microbes in the soil, so the beneficial microbes will take time to return into your soil.  You may have to wait for a while until you plant certain varieties of crops such as potatoes.  It will also take some time for the beneficial bacteria that works with nitrogen fixing plants such as legumes like beans, and peas to return and be effective.

The benefit of soil solarization without the cost and hazards of fumigating the soil is amazing.  Soil solarization has proven to be an effective treatment for disease, fungus and bacteria where nothing else would work.  If you can allow your plot to be treated for 4-8 weeks you will have some amazing results and benefits to your soil.  

Some areas do not have the option of rotating crops.  Soil solarization allows the same crop to be planted on the same ground without the buildup of toxins and possible disease.  Growers are able to grow tomatoes on the same ground and kill off diseases such as crown rot and timber rot.