We have been growing potatoes on our place for generations. My grandfather and great grandfather grew potatoes as a cash crop for many years. Here is a guide on how to plant and grow potatoes.
The basic things that you need to remember in planting and growing potatoes are:
1. Plan ahead
2. Prepare the soil
3. Choose what kind of seed
4. Prepare the seed
5. Irrigate properly
6. Fertilize properly
7. Keep the potatoes weeded
8. Hill up the plants
9. Let the skins set before storage.
10. Store the potatoes properly
Here is how we plant and grow our potatoes.
There are some tips and tricks to help you have a good time and great harvest.
Before you plant
Soil prep
Before planting anything you need to plan ahead and prepare the spot where you are going to grow your potatoes. Potatoes themselves need as full sunlight as they can get. They also need loose well-draining soil. In choosing where you plant your potatoes keep this in mind.
You will also want to keep plant rotation in mind when choosing your garden plot as well. Potatoes will need to be rotated on new ground as much as possible. Choose a new patch of ground that hasn’t had potatoes on it for 3-4 years if you can.
Potatoes are part of the nightshade family as are tomatoes, so you will want to keep that in mind with crop rotation. You will not want to plant potatoes on the same ground that had tomatoes on it the previous year if possible.
The reason you need to keep crop rotation in mind is that potatoes are really susceptible to viruses. The viruses can build up in the soil and create a lot of problems with your plants both potato and tomato. This is often the cause of the harvested potatoes getting smaller and smaller every year.
Fertile soil is great, but potatoes are a fairly tolerant plant and can handle a little less than perfect soil.
The acidity of the soil will also help with potato growth. Potato plants do well with slightly acidic soil. In my area we have somewhat alkali soil and have had good results with adding a Sulphur supplement.
I wrote an article on soil ph here. The article has some good information on how to find out if your soil is more acidic or alkali and how to correct it.
Getting seed
It is advised to get certified potato seed every year. Many backyard growers will use potatoes from the store, or potatoes that they grew for years as their seed stock. This may work and give you some crop to harvest, but there are some downfalls to going this route.
It is great to be able to perpetuate your potatoes from your own garden. You may find that the size and yield of the potatoes will decrease as the years go on. Similarly to not rotating your crop, using the same potatoes as your seed stock can build up fungus, bacteria, and viruses. The result is smaller and lower production potatoes.
As I wrote before it is advisable to use USDA certified potato seed. The certified seed will be more guaranteed to germinate and give better production. The strict inspections and measures taken from certified seed growers ensures good seed to work with.
If you can try to get seed from a seed grower or supplier that can get seed that is geographically far away from you. For example, if you live in Utah you should try to get seed from Minnesota. If you live in Minnesota you should try to get seed from Idaho.
The reasoning behind this is that the fungi, bacteria, and viruses or defects from a geographic area can be avoided by using seed from a different area. We have grown potatoes from the neighboring state and have just done fine, but it’s just another easy precaution that can aid in a healthy crop of potatoes.
Using heirloom seed
There is a strong movement for using heirloom seeds of all kinds in gardening including potatoes. This is a fun way to add a different crop to your garden. The thing to remember is that the resultant crop may be a bit smaller and a bit less in production.
Potatoes known as finger potatoes are what most heirloom potatoes look and taste like. They do indeed look like small knobby fingers. You can also get heirloom potatoes that are oblong and more round like the more modern varieties.
The finger potatoes come from South America. They come in all kinds of colors. They are small and have great nutritional value. They also have thin skins and do not need to be peeled.
You plant and grow these heirloom potatoes just like every other potato. The caution with finger potatoes is that they do not store well. You really need to be careful with the thin skins when handling them and be gentle when putting them into storage.
Location rotation
When planning out your potato patch you need to keep rotation of your crop in mind. It is advisable to rotate your crop as often as you can. Try not to grow potatoes in the same spot every 3-4 years.
The reason you need to rotate potatoes is that potatoes are very susceptible to fungus, bacteria and viruses. The viruses, fungus, and bacteria can get built up into the soil if you keep planting the in the same spot year after year.
With this buildup of bad stuff, you may notice that your potatoes will decrease in size and yield. You may also notice that your potatoes may not grow at all due to the buildup of potato viruses, bad fungus and bacteria in the soil.
One way to deal with the buildup of bad bacteria and viruses is soil solarization. I wrote an article here about it. Its a unique way of using the sun to take care of the bad stuff in the dirt.
Tomatoes and Potatoes
Tomatoes and potatoes are from the same family, the solanum or nightshade family. They are both susceptible to the same or similar fungi, bacteria, and viruses.
Planning and caution needs to be used with planting tomatoes and potatoes in the same garden. Plan to rotate these crops and not plant them on the same ground for every 3-4 years. So you will need to keep both crops off the ground every 3-4 years.
Deciding what kind of potatos you want to grow.
There are several varieties of potatoes that are available for cultivation. I believe the list of potato seeds available for planting are up into the hundreds. Here is an article on kinds of potatoes are available.
Needless to say, choosing what kind may be a difficult thing. Many of the varieties have been cultivated for taste or shape and size, or color, or production. It may take some trial and testing to see what you will like best, but there are many fun varieties to try.
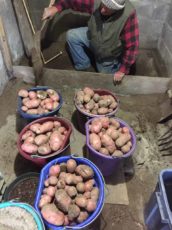
My personal favorite for storage, production, and mainly flavor are Pontiac reds. I am also somewhat partial to the original Burbank russet.
Preparing the seed potatoes
Preparation of the potato seed is fairly simple. The basic concept it to have the potato plant grow from the eye of the potato. The eye of the potato is the little indentation with a small nub. This is where the new potato plant will grow from.
Often the seed potatoes will be stored in large cellars at a constant temperature in darkness. This will render the seeds dormant until they are triggered into sprouting and growing.
If you get your seed potatoes from a seed grower you will need to allow time for the seed to be stimulated into sprouting and growing. This can be easily done by letting the seeds stay at a warmer temperature. When you see the eyes of the potatoes begin to sprout you know that the potatoes are ready to prepare and plant.
If you are buying seed from a store you will probably already see the seeds beginning to sprout. If they are sprouting, then they are ready to plant. If you are planting potatoes from your own supply just make sure that they are beginning to sprout.
Care and caution should be used when handling the sprouted spuds. The sprout will become the actual potato plant. The sprout feeds off of the potato flesh until it gets established roots going. You need to make sure not to break off the sprouts.
You can just put the entire seed potato into the ground and have it grow a new plant. A more efficient way to use the potato seed is to cut up the seed and use one potato for several plants.
The general rule of thumb is to have at least 2 eyes pet each cut chunk of potato. What you do is get your seed potato and cut it into chunks that are about 2×2 inches or so. The chunks of potatoes are referred to as potato sets.
Again, you need to make sure you have 2 eyes per chunk, or set. You can have some grow just fine from one eye per piece, but it’s a little more insurance of a plant growing if you have 2 or 3 eyes per piece.
My cousin had a bumper crop of just one tiny piece of potato and one eye per potato set. He swears by one eye, but I still believe 2 or more is a better plan.
As the roots grow the potatoes develop on the roots of the potato plant. Where the root taps into the potato can sometimes look like an eye. So be a bit discerning and careful to see if you have potato eyes or the root that the potato developed from.
Once you have your potatoes cut you need to let the cut part dry and harden up. This is where you set the cut seed aside in a cool dry place.
The time it takes to harden up your seeds varies due to the humidity. We live in the mountain west and it’s pretty dry. We can usually cut the potato seed in the morning and plant it in the evening. However, there have been some more humid times where we have let the seed dry overnight and they worked out well.
I have read on some extension service sites that you should let your potato seed dry for 2-3 days to have them harden or cure for planting. The main idea of curing your potato seed is to have the cut skin become a barrier for the moisture of the seed to stay with the eye of the potato feeding the eye to help it to grow.
You can have a successful crop by just dropping in the wet cut potato seed, but you may find that the soil will absorb all the moisture from the seed and dry out the eye and kill your plant before it has a chance to grow.
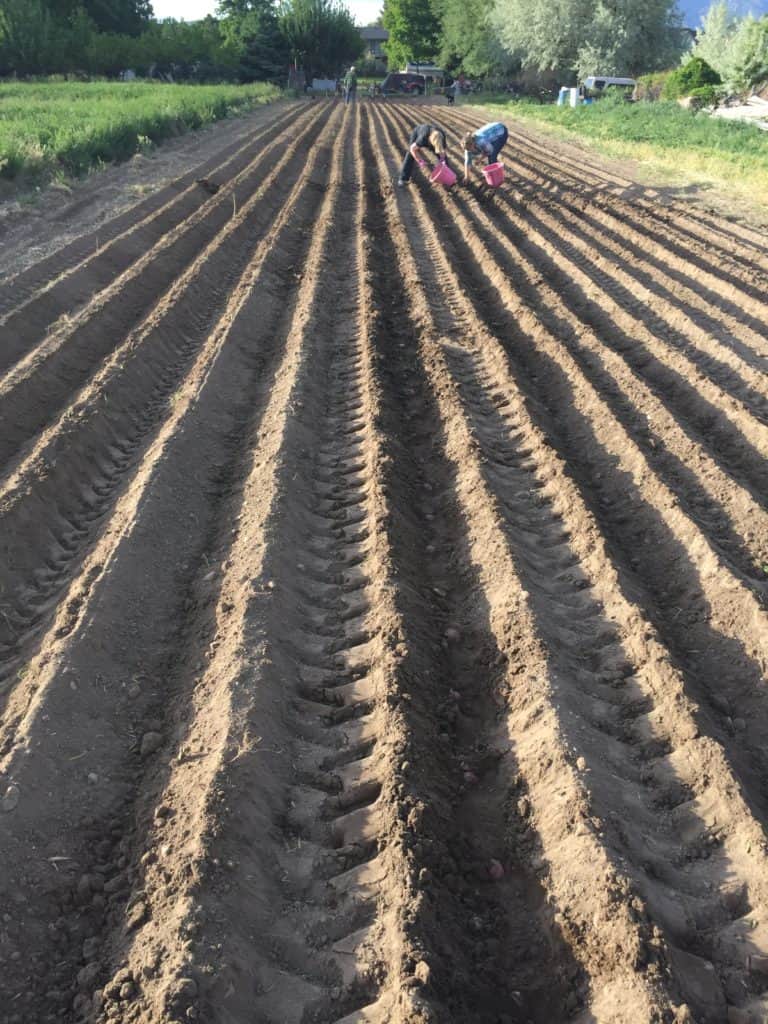
Planting the potato seed.
The basic idea of planting potatoes is to get the eye of the potato in the ground.
- It’s best to plant the seed under 3-6 inches of soil, optimally being 4 inches.
- The seeds should be 8-12 inches apart.
- If you are growing the potatoes in rows the rows need to be 24-36 inches apart.
When to plant potatoes
You should be able to plant the potatoes after the last frost. You need to plan ahead when you plant and grow your potatoes.
Don’t plant your potatoes too early. Some potatoes will go through their plant lifecycle and will grow, die, and begin to start growing again if left too long in the ground.
Growing potatoes
Watering/Irrigating
Growing the potatoes is not that difficult. You will need to keep them watered but not constantly wet. Potatoes are a tuber and can have rot issues if you keep them too wet.
We generally water about every 5-9 days depending on the temperature.
Fertilizing
Fertilizing potatoes can help you get a better yield. The potatoes will use nitrogen to get the plant above ground growing well. A good garden mix will be good for this stage.
The better you can get the green part of the plant growing above ground the more resources the tubers will have when they start growing. You can overdo nitrogen however and get great green leafy tops with no tubers at all, so stick with a good balanced garden mix to begin with.
Once the plants start to have blossoms you need to fertilize for the tubers, or the potatoes you are going to harvest. The tubers are formed on the roots, so you will want to fertilize for the roots. If you are using commercial fertilizer you will want the last 2 numbers on the bag to be larger than the first.
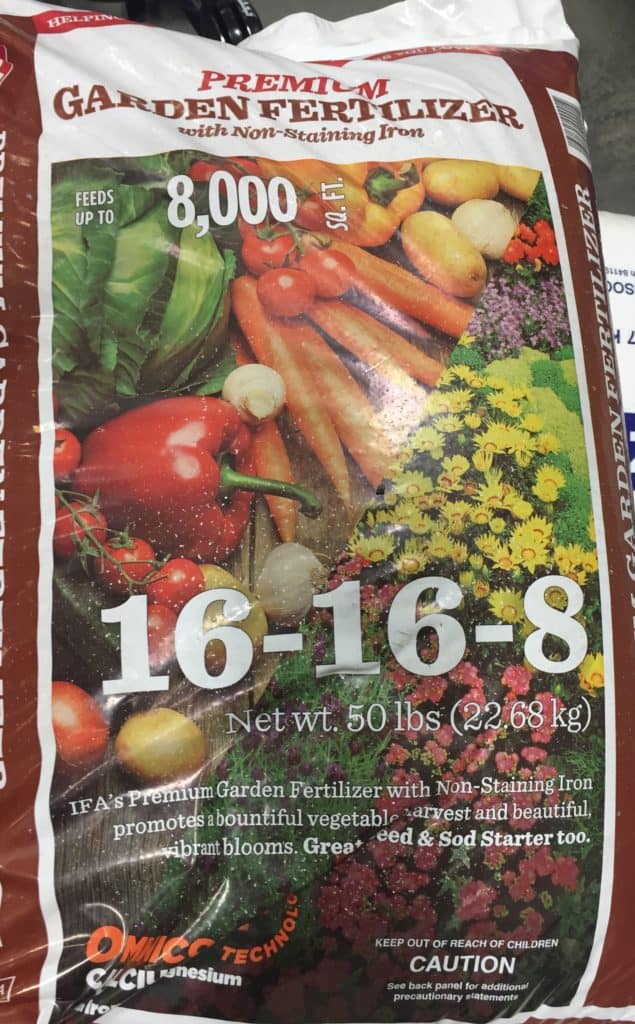
Here is an article I wrote on fertilizer. This will explain it if you want more information.
The root fertilizer will be potassium and potash. You can also use some tried and tested natural amendments like bone meal and Epsom salt. The bone meal adds potassium which helps flowers and roots to grow. Epsom salts add magnesium and will help with cell wall growth of the potatoes.
Weeding
Keeping the potatoes weed free is helpful in having the plants thrive and the nutrients going to your plants instead of the weeds. Caution should be used when weeding potatoes. The tubers are located fairly close to the surface and can sometimes be pulled out with the weeds.
I have often had the opportunity to weed potato patches that seemed doomed to being overgrown with weeds. Once we got the weeds out the potatoes thrived and produced well. So, don’t give up on your potatoes if the weeds get the upper hand during the growing process.
Hilling the potatoes
A common practice when growing potatoes is hilling the plants. I have heard arguments for and against hilling the potatoes. I practice hilling and have had good results.
What “hilling” potatoes is, is piling more dirt around the base of the plant and hilling up dirt around the plant. What this does is create more room for the tubers, or potatoes, to grow. This will often result in a better yield and will protect the potatoes from getting green skins on the tubers.
The argument I have heard against hilling potatoes is that it will stunt the plant, create rot, and kill the plant. I have not experienced these negative effects, but I do live in a dryer climate. Perhaps in a wetter garden plot these problems could arise.
If you decide to hill up the potato plants, you need to hill them up after the plants have grown 6-12 inches tall. Then you can hill up dirt around them, leaving the top 4-6 inches above the dirt. This will allow the plants to grow and add more tubers to the roots.
Some will only hill up the plants once in a season. During the major growth time of the plant above the ground you can hill them up 2-3 times. You can hill them up until they begin to flower. After they flower you want to encourage the growth of the tubers on the roots.
Harvesting potatoes
Once you have taken the time to plant, fertilize, water, weed, hill, and maintain the potatoes it is time to harvest. This is one of my favorite things to harvest in the fall. Potatoes were a cash crop for my family for generations. Bringing in a good potato harvest meant food storage for the winter and money in the bank.
When you decide to harvest your potatoes is up to you somewhat. You can begin to rob some of the small potatoes about 60 days after you plant. These will be small tender gems. If you time it right, you can have some of these small potatoes with fresh sweet peas and that is a treasure. You need to realize that when you rob them that takes away from your fall harvest, so don’t get too greedy too early.
We plant our potatoes after or around Mother’s Day. That gives time for the potatoes to get good growth and go through their natural cycle where the plants will die off in late September or early October. Don’t be alarmed when the plant dies later in the season. This is natural and signals the time for harvest is soon at hand.
Hardening the skins
Once the plant has died you need to let the potatoes sit in the grown for 2-3 weeks. This will allow the skins of the potato to harden off.
If you harvest the potatoes with soft skins you need to eat them soon. Soft skin potatoes do not store very well. They are prone to going rotten.
One test you can have to see if the skins are hardened enough is to dig up a few from a plant of two. Rub the potato with your fingers or thumb and see if the skin will rub off easily. If the skin just slips off, they need to harden a bit longer. If the skins hang on then you can harvest and the potatoes will store well.
Harvest by shovel
You can use a shovel to dig up the potatoes. This works well, but you need to be careful not to cut the potatoes with the sharp edge of the shovel. Dig 12-18 inches out from the center of the plant to avoid cutting the tubers you worked to grow.
Make sure you dig deep enough 8-14 inches deep. You will also need to sift through the dirt well. Potatoes will look similar to dirt clods and hide from you.
Harvest by fork
There is a potato fork available to use for harvesting. A potato fork can be used for many purposes beyond potatoes, but does work great for potatoes. You use it like a shovel and dig around the plant. As you pull up the dirt the dirt will sift through the tines and leave the potato. It is a bit more efficient than a regular shovel.
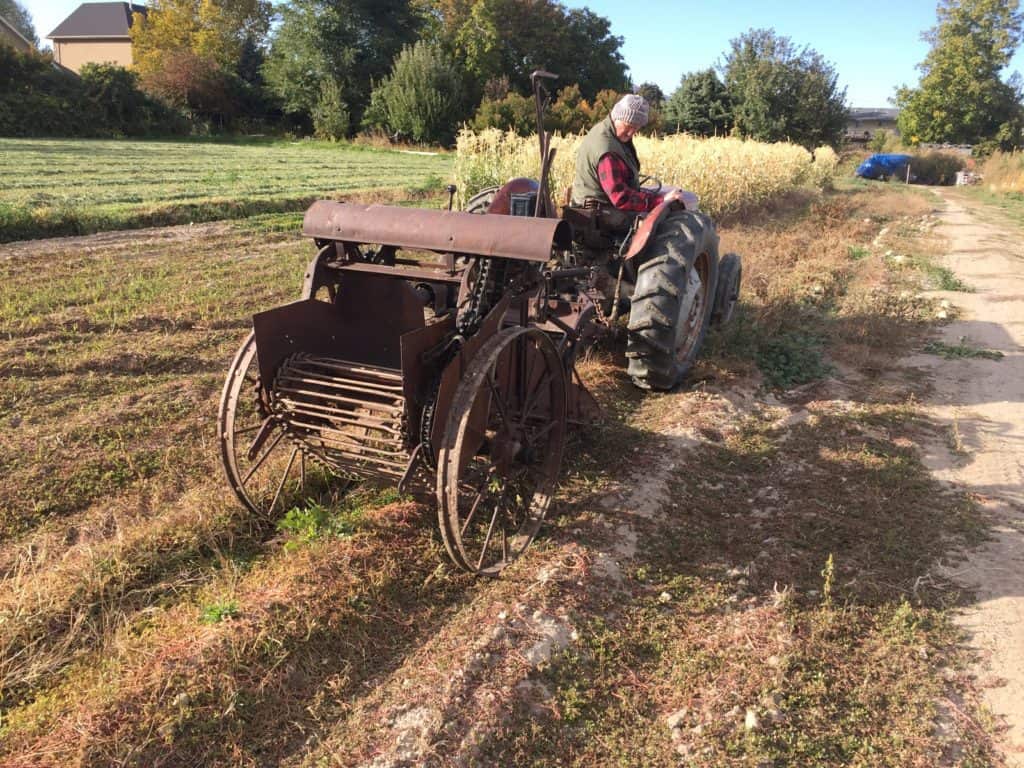
Harvest by machine
Using a tractor and a potato plow is my favorite. I really enjoy seeing the old farm machinery work. There are many older farm implements and tractors that are still in use for harvesting smaller plots and gardens. This is something that you might want to consider if you are going to be harvesting more potatoes than you would want to dig up by hand.
Here is a short video showing a potato plow that has been used by my family for generations.
There are some modern potato plows available and might be worth considering depending on your budget for equipment. I will list some of these on our resource page.
I would encourage looking into the older farm machinery if you are concerned about budget and have more potatoes than you want to dig by hand. Some people almost give the implements away, but most understand the value and will charge a fair price.
Storage
Once you have harvested the potatoes you need to eat them, sell them, store them, or all of the afore mentioned. When stored properly you can keep potatoes for months.
The main things to remember about storing potatoes are to keep them in a dark, humid, and cool place.
When exposed to light potatoes get triggered to begin to sprout and grow. Keeping them in a dark cellar or a box or sack will prevent the light from triggering the sprouting response. They will need airflow, so plastic sacks and containers won’t work unless they have plenty of air holes or mesh to allow for the air to flow.
The temperature should be between 42-50 degrees Fahrenheit for optimal storage. When you keep potatoes too cold it will turn the flesh darker tan or brown. If the potatoes freeze it will turn the flesh gray.
The humidity is important as well. If potatoes are stored in a dry environment, they will shrivel and become rubbery. Keeping the storage area humid will help keep the potatoes good to use.
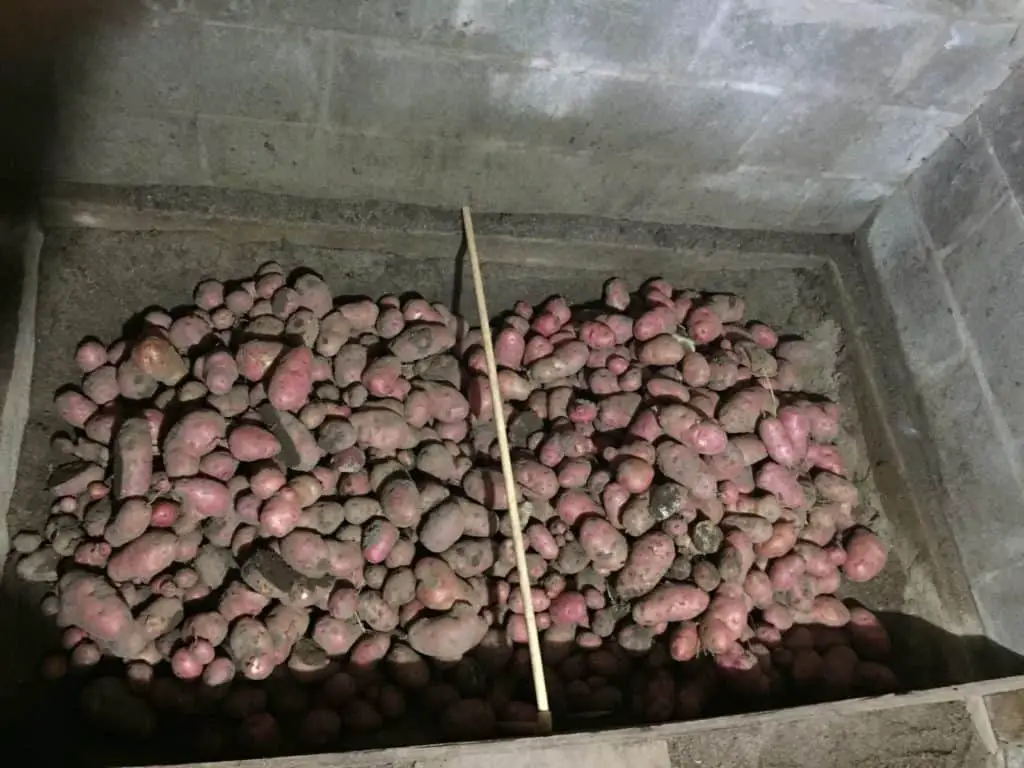
A dirt floor in a cellar is a perfect place for potato storage. The temperature remains fairly consistent and the humidity usually is good. The airflow can be a little tricky with a cellar. We accomplish airflow on our cellar with an adjustable vent on the door and a vent pipe out the top.
Conclusion
Potatoes are some of my favorite plants to grow and harvest. I hope this guide will help in your quest of gardening and growing your own food.
With a few steps you can have great success in growing some spuds for your table.