Helpful Hints for Growing Homesteads

Recent Posts

How to Grow Popcorn!

I have grown field corn and sweet corn for years.  I was wondering if growing popcorn would be a good idea.  Is growing popcorn just a strait forward thing like growing regular sweet corn?  Well, the answer is yes and no.

You plant popcorn and grow it like sweet corn, but you really need to be careful about cross pollination and you preserve it differently than sweet corn.  This article will explore the interesting idea of growing you own popcorn.

Can any corn be used to grow popcorn?

When you grow sweet corn in your garden at home you can let it grow until it matures and dries out. Those kernels look pretty hard and similar to popcorn kernels.  If you grow field corn for feed or seed, it can resemble popcorn kernels as well.  The resemblance ends there.  If you try to pop sweet corn or field corn you will get a burnt mess. 

There is only one variety of corn that will pop.  This sounds rather alarming, but there are over 100 strains of that one variety.  So there are many choices of popcorn to grow. 

Some of the corn will pop in a flowerlike or snowflake shape.  Some corn will pop more in the shape of a ball, some will mushroom out.  The different varieties have different applications.  

Carmel corn uses the more ball or mushroom shape.  Movie theater will use the larger flower shaped ones. Most of the popcorn used at home, in movie theaters, and for snacking is the flower shaped variety.

You may want to experiment and try something different.  When you decode to grow popcorn you need to be concerned with crosspollination. We’ll address this a little later in this article.  

Can I grow popcorn from kernels from the store?

When you look the bottle or bag of popcorn kernels that you bring home from the store they look like pretty good seed to use to grow your own.  The results can be a bit sporadic.  

You may be able to get some of the seeds to germinate, but not all. Many of the kernels may have been flavored, treated with preservatives, or processed resulting in a lack of germination.

You can try a germination test on your favorite brand of popcorn from the store.  What you do is sow about 20 seeds of the popcorn.  Wait and see if they germinate.  You should start seeing the plants in about a week. If you don’t have germination or spotty germination in 2 weeks the seed isn’t fertile.

Growing your own popcorn

It’s best to obtain popcorn kernels specifically grown for planting.  Many varieties of corn are available from nurseries and online. When ordering these seeds make sure you have seeds that have been developed for your growing zone.  Once you have obtained the popcorn seed you treat it the same as sweet corn for growing.  

Planting popcorn

Wait until the soil gets warm and the chance of a freeze has past. One trick is to soak the seed for about 12 hours before  you plant it.  This will help the seeds germinate faster.  

Plant the popcorn about a half inch deep in the spring.  You may need to plant deeper if you sow the seed in the hot summer, up to 2 inches or so.  You need to plant the seeds 6 inches apart, and in rows of two or more about 18-36 inches apart.  

You should plant 2 seeds in each hole, germination tends to be about 70-80%.  Rows of 4 or 5 are preferable to allow for ample pollination.  Pollination is essential to have a good yield.

Soil prep for popcorn

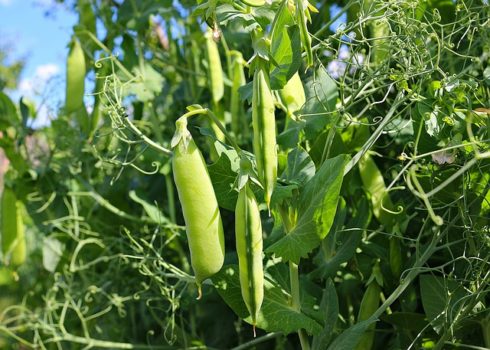
Corn is a big nitrogen user. Try to plant corn in soil that has had legumes in it.  Legumes like peas, beans, and alfalfa add nitrogen to the soil naturally.  It’s not essential that you plant in this kind of soil, it’s just something that you can plan for in your garden.  

In any event you want to make sure that the soil has plenty of nitrogen for the corn to flourish.  I have an article on garden fertilizer here.

The soil needs to be soft and free of large rocks and debris.  You should spade or till the soil 8-12 inches deep.  If you have a large enough patch plowing with a tractor will work.  Roto-tillers are also great for this kind of project.  Using a good old shovel works just fine as well.  

If you till, plow, or spade in the fall it will be easy to get the space ready in the spring.  Having the soil turned over in the fall will also allow vegetation to decompose through the winter adding nutrients and good fiber to the soil.

Caution needs to be used when growing popcorn

Often different varieties and strains of corn are grown together for the opportunity of crosspollination.  You can get some interesting results of the crosspollination.  

We have grown two specific varieties of sweet corn next to each other for years with great results. However, when popcorn crosspollinates with sweet corn or another strain of popcorn, it can have less than desirable effects.  

When the popcorn cross-pollinates you can get kernels of popcorn intermingled with the sweet corn and vice versa on the ears. It’s an interesting thing to be eating sweet corn on the cob and come  onto a hard popcorn kernel right in the middle of your cob.  

So be sure to have a barrier, or about 100 feet between popcorn strains and other corn varieties.

Thinning popcorn

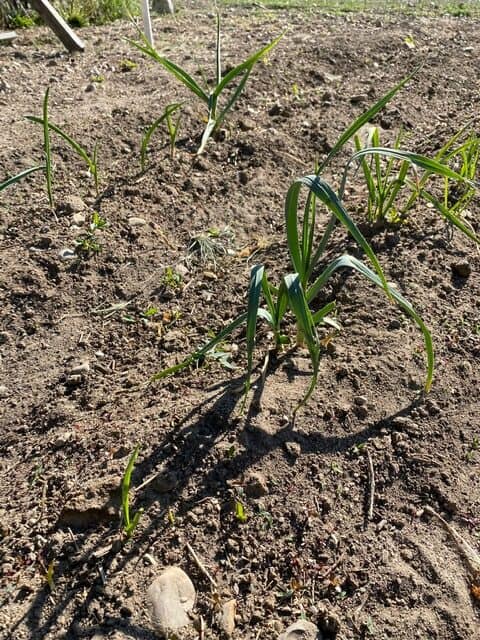
Once you have the seedlings coming up you need to thin them. Don’t thin the seedlings until they are 4-6 inches tall.  Generally once the seedlings are 4-6 inches tall they will survive.  Not all seedlings will survive, so wait until they get a little taller.

When you do thin them, you want to space them 5-12 inches apart. If you are careful, you can transplant the seedlings that you are thinning and not waste that seedling.

Popcorn irrigation

Corn will need watering. If you live in a climate where it rains a lot consider yourself lucky, because the rest of us will need to keep an eye on the soil and make sure that the corn has enough water.  

You don’t want to over water.  Generally popcorn will need about 2 inches of water a week. This will vary according to the heat, soil drainage, weather, and humidity of your garden.

Popcorn plant fertilization

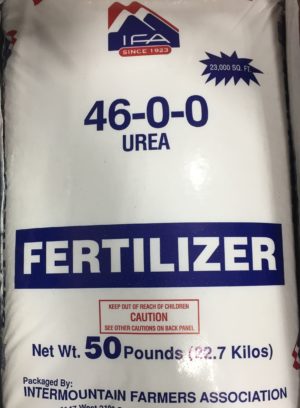
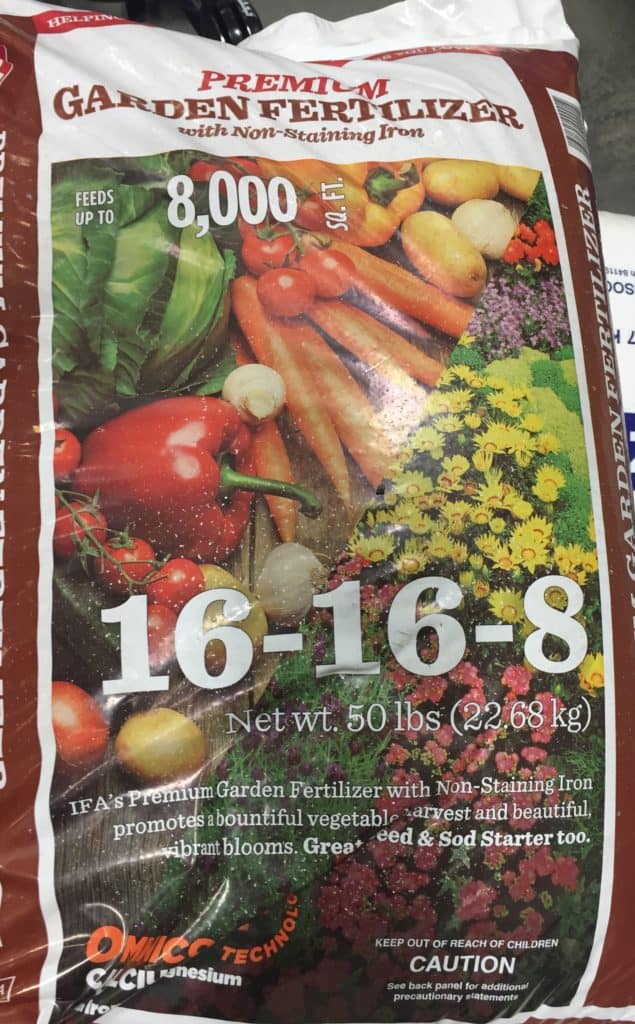
Depending on your soil you may need to feed, or fertilize your crop throughout the growing season. If you are using a commercial fertilizer one with a 12-12-12 percentage will be a good one to use.  Those numbers are usually large and in bold on the front of the fertilizer bag.  

  1. The first time you should fertilize is when the corn is about 16-20 inches tall, and has 8-10 leaves on the plant.  You should use about a half pound of fertilizer for 100 square feet.  
  2. The next time to add fertilizer is when you see the silk forming on the ears.  Use about the same amount as before.  
  3. If you see the plants are turning yellow or pale after they are growing the silk, you might need to add fertilizer then as well.  

For the more organic grower you will want to fertilize at the same growth stages as you would with a commercial fertilizer.  You can use nitrogen rich fertilizer such as decomposed manure or rich compost.  You need to use caution with animal manure. It can have too much nitrogen in it and can chemically burn the plants.  Refer to my fertilizer article for information on this.

Some gardeners will have ample nutrients and might not need to use additional fertilizer at all. This is where you need to keep an eye on your crops and know your dirt.  

How long does it take to grow popcorn?

Popcorn germinates in 5-14 days.  The plant will then grow for about 85-120 days to maturity.  This depends on the type of seed, the amount of sunlight and nutrients, as well as irrigation.  

The growing length will be listed on the package of seed.  You do need to plan ahead when to plant your popcorn and consider the length of growing season you have. 

Considerations during the growing season

During the growing season you don’t get to just sit back and watch the corn grow.  You need to watch out for a few other things like weeds and pests. 

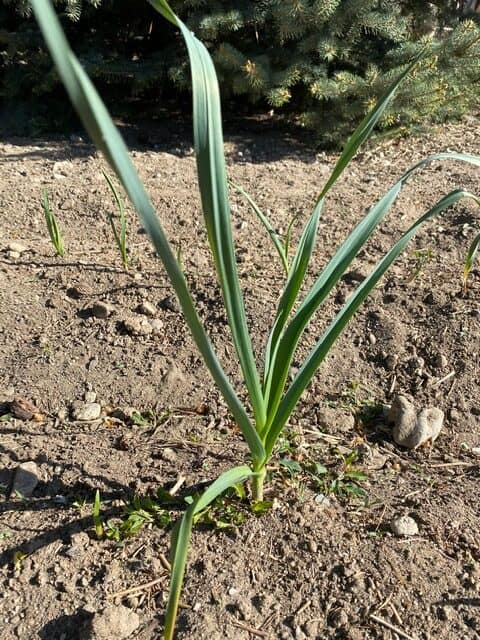
Weed control is a battle that all gardeners have to wage.  When you battle the weeds be careful of the roots of you popcorn. The roots are delicate and are the supporting structure of the tall stocks.  

One your popcorn stalks are 18-24 inches tall, you may want to pack your soil up around the base of the plants to give them support.  This has been a great technique to shore up the plants in windy areas.  It’s a method that has been used successfully for decades if not centuries.  

Pests to be concerned with vary depending on where you live.  Crows, magpies, and other birds can be devastating to seedlings.  Even your friendly chicken flock can lay waste to tender seedlings in seconds.  

Sometimes a mulch layer can hamper the birds.  Putting up a scarecrow or two may help. Putting up a tunnel of chicken wire can deter to birds a bit as well.

Another pest that has started to show up all over the place are racoons.  Racoons can take out a crop fairly quickly.  Some deterrents to racoons are: 

  • An electric fence
  • Putting a radio in the corn patch
  • Placing moth balls around your patch
  • Placing cups of ammonia around your patch
  • Putting a spotlight on your corn patch.
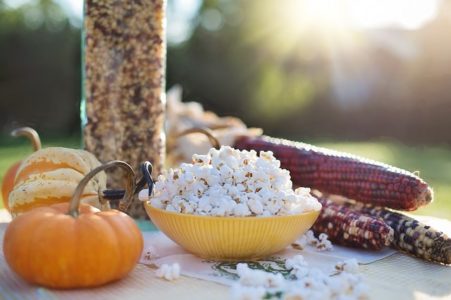
  • Planting a cover plant like a pumpkin, winter squash, or cucumber at the base of the corn.

Just realize that racoons are very smart and adapt quickly to many of these different methods.  You may need to change your racoon strategy as the season goes on.  

Some communities have live traps that you can use an have the racoons relocated.  This varies from community to community.  If you contact your local animal control they may have options available to help out.

Squirrels love corn and popcorn too.  A unique strategy for a squirrel problem is to use empty water bottles.  You can cut the top off and put the bottle over the ears of popcorn.  You need to punch holes in the bottle allowing airflow.  It’s a bit labor intensive, but can save your crop. 

Insect control for popcorn

Other pest that may show up are insects such as root borers, corn maggots, wire worms, white grubs, cut worms, fall armyworms, and earworms.  You can just squish them and kill them immediately. Keep an eye out, an as you see them you can mash them, or catch them and use them as fish bait.

The squishing method works well if you have a smaller crop and a lot of time. Other methods include pesticides or insecticides. This is where you can purchase a specific insecticide for a specific insect, or go for a more broader approach to attack several species with one blow.  

You do need to realize that the insecticide will kill beneficial insects as well.  It doesn’t discriminate.  Some insecticides have been linked to harmful side effects. Use caution when considering using any pesticides, insecticides, and herbicides.

There is research proving that many insect species are developing resistance to pesticides and insecticides. If you are growing this crop for a profit then you may want to consider an insecticide, but research it well.

Some people have introduced beneficial insects into their gardens with good results.  Some of the beneficial insects include:

  • Ladybugs
  • Praying Mantis
  • Green lacewing
  • Pirate bugs
  • Aphid midges
  • Damsel bugs
  • Braconid wasp 

How do you know when and how to harvest popcorn?

So you’ve battled all the pests and weeds.  You have irrigated and fertilized.  The popcorn plants have survived and thrived.  Now what do you do to bring the crop all the way to the harvest?  

Popcorn is different than sweet corn in many ways. Obviously you pick sweet corn when it’s ripe and juicy and super yummy.  You do not harvest popcorn when it’s juicy!  Try to leave popcorn in the field as long as you can.  Hopefully you can let the ears dry on the stalk.  When your ears are dry and the leaves are brittle and brown it’s time to pick the ears.  

At this time pull off the husks from the ears and put the ears in mesh bags.  Store them in a dry warm place to allow the kernels to keep drying. If you don’t have mesh bags you can use any receptacle that allows air in to let things dry.  Some have used nylons, milk crates, and cardboard boxes with holes punched in them.  

Here is the tricky part.  You need to have the ears and kernels dry, but not dry out.  If the kernels are too wet, they will not pop and can burn.  If the kernels are too dry they won’t pop fully and can leave some kernels unpopped.  The magic moisture content number is 13-14%.  

A way for the backyarder or hobbyist to test is to see if the kernels feel dry.  Put a cob or a few kernels in a bag in the microwave and see if they pop.  If they do then the popcorn is good to go.  

Some people will shell the kernels off of the cobs.  This process is a little rough on bare hands.  Many just leave the kernels on the cob.  In either method the popcorn needs to be stored in an airtight plastic or glass container.  When stored properly popcorn can last a super long time.  You don’t have to shell the kernels off of the cob if you don’t want to.  Some people will just throw in a whole cob in a paper sack and microwave it having it pop right off of the cob.  

If you find that your popcorn is too dry you can try rehydrating it.  Put a little water in with the kernels and they might work.  Put about a tablespoon of water per quart of popcorn and shake it up until all the water is absorbed.  Let it sit for a few days and try to pop it again.  It may rehydrate a bit.  It sure is worth a try after growing the popcorn all summer long. 

Growing Popcorn Summary

Growing popcorn is pretty simple to do.  You grow it about the same way as growing sweet corn.  

  • Plan ahead when and where to plant it  
  • Plan for enough time for your variety to mature  
  • Plan to have it not crosspollinate with other corn
  • Have enough rows to pollinate itself  
  • Harvest when the plant dies and dries out  
  • Dry it and store it properly  

It is a really fun crop to grow.  The taste of home grown popcorn is outstanding!

How to Grow Garlic in your Home Vegetable Garden!

Growing garlic seems like it might only be a professional farmers crop.  With a little planning you can grow your own garlic in your vegetable garden. It’s not very difficult, and can bring great tasty rewards at harvest time.  The timing is the key. 

How difficult is it to grow garlic?

Garlic isn’t particularly difficult to grow.  You plant it similarly to planting tulips or daffodils and other bulb plants.  You plant in the fall and let it winter over then you harvest next summer in July-ish depending on the growing zone where you live.  

Garlic has some maintenance steps, but has the same general issues as other vegetables. You need to have good soil for it to grow, water, fertilize,  and weeding of course.  It is a relatively simple plant to enjoy.

Garlic growing in the garden.

Where can you grow garlic?

Garlic can be grown worldwide.  As a general rule you need to plant it in the fall and let it go through a dormant cycle through winter.  The winter dormancy it an important step.  If the bulbs don’t experience this cold, you won’t get very large bulbs to eat at harvest time.  

Once the temperature begins to warm up the bulbs will begin to grow.  People enjoy growing garlic from all over the world in their back yard.  You just need to follow a few simple steps and you can grow garlic from China, Russia, Italy, Sicily, Poland, etc. right in your own backyard. 

Can tropical places like Florida or Costa Rica grow garlic?  

Yes you can grow garlic in these areas.  You need to add a step or two to the process.  What you need to do is put the garlic bulbs through a dormancy phase, or a phase that mimics a winter season. The term for this is vernalization. The bulbs need to experience an extended period of cold.  

This can be accomplished by putting the bulbs in your refrigerator.  You need to keep the bulbs under 50 degrees Fahrenheit for 4-10 weeks before you plant them.  From the research I have done it seems that putting the bulbs into a freezer is a bit too harsh.  Using a refrigerator is a good way to have it cold, but not too cold.  It does take quite a commitment to leave a space full for that long in your refrigerator. 

Another consideration is water.  Sometimes the more tropic climates get a bit too much rain for the garlic plants. Garlic needs to have about 2 inches of water a week.  You may need to plan accordingly to have the garlic watered enough but not get waterlogged.  Perhaps safeguards against too much water will be needed.  

Some growers have cultivated varieties of garlic to be grown in more warm climates. Some of these include:

  • Creoles
  • Asiatic
  • Hardnecks
  • Marbled Purple Stripe

Many local gardeners are using heirloom varieties that have been adapted to the local conditions.  If you reach out to the local growers you may find some gems that will work where you live.

Once you have the vernaliztion worked out, the varieties decided, and watering figured out;  you grow it similarly to everywhere else.  WE will discuss growing garlic a little bit later in this article.

What kind of garlic can you grow?

There are lots of varieties of garlic available to pant.  You can plant the kind you find in the grocery store, but you will get mixed results. Sometimes those garlic bulbs have been treated with a sprouting inhibitor.  It’s better to get garlic that is specifically meant for planting and growing.  

The garlic comes down to 2-3 basic types.  The hard neck variety, the soft neck variety, and the elephant type.  All can be grown in the home vegetable garden.

Hard Neck Garlic 

Hard neck garlic has a stiff stem that grows up from the center of the cluster of bulbs.  Hardneck varieties are stronger in flavor and can vary in flavor from variety to variety.  Many hardneck varieties have been handed down for generations. Hardneck garlic varieties can handle harsher winters with colder climates.

Soft Neck Garlic

Most garlic available in the grocery store is the soft neck kind. Soft neck garlic is a little more mild in flavor.  Soft neck garlic also grows better in climates with a more moderate winter. Soft neck garlic stores well.

Elephant Garlic

Elephant garlic is more of a sort of garlic than a true garlic.  It’s more like leeks than garlic.  They can grow huge and be a really fun addition to the garden.  They have a more mild flavor and like the name suggests they have huge bulbs.

Heirloom Garlic

When it comes to garlic a fun thing to do is to get associated with local growers that have heirloom varieties.  Some of these varieties have adapted to the local climate and will grow well.  Some of the histories of the garlic is interesting. Some varieties were brought in through immigrants on Ellis island.  There is a treasure-trove of varieties from local heirloom growers and seed exchangers.

Planting garlic

Planting garlic is relatively easy.  You prepare the ground or garden bed in the fall.  Depending on what growing zone you are in you plant in October-December. The soil should be soft and free from debris as much as possible. Dig, till, or spade down 8-12 inches and loosen up the soil.  Now is a good time to fertilize and till the fertilizer in mixing the soil up well.

The bulbs are separated from the cluster and planted with the point up and the root part down.  The need to be planted 6-10 inches deep and 6-8 inches apart.  You can shorten the spacing apart if needed, but try not to crowd them.

You plant them similarly to other bulb plants like tulips, daffodils, or crocus. The key is to get the roots beginning to grow in the fall and then after the dormancy in winter they take off and grow when spring hits.

You can still plant garlic in the spring however.  You need to get the bulbs in as soon as you can get onto the soil.  They will grow well if the bulbs have been left in the cold allowing for vernalization, or the dormant process to work.  Garlic in planted in the spring may be a little behind in the growth, but will produce good result a little later. 

Young garlic plant.

Growing garlic

Growing garlic is relatively simple.  You need to water it, but not drown it.  You need to keep the weeds under control.  Be careful when weeding garlic.  Pulling weeds near the plant can uproot the whole thing and damage the plant. You also need to fertilize the plot where you are going to plant.  I have an article on fertilizer here.

One thing that I have experienced is chickens and birds digging up the new shoots in the spring. The garlic will be one of the first plants to break the ground and grow in the spring.  These tender green shoots are a magnet to birds and especially chickens. I usually roll out some chicken wire fencing on top of the beds of garlic.  This allows the snow, rain, and sunlight to hit the bed, but protects the new shoots of garlic as they grow.

If you are growing the hardneck variety of garlic, in May or June you will notice the plants growing leaves and a center curly stock will show up.  This is the garlic scape.  Most growers will snap off this scape.  This will allow the plant to focus more growth and nutrients to the bulbs instead of a flower.  The scapes are really tasty and can be used in all kinds of recipes. 

Once you have tasted home grown garlic you will probably want to keep growing it.  You can use the bulbs from the previous harvest to plant with. It’s a good rule of thumb to pick the biggest bulbs to plant.  Bigger bulbs will produce bigger bulbs.  

Harvesting garlic

Harvesting garlic is pretty straight forward and simple.  You will notice the plants starting to die generally towards the middle and end of July.  You just dig beside the plant using caution to not dig too close cutting the bulbs. Pull the plants out and the bulbs will be attached to the bottom of the plants.  

The garlic bulbs are a bit tender at this point and should be handled with care.  The garlic plants should be left in a warm dry place out of the sun to cure.  It takes 4-6 weeks to cure garlic depending on the humidity and temperature.  You will notice that the skin around the bulbs will be like dried fragile paper.  

When the garlic is cured you can trim off the stem and leaves.  You don’t want to trim them too short, about an inch or two above the bulbs.  If you trim the stem and leaves too short you run the risk of cutting the bulbs and drying them out.

Storing garlic.

There are a few different ways of storing garlic. Once the garlic is dried and the stem and leaves are trimmed you can store it in a cool dry place.  Containers that will allow air to get to the bulbs is what you need. Mesh bags, crates with holes like a milk crate work well. This will have a shelf life of about 8-10 months.

A traditional method of storing garlic is weaving the leaves together creating a chain to hang in the kitchen or storage room.  Soft neck garlic it a little easier to do this with.  Just leave the leaves on and don’t trim them, use the leaves as the weaving material.  It has the same shelf life of 8-10 months.

You can dry garlic, but be warned this can be a rather odiferous  opportunity.  Peel the cloves and slice them into even slices.  Start your drying temp a little higher then turn it down after about an hour. You need it to dry not cook.  Star around 140 degrees Fahrenheit for a couple of hours, then lower the temperature to 125-130 until it’s dry. How long you need to dry it will vary on the humidity. Once it’s dry you can grind it up for powder or blend with salt to make garlic salt.

You can freeze garlic in whole cloves.  Some chop up garlic, put it in a freezer bag, and break of the amount they want as needed. Others will blend the garlic with olive oil or vegetable oil, freeze the paste in a freezer bag and use what they want. Freezing the garlic increases the length of storing the garlic.

Another method of storing garlic is in vinegar.  Just submerge the peeled cloves in vinegar.  This adds a great flavor to the vinegar as well.  It’s fun to experiment with apple cider vinegar, rice wine vinegar, red wine vinegar, etc.

Summary 

You can for sure grow garlic in your garden!  You just need to:

  • plan ahead a little bit
  • prepare your soil by tilling and fertilizing
  • plant the bulbs in the fall as you would other bulb plants
  • take care of the plants when they sprout in the spring
  • weed and water as you would normally
  • snap off the scapes when they show up in May or June
  • harvest the garlic when the leaves start to dry and turn brown
  • let the bulbs cure and dry for a few weeks
  • store and enjoy.

What is a Keyhole Garden?

I live in the Western United States and I come from several generations of gardeners.  I am always on the lookout for good gardening ideas and tips. One kind of garden that has intrigued me since learning of them is a keyhole garden.  It really looks like a great idea and could solve quite a few issues that we have in the west with water usage, land usage and crop productivity. 

A keyhole garden is a raised bed garden that is usually shaped in about a 6-12 foot circle with a center basket where table scraps and vegetation can be composted and fed to the garden. There is an access path into the center so from a top view it looks like a keyhole.

Layers of compost, cardboard, phone books, and manure are used.  In the center you can put in all your table scraps to have them composted and utilized in your garden.  

The benefits are that you can easily compost your table scraps, have easy access to all your vegetables, can grow a ton of crops, and conserves water.  

The idea of a keyhole garden sounds really great for many situations.  In the West water is becoming increasingly a concern.  Many areas in the West  have had years of drought.  There is increasing demand on water resources, due to all the land development for homes and businesses.  We are needing to think of different ways to conserve water and use it more wisely.  

There is also increasing competition for good arable ground.  Sadly much of the good farm land is being used for home and business development. Larger plots of ground to be used for gardens and farms are becoming fewer and farther between.  

Alternatives are becoming increasingly necessary to grow gardens and have them be productive. A keyhole garden is a good way to address the issues of space, water use, and fertile ground. 

History of a Keyhole Garden and where it is used

Keyhole gardens were made popular in Africa.  The super dry arid ground is challenging at best to grow a garden.  The keyhole garden was developed to use water wisely and develop fertile soil for gardens to flourish.  

In Africa the keyhole gardens and located near the kitchen. Kitchen scraps are put into the center of the garden and become compost to feed the rest of the garden.  Often the greywater from the kitchen will be the source of irrigation for the garden.  It’s pretty ingenious to use everything so efficiently to get such great results.  

The concept of a keyhole garden is now branching out worldwide.  It’s been embraced in the U.S. where similar challenges of water and soil to Africa can be found, and has been very successful.  

As the concept of Keyhole Gardens is going around the world adaptations are beginning to show up.  So a Keyhole garden is something that you can tailor to your needs.  It can be used in many environmental conditions besides the harsher arid ones.

Benefits of a Keyhole Garden

There are some really great benefits that are found with keyhole gardens.  One great advantage is that they don’t take up much room.  On average they are about 6-12 feet in diameter and about 3 feet tall. You can also adjust the size to whatever you want, but this size seems to be the most efficient.   

A keyhole garden can be constructed from whatever you have available to work with.  You can use rocks or stones that occur naturally on your place.  You can use tires, broken concrete, rammed earth bags, bottles, etc.  You can also use retaining wall bricks, wood panels, or cast concrete for a more finished look if desired.  

When growing a keyhole garden you can minimize use of water and fertilizer.  It creates a more efficient garden.  As many know, efficient use of water is becoming increasingly important.  

I’m not sure greywater from the home is a legal option in all locations.  You may need to  research what is allowed and what is not where you live.  For those places that can use greywater it is a huge saving on water that has already been used once and can be used again.

Composting your table scraps is easily done with a keyhole garden.  Instead of throwing you scraps away, or grinding them down the garbage disposal, you can use your table scraps as a resource to grow vegetables.

Crops to use in a Keyhole Garden

A keyhole garden is generally planted with vegetables that don’t take up much room.  You can plant intensively and densely to get a great yield. Many of the typical plants used in a keyhole garden are:

Leafy greens:

  • -lettuce
  • swiss chard
  • arugula
  • spinach
  • cabbage
  • kale
  • kohlrabi
  • cellery

Root crops:

  • onions
  • carrots
  • garlic
  • raddishes
  • beets
  • parsnips
  • leeks

Herbs:

  • parsley
  • oregano
  • basil
  • mint
  •  sage
  • rosemary
  • thyme
  • comfrey
  • lavender
  • chives
  • anise
  • dill

Some people choose to have their garden to have a theme.  For instance you can have an herb only garden, or a salad garden focusing on stuff for salads, or even a flower garden.  If you have a garden located right outside your kitchen you can have fresh stuff to eat all the time.

Limitations of a Keyhole Garden

As with everything there are some limitations to a keyhole garden.  The major limitation is the types of plants you choose to grow in them. Plants that take up large areas to grow might prove to be challenging in a keyhole garden.  Tomatoes, cucumbers, squash, corn, and pumpkins could be difficult. I am sure that they can be grown in them, but it will take some planning.

It can be a bit of a chore to get a keyhole garden set up.  You have your work cut out in laying out a retention wall.  You also need to create a center basket for composting.  You have to haul in the materials to create the bed of the garden.  If you are not interested in a little hard work invested for a big return this may not be for you.

How to build a keyhole garden

When constructing a keyhole garden using what you have around you or what is available has been the design of choice.  Necessity has been the mother of invention with these.   You can use new materials from the hardware store, or just put to use what you have already available around your house and neighborhood.

Measure out a base of 6 feet.  In the center you have a receptacle for the composting scraps.  The center basket can be made out of screen material, a barrel with the sides perforated, sticks, or buckets that are perforated.  Necessity is the mother of invention here. 

There needs to be a slight slope from the middle of your garden to the outer walls.  The way it receives water and nutrients is from the center and it wicks or leaches outward to from the center.  

You mark out a path to the center on one side.  Build up the sides to the height that you would prefer.  Generally they are around 3 feet, or one meter tall.  Keyhole gardens can slope down to no wall on the outer edge as well.  It just depends on your wants and needs. 

You can vary the size and shape  of your keyhole garden if you want to as well.  Some prefer a rectangle, oval, or a more organic shape.  The circle will be the most effective as far as efficiency of distribution of water and nutrients from the central feeding basket to the outer edges.

Once you have the walls build up start the first layer.  The first layer is the drainage layer.  You can use rocks, gravel, chunks of concrete, etc. Having larger rocks and stones near the center with allow for better drainage.  Without proper drainage you can end up with a swamp of yucky smelly stuff that won’t grow much at all.

Next you build up the bed by layering compost and soil and fertilizer.  This is where some have incorporated the use of cardboard, phone books, magazines, etc.  Layering the cardboard and such with soil and fertilizer will add a great water and nutrition storage system.  This is where some gardeners find that cardboard is really beneficial to the garden, and with all the online shopping cardboard is readily available.

The top layer is the soil that you plan your seeds and plant in. You may want to add a cover to the center. You can keep animals from falling in and getting stuck.  You can reduce the evaporation of water by having the center composter covered.  You do need to still have air flow to the compost, so don’t put a air tight cap on it.  

Using your keyhole garden

Once you have your keyhole garden set up, using it is pretty simple.  You dump table scraps into the center and water it in if you need to.  As the center scraps decompose it turns into compost and feeds the rest of the garden. 

Some gardeners have found that adding earth worms to the compost helps even more.  Earth worms speed up the composting as well as creating fertile soil.  The worms also add oxygen, loam, and beneficial bacteria to the soil.

Guide to Garden Fertilizer

How you fertilize can really help or hinder how your vegetables will grow. In this article we will discus what you will need to know about fertilizing your garden.

Fertilizer is an essential part of every garden. Fertilizer is the nutrient that the plants use to grow and produce

It may not be the funnest part of the garden growing process, but it sure is a necessity to understand and know about. Here are some things to think about and some of the options available.

Determining what kind of fertilizer you need

First of all you need to understand what your garden plot needs.  Not all soil is created equally.  Some soil is full or nutrients and some soil has been depleted of nutrients  and needs to be amended with fertilizer.  The best way to see what your ground needs is to have the soil tested.

There are several do it yourself soil tests that you can perform. They mostly tell you the Ph, the alkalinity or acidity of your ground.  They don’t really have a good breakdown of the other nutrients that are in your soil, but they can let you know if you have an acidic or alkali soil.  

The better thing to do in my opinion is to have your soil tested by a lab.  Many agriculture extension service offices are available all over the world.  I have always had a good experience with them and their tests are really accurate.  It will tell you what you have with your soil and what is deficient.  With this information you can add the fertilizer and amendments that you need.

What do all the numbers mean?

If you choose to use commercial fertilizer there are a few things to understand.  Commercial fertilizer has some numbers on the package letting you know what the contents are.

There are three numbers in bold on the front of the fertilizer bags.  The first number is nitrogen, the second number is phosphorus, and the third number is potash.  

When you get a soil test it will show you what kind of fertilizer you need.  Match what you need with the number on the front of the fertilizer bag.  If you need higher nitrogen then get the fertilizer marked higher in nitrogen.  If you need more phosphorus, get higher phosphorus, etc. 

Follow the recommendations on the bag of fertilizer.  The instructions will give the amounts needed per square feet.  Make sure you get the fertilizer where you are going to plant your seeds and plants.  

If you are running on a budget, you can isolate the fertilizer to the specific sections you are going to plant.  However, it’s much easier to broadcast the fertilizer over the entire plot and till it in.

You can also get fertilizer with only one nutrient in it depending on your needs.  Often nitrogen is needed in vegetable gardens for plants where the vegetables are above ground. With root crops such as potatoes potash is needed.  You can get fertilizer that contains just the ingredients you need for your garden if you desire.

Many nurseries an local garden shops will have a general vegetable garden mix that will meet most needs of the home and backyard gardener.  The folks who work there often have great tips on what is needed for the local growing area.

You can often get more information chatting with a knowledgeable person for 5 minutes than you can get in an hour of reading. However, not all experts are experts, so research before you take everything you hear as the best practice.

CAUTION

Be careful to make sure that your fertilizer is not a weed and feed type for your flower or vegetable garden.  

Many lawn and grass fertilizers will have what is called a weed and feed type of compound in it.  The weed part is an herbicide that kills everything other than grass.  This can kill most of the plants in your vegetable garden.  Look carefully and make sure it doesn’t have the weed herbicide. 

However if you are fertilizing your lawn, the weed and feed will fertilize your lawn well.  I still stay away from the weed and feed type.  I keep honey bees.  They find some really great sources of nectar with the weeds found in lawns.  

Other beneficial bugs use the weeds in lawns for a food source as well.  So, use a weed and feed if you must, just be careful and cautious when doing so.

You will want to keep the grass clipping from a weed and feed lawn off of your vegetable and flower garden as well. The herbicide can often last into the clippings and kill off your vegetables and flowers. We have a great article about it here.

Alkalinity and Acidity of your soil, Ph.

You may also need to amend the soil to create the best Ph. For your plants. Where I live the soil tends to be a little more alkali and the acidity needs to be raised.  I have increased the acidity with adding pine needles. You can use vinegar to help acidify as well.  Trying to be precise with this can be challenging.  It’s a little more precise to use commercial amendments to adjust the Ph of your soil. 

There is usually limestone and Sulphur amendment products available at your garden center or nursery. Limestone will bring the acid down, and Sulphur will help to acidify.  When it comes to the application of these amendments it’s usually done with a simple drop spreader, the kind you use to spread fertilizer on your lawn.    

Organic fertilizer

Organic fertilizer has been used for centuries.  Animal manure is really great to use on your vegetable garden.  Composted or degraded manure is generally what is used.  

The composted stuff is a lot less odiferous and doesn’t offend neighbors as much.  However, the fresh manure can be used with excellent results.  You definitely need to plow under or spade under the fresh manure.  

Some people even will keep chickens on their garden plots to dig and fertilize as they live there. I will cover that in another post.  

Not all organic fertilizer is created equal.  For instance, poultry manure is very high in nitrogen. Poultry fertilizer is really good if you plan ahead.  I use poultry fertilizer in the fall.  The extra nitrogen breaks down vegetable matter, leaves, and straw throughout the winter.  This leaves good ground in the spring ready to be used for planting.  

I have a neighbor who has horses.  He uses the horse manure every year and has excellent results. 

When using manure you need to take caution on what is used as bedding with the manure.  If straw is used for bedding, it’s is easily compostable and adds humus to the soil.  Some straw could have been treated with an herbicide while growing and the might stay residually n the straw. If you can ask the producer of the straw if they used herbicide when growing it. If they did use an herbicide you may want to think twice about using it on your garden.

Sometimes wood shavings are used for bedding.  Wood shavings and chips are fine most of the time.  Wood shavings and sawdust from pressure treated lumber can have chemicals that are detrimental to the soil.

The amount of manure you use can vary a bit.  As a general rule you want to spread the manure evenly and use 20-30 pounds for every 100 square feet.  Be careful not to use too much, it can just be a bit too strong and hamper the growth of your plants.  

Adding straw, leaves, and wood chips to a garden as fertilizer is good practice for sure.  All these fibrous materials add humus to the soil and hen with the loam.  

An important thing to consider is that all these fibrous materials will use up nitrogen to break them down.  So when you add leaves, straw, wood shavings, etcetera to your garden, you need to make sure to add extra nitrogen to replace what is used by the decomposition of all the stuff you are adding.

Cover Crop and Green Manure

Another method of adding humus and nutrients to the soil is by planting a cover crop.  Sometimes these cover crops are known as green manure. 

It’s basically planting an area with a lot of seeds of one kind to suppress weeds and to add nutrients.  Winter rye, buckwheat, and red clover are a few examples of a cover crop.  This method is pretty simple and effective.

To Summarize

In summary, fertilizing is pretty simple and easy to do.  A good thing to do is to get your soil tested to see what fertilizer and amendments you need to add to your garden to get into shape for growing your plants.  

Soil test kits are available online, at your local nursery, garden shop, and farm/ranch store.  A more effective and accurate test can be done by a lab through your local extension service. We have a. list of all the extension services in this article here.

Once you know what is needed to fertilize and amend your soil you can get commercial or organic fertilizer and take care of the needs of your garden.  Amendments area also available to adjust the Ph of you soil of needed.  

Once added make sure you follow the directions on the package for the amounts needed.  Incorporate the fertilizer through tilling, spading, and/or plowing.

The Complete Guide to Cover Crops and Green Manure.

I’ve heard the phrase cover crop and green manure used for vegetable gardens.  I wanted to research the idea and here is some information I found out about it.  It looks pretty simple and seems to be really effective and a good idea to build up your garden naturally.  However there are some cautions and things to think about when applying this technique to your garden.

What is a cover crop and green manure

A cover crop is a crop sewn to cover up, or use the ground that you don’t have in production.  It’s a technique used to hamper weed growth, attract beneficial insects, aid in water retention, add nutrients, and bring up nutrients from lower in the soil.  Cover crops are generally used on larger plots of ground, but is being used more and more on smaller garden plots and grow boxes.

The initial crop is called a cover crop.  When that crop is tilled under it becomes green manure.  This green manure adds humus and nutrients to the soil. This method creates a good loamy soil full of nutrients ready for plants and seeds. 

Different Cover Crops

There are a whole variety of cover crops available to use. Generally the cover crops break down into two basic types, legumes and grasses.

Legumes are nitrogen fixing plants.  The legumes have nodules on the roots of the plants. These nodules work in conjunction with bacteria in the soil to take nitrogen from the air and fix it in the nodules on the roots of the plants.  The nitrogen is transformed through this process to become useful for plants. When the cover crop plants die and decompose it leaves this beneficial nitrogen in the soil available for nitrogen using plants.  

The grasses are a hearty and easily grown cover crop. Caution should be used when planting grasses as a cover crop.  Sometimes if you don’t process the grass at the right time it can become more of a nuisance then a benefit.  Winter wheat and winter rye can leave a pretty extensive root structure that is tough to deal with.  Also many of the grasses will reseed themselves if you don’t mow, or till them in before they go to seed.  You might end up with a problem with all this grass growing where you don’t want it to.

Green peas make a great nitrogen fixing cover crop.

Suggestions of Cover Crops

-Legumes

  • -vetch
  • clover 
  • beans
  • peas

 -Grasses 

  • -annual ryegrass
  • oats
  • rapeseed
  • winter wheat
  • winter rye
  • buckwheat

 Uses for a cover crop and green manure

Both grasses and Legumes will work well depending on what you want to do. Here are some benefits of using a cover crop: 

  • Add structure to sandy soil
  • Adds and helps retain nutrients
  • A deep rooted cover crop can be used to break up hardened soil
  • Draws up nutrients from deep in the soil allowing plants to utilize the nutrients
  • Prevents soil erosion
  • attracts beneficial insects such as bees, butterflies, and other polinators
  • Aids in water retention
  • Helps with weed control
  • Adds visual interest and a pleasing look to your garden

How to plant a cover crop and turn it into green manure

Sewing a cover crop is relatively simple.  The ground needs to be prepared by clearing the ground of debris, rocks, dead vegetation, etc.  Work the ground with a rake or spade as needed.  

The seed can be broadcasted over the area.  You can use a simple hand broadcaster, the kind used to spread fertilizer on your lawn.  You can also just broadcast with your hand spreading it as evenly as you can.  

Once you have it scattered you rake it in, making sure the seeds have good contact with the soil.  Lightly water in and the plants should germinate.

When you have your cover crop germinated and growing, it’s just a matter of maintaining.  Water as needed.  

Make sure you keep an eye on crops that you don’t want to reside themselves becoming a nuisance in the long run.

Once it is time to turn the cover crop into green manure it’s a simple process.  When sewing a cover crop in the fall the first frost or two will kill cover crop plants.  Then you can simply till, spade, or plow the crop in and incorporate it into the soil. 

If you are growing a grass you may want to mow or cut the grass before you till it in.  The grass might be a bit too much volume for your ground, or you may want to keep the grass from reseeding itself.  

When tilling in the spring you need to incorporate the cover crop into the soil with a tiller, spade or plow when you decide.

When to plant a cover crop

Timing is another consideration when planting a cover crop.  Often home gardeners will use the cover crop method in the fall.  Be sure to start the cover crop 3-4 weeks before the first expected frost. 

Some home gardeners will use a cover crop in the spring before they plant the warm/hot weather crops like peppers and tomatoes.  

If you grow a spring cover crop you need to watch carefully.  Cover crops can go to seed and reseed themselves causing a problem and becoming a weed

You can basically plant a cover crop whenever you desire.  You just need to be sure to manage it well.  Consider the first expected frost, or manage the crop before it becomes a nuisance or weed.

As a general rule most home gardeners will want to plant in the fall about 4-6 weeks before the first expected freeze, and in the spring before the warmer season crops are panted.  

If you are starting a new garden plot you may want to plant a few sessions of cover crops and till it into the soil.  This can aid in adding nutrients, soil loam, and water retention to your garden plot.  

Choosing a cover crop

Choosing what crop to use just takes a little research on what would be best for your garden.  

If you are lacking in in nitrogen, legumes would be a good way to go.  If you need your hard ground broken up maybe a more deep rooted cover crop could break it up.

If you have a weed problem, grasses might be a way to suppress the weeds. If you have sandy soil the root structure of grass may aid in building the humus or loam of the soil.  

When making a choice on what cover crop to use you may want to try a small spot instead of planting a large area.  Try it out first and see how it works out.  You can try a few different cover crops and see which works out the best.

Summary

In summary, it looks like planting a cover crop and turning it into green manure is a really viable way to help out your garden soil.  It doesn’t appear to be very difficult if you plan ahead.  

You do need to plan ahead to avoid making a cover crop a nuisance.  Using a cover crop method has been used successfully by larger farms, and is increasingly being used by the home gardener.

How to prepare soil for a Vegetable Garden

I have been growing a garden my entire life and have had several neighbors over the years ask me  how I prepare the ground for a vegetable garden?  This is a great question, that I thought others may want to know as well, so here is how I prepare my garden spot.  

To prepare the soil for a vegetable garden you will need to loosen the soil by spading or plowing 10-14 inches deep and till in a good garden fertilizer.

The major thing you need to remember while spading, tilling, or plowing, is to go down 10-14 inches deep and loosen up the soil.  Loose soil allows the water to get to the seeds and roots of the plants.  

Loose soil also lets the roots of the plants grow freely without the hard ground to bind up the roots, thus hampering growth.  

The other major thing to think about is how fertile your soil is.  You will probably need to add fertilizer, especially if you have used the ground before.  So it is a great idea to till and spade and incorporate fertilizer into the soil as you are preparing it.  

You will want to have the fertilizer disbursed throughout the soil to allow the plants roots to access it as they grow.  We have a great article on fertilizer here.

Preparation

I often prepare the ground in the Fall, which makes the garden plot relatively easy to have ready in the Spring. If you leave excess weeds, growth, or last years dead plantings to remain all winter long, it can be more difficult to get things going in the Spring. Preparing the ground in the Spring is fine, it’s just a little easier to prep the ground in the Fall if you can.

When you spade, till, or plow the garden spot in the Fall;  the old vegetation will break down and decompose through the winter.  This will add beneficial nutrients and humus to the soil.  

The humus is the fluffiness of the soil, also known as the loam of the soil.  More humus means lighter soil, adding more room for roots to grow, and more room for water to get to the roots of the plants, which means healthier happier plants. 

Planning

There are however, some other things to consider when starting a vegetable garden plot.  Here are some things that I have found that have helped me over the years.

1- Choosing a Size for Your Garden

First, begin with the end in mind. Plan ahead on what size of garden you wish to grow, where it will be located and what types of vegetables, herbs, flowers, or berries you want to grow there. 

The size of a garden plot you choose to grow will vary depending on how much land you have available, how much area the plants need for growth, and how much work you are willing to put into the project.  The more land or area you use, the more work that will be needed to maintain efficient growth.  More land cultivated also means a better yield, (or more delicious vegetables !!!)  

My family loves vegetables, so our garden has always been pretty good sized.  With a larger garden plot you can also plant a lot of different varieties of plants.  This past year, our garden included: garlic, onions, peas, bush beans, black beans, navy beans, Anasazi beans, red cabbage, green cabbage, kohlrabi, lettuce of all kinds, swiss chard, cucumbers, peppers, tomatoes, summer squash, zucchini, butter nut squash, banana squash, acorn squash, hubbard squash, corn, raspberries, black berries, currants, potatoes, watermelon, cantaloupe, carrots, and beets.

You can always explore fun and different varieties of plants with your own garden, which is what I highly recommend. Let your garden be something fun for the whole family and neighborhood. Feel free to try new stuff and you might find some really great vegetables and flavors that you have never even thought of or tasted.

2. Choosing the Location of Your Garden

Choose your garden location wisely.  Most gardens need some source of water for irrigation.  If you have a small plot, you could feasibly irrigate with a water can or bucket.  You can also string a hose to the plot, or hire a neighbor kid to carry water for you.  However where I live water is in high demand and we have to really plan how we irrigate, (including the purchase of water shares).  I will explore methods of irrigation in another post, but please think ahead. Your water source is a vital element when planning ahead for preparing your ground for a garden plot.

Sunlight is also a critical consideration when deciding where to put you garden plot.  Without the sun, your yield can be lessened, or your garden may even fail. It is best if you can find a location that will allow full sunlight coverage on your plants unless your seed packet says otherwise.  

Most garden plots will have shade during some time of the day. That’s ok, but try to find a place where your garden can get the greatest amount of sunlight possible.  Some people have explored growing vegetables in the front yard and had great results.

It is also important to consider accessibility to your garden, and potential growth interruption such as foot traffic, fence and property boundary lines or other backyard projects as the season changes. Remember to plan for weeding, watering, and harvesting your garden.  Planting is quite simple, and you can plant vegetation almost anywhere, but you may not always be able to access where plants grow.  It is difficult to move the plants after they are growing, so think ahead.  

I remember a neighbor of mine planted their garden in a great spot for sunlight and irrigation and the garden grew really well.  The plants were vigorous, and the family was so excited about the vegetables that were growing.  They unfortunately didn’t plan on needing to move their camping trailer for some vacation trips they had scheduled for the summer.  It was sad to see those really beautiful plants get squished when they pulled the trailer back and forth over the garden.  

Another neighbor had some children that didn’t embrace the garden as well as the parents did.  A super competitive football game went awry and the tomato patch got pummeled. Needless to say, look ahead on where you are going to put your vegetable garden plot.

3. Choosing what to Grow

Perhaps the most exciting step, is choosing what you are going to  grow.  This also will require some forethought. Some plants only need a few feet, other plants need a lot of room.  Pepper plants don’t require as much space as tomato vines.  Cucumbers will spread all over as well as squash and melons.  Bush beans use less room than pole beans.  

So plan ahead on what you are going to plant.  Most of the guidelines on spacing of plants are on the seed package.  Many of the workers in a local nursery will have suggestions on how much room a plant will need to grow properly.

4. Choosing a Fertilizer for your Vegetable Garden

It is likely that you will want to add nutrients or fertilizer to your garden plot. Fertilizer is a loaded topic for gardeners. There a many differing opinions on fertilizer and everyone seems to be an expert.  

I think personally you should try to be as natural and organic with your fertilizer as possible.  If you think about it, you are going to be eating the food you grow.  I have always believed that a natural input will yield a stronger and more nature supported output. I don’t want to say that you should never use commercial fertilizer, just learn about it before you use it.  I have used a mix of natural and organic over the years, and have had good results from both.  

Often you can just add some good garden mix fertilizer from your local nursery, farm, ranch, or hobby store.  If you have access to composted or degraded animal manure it’s really great for your ground.  However you need to be careful with using manure!  It’s powerful stuff.  

Poultry manure is particularly strong and can hamper the growth of your garden.  Often it is referred to as being too “hot” or strong for the garden.  I find that when you use the strong stuff you can use those strong properties to your advantage. I have written a post on fertilizer for those who want to learn more.

To summarize

What you need to do to get your ground ready for a vegetable garden is:

  1. Plan where you want it
  2. Plan on how to water it
  3. Plan on the location
  4. Plan on what you are going to plant and grow
  5. Till or spade 10-14 inches deep to loosen up the soil
  6. Work in fertilizer during the tilling, spading, plowing phase to incorporate the fertilizer throughout the soil