Many farmers or property owners face the problem of yellowing leaves in their trees, plants, and crops. This problem is seen most often in areas of low precipitation, and signifies a lack of nutrients. There are numerous causes for this yellowing color, as well as numerous methods to correct the problem and potentially deliver nutrients back to the plants.
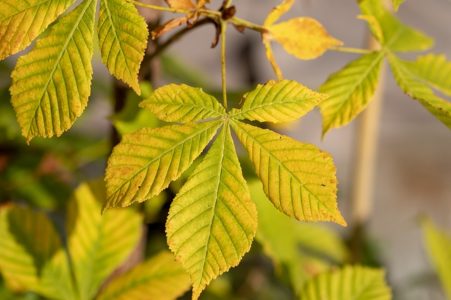
One sign of trees that are lacking in nutrient content is a yellow appearance with green veins in the leaves, often causing the leaf or plant itself to appear sick and yellowed.
The cause of this yellowing can be a number of things but is typically a lack of the plant getting nutrients. This yellowing is called chlorosis. There are a few clues to look for when diagnosing possible nutrient deficiencies.
A common nutrient deficiency for my area is the lack of iron getting to the plant. However, there is a more to it than just adding iron to the soil to fix the issue. I’m going to let you know what I found about this issue and some possible solutions.
Nutrients are mobile and immobile
Nutrients are taken from the soil through the roots. The nutrients that are used by the plant can be mobile or can be transported from one part of the plant to another depending on need and stresses.
Some nutrients are not mobile throughout the plant. These nutrients can be brought into the plant through the roots and into the plant the same as mobile nutrients. Once these immobile nutrients are brought into the plant they stay in that part of the plant.
Here is a great article on the nutrients that plants need. It also explains the mobile and immobile nutrients.
You can determine if the nutrient deficiency is a mobile nutrient or an immobile nutrient by where the chlorosis occurs. A quick observation of whether the chlorosis is on new leaves, or old leaves is very informative. If the older leaves have the chlorosis, then the nutrient deficiency is mobile nutrient deficiency. If the newer leaves show the chlorosis, then it’s an immobile nutrient deficiency.
Should I just dump on a bunch more fertilizer to fix my plants? NO!
Many people will just keep adding fertilizer to their gardens and orchards and expect that to take care of their chlorosis issues. This can be exactly what the plants do not need. When you add too much fertilizer nitrogen and potassium buildup can harm the roots of your plants with too much salt build up. Phosphorous can also build up and keep iron, manganese, and zinc from being absorbed.
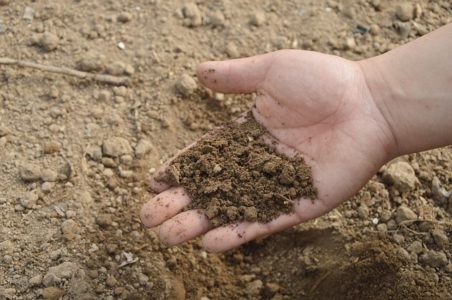
The best thing to do is to get your soil tested. There are some soil test kits available that you can do yourself. These kits do a fairly good job at finding the pH of your soil. This is the acidity or alkalinity of your soil. This may be all you need, but I would recommend getting a more thorough test through your local extension service. This will give better and more complete information for you to use.
DIY Soil Ph tests.
There is a more fun home-grown method of testing soil pH if you don’t want to purchase a kit. What you do is:
- Gather 1 cup ofsoil from different parts of your garden.
- Put 2 spoonfuls into separate containers.
- Add 1/2 cup of vinegar to the soil.
- Watch the reaction.
- If it fizzes, you have alkaline soil, with a pH between 7 and 8.
- If it doesn’t fizz after doing the vinegar test, then add distilled water to the other container until 2 teaspoons of soil are muddy. Add 1/2 cup baking soda. If it fizzes you have acidic soil, most likely with a pH between 5 and 6.
- If your soil doesn’t react at all it is neutral with a pH of 7. A neutral Ph would be awesome for a garden but is seldom found wherever I have gardened.
Another homemade test is to use red cabbage water. It’s a fun test to try, here is what you do:
- Measure 2 cups of distilled water into pan.
- Cut up and add 1 cup of red cabbage.
- Simmer for 5 minutes.
- Remove from heat and allow it to sit for up to 30 minutes.
- Strain off the liquid. The color will be a purple/blue. This indicates a neutral Ph
- Add 2 teaspoons of garden soil to a jar.
- Add a few inches of cabbage water.
- Stir and let sit for 30 minutes.
- Observe the color. If it turns pink, your soil is acidic. If it is blue/green, your soil is alkaline.
Often the soil testing will give you the needed information to fix your plants. You can see the nutrient you need to add, or the pH of your soil that is affecting how your plants are getting the nutrients from the soil.
The information I found out about my soil was that it’s more alkali and could use some more acidity. As a general rule, areas that receive a lot of rain have acidic soil. Areas that have less rain will have more alkali soil.
How do I fix the problem?
The easiest way to fix the problem is to not have the problem in the first place. Often trees, shrubs, and plants are chosen that just are not adapted to the pH of the soil. Choosing plants that are already adapted to the area is the best way to avoid all nutrient deficiencies. So, if you can, choose varieties that can handle the soil where you live. Many native species are available that will do what you want or need.
I found that the plants and trees that have this chlorosis problem that I have is from an iron deficiency. Iron chlorosis is rather common where I live and can be treated in a variety of ways.
1-Soil Treatment
Do a soil application of elemental sulfur and ferrous (iron) sulfate to treat individual trees and shrubs, or small areas in your garden or landscape. It’s most effective in the fall or early spring. A mixture of equal parts ferrous (iron) sulfate and elemental sulfur can produce good lasting results. It is one of the least expensive ways to go.
What you need to do is get an inorganic iron source with a high concentration of iron and one that is derived from iron or ferrous sulfate. Read labels to determine iron concentrations and forms in different products. There are a lot of iron fertilizer products, so read a little before you purchase.
You probably can’t, or don’t want to cover an entire landscape with the elemental sulfur-ferrous sulfate. Instead, treat small areas by making holes 1 to 2 inches in diameter and 12 to 18 inches deep. Space the holes 18 to 24 inches apart around the area within the drip line of affected trees and shrubs. Fill each hole with the iron sulfate-elemental sulfur mixture to within 4 inches of the soil surface. Make holes with an auger or soil probe that removes soil to reduce compaction that can affect the absorption of the nutrients. Steer clear of the damaging large roots when making holes. You may also want to get the blue stake guys to come out and post where the gas lines, power lines, cable lines, etc. to avoid damaging stuff.
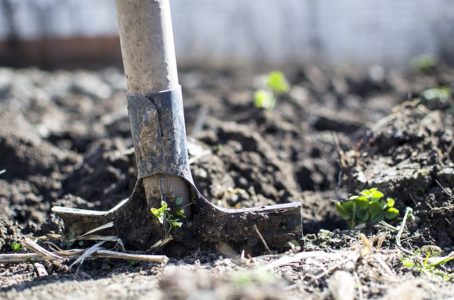
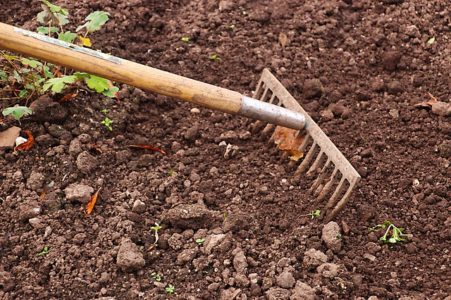
Shrubs in a garden also can be treated with equal parts ferrous (iron) sulfate and elemental sulfur. You can use a shovel or hoe to excavate a small trench about 4 inches deep, 12 to 24 inches away from the base of the plants. Then add one inch of the ferrous (iron) sulfate-elemental sulfur combination to the bottom of the trench. Then fill in the remainder of the trench with soil.
The concentrated sulfur in the holes or trenches reacts over time to form acid which neutralizes lime and lowers soil pH in a small zone around the treated areas. The acidification of soil in combination with the iron sulfate maintains iron in a form that can be absorbed by plants as roots grow into the treated areas. One soil treatment with iron sulfate-elemental sulfur may last 2 to 4 years.
2-Iron Chelate soil treatment.
Iron chelates can be used as a soil treatment as well. The effect is temporary, maybe a year or less. Chelates are fairly expensive as well. It may not be the way to go. The only chelate that works well under high pH soil conditions is one containing the FeEDDHA molecule. All other chelates currently on the market don’t work well at pH greater than 7.2. So, a precise pH test should be used if you are considering iron chelate treatment.
Apply chelates in spring before growth begins. Sprinkle dry chelate on the soil surface and irrigate in, or dissolve in water and apply to soil around the base of plants. I know of people who even sprinkle the chelated iron in the snow around the drip line of the tree or bush that they are treating. They have great results and have just made it part of their garden maintenance. You can also put iron chelates in holes drilled around the drip line of affected vegetation instead of sprinkling it.
3-Foliar Treatment
Foliar treatments are applications made directly on the leaves of affected plants during the growing season. These direct foliar treatments produce a fast response, often in a matter of days. The downfall to foliar sprays is often incomplete and temporary. You will probably need repeated applications of foliar sprays if iron chlorosis symptoms persist. Another thing to consider is that it’s difficult to spray large trees.
You can use iron chelates as your foliar sprays. You can use a 0.5% solution of ferrous sulfate applied to the leaves. This can be a less expensive way to go. An iron chelate spray recipe is to dissolve 2 ounces of ferrous sulfate (20-22% iron) in 3 gallons of water. The trees or bushes or plants should be sprayed in the evening or on a cool, cloudy day to prevent the leaves from burning. It’s a good idea to add a few drops of liquid soap or wetting agent to help the solution adhere to the leaves. You will probably need to repeat spraying if the iron chlorosis symptoms persist or as you see it on new leaves.
Trunk Injection treatment

There is also a trunk injection treatment where you basically put an IV into the trunk of the tree and feed it. You can drill small holes and put in dry nutrients. You can also use a hypodermic method where you can inject the iron. All the methods need to be done with caution. You are injuring the tree and you need to be careful. When getting the injectable solutions, look for product that contain ferric ammonium citrate (iron citrate) or ferrous sulfate.
The holes should be made with a sharp bit to ensure quick uptake and reduce injury to the tree. Pay close attention to manufacturer recommendations on the hole placement, angle, depth, and diameter. The absorption is better and more evenly distributed if holes are drilled near the soil surface on the outside of root flares.
If you decide to give your tree some Injection treatments, it’s most effective in the early spring during bud break. Some individual products may vary on this, so follow the label directions. Sometimes treatments later in the year will not work as well and may not last as long. The effects of an injection can last for two years or more. Be careful to avoid injecting trees on hot, dry, windy days because this might blacken or burn leaves. Water the tree well before and after the injection, this will help with the distribution of the treatment.
Summary
The problem of yellow leaves is an interesting one that can be solved. It does take a little more investigation and diagnosis than just adding more fertilizer. In fact adding more fertilizer might be the exact wrong thing to do.
I strongly recommend having your soil tested and maybe do some of the DIY soil tests. I know that a lot can be taught and learned by doing the DIY projects with your family. Then you can find out what your soil is lacking, or what your pH is. With that information you can follow several treatment options.
Like most things, it will take some planning, but the issue of yellow leaves can be treated.