Spring is trying to burst forth with all the glory it can possibly muster. It’s having a bit of a hard time. Never fear, the “flags” are here. One of the first beautiful flowers to welcome the rebirth of this world is the IRIS (I grew up calling this flower a flag).
In this article we will show you the different kinds of Iris and how to grow them. They have been nicknamed the Poor Man’t Orchid.
Greeting the season from mid April thru June in a variety of colors from pale yellows, soft pinks, bright lavenders and even blacks and white, these blooms bring joy in a bouquet in the house, in a row along the edge of a garden or in a field just full of plants. The name Iriscomes from the Greeks and it means “Goddess of the Rainbow”. Not a bad gig to have.
There are over 200 different species, but we will discuss five of the more popular. The Bearded Iris, also called the German Iris is perhaps the best known. It is bigger and taller than the other species. But there are also Dutch Iris, Siberian Iris, Japanese and Louisiana Iris. This flower is a world traveler.
It has been said that you can abuse this plant, leave it in the road and run over it, forget to water it and then feel remorse and plant it in dirt and it will repay you with beautiful flowers, even blooms that have a most intoxicating fragrance. But let’s not try to prove this theory. Instead let’s do it RIGHT. We will start at the very beginning.
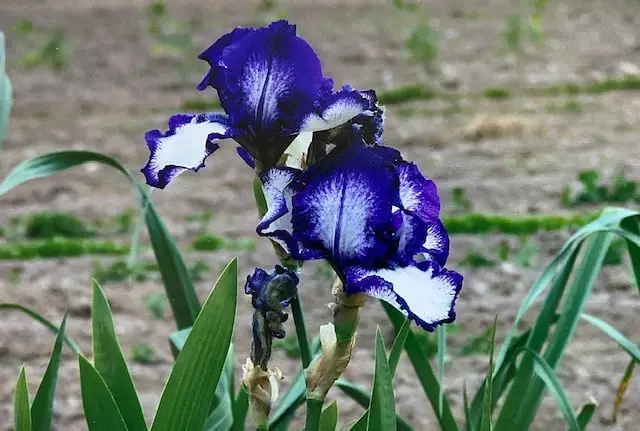
Iris’s just starting to bloom in early spring.
GROWING BEARDED IRISES
The root section of the plant is called a rhizome. This can have tendrils off of it that look like roots. When you get a start for an iris it will generally be a chunk of the rhizome with a knob or two on it and a tendril of two also.
You should have an area to place this plant that will have at least 6 hours of direct sun. The soil should be loose and should drain well. You can work a bit of compost in the planting area before putting the rhizome in. The rhizome looks like a sausage half buried in the soil.
The plant does NOT like to be buried. Part of the rhizome should be above ground, about ¼ to ½ inch above the soil line. Iris like to have their backs to the sun. Cover the rest of the plant with soil.
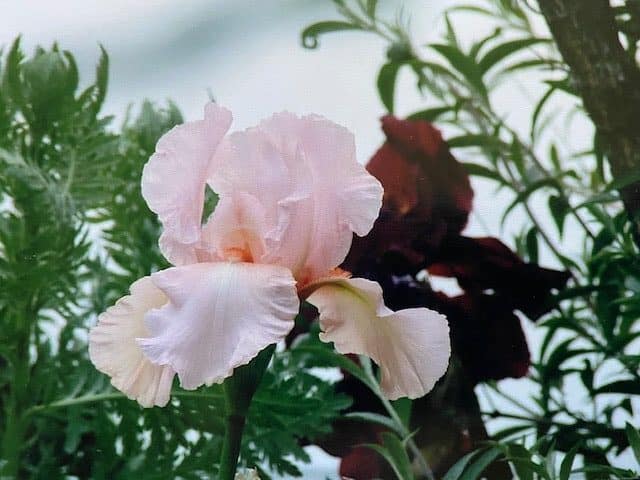
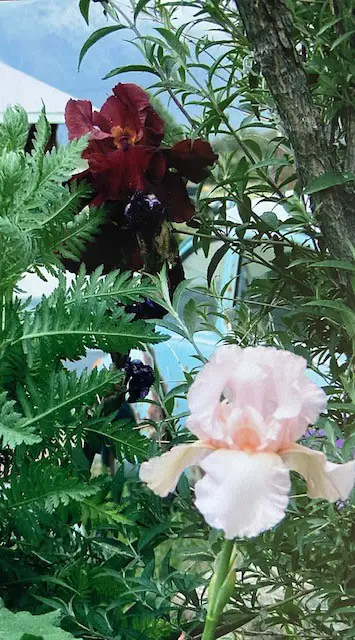
Beautiful white and purple iris
Arrange the tendrils or roots down in the soil before covering with dirt. Water the iris in, but don’t drown it. Iris do NOT like soggy feet. When the top dries, water again.
The Bearded Iris develop large clumps of rhizomes and need to be divided every few years. One of the easiest ways to divide a clump is to take a sharp shovel and make a cut down the center of the plant leaving one half of the plant in the ground and prying the other half out. Bed the original back in with dirt and then divide the loose half into several pieces. Plant together in small groups or singly.
The new divisions will quickly take hold and start developing their fans of leaves and blooms. The Bearded Iris loves to grow horizontally as well as sending roots into the earth.
You can also dig up the entire plant, divide into smaller sections with a sharp knife and replant in your garden, with enough to share.
The Bearded Iris flower is made up of uprights and falls. The blooms on these plants are beautiful and some have the fragrance of an expensive perfume.
Some could take the place of an orchid in a corsage, but don’t do like a friend of mine that brought the flower, leaves, roots and dirt to give to his girlfriend for prom. (That romance didn’t last)
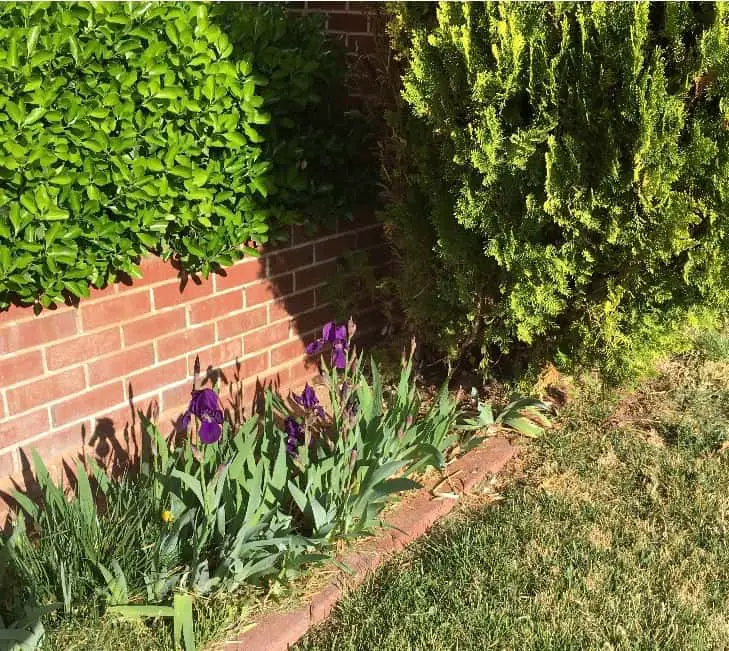
Great for decorating on Memorial Day
This was and is still one of the best garden flowers to put in a cut bouquet for decorating gravesites for memorial day. This is a tradition that we observe at the end of May and it is very satisfying to use blooms from the iris that our mother had cultivated all her gardening days.
The old iris plants have survived many divisions, many transplantings, but I will tell you that naming your plants and talking to them about how beautiful they are will reap rewards. A companion flower, the Oriental Poppy has some of the same growing habits of the iris and makes a great companion in the garden, along with a beautiful display of blooms.
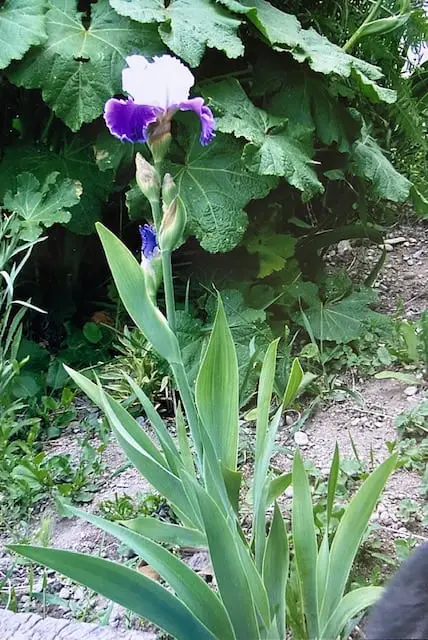
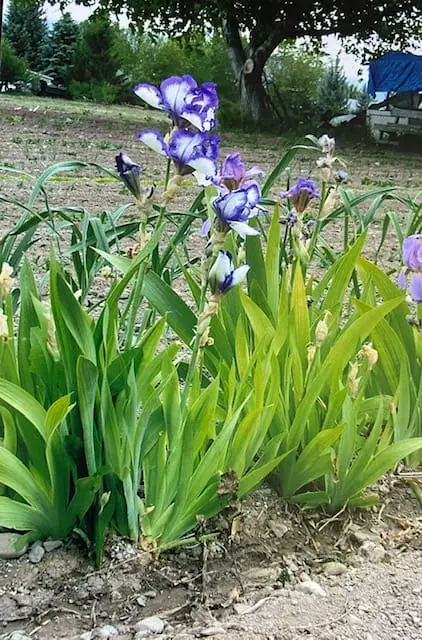
Spring color from the Iris
GROWING BEARDLESS IRISES
Japanese Iris
This beautiful flower goes by many names, the Kaempferi Iris, the Butterfly Iris, but most commonly known now as the Japanese Iris. The come in luscious colors of purple, pink and endless bi-colors. Cultivated in Japan for over 500 years, they were strictly for the royal gardens.
These beauties like a moist environment similar to ferns, astilbes or impatiens. The petals of this beauty all flat, forming a simpler, flatter flower. They like to form large, lavish clumps and are very decorative. They are also prized as a cut flower in bouquets.
Makes the front yard look great!
Siberian Iris
This Iris is favored by landscapers for many reasons. It is a very hardy plant. Once established it will live for generations . The flowers bloom on slender stems in colors of blue, yellow and purple (other colors are slowly being added). After the blooms have faded, the leaves remain and look as beautiful as any other garden grass. They can be planted in spring or fall
Louisiana Iris
These magnificent Irises are our own native plants’ spectacular wildflowers. They hail from the bayous and wetlands of the Gulf Coast. They have large flowers often from 4 to 6 inches across and a form more like the Japanese type’s flatter and wider than the tall up-and-down Bearded Iris bloom.
The hybrids of these beauties are often hardy all the way to Canada. They enjoy conditions similar to the Japanese types, so all you need is a moist area, rich soil, and partial shade. Any well-watered partially-shaded perennial garden will do. This group is world famous for its large flowers and wide palette of coloring, featuring some colors found in no other group.
Wild Iris
Many of the ‘species’ or wild irises are among the Spring-planted beardless group. The two best known are the ”Blue Flag’ (loved by the Northeast) and the taller “Yellow Flag” grown in England.
The Blue Flag is a perfect wild flower but the Yellow Flag has a tendency to spread and can clog up small waterways. In places it may be considered an invasive plant.
Water Iris
There is a misconception that iris from the beardless group tend to like water and would prefer to be planted in water. Nothing could be further from the truth. These beauties like to keep their complexions (and roots) moist, but not dripping.
They can enjoy being near a pond or stream, but do quite well in a well –watered perennial garden. One exception is the Siberians. They like moisture, but are perfectly happy with normal conditions and don’t resent drying out from time to time.
Iris flower in bloom
Mulching and Fertilizing Spring-planted Irises
Mulching is important for this group. Since they enjoy moist, partially-shaded conditions, mulch their roots to help them retain moisture during warm dry periods. Bark chips, peat, or any good moisture-retaining mulch will be a big help. Full sun is ok, too, but no irises should be in blazing hot dry areas.
They need no more than the usual feeding, like most flowering perennials. For feeding perennial gardens, expert Frederick McGoury recommends familiarizing yourself with standard perennial flower fertilizers, which are always labeled with three numbers in a sequence, such as 5-10-5 or 5-10-10. These numbers on the bag refer to percentages of Nitrogen, Phosphorus and Potassium.
MGourty explains that the most important element for flowering plants is the middle number, Phosphorus, so he recommends choosing a fertilizer with the middle number no lower than the other two.
If you are new to the neighborhood, it is always good to give your local county extension agent a call, and discuss soils and feeding with him or her. That’s what they’re there for. It’s great local advice, and it’s free.
There is still another variety of Iris and it comes in a bulb about half the size of a tulip bulb. It is planted just the same as a tulip and they are generally called “Dutch Iris”. They are planted in the fall, just as you do other bulbs.
Plant Beardless Irises in the spring. They include Siberian, Japanese and Louisiana Irises. Summer plant Bearded Irises, commonly called German Irises. But I have found them pretty hardy if they have to be disturbed at other times. Plant Bulb Irises ( Dutch) in the fall.
So many varieties, so many colors, so much to do. But once planted they last for generations..
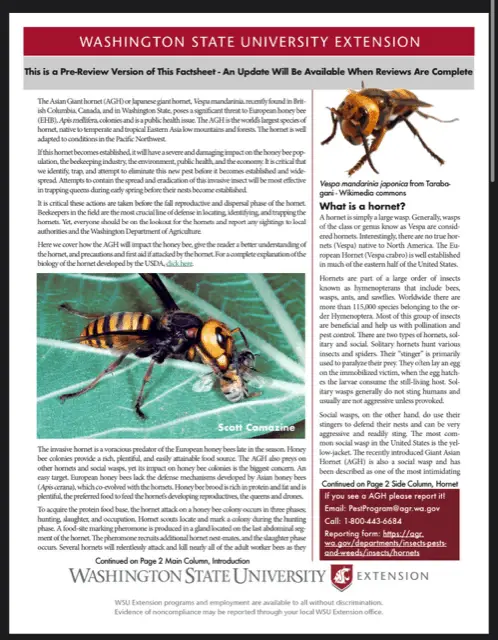
Will Murder Hornets Overtake and Kill Your Bee Hives? Not Likely
This week, we have seen numerous reports about Japanese “Murder Hornets” making their way to the United States, with reports that they are a threat to the U.S. honey bee population, as well as humans. CBS ran a headline earlier this week that the “Murder Hornets could decimate the honey bee population.” These reports are grossly exaggerated, and need not cause the widespread panic news outlets seem to have been attempting to stir up. As apiarists, we have had numerous inquiries as to whether we should worry about these giant hornets. The simple answer to this question is NO.
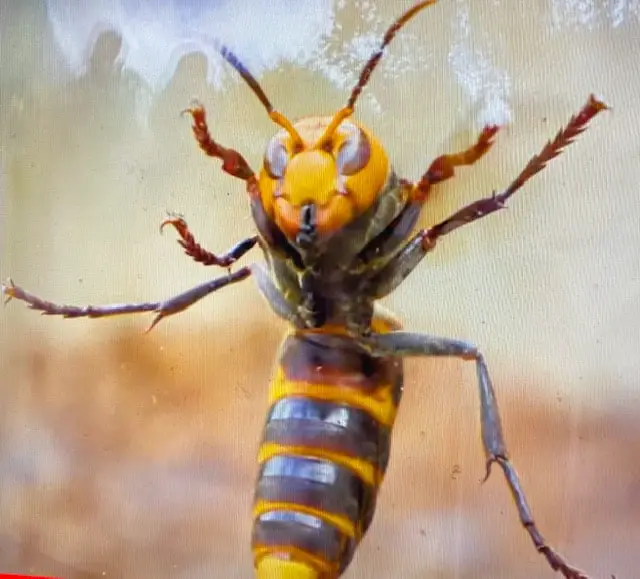
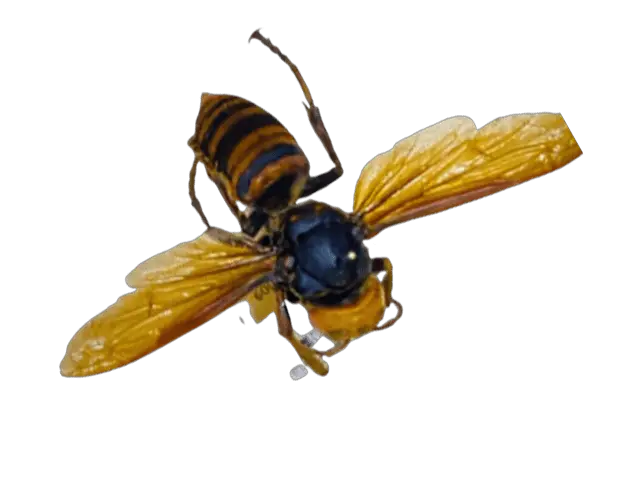
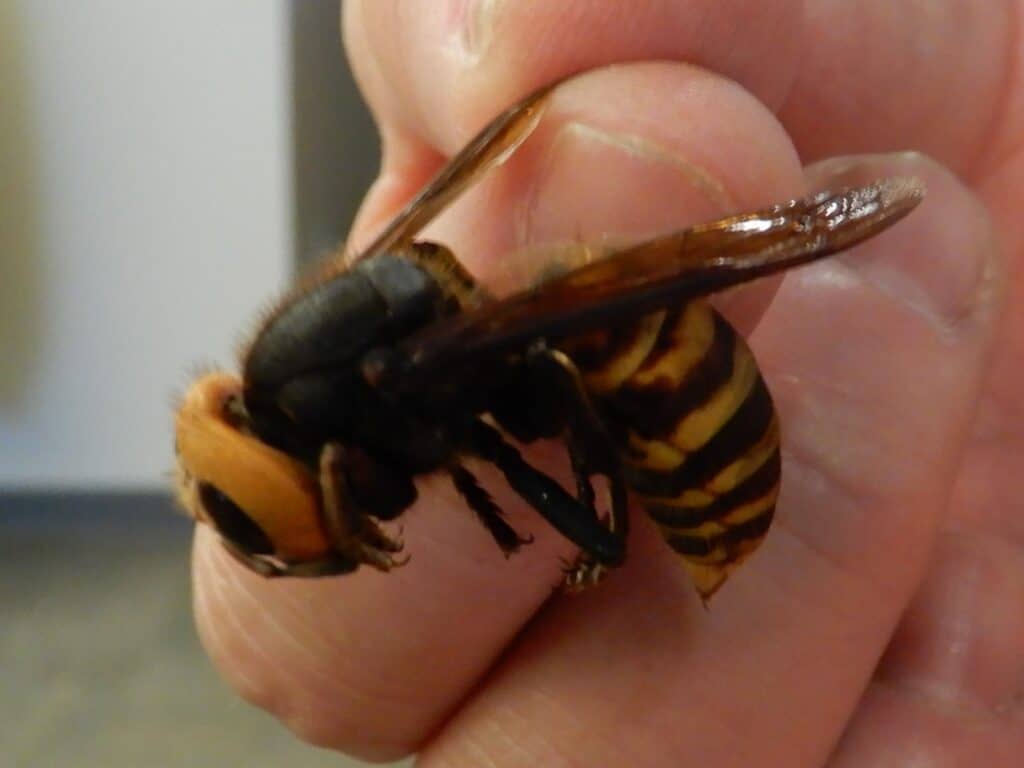
A little Background: Known as the Asian Giant Hornet, or Vespa Mandarina, the species itself seems a little scary. It can grow to be between 1.5 to 2 inches long, and have very large yellow heads with prominent alien-looking eyes and a striped yellow and black abdomen. They have also been known to decimate an entire bee colony in within just a few hours. That being said, these “murder hornets” are native to the forests and low mountains of eastern and southeast Asia, and only one colony of the species has been found in North America, AND WAS EXTERMINATED, in Nanaimo, British Colombia on Vancouver Island in September of 2019, with a few associated sightings. One additional wasp believed to be from that colony, was found (already dead) on the U.S. side of the Canadian border near Blaine, Washington in December 2019.
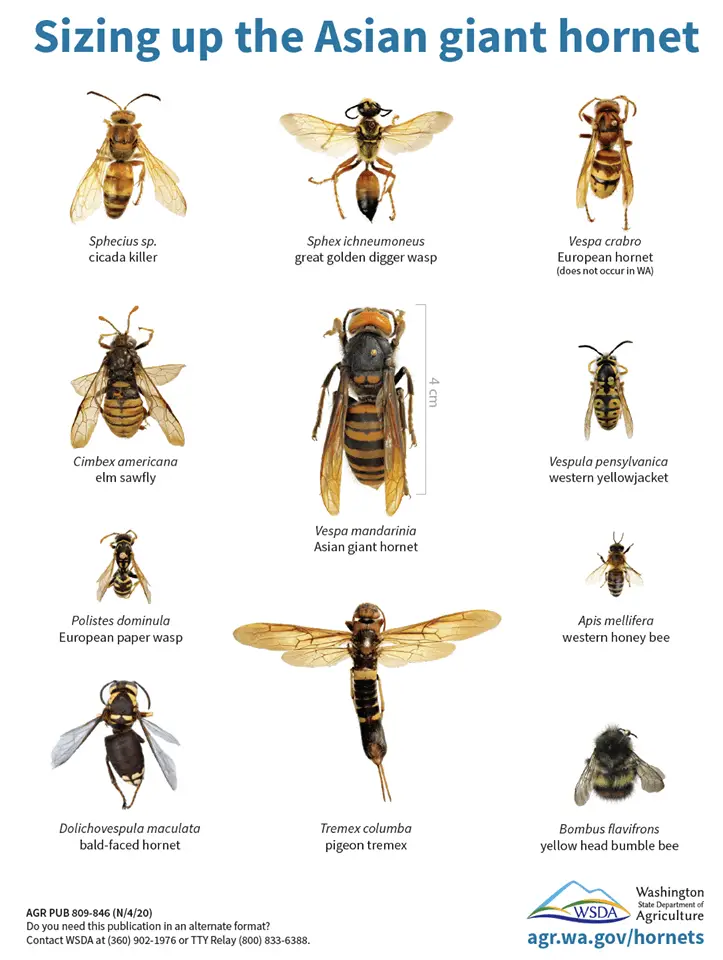
Asian Giant Hornet (middle) in comparison to other similar species. Photo Washington State Department of Agriculture
According to Douglas Yanenga of the UC Riverside Entemology Research Museum, “I was one of the authorities brought in to consult on this (the Nanaimo) case, and to my knowledge there have not been any sightings in 2020 that would suggest the eradication attempt [in Nanaimo] was unsuccessful.”
Why the Sudden Fear of Threat then?
According to an article put forth by the American Bee Journal on May 5, 2020, not only is it “ridiculous” to call the Asian Giant Hornet the “Murder Hornet”, but “some poorly-worded media reports” about the hornets “have triggered a veritable avalanche of nonsense online.” We agree. Though the Asian giant hornet has been deemed a pest because they are a predator of honey bees, are an invasive species, that will attack and kill honey bees to steal protein sources such as larvae and pupae, and may completely destroy a hive in a matter of hours—at this point, there is no need to fear a US infestation.
WSU Fact Sheet
The Washington State University Extension Service has published an AGH fact sheet put together by bee breeder-geneticist Susan Cobey and Timothy Lawrence that explains the nature and habits of the Asian Giant Hornet, including some frightful facts that bring it to the top of the list of the world’s most venomous insects. Additionally however, Lawrence also writes that “The [recent] sensationalism on the media is a concern, but … we need to find out just how extensive this infestation is”. Though “it is possible this species could establish,” wrote entomologist Sloan Tomlinson. “Has it yet? No. Until concrete evidence is presented about any further establishment by this species, it’s simply conjecture. Additionally, even IF this species is established, their infamy is overhyped and sensationalized. In Japan they do indeed kill around 30 people a year” . . . but “around 40 people are killed annually in the U.S. by domestic dogs.”
In a press release from April, entimologist Todd Murray, with the WSU Extension Service was quoted in news services nationwide, stating that the giant hornets are “a health hazard, and more importantly, a significant predator of honey bees.” However this press release was not intended to spark a cavalcade of alarm, but rather to ask naturalists and other outdoor enthusiasts to keep their eyes open for the giant hornet while out and about, and if sighted, rather than attempt to kill them, (as the hornet’s stings can penetrate beekeeping suits) report the sighting to the Washington State Department of Agriculture. This announcement was intended to better ensure “finding, trapping, and eradicating” the pest. Moreover, entomology Ph.D. candidate and researcher Ellie Field of Iowa State University wrote on an online account that “the murder hornet articles are making the rounds quickly and they seem to be doing more harm than good. Yes, it is awesome to track insect populations (particularly staying watchful for non-native and potentially invasive species). But no, the Asian giant hornet. . . is not going to destroy America. The one nest and individual that was found around Vancouver last year was destroyed, and this doesn’t indicate any establishment. Introduction events happen all the time, all across the world! That region should continue to keep a watchful eye, but for everyone else this is not going to be relevant. There is no invasion, just a small possibility that some may have overwintered in that area.”
Photo WSDA
It is reported that the giant hornets’ “active season” begins in April and runs through early summer and early fall. The giant hornets have also donned the moniker “killer” or murder” hornets because their sting can be fatal to humans because it can deliver up to seven times the amount of venom as a regular honey bee, and sting multiple times. The sting is loaded with a potent neurotoxin, and thus multiple stings can kill humans, even if not allergic. That being said however, it should also be noted that the Asian Giant Hornet is not predatory upon humans, and, like honey bees, will only attck if their hive is threatened.
In summary, there is no need for apiarists in the US to fear an infestation of giant “Murder Hornets” at this time. If you come across a hornet you believe may be a giant hornet, and are unsure about insect identification, you can email an image to Lynn Kimsey at lskimsey@ucdavis.edu or contact the Entomological Society of America at https://www.entsoc.org/ or https://bit.ly/2W2jRmi.
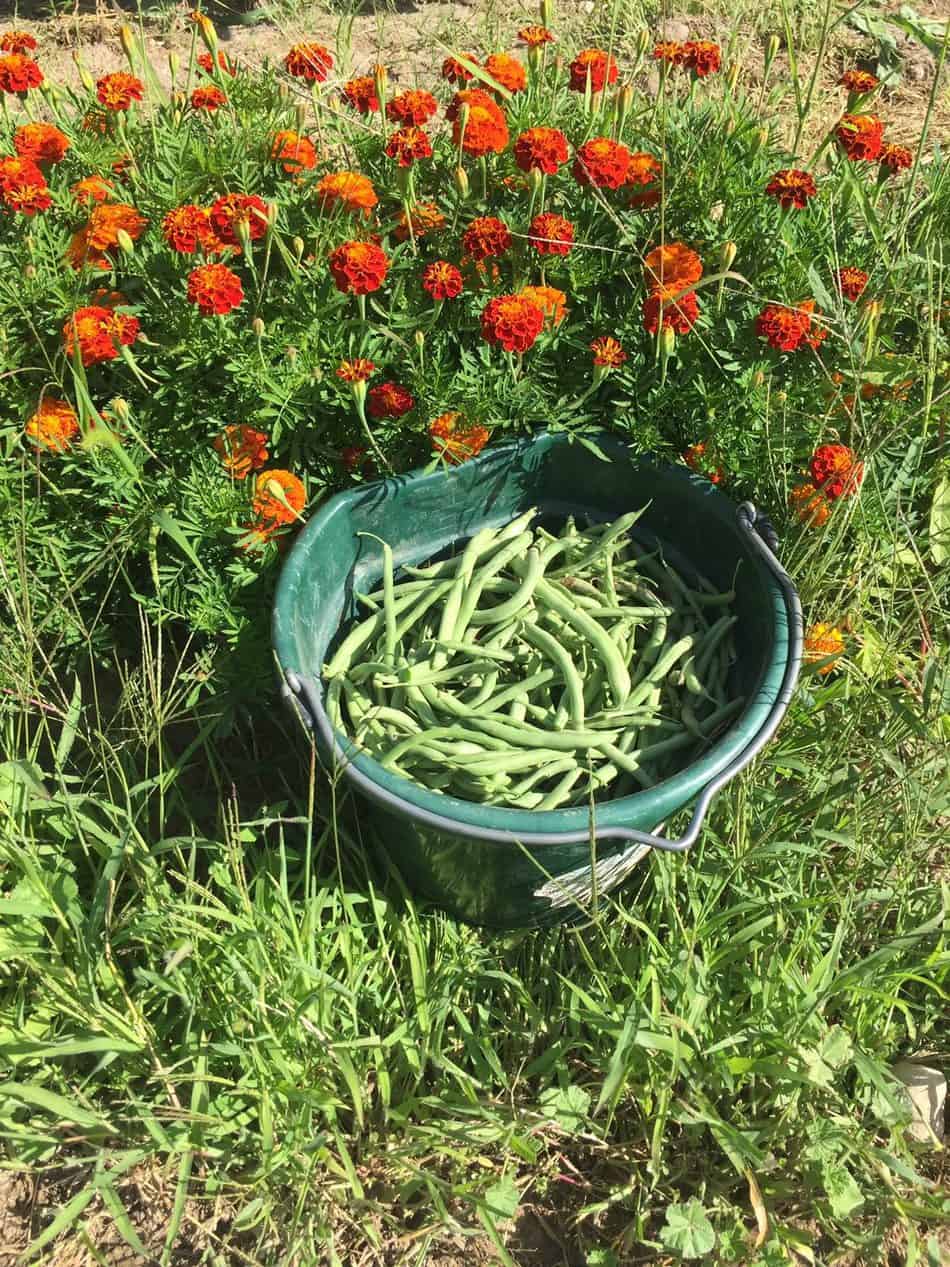
Green beans are a mainstay for growing in the garden. They can be cultivated and will continue to bear a harvest all season long. Sometimes also known as string beans and snap beans.
In this article we will give you some great tips and a few tricks to ensure a great crop of green beans. We will let you know about:
The varieties of green beans you can plant.
Pole beans versus bush beans.
When and how to plant
Watering
Fertilization
Pest issues
Harvesting
Preservation and storage
Green beans are some of people’s favorite vegetables from the garden. Green beans can be a fresh raw snack and preserved to be a great vegetable all throughout the year.
This article will give tips and information to grow a great crop of green beans to enjoy.
Varieties of green beans.
There are two main groups of green beans. Pole beans and bush beans. Bush type green bean varieties need no support and are simple to grow and provide excellent green beans.
When you grow the tall climbing pole bean varieties you will need to construct a trellis or have a fence or some kind of support for the green beans to grow up on. Many people argue that the flavor of pole beans is much better than bush beans.
I think they are both great. If you have room, I would recommend trying to grow both and see what would work best for you. We have found that the bush green beans serve our needs best. We are out for good production for eating and preserving.
Bush beans
Bush beans were developed to be a production crop. Bush beans are often picked by machines for commercial growers. They are more easily managed and do not require any support or trellis to grow on. Some green bean connoisseurs argue that they maintain a “green taste” that is less than desirable. I think they taste great and will often mature two weeks before pole beans will.
I have been happy with our bush beans. They are easily picked, snapped, and preserve well. Many of our neighbors and those who purchase beans from us will eat them raw as a fresh snack.
Bush beans are a great plant for smaller areas, and you don’t have the room or time to construct a support for beans to grow on. There are many small yard gardeners that can grow bush beans in grow boxes, pots, and vertical planters.
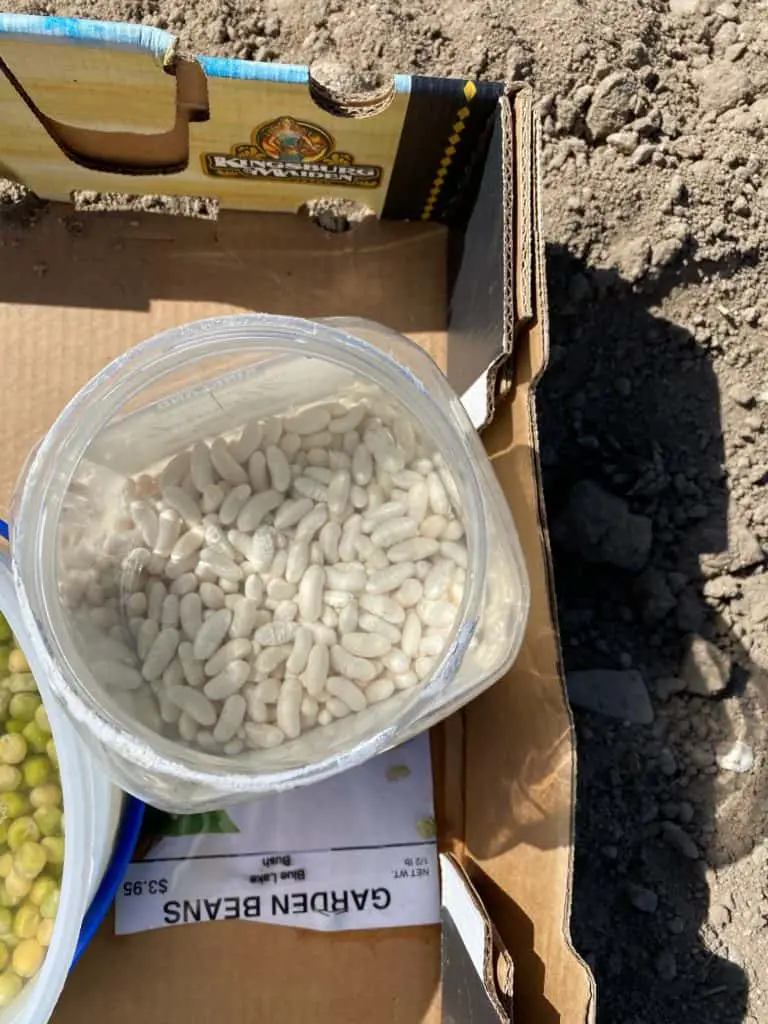
Some recommended bush bean varieties with great quality and yield are:
We grow Bush Blue Lake and Slenderette. Both have great flavor and produce well. The Slenderette variety has a smaller diameter and the bean seed inside the bean pod is smaller.
Bush Blue Lake have a great flavor and produce throughout the summer and into the first few frosts.
Pole beans
Pole beans have been around for a long time. With the heritage of pole beans comes great varieties with distinctive characteristics. Most notably the colors, which can vary from green to yellow to purple, and flavor, which is a richer nuttier flavor. The flesh of the pole beans are often thicker than bush beans.
Most pole beans will grow 6-12 feet. You will need to use some type of support for the beans to grow up. It will also take a little training for the vines to grow where you want them to grow.
Some people will put up a pole with twine stretched down to the bean plants. Some will create a bean tunnel. You can be as creative as you want or need, as long as you have some kind of support for the beans to grow on. If you just let them grow on the ground you will find problems with the beans rotting, leaves getting mildew and attracting diseases and pests.
There are also decorative beans called runner beans that are sometimes classified as pole beans. They are often sold as a flower in the United States, but or sold as a production eating bean in Europe.
The runner beans are fun to grow if you have the right climate for them. They grow well in cool wet areas. Often seed companies will sell them as flowers in the U.S., but you can grow them to eat the beans.
The varieties of pole beans that we recommend are:
An interesting fact about runner beans and pole beans. Runner beans will wind themselves around the support clockwise, whereas pole beans wind themselves around the support counterclockwise. This should be taken into consideration when training the new vines as they are growing.
When and how do you plant Green Beans?
Green beans are a hot weather crop and love full son and heat. You can plant them late in the spring, after the final frost date. They can be planted in monthly succession until mid-summer to continue a crop until fall.
For beans to germinate the soil needs to be warm 70 degrees F (21 degrees C). Green beans like full sunlight as well. If you plant beans too early you risk having the seeds rot before germination.
Green beans are a quick geminating plant. They are also fast growing. You will not need to start them inside and transplant them. Green beans really don’t do well with transplanting.
Planting green beans
When you plant the green bean seeds in rows you should plant them right in the middle of the row. The rows themselves should be 30-36 inches apart. Space the green bean seeds 2-3 inches apart, and 1 inch deep. If you have clay soil you will want to plant the seeds a little shallower to allow the sprouts to break through the surface.
Green beans do well as a row crop but can be cultivated in a variety of ways. They work well in planter boxes, raised beds, vertical planters, and even buckets. Some vertical planters can get as much yield in a small space as others get in a long row or huge patch.
We have used a manual seed planter to plant green brans and done well. You simply select the correct size planting disk, put the seed in the hopper on the top of the planter, set the depth on the foot of the planter and push it down the row. This is a good option if you have a larger garden area to plant. When you are planting with a seed drill attached to a tractor, follow the specifications recommended by the manufacturer of your seed drill.
We also have found that just opening up a row and placing the seeds by hand then closing up the row burying the seeds works great.
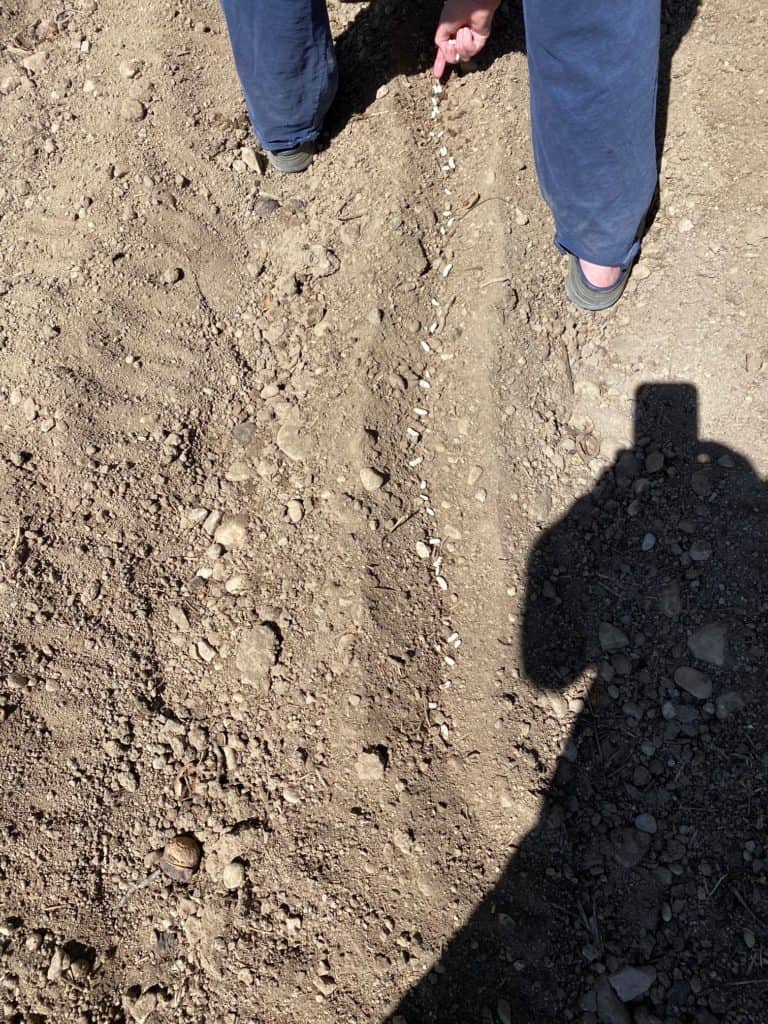
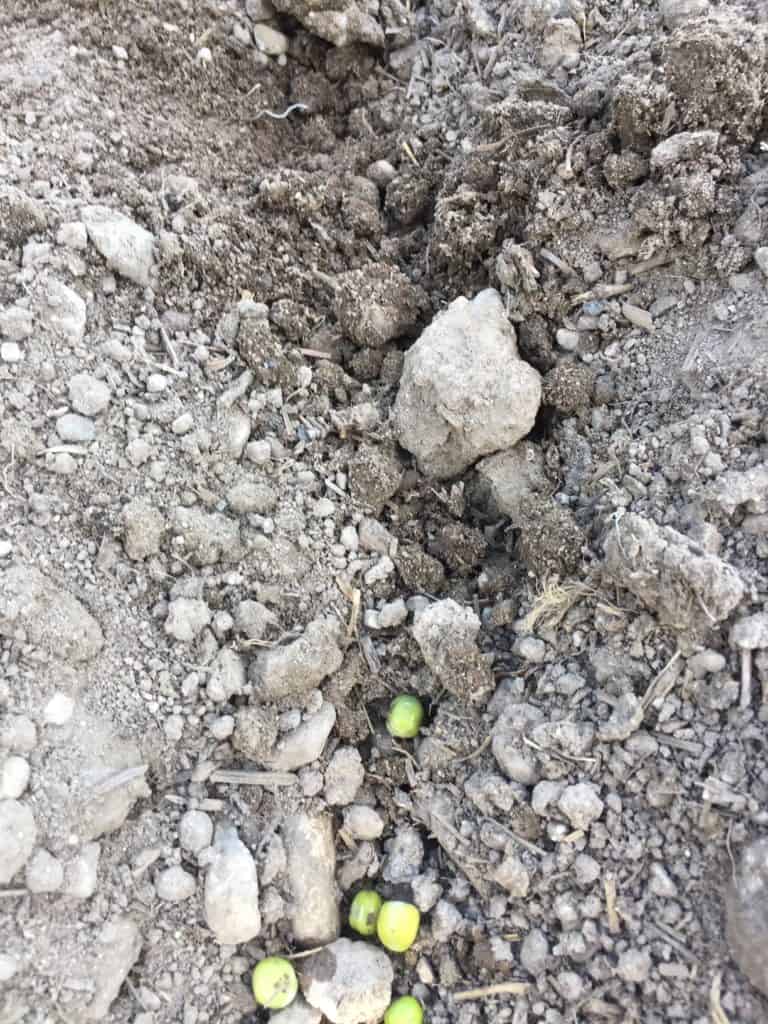
Green bean seeds soaked to aid in sprouting.
A tip that we use with green beans for smaller gardens is to soak the seeds in water for a few hours, sometimes even overnight to help with germination. When you soak the green bean seeds, they will not work in the seeder, so planting them by hand is the best option if you soak the seeds in water.
Watering
When watering the green beans, you will want to keep the soil moist until germination. Using a sprinkler will work and will keep the surface of the soil soft for the sprouts to go through.
Once the green beans have germinated then it’s much better to water them with a furrow or drip system once a week. Sprinkling green beans captures water on the leaves. Green beans are highly susceptible to fungal damage and disease that can come when water sits on the leaves after sprinkling.
Be observant if the soil is too dry. Sometimes a warm spell in the hot summer can dry out the soil pretty quickly.
Usually watering them once a week when it is cool and twice a week works fine, but will depend on the composition of your soil, whether it is sandy or clay. Sandy soil may need a little more water.
Green beans are susceptible to mineral deficiencies in the soil, especially zinc and iron deficiencies. If your soil is low in these, you will want to add zinc and iron in a chelated or sulfated form. It’s best to work the fertilizer and the zinc and iron supplements into the soil before planting.
Green beans are a legume and have the property of being a nitrogen fixer. They have properties with their growing and bacteria in the soil that works to fix nitrogen into the soil. This leaves the soil full and ready for nitrogen using plants. Often legumes such as green beans are used as a green manure to help fertilize soil. We have a great article on it here. You can in effect use green beans for a double purpose in your garden or farm.
Maintenance and pest management
Green beans are fast sprouting and growing. Keep them weed free, especially the young plants. Once the green bean plants mature the leaves will shade out most of the weeds making them easily maintained.
Green beans do have insects and pests that can decimate your crop. Beetles, leaf hoppers, moth larvae, slugs, and snails are some of the main pests to deal with.
If you have a smaller row or patch of green beans, it’s advisable to handle these pests by hand. Just inspect the plants as you are weeding and harvesting. Pick off the pests and keep your plants growing strong.
One pest in particular is one we battle every year is the Mexican Bean beetle. They are pretty tricky. They look similar to ladybugs so often they get left alone thinking that they are a beneficial bug. They lay eggs on the underside of the bean leaves. These beetles can really take down a bean plant quickly when the eggs hatch. If you see them squish them and look for patches of little yellow eggs on the underside of the bean leaves. Squish the egg patches as well.
If you have a larger row or patch of green beans you may want to use an insecticide or pesticide. I would caution anyone when they are looking into using insecticides and pesticides. Pesticides do not discriminate. Pesticides will kill beneficial bugs as well as the detrimental bugs. Some pesticides can leave residue and chemicals that stay in the soil for years.
If you decide to use pesticides use them early in the growth of the plants before the beans begin to bear fruit to avoid contaminating the green beans. Some pesticides that are recommended for home use are Malathion or Sevin. Again, be careful and read the entire label including the warnings before using a poison on your garden.
Fresh picked green beans.
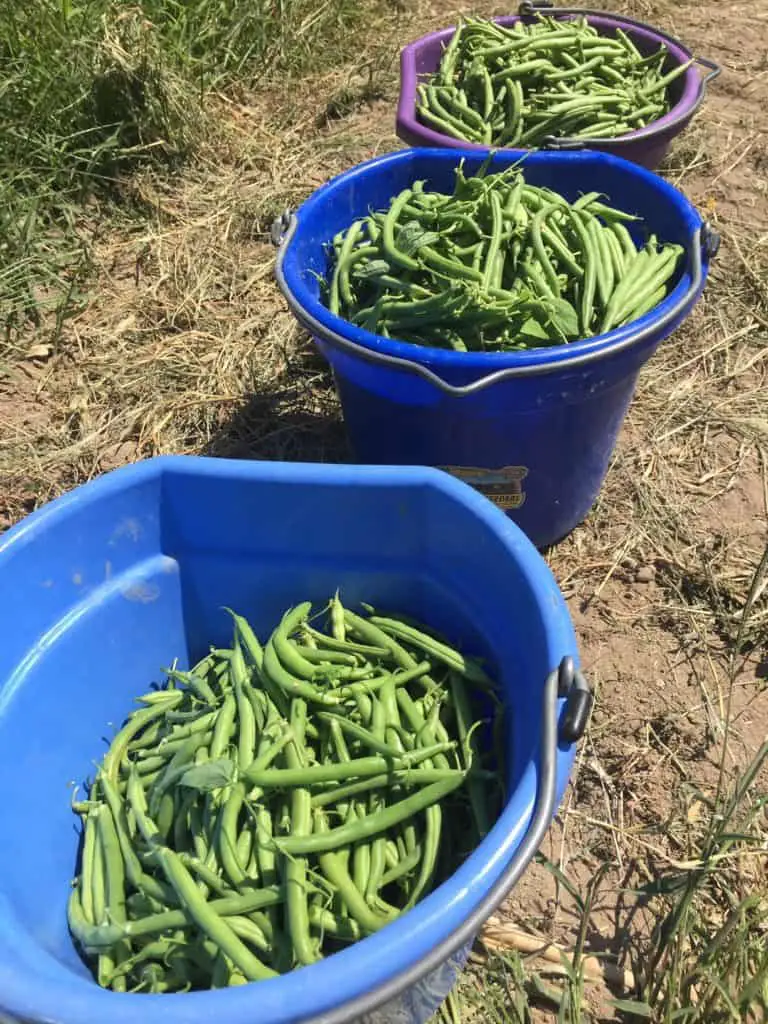
Harvesting.
Harvesting green beans is rather a simple technique. You grab the green bean and grab the plant and carefully pull the pod off the plant. In my experience the green beans don’t all ripen at once. It usually takes us 4-8 pickings to get all our green beans. Often, it’s the cold autumn weather that gets our green bean plants before they finish producing. So being careful to not damage the plant is important.
Green beans will ripen and grow long and swell up. You will want to pick the green beans when they are long and crisp, not old and rubbery. Sometimes the green beans can even seem like they are made out of Styrofoam if they get too old.
If you can, pick green beans early in the morning. They retain the moisture in them and taste better. Green beans are also easier to snap when they are full of moisture.
Snapping
Snapping green beans is completely up to your preference. If you are creating a beautiful display, then you will want to just snap off the top. Some chefs like to leave them entirely intact to give a natural look. If you are eating them straight from the garden, you can pretty much do whatever you want.
If you are canning, bottling, or preserving them you will probably want to snap them into 1-2-inch lengths. The shorter lengths can fit more per bottle.
If you are pickling green beans, then you will want to leave them long and snap the tops off.
Preserving and Storing Green Beans.
Green beans are one of my favorite vegetable for storing from the garden. Green beans are full of flavor and nutrients. Green beans are great fresh and even raw for eating. They are also a great vegetable to eat throughout the rest of the year and can be preserved in several ways.
Canning Green beans
You can preserve green beans by canning them. For canning green beans, you will need clean glass canning jars, canning lids, canning or pickling salt, water, and a canning pressure cooker. Here is a link to a canning pressure cooker, and here is a link to an instant pressure cooker that can be used for canning.
For a rule of thumb. 9 pounds of green beans makes 9 pints. 14 pounds of green beans makes 7 quarts. If you want to add salt to your green beans it’s recommended ½ teaspoon per pint, or 1 teaspoon per quart.
You will want to snap and wash the beans. You will then need to decide whether to can the green beans in a hot pack or raw.
Hot is when the green beans are cooked before pressure canning.
Raw is when you put raw green beans into the jars and poor boiling water over the peas.
Processing the jars in the pressure canner is the same for both methods. The minor difference is the taste.
Hot pack
For hot pack green beans cover peas in a large pot with boiling water. Boil the green beans for 5 minutes to fully cook them. Add ½ teaspoon of salt per pint to the pint jars, or 1 teaspoon of salt per quart to the quart jars. The salt is added for flavor, you do not need to add the salt if you don’t want to.
Fill the jars loosely with hot green beans. Add enough of the juice that the green beans are cooked in to leave a 1-inch headspace in the top of the jar. Make sure the bubbles are out of the jars. If you are low on the juice the green beans have been cooked in, you can just add boiling water to the jar until there is about 1 inch of space at the top of the jar.
Wipe the jar with a clean towel. Place the lid on the jar and screw the top or screw band on. Follow the recommendations on the lid package. You will need to tighten the screw band finger tight, meaning not too tight and not too loose.
Raw
The raw method is fairly simple. Add ½ teaspoon of salt per pint to the pint jars, or 1 teaspoon of salt per quart to the quart jars if desired. Fill the jars with raw green beans leaving at least 1 inch of room at the top of the jar. Add boiling water to the jars leaving 1 inch of room, or headspace, at the top of the jar. Remove air bubbles in the jars. You may need to add a little more boiling water to the jars as you get the bubbles out.
Just like the hot pack, you wipe off the top of the jar with a clean wet towel, put on a lid and screw the top or screw band on. Make sure the screw band is finger tight, not to tight and not too loose.
Process Jars in Pressure Canner
Make sure you read and understand how to run and work the pressure cooker. Pressure cookers can be very dangerous and need to be used with great care. Read, follow, and be familiar with all guidelines from the manufacturer.
Pressure canning beans is essential for preserving canned green beans. Pressure canning is dangerous, and you will need to be observant during the process. We have used pressure cookers for canning beans for decades and have never had a problem, other than the occasional burn when not being as observant as we should have been.
Prepare the canner by putting in hot water and the rack. Follow the recommendation of the manufacturer, generally two or three inches of water above the rack.
Put the filled jars on the jar rack in the canner. Be careful to keep the jars upright. Sometimes tipping the jars can get food under the lid and will not let the jar seal properly.
Fasten the canner lid and leave the weight off the vent pipe or open the petcock. Turn on the heat to high.
Soon the water will boil, and steam will come out of the vent pipe or petcock. Once a continual flow of steam is coming out let it exhaust for 10 minutes. After 10 minutes of continual steam venting you can put on the counterweight or close the petcock. This is when the canner pressurizes for the next 3-10 minutes.
The pressure and time used for canning beans is important and depends greatly on the elevation you are canning at. Refer to the guidelines on your pressure canner instructions for the pressure and time.
Fasten the lid of the canner and turn up the heat of the stove. You will want to heat the water in the pressure cooker to a boil leaven the weight off the vent pipe or leave the petcock open. Steam will come out of the vent or the petcock. Let the steam go for 10 minutes.
After ten minutes of the steam flowing, place the counterweight or close the petcock. The pressure canner will pressurize in 3-10 minutes. The time it takes to pressurize depends on the elevation you are at. Refer to the manufacturer’s guidelines.
Make sure you keep a close eye on the pressure. If the pressure goes below the recommended amount you will need to bring it back up to pressure and start the time needed to process over. If you don’t, you risk the peas being under-processed and being unsafe to eat.
When finished processing take the canner off of the heat and let it cool. Just let it cool naturally to allow the proper processing of the green beans. Forcing cooling could result in spoiled beans. So just relax and let it cool down by itself.
After the canner is cooled and depressurized take off the vent weight or open the petcock. After ten minutes take the pressure canner lid off. Be careful not to mess up the lid and seal. Remove the jars one by one carefully. Let the jars cool naturally and sit for 12-24 hours.
Once cool you can eat the green beans or store them on the shelf for future use.
Any bottles that didn’t seal will need to be eaten immediately or stored in the fridge. You can also reprocess them starting from the beginning of the canning process again.
Green beans are a low acid vegetable. Due to their low acidity you will need to boil them for 10 minutes before eating them to be safe.
Freezing green beans
Freezing green beans is a good way of preserving them. Freezing green beans is simple and straightforward. The process is blanching the green beans, cooling them down quickly, putting them into containers, and then freezing them.
Snap the green beans and wash them thoroughly. Blanch them in vigorously boiling water.
You need to be aware of the elevation you are living at for how long to blanch green beans. 3 minutes below 5,000 feet, and 4 minutes at 5,000 feet and above.
Cool the green beans in ice water immediately after the time is up for blanching. The cooling process should take about the same amount of time as the blanching process. Drain them once cool.
You can then put them into containers and put them into the freezer. One thing you need to be cautious about, if the green beans are left to freeze in a thick bunch or pile, they run the risk of getting spoiled or turning sour. What happens is that the outer layer of beans will freeze and insulate the inner layer form being frozen. The inner layer can sour or spoil before it gets frozen.
The best method we have found is to put a cup or two of green beans into a gallon freezer bag and spread the bag of green beans flat in the freezer. This allows the green beans to freeze quickly and uniformly.
Vacuum sealers work great as well. With vacuum sealers it takes all the air out of the package and there is a lessened chance for freezer burn. Here is a vacuum sealer that might work for you.
Drying green beans
Drying green beans is very similar to freezing green beans. You blanch them, cool them down, and put them in a dehydrator. You can use an oven, but a dehydrator is more efficient.
Snap and wash the green beans. Bring a pot of water to a rolling boil. A precaution can be taken at this point. You can add 1 teaspoon of citric acid per gallon to the water. The citric acid acts as an anti-microbial agent.
Put the green beans in about 4 cups to every gallon of boiling water. You will need to blanch the green beans for 2-4 minutes depending on the elevation. Below 5,000 feet 2-3 minutes, 5,000 feet and above 3-4 minutes.
Put the green beans immediately in ice water. Don’t cool the green beans too much, just stop the cooking process. You will be heating them up with the dehydrating.
Drain the green beans and dry them on a towel or cloth. Spread out the green beans on drying trays in single layers.
Dry the green beans in a dehydrator or oven at 140 degrees F. You may need to turn the green beans over every 3-4 hours. As the green beans get close to being dried, watch closely. They can sometimes get burnt or scorched towards the end of the drying process. Green beans should be very dry or brittle when finished drying.
The time to dry green beans in a dehydrator is 8-14 hours. A conventional oven will take a lot longer, up to twice as long.
After the green beans are dried, they can be stored in a container with stay fresh packets, moisture-vapor-proof containers or bags.
Freeze Drying
Freeze drying green beans has not been readily available for the home user. There is an option available for the home use now and can be used readily for most all vegetables and fruits including green beans.
Freeze drying green beans is very simple. You snap and wash the green beans. Dry them out on a towel or cloth. Put the green beans in the freeze dryer and let the freeze dryer go through its process. The freeze dryer can take anywhere from 30-40 hours to work depending on the moisture and size of the green beans themselves.
Freeze drying tastes great and keeps the nutrients in the process. Freeze drying will keep the food edible and nutrient rich for 25 years. The machine itself is a bit expensive. If you are planning to store a lot of your produce, then you will want to consider a freeze dryer.
If you are working on a more frugal budget, then you should consider other methods of preserving your green beans.
Summary
Green beans are an easy fun plant to grow in your garden. They sprout and grow quickly. They are relatively easy to care for and maintain. Just make sure the soil is warm and keep the seeds moist. Once the green beans get growing you will just need to keep them watered about once a week and harvest the beans as they ripen.
Peas are a delightful sweet treat from the garden. Green peas can be cultivated and grown early in the growing season, and again in the fall when the temperatures grow cool.
In this article we will give you all the tips and a few tricks to ensure a great crop of peas. We will let you know about:
The varieties of green peas you can plant, even some that can handle a little hotter temperature
When and how to plant green peas
Watering
Fertilization
Harvesting
Preservation and storage
Benefits
Some people will argue that the space required for growing peas is not proportional to the amount of product you get from them. I have been on this side of the argument many times. I find myself wondering if all the weeding, watering, picking, and shelling are worth the gallon or two of peas that we end up with.
I end up loving the flavor texture and satisfaction of the pea crop most every time. There is much more going on with the pea crop than meets the eye. We will discuss this in the benefits of peas a little later in the article. Let’s move forward and see what it takes to grow garden peas.
Varieties of peas
There are two main groups of peas, short determinate varieties, and tall indeterminate climbing varieties. Short varieties usually need no support and are simple to grow and provide excellent peas. When you grow the tall climbing varieties you will need to construct a trellis or have a fence or some kind of support for the peas to grow up on.
Short, Determinate
Some recommended short determinate varieties with great quality and yield are:
Little Marvel
Lincoln
Green Arrow
Tall, indeterminate
There is one variety we would recommend for a tall indeterminate pea, Alderman peas. The Alderman variety has been a top choice of tall pea growers.
Warm temperature peas
Peas are a cold weather crop but there is a variety that can tolerate a little warmer temperature. Wando is a variety that you may want to try if you are planting a little late in the season, or you are in a warmer growing zone.
Edible pod peas, also called sugar, sugar snap, Chinese, and snow peas.
Some peas have been cultivated where the entire pod is edible. I was excited to grow these because what you picked is pretty much what you got. Picking and shelling peas leaves you with a pile of pea pods and a lot less volume of the peas themselves. It was encouraging for me to see the volume of the edible pod peas stayed the same for eating.
The varieties we recommend are:
Dwarf Gray Sugar Peas
Mammoth Melting Sugar Peas
Super Sugar Snap Peas
Sugar Snap peas are relatively newly available for home gardeners. These are a pea that has been developed to grow full sized peas inside the pod and have less fiber in the pod. The result is a full round pea pod that you can eat the whole thing pod and all. I have gotten them in stores like Costco and the grocery market, but it is exciting to be able to grow some of these in the home garden or on the farm.
These edible pea pod peas are very popular. The older varieties had strings that grew on the top of the pod. You would have to process the peas by peeling off the string before eating them. There are newer varieties that are stringless. Look for the stringless seeds when getting your seed. Sometimes even the stringless varieties will develop strings when the weather is erratic and gets too cold or too hot when the pods are forming.
When and how do you plant peas?
Peas are a cool weather crop. You can plant them early in the spring, or in the fall when the temperatures cool down. Mild frost doesn’t hurt peas. Peas can even handle a light snow.
When peas are planted in the spring you can put the seeds in as soon as you can get onto the ground. Late winter and early spring will usually work fine.
An old timer around here would sew pea seeds in the late fall or early winter and have them germinate in the early spring when the ground warmed up. I am not certain how well this will work, but it might be worth a try.
The thing to remember is that green peas are a cool weather crop and will not do well when the temperature warms up and gets hot.
When you plant the pea seeds you should space them 2 inches apart. If you have sandy soil you will need to plant them 2 inched deep. If you have heavy clay soil you will need to plant them a little shallower, about 1 inch deep. The clay will keep more moisture in the soil and can sometimes create a harder crust for the pea sprout to break through.
Peas do well as a row crop and can be planted on both sides of a 30-36-inch (76-90 centimeters) row. You can also put them into a patch style planting, just keep them spaced far enough apart for the plants to fill out with leaves and peas.
You simply select the correct size planting disk, put the seed in the hopper on the top of the planter, set the depth on the foot of the planter and push it down the row.
If you have larger areas to plant you may, there are also some planters that you can attach to your garden tractor or ATV that you just pull.
When you are planting with a seed drill attached to a farm tractor, follow the specifications recommended by the manufacturer of your seed drill.
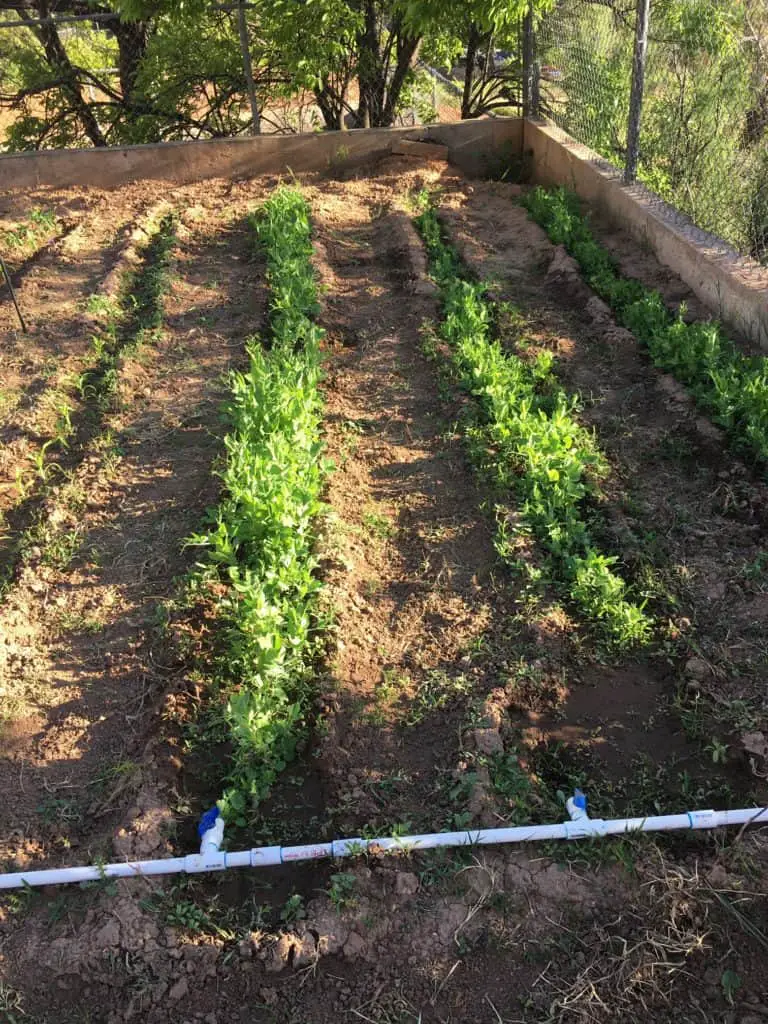
Planting green pea seeds in a row.
Planting tip
We have found that just opening up a row and placing the seeds by hand then closing up the row burying the seeds works great.
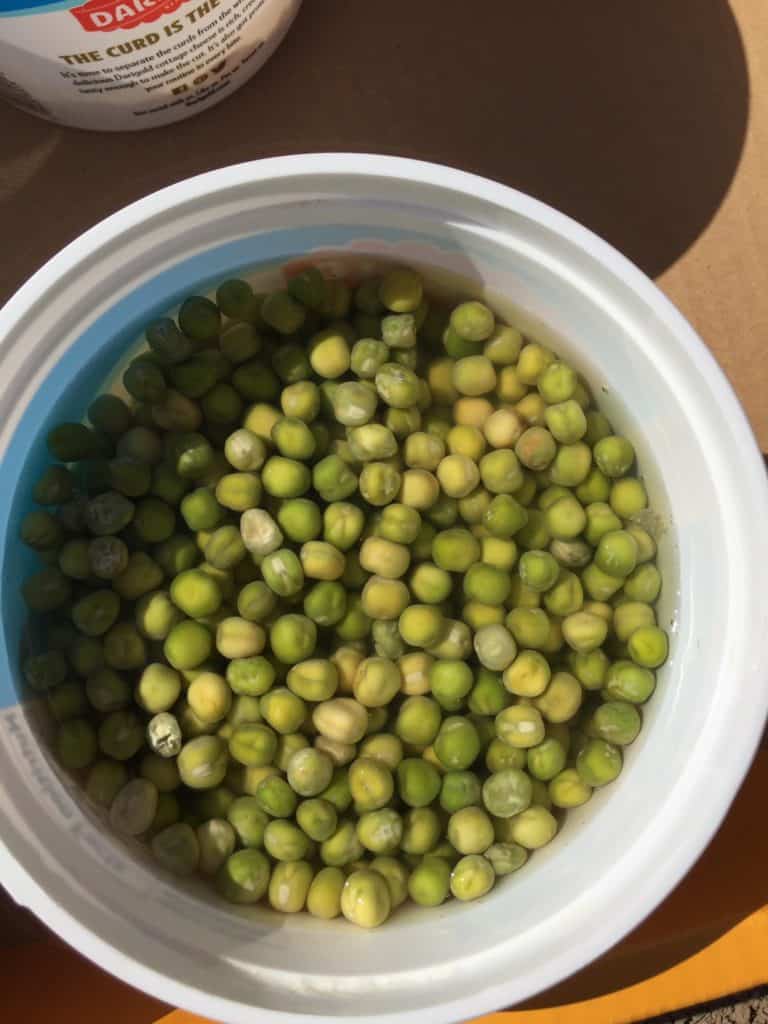
A tip that we use with peas is to soak the seeds in water for a few hours, sometimes even overnight to help with germination. When you soak the pea seeds, they will not work in the seeder, so planting them by hand is the best option if you soak the seeds in water.
Green pea seeds soaked overnight before planting.
Watering
When watering the peas, you will need to monitor them. Peas will need moist soil, but not too wet. Peas are highly susceptible to mildew. Due to the susceptibility of peas to mildew you should avoid overhead sprinkling. Peas to much better with furrow irrigation or a drip system.
Be observant if the soil is too dry. The peas will not develop the peas inside the pod well without good moisture. Sometimes a warm spell in the spring can dry out the soil pretty quickly.
Usually watering them once a week when it is cool and twice a week when the temperature warms up. This will depend on the composition of your soil, whether it is sandy or clay.
Peas are a legume. They have the property of being a nitrogen fixer. They have properties with their growing that works to fix nitrogen into the soil. This leaves the soil full and ready for nitrogen using plants.
Often legumes such as peas are used as a green manure to help fertilize soil. We have a great article on it here. You can in effect use peas for a double purpose in your garden or farm.
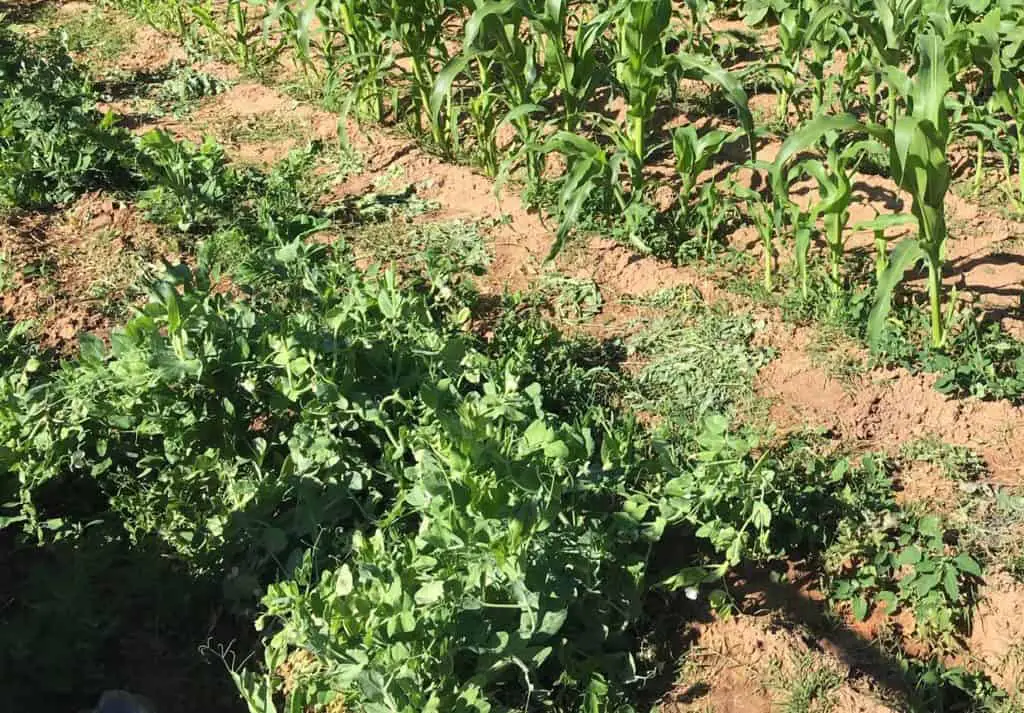
Green peas growing in the garden.
Harvesting.
Harvesting peas is rather a simple technique. You grab the pod and grab the plant and carefully pull the pod off the plant. In my experience the peas don’t all ripen at once. It usually takes us 3-4 pickings to get all our peas. So being careful to not damage the plant is important. The final picking isn’t as crucial to save the plant, you can till it into the soil or remove it from the garden after the final picking.
Peas will ripen and begin to swell the pods. You will want to pick the peas when they are young and sweet, not old and hard.
When to pick the peas is always a conundrum. Some get a little too eager and anxious and pick too early. Younger peas taste better and picking the peas will stimulate the plants to continue bearing. Use your best judgment.
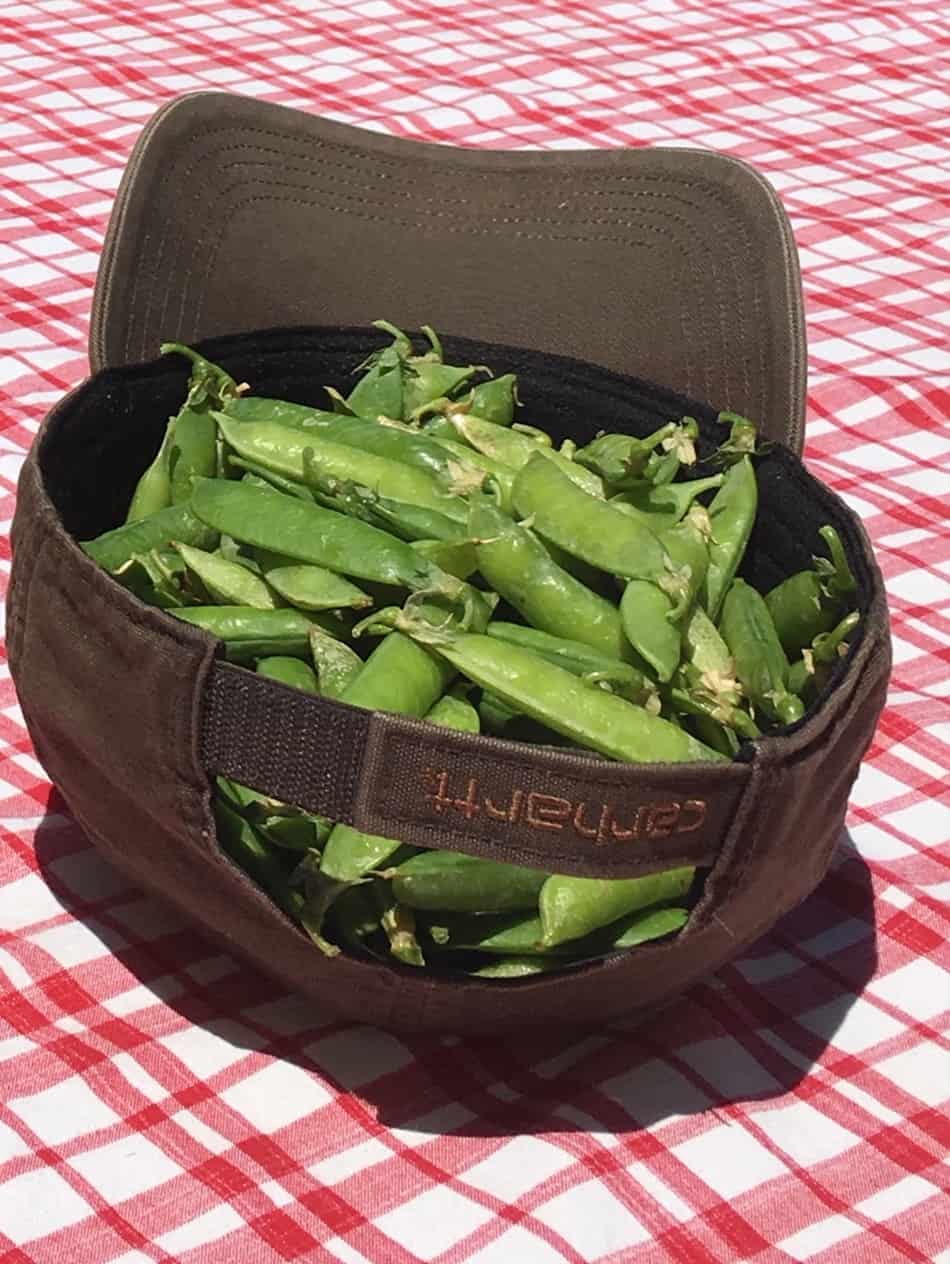
Snow peas and sugar snap peas also need to be picked when they are young and tender. If you wait too long the pods will grow fibrous and become pretty terrible to eat.
Shelling
With the exception of the Sugar Snap and Snow peas you will need to shell the peas out of the pod. This can be time consuming but is usually worth the monotony. The end results are sweet tasty peas ready to eat or store for future use.
Over the years there have been some interesting inventions to shell peas by machine. We have tried a few of these contraptions. Most of the time the peas end up turning into some kind of sad mush of pea juice and pulp.
The shells of the peas can be used for chicken feed, compost, or tilled back into the garden to add beneficial organic matter to the soil. The more organic matter that gets put back into the soil the better the loam of the soil will be. Here is an article on loamy soil we wrote.
Beautiful green pea plants growing in the garden.
Preserving and Storing Peas.
Peas are one of the first things to be harvested from the garden. They are sweet and full of flavor. You will probably want to eat them raw as a snack or blanched and devoured as soon as they hit the table. If you do end up having enough to store there are a few methods of storing and preserving peas for future use.
For a rule of thumb. 20 pounds of peas makes 9 pints. 31-1/2 pounds of peas makes 7 quarts. If you want to add salt to your peas it’s ½ teaspoon per pint, or 1 teaspoon per quart.
You will want to shell and wash the peas. You will then need to decide whether to can the peas in a hot pack or raw. Hot is when the peas are cooked before pressure canning. Raw is when you put raw peas into the jars and poor boiling water over the peas. Processing the jars in the pressure canner is the same for both methods. The difference will be the procedure and the taste is slightly different.
Hot pack
For hot pack peas cover peas in a large pot with boiling water. Boil the peas for 2 minutes to fully cook them. Add ½ teaspoon of salt per pint to the pint jars, or 1 teaspoon of salt per quart to the quart jars. The salt is added for flavor, you do not need to add the salt if you don’t want to.
Fill the jars loosely with hot peas. Add enough of the juice that the peas are cooked in to leave a 1-inch headspace in the top of the jar. Make sure the bubbles are out of the jars. If you are low on the juice the peas have been cooked in, you can just add boiling water to the jar until there is about 1 inch of space at the top of the jar.
Wipe the jar with a clean towel. Place the lid on the jar and screw the top or screw band on. Follow the recommendations on the lid package. You will need to tighten the screw band finger tight, meaning not too tight and not too loose.
Raw
The raw method is fairly simple. Fill the jars with raw peas leaving at least 1 inch of room at the top of the jar. Add boiling water to the jars leaving 1 inch of room, or headspace, at the top of the jar. Remove air bubbles in the jars. You may need to add a little more boiling water to the jars as you get the bubbles out.
Just like the hot pack, you wipe off the top of the jar with a clean wet towel, put on a lid and screw the top or screw band on. Make sure the screw band is finger tight, not to tight and not too loose.
Process Jars in Pressure Canner
Make sure you read and understand how to run and work the pressure cooker. Pressure cookers can be very dangerous and need to be used with great care. Read, follow, and be familiar with all guidelines from the manufacturer.
Prepare the canner by putting in hot water and the rack. Follow the recommendation of the manufacturer. If there are no specifications, then fill the canner two or three inches high with hot water. For hot packed peas you can preheat the water to 180 degrees F. When doing that you will need to make sure you don’t evaporate the water out of the pressure canner. For raw packed peas the water needs to be preheated to 140 degrees F.
A little timesaving tip is to prepare the jars while the water is heating in the pressure cooker. That way the jars and peas are hot when you can them.
Put the filled jars on the jar rack in the canner. Be careful to keep the jars upright. Sometimes tipping the jars can get food under the lid and will not let the jar lid seal properly.
Fasten the lid of the canner and turn up the heat of the stove. You will want to heat the water in the pressure cooker to a boil leaven the weight off the vent pipe or leave the petcock open. Steam will come out of the vent or the petcock. Let the steam go for 10 minutes.
After ten minutes of the steam flowing, place the counterweight or close the petcock. The pressure canner will pressurize in 3-10 minutes. The time it takes to pressurize depends on the elevation you are at. Refer to the manufacturer’s guidelines.
Make sure you keep a close eye on the pressure. If the pressure goes below the recommended amount you will need to bring it back up to pressure and start the time needed to process over. If you don’t, you risk the peas being under-processed and being unsafe to eat.
When finished processing take the canner off of the heat and let it cool. Just let it cool naturally to allow the proper processing of the peas. Forcing cooling could result in spoiled peas. So just relax and let it cool down by itself.
After the canner is cooled and depressurized take off the vent weight or open the petcock. Then wait another ten minutes and take the pressure canner lid off. Be careful not to mess up the lid and seal. Remove the jars one by one carefully. Let the jars cool naturally and sit for 12-24 hours.
Once cool you can eat the peas or store them on the shelf for future use.
Freezing peas
Freezing peas is one of the best ways of preserving peas to keep their texture and taste. Freezing peas is simple and straightforward. The process is blanching the peas, cooling them down quickly, putting them into containers, and then freezing them.
Shell the peas and wash them thoroughly. If you are freezing edible pod peas, just wash them thoroughly. Blanch them in vigorously boiling water.
You need to be aware of the elevation you are living at for how long to blanch peas. 1-1/2 minutes below 5,000 feet, and 2-1/2 minutes at 5,000 feet and above.
Cool the peas in ice water immediately after the time is up for blanching. The cooling process should take about the same amount of time as the blanching process. Drain them once cool.
You can then put them onto containers and put them onto the freezer. One thing you need to be cautious about. If the peas are left to freeze in a thick bunch or pile, they run the risk of getting spoiled or turning sour.
The best method we have found is to put a cup or two of peas into a freezer bag and spread the bag of peas flat in the freezer. This allows the peas to freeze quickly and uniformly.
Another method is to use a vacuum sealer. The process is the same as with the freezer bags, but you use the vacuum sealer to take out any air. Vacuum sealed food stays fresh tasting and will easily freeze. Here is a link to a vacuum sealer and the bags needed.
Drying Peas
Drying peas is very similar to freezing peas. You blanch them, cool them down, and put them in a dehydrator. You can use an oven, but a dehydrator is more efficient.
Shell and wash the peas. Bring a pot of water to a rolling boil. A precaution can be taken at this point. You can add 1 teaspoon of citric acid per gallon to the water. The citric acid acts as an anti-microbial agent.
Put the peas in about 4 cups to every gallon of boiling water. You will need to blanch the peas a little longer for drying. Below 5,000 feet 2-3 minutes, 5,000 feet and above 3-4 minutes. Put the peas immediately in ice water. Don’t cool the peas too much, just stop the cooking process. You will be heating them up with the dehydrating.
Drain the peas and dry them on a towel or cloth. Spread out the peas on drying trays in single layers.
Dry the peas in a dehydrator or oven at 140 degrees F. You may need to turn the peas over every 3-4 hours. As they peas get close to being dried, watch closely. They can sometimes get burnt or scorched towards the end of the drying process. Peas should be wrinkled, hard, and green when finished drying.
The time to dry peas in a dehydrator is 8-10 hours. A conventional oven will take a lot longer, up to twice as long.
After the peas are dried, they can be stored in a container with stay fresh packets, moisture-vapor-proof containers or bags.
Freeze Drying
Freeze drying peas has not been readily available for the home user. There is an option available for the home use now and can be used readily for most all vegetables and fruits including peas.
Freeze drying peas is very simple. You shell and wash the peas. Dry them out on a towel or cloth. You can also blanch them just as you would with freezing or drying peas.
Put the peas in the freeze dryer and let the freeze dryer go through its process. The freeze dryer can take anywhere from 30-40 hours to work depending on the moisture and size of the peas themselves.
Freeze drying tastes great and keeps the nutrients in the process. Freeze drying will keep the food edible for 25 years. The machine itself is a bit expensive. If you are planning to store a lot of your produce, then you will want to consider a freeze dryer.
One obvious benefit of growing green peas is the great taste. Green peas are one of the earlier food you can get from your garden. Green peas are full of flavor, especially fresh picked.
Green peas are high in nutrients and low in calories. They have a good amount of protein for a crop grown in your garden. 1/2 cup of green peas provides:
Calories: 62
Carbs: 11 grams
Fiber: 4 grams
Protein: 4 grams
Vitamin A: 34% of the RDI
Vitamin K: 24% of the RDI
Vitamin C: 13% of the RDI
Thiamine: 15% of the RDI
Folate: 12% of the RDI
Manganese: 11% of the RDI
Iron: 7% of the RDI
Phosphorus: 6% of the RDI
Another great benefit of growing green peas is the nitrogen fixing properties. Peas will help fix nitrogen into the soil. This is a property of most legume plants. You will have better success in growing nitrogen using plants like corn, cabbage, and lettuce in an area where you have grown green peas.
If you can try to till the plant into the ground when it’s finished in the garden. The plant will break down well and add really beneficial organic matter. The addition of the organic matter really aids in soil loam and creates better soil for gardening.
Summary
Green peas are some of the earliest plants you can grow in your garden. Plant them in late winter-early spring. They grow well in cooler temperatures. Green peas are easily cultivated and provide a great tasting, nutritious treat. If grown and preserved well you can enjoy them throughout the year.
Raising chickens is a great thing to add to your backyard, farm, homestead, and life. After raising chickens for a while, you may want to add variety to your flock. Adding turkeys could be something that you are considering.
Can you raise turkeys and chickens together? The quick simple answer is yes, and that this has been done for years. You do need to take some precautions, turkeys need a lot of room and there is a very serious disease called “Black Head” that you need to consider.
Hatch and Brood turkeys and chickens separately
Chicken chicks and turkey chicks are similar in appearance with a size difference. Turkey chicks are sizably larger than chicken chicks. With the size difference you would think that the turkey chicks would beat up on the chicken chicks. This is usually the exact opposite.
Turkey chicks are somewhat lethargic, timid, and docile. When put in with chicken chicks turkey chicks will often get picked on and may even get killed. Chicken chicks are vigorous, inquisitive, and can be fairly aggressive.
When hatching out your turkey chicks and chicken chicks you will want to separate them very soon after they hatch. You may even want to use two separate incubators to keep the newly hatched turkey chicks safe. It’s amazing to see how quickly chicken chicks hatch and are full of energy and ready to go.
Some people have had success with raising chicken and turkey chicks together from hatching them together. It is a bit of a risk and you need to keep close attention to the chicks. Separate them immediately if you see them picking at each other. Chickens can kill a docile turkey chick quickly.
A good practice is to order chicks already hatched from hatcheries or buy from a local farm and ranch store. I personally recommend this for first time and new poultry raisers. The hatcheries and farm/ranch stores take the risk of the initial hatching of chickens and turkeys not working out. The mortality of an incubator can be high for people that are new to doing it.
Once you get the chicks be it from your own incubator or purchased already hatched you should brood them separately. Keeping the chicken chicks separate from the turkey chicks will allow the turkey chicks to develop without being picked on and possibly killed.
Brooder set ups can be easily situated to keep the chicks separated and healthy. As the turkey chicks grow you may want to introduce them to your chickens when they are becoming larger and more vigorous.
Feed may need to be different
Another thing to consider is the protein content of the food for the chicks. Turkeys are a much larger bird and may need a high protein feed as they grow. Feed suppliers have come up with some options that can fit the need of a multi-species flock. Here is one all flock feed available online.Here is another option for feed.
Raising for meat, egg layers, feathers, or pets
Turkeys can be raised for multiple reasons. Turkeys are raised for meat, feathers, eggs, or pets.
Meat
If you are raising them to be harvested, you may want to separate them and give them a higher protein feed. This will allow the bird to reach the highest weight you can when butcher time comes.
Egg layer
If you are raising turkeys for eggs they will do fairly well on the same feed as your chickens, or the all flock feeds available.
Turkeys will need a ground nest to lay eggs in. Turkeys and chickens generally will not have a conflict with laying eggs in the same coop if you have ground level boxes for the turkeys and nest boxes for the chickens off of the floor. The flock raising feeds will do well for them.
For feathers
The feathers from the turkeys can have uses. Turkey feathers are used for art, crafts, and decoration. I use turkey feathers for tying fly’s for fishing.
You don’t necessarily need to kill the turkey for the feathers. Often I get plenty of feathers for my need just gathering the feathers that the turkeys loose just living life normally.
Pets
When raising chickens and turkeys together they can easily become pets. The fun and interesting personalities of the turkeys are very engaging. One tom turkey we had was just a joy to have around. He would keep watch on everything and warned the chickens about predators such as hawks or dogs.
Having a turkey as a pet is not that unusual especially with some specialty breeds. They can be rather beautiful and full of character.
Equipment
The equipment for raising turkeys is similar to chickens. The thing to consider again is the size of the turkeys. Some of the feeders and waterers are too small for turkeys to use effectively. You will want to consider some larger feeders and waterers to accommodate the turkeys.
Here are some feeders and waterers that could make it a lot easier for your turkeys.
You will find out that turkeys will try to perch on the same things that chickens do. Some chicken perches just won’t work for turkeys. The perches for turkeys don’t need to be very elaborate or anything, just sturdier. 2×2 or 2×4 boards are a good option to make perches from.
Temperament
The temperament of turkeys is a little different than chickens. As stated earlier, turkey chicks are a lot more docile than chicken chicks.
When turkeys reach maturity, they will act different than chickens as well. They can act as sentinels and protectors. Turkeys will have very fun and interesting personalities as well. We had one tom that would fly up to the roof of the house and scan the fields keeping watch. When he would see a hawk or a stray dog, he would sound his alarm and flare out his tail and warn the rest of the flock.
Turkeys are generally not very aggressive with the chickens. However, they will protect the hens vigorously. If a rooster gets a little too rough with the hens, he may find himself on the discipline end of a turkey’s wrath. Some people have even found the turkeys will kill a rooster if the rooster is too aggressive.
Often the turkeys will become the mediators of the flock. Turkeys will break up squabbles and sometimes will look after shy or loner birds. When you see the personalities emerge from the flock is becomes really interesting and fun to see. For me it makes it difficult to harvest a turkey after you see how fun some of their personalities are.
Turkeys with Chickens Need Lots of Room
When introducing multi specie flocks together you will need to make sure there is enough room. Turkeys are huge compared to chickens. Turkeys will need a lot of room to live. Putting the two species together will require the space issue to be resolved.
When you do not have enough room for the chickens and turkeys several problems can arise. Crowded birds will not lay eggs as productively. More food will often get wasted trying to show acts of aggression or dominance without proper room. Death and cannibalism can be the result of too tight quarters for the birds.
Make sure to have plenty of room for turkeys and chickens. They will adapt to become a cohesive flock generally the chickens will be the first for food and treats and the turkeys will come later in a calmer method once the frenzy is over.
Blackhead disease
Blackhead disease is something to keep your eyes out for. Turkeys are susceptible to this terrible disease that will kill them and can infect the entire flock. Chickens are a bit more tolerant of the disease but can be carriers and can infect turkeys.
Blackhead disease comes from a protozoan that is a pericyte. This pericyte will attack important internal organs especially in turkeys. It attacks the liver and the intestine, specifically the cecum, of the host bird.
The protozoan is found in the eggs and larva of a parasitic worm, the cecal worm. Earth worms will eat the eggs and larva and the protozoan will infect the turkeys when they eat the earth worm. The protozoan can be in the soil and viable for up to 3 years, so it is difficult to eradicate once you have it.
Chickens are less likely to be affected much, but they can be carriers. Turkeys, quail, and game birds are all susceptible to the protozoan and can get very sick and die.
There is a treatment for the infection of Blackhead disease. You can use an antiprotozoal medication and treat your flock. Antiprotozoal medication needs to be prescribed by a veterinarian. Once prescribed you can great your birds and they should be ok. There are even some turkey feeds that have a Blackhead preventative.
Signs to look for with Blackhead disease is the turkeys acting lethargic, ragged feathers, not preening themselves, seeming depressed or just not feeling good.
If you do need to treat your turkeys with an antiprotozoal you should not eat the eggs they lay. You will also need to take precautions and separate the birds from your laying chickens.
If you don’t have Blackhead disease, then there is no worry and the chickens and turkeys will do great. If your property has been without chickens for a number of years you probably don’t need to worry that much about Blackhead disease.
Marek’s disease imunity
Mareks disease can be found in chickens and can prove to be deadly. When you keep turkeys and chickens together turkeys carry a disease that is similar to Mareks disease but is harmless.
When the chickens associate with the turkeys, the chickens build up an immunity to Mareks disease. The chickens will catch a related harmless virus and it gives the chickens a fair chance.
Introduction of turkeys to your flock
When turkeys are introduced to a chicken flock you will need to be careful. You should wait until the turkeys grow to maturity. Young turkey poults are docile and could be picked on by the chickens. A grown turkey should be able to hold their own with the flock.
Slow introductions would work well. Establishing a pen for the chickens and turkeys to see each other for a few days would be ideal. We have fashioned a transition pen within the coop to assist in introducing a new birds to the flock.
Some people have found successful introductions to the flock by using a good broody hen. A good dedicated broody hen can take excellent care of the turkeys. That will allow a smooth transition for the turkeys into the flock.
I have yet to find a broody chicken hen that would last the entire duration of raising their own chicks, so be cautious to use a broody hen that you know very well to be a good brooder.
Turkeys are a great addition to the flock.
Summary
In summary you can raise turkeys with chickens just fine and many have been doing this successfully for years and even generations. You will just need to be careful with a few things:
Keep the chicken chicks and the turkey chicks separate. Turkeys are much more docile than chicken chicks.
Make sure you have the correct feed that will work for both chickens and turkeys.
The equipment such as feeders, waterers, and roosts will need to be bigger to accommodate the size of turkeys.
Make sure there is plenty of room for the turkeys and chickens to roam, lay, and roost.
Keep your eyes open for Blackhead disease and contact your veterinarian to treat it and save your birds.
Take caution and precautions to introduce your turkeys to the chickens. Chickens are much more aggressive than turkeys.
If you follow these guidelines and suggestions, you can have a really fun and colorful flock to enjoy. Turkeys and chickens together really accentuate the different personalities of the birds. You will also have more opportunities of having turkey eggs, meat, or as pets.
Beekeeping is a great thing to pursue. You will need the use of several tools to do beekeeping effectively. With good tools beekeeping can be easily managed.
These are some recommended supplies for beekeeping. They are linked to actual items that you can purchase, and we do get a small percentage through an Amazon affiliate program if you choose to purchase them. It doesn’t affect the price you pay; it just helps us out.
The first thing I would recommend is a good hive tool. The hive tool is something you should always have on hand when beekeeping. The hive tool is how you are able to look into the hive, separate the frames to inspect them, pry open the lid and separate the supers. A hive tool is indispensable for a beekeeper.
You will want to consider getting more than one hive tool. With finding out how handy they are at things beyond beekeeping my hive tool gets borrowed for other projects leaving me with always needing one.
You will also want to keep the spread of disease, mites, and problems from one hive away from another hive. You may want to have one tool soaking in a sterilization solution to kill any contaminants while using a second sterile hive tool to keep your hive inspections going.
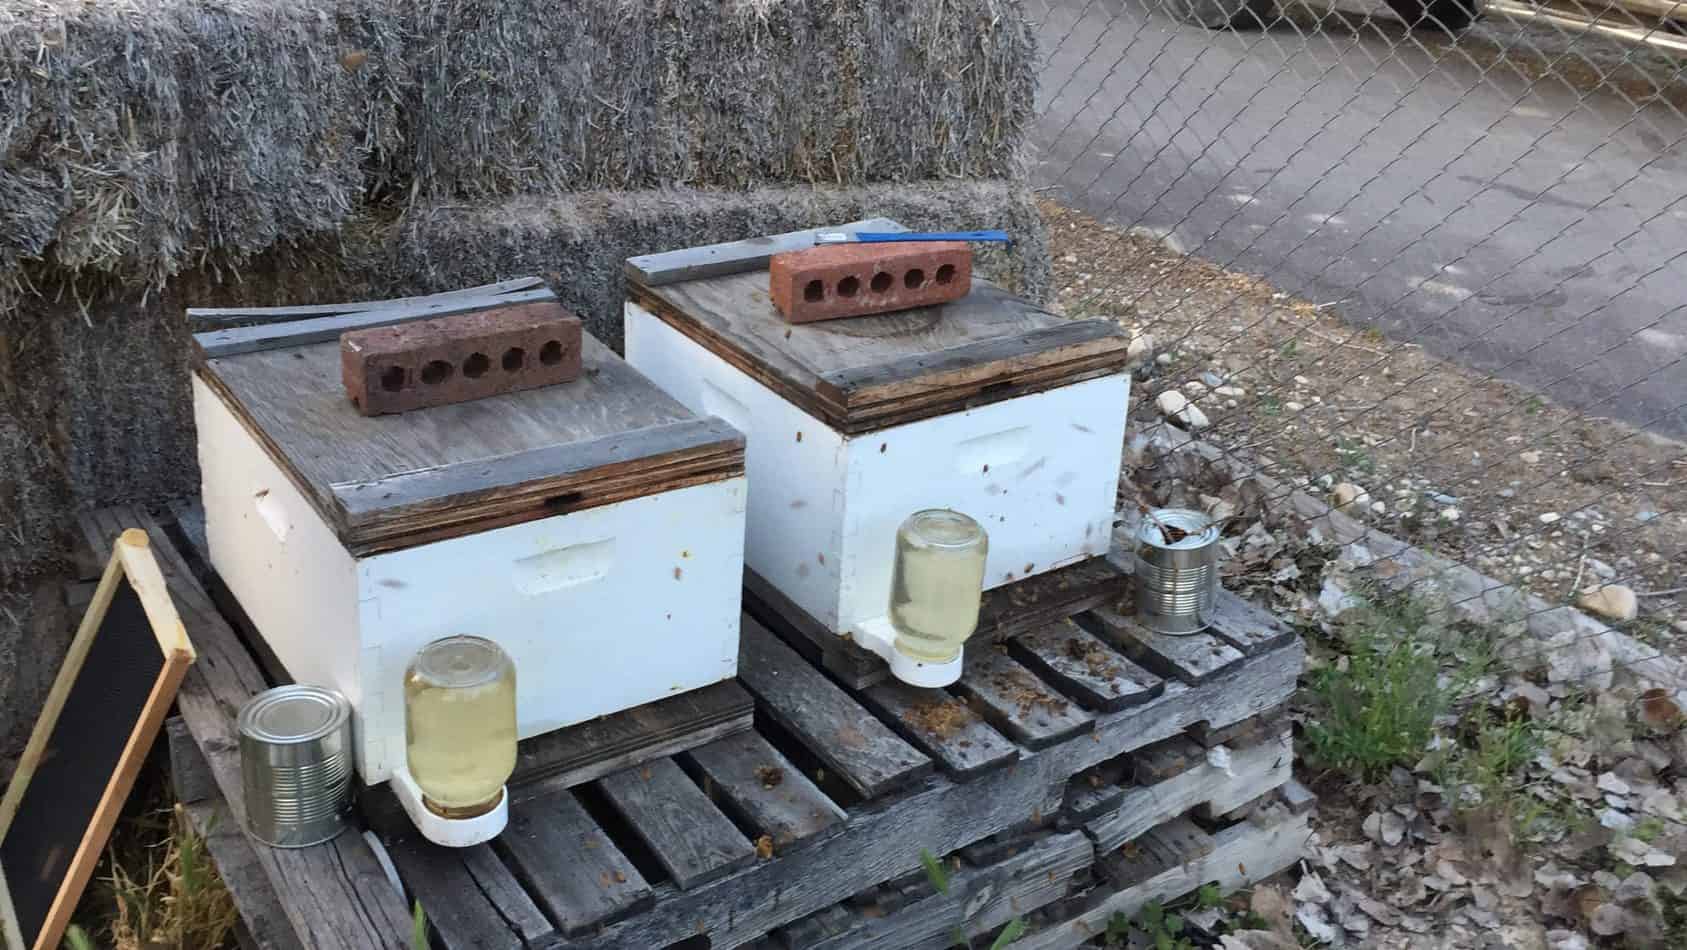
The next thing to consider is the hive body itself. I use the Langstroth design for my hives. I really enjoy the availability of the components and the information I can find about how to use them. Generally you will need a top, 2 deep hive boxes, 2 medium hive box, and a bottom board. Some people use a queen excluder, I don’t personally use one.
You can use a combination of deep and shallow boxes, or whatever will suit your needs. Deep boxes can get up to 80 pounds or more when full of honey, so medium boxes may be a little more manegable.
Here are some Langstroth style hives I would recommend online:
Flowhives are a relatively new option. They have a design that simplifies the harvesting of honey. They are also gentle on the bees themselves. The Flowhive was invented by beekeepers who wanted to leave the bees free from harm and having a beekeeper tearing into it. It was a successful kickstarter campaign and they have developed a great beehive ready to use when shipped. Here is a link to purchase.
A Flowhive may not appear to be on the reasonably priced side. However, with the Flowhive you don’t have to purchase a honey extractor or take all the space and time to harvest each frame. You just use their patented design and have the honey poor out of the hive itself without disturbing it.
A top bar hive is an interesting way to raise bees. I do know of some good books for designs to build you own top bar beehive. Here are some books that I would recommend for getting into top bar beekeeping.
One option for a beehive that I have no experience with is a Wingoffly beehive box. It certainly looks interesting to me. It is trying to be more gentile with the bees themselves. I have no experience with this style of hive, but I would encourage you to look at it. It might be just the answer for you and your beekeeping.
Nuc box
Nuc Boxes are used when you want to split your hive and establish a new colony of bees. The idea is to have a smaller space that has a few frames, typically 5 frames. This smaller space will help to establish a new colony from an existing colony. Having a Nuc box isn’t a necessity with beginning beekeeping. They are great when you have some time into beekeeping and want to expand your apiary.
Nucs are relatively simple to build yourself, but many are available for purchase. Here is one that I would recommend. It will last you a long time if you take good care of it.
You can also get a lightweight more portable Nuc here. Sometimes you will only need to house your new beginning bee colony for 24 hours to a week and a simpler reasonably priced box will work. It does not include the frames.
Beekeeping Smoker
A must have for beekeeping is a beehive smoker. These are the things you always see with beekeepers. They are how you can help control the bees during inspections, harvesting honey, splitting a hive, etcetera. You will want a good one that will work well especially when you need it to.
I personally use a beekeeping jacket instead of a suit. I have found that a beekeeping jacket serves my needs more easily. I have beehives located in different areas and need to drive between them when inspecting. I have found that a beekeeping jacket is much easier to work with when driving to and from my different hives.
If you would like a beekeeping suit here is one that I would recommend. You may want to consider a beekeeping suit if you are planning on running a larger apiary. You may also want a suit to keep your other clothes cleaner. Some suits are good for protection if you are raising more aggressive bees. Suits can get a bit hot during higher temperature inspections.
Beekeeping veil
I like to use just a beekeeping hat with veil. This allows you to have your face protected during beekeeping chores, but still remain cool and more comfortable. Often during a honey flow or for general maintenance inspections the bees will not be overly aggressive, and a hat and veil works well. I like this one here.
Through much of beekeeping you may not want to use gloves just to maintain a gentler hand with your bees. You will probably want or need to use gloves at some time during your beekeeping adventure. Official beekeeping gloves are long and have elastic at the top. They work well. I would recommend this one,
A beehive brush is a great tool. I raised bees for several years just fine without one, but they come in handy during hive inspections if you want to brush off the bees gently to inspect frames. They can also help when you pull honey to harvest. They are a simple long soft bristled brush. We recommend this one.
Beehive feeders are very helpful for beginning beekeeping as well as professional and backyard beekeepers. Feeders are also great for those who want to focus on honey production. There are Interior and exterior feeders available. I have used both and have liked both for different reasons.
Interior feeders
Interior feeders are where the feeder is inside the hive body itself. They are basically a reservoir of bee food that the bees have access to without needing to leave the hive. I have used interior feeders when establishing a new colony. It allows for quicker production of the hive.
I use external feeders a lot. External feeders are more easily monitored and refilled. The external feeders I recommend are a glass jar entrance feeder or a bucket style feeder. I prefer the glass jar entrance feeder due to the ease in monitoring intake and it doesn’t’ introduce a lot of moisture into the hive.
Frames
Frames are needed depending on what style of hive you are going to use. A traditional Langstroth hive will use wooden frames with a plastic foundation coated with bees wax. You can get frames with the foundation of the frame in different colors, usually white, light yellow and black. The black foundation makes it a little easier to see eggs and brood during inspections. Make sure you get the correct size of frame. The frames will com in a deep size 9 1/2 inches, or a medium size 6 1/4 inches.
You will often get frames included if you purchase a hive kit. If you are building your own hive bodies you will need to get some frames with foundation to begin.
Small cell foundation
There are some beekeepers that use a small cell foundation. The idea behind small cell foundation is that the honeybees will revert back to their original size that was historically smaller. If you do want to use this smaller size, you will need to get bees that are adapted to this smaller size or transition you bees to the smaller size by using a mid-size then eventually a small size.
These foundations are not found on Amazon. You will need to look for them here or here.
Honey extractor
There are a few ways to extract your honey from the honeycomb. You can just chew on it and spit out the wax. That can be fun and interesting to try. Some people even prefer this as a snack.
You will probably eventually want to get some kind of extractor or use an extraction process to separate the honey from the wax.
You can often find these hand crank ones for sale in want adds or Craigslist. People either get tired of hand cranking the honey out, or they get out of beekeeping all together. Sometimes the gears will get stripped, but the gears are readily available and easily replaced.
If you have more than 10-15 frames to spin out, I would suggest renting a motorized honey extractor, or purchasing one. I have not seen any that I would recommend on Amazon right now. I would suggest Mann Lake or Dadant for an electric motorized honey extractor.
Heated knife
When extracting honey from a frame you can use a heated knife to cut off the caps of the honey cells in the comb. I would recommend this one. I often don’t use a heated knife. I just use an uncapping fork.
Uncapping fork
Uncapping forks are one of my favorite tools for removing the caps from the honeycomb. It takes a little technique, but you can remove the caps without destroying the rest of the comb. You will also avoid getting melted wax in your honey as you would from using a heated knife.
An uncapping tank is very useful during harvesting and processing honey. This tank is used to uncap the honeycomb. You can do this over a tank where it will drain down the honey from the caps and not clog up the honey strainer.
An uncapping tank isn’t a necessity, but it sure makes honey processing easier.
You can strain the honey through the filter I suggested above. When you use that filter with a good food grade bucket with a honey valve then bottling the honey is a snap. I would recommend this one. It makes your life a lot easier if you want to store your honey in smaller bottles or market smaller bottles.
Filter
Here are the filters I would recommend again. I prefer this one, but this one works well if you prefer stainless steel to plastic.
Refractometer
A refractometer is a relatively inexpensive tool that tests how much water content your harvested honey has. If you have too much water, you can run the chance of having your honey ferment. A refractometer is very helpful if you plan on giving your honey away or selling your honey.
I would recommend this one. I believe you can probably find several used ones on eBay for a good price as well.
Swarm Trap
A swarm trap is not essential, but it is a way for you to possibly get a whole free colony of honeybees for free. I have used a swarm trap like this one, and it works well.
A screened bottom board is used to monitor and control pests that can be in a beehive, especially varroa mites and bee beetles. There is some controversy that a screened bottom board adds too much ventilation.
Most studies have resulted in the screened bottom boards not really affecting the colonies a lot. It can create too much ventilation through the wintertime in cold areas.
You can get some kits that have most of the tools that your will need for beginning beekeeping. Sometimes you can get all the tools you need at a more reasonable price if you get a kit.
This is just the bear boned basics to get started.
Most of the tools we recommend are available at Amazon and are easily purchased there, just click on the link provided and it should take you right to what you are looking for.