Helpful Hints for Growing Homesteads

Recent Posts

How to Remove Rooster Spurs

Long spur of buff orpington rooster. Old rooster. He's been through a few fights

Unless your flock consists of hens only, anyone raising backyard chickens will have to deal with roosters, and consequently, rooster spurs. The spurs of a rooster are its first line of natural defense, as well as a first line of defense for the flock against predators. For this reason, you will not want to remove a rooster’s spurs unless prompted by necessity. Typically a rooster’s spurs will not become a problem, and can be left alone. These spurs however can prove harmful to humans, hens or other roosters if a rooster becomes overly aggressive. In these instances, spur maintenance is essential to keeping a happy and healthy flock. This article describes the best methods for trimming or removing rooster spurs.

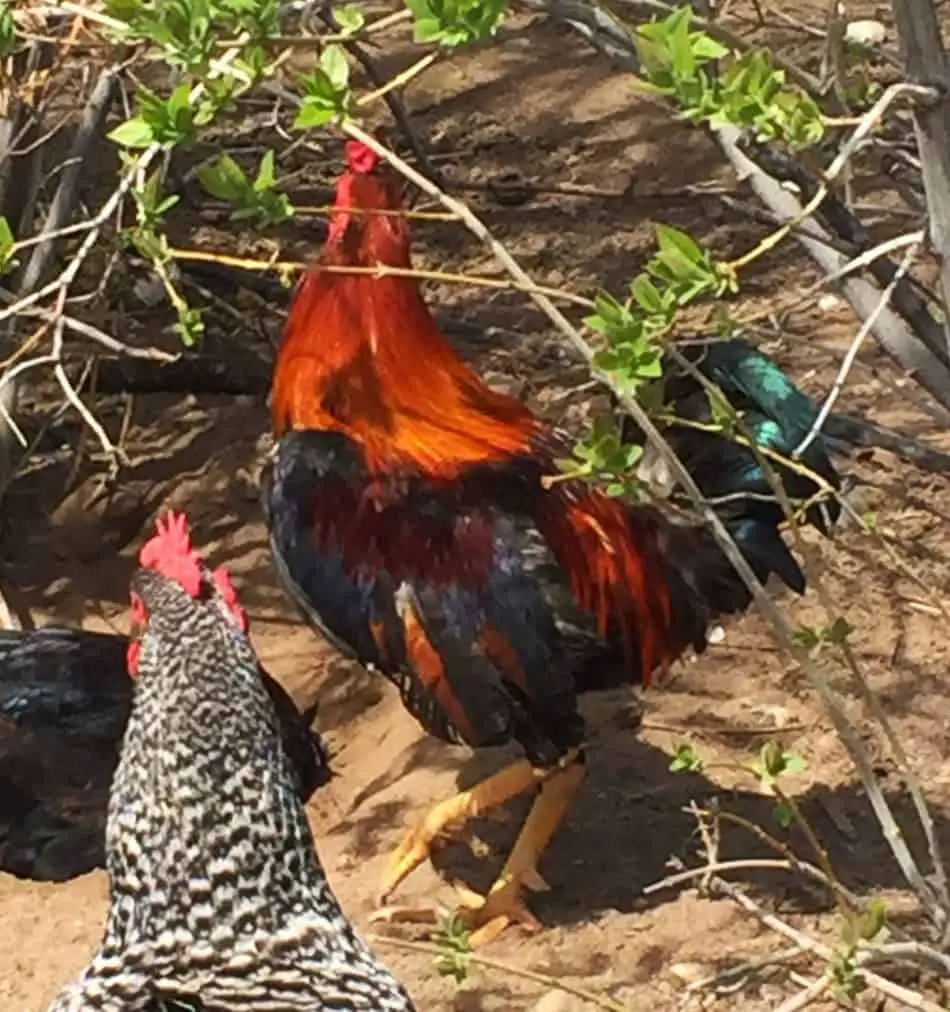
When I was eight years old, I was attacked and spurred by our family’s black australorpe rooster when I entered the coop one evening to gather eggs. Without warning or provocation, the rooster jumped into the air and spurred me on the top of the head, causing a rather serious wound. Needless to say, after the wound had been cleaned and dressed my father quickly “dispensed” of the bird, and I have been cautious of roosters ever sense. The point of this story? First off, if you are worried about an aggressive rooster in your flock, my first recommendation is to get rid of him. Some roosters are simply overly protective of their hens, and will attack other roosters, pets and humans if they perceive a threat. Though there are methods to train roosters to be submissive to humans, it is my advice that if you have a rooster showing overly-aggressive behavior, your flock (and your children) will be better off without him.

What are spurs?

Spurs typically only grow on roosters, however, in some breeds, hens may grow a small spur as well. This customarily occurs only in Mediterranean breeds, such as the Leghorn, Ancona, Minorca or Polish, or in hens of advanced age. In my backyard flock, two of my leghorn hens have developed a small spur on one leg.

All chickens, both hens and roosters, will develop a small bump or spur bud on the back of their shank bone just above the back claw at around three to six months of age. In hens, the spur bump will generally stay dormant and not grow. In roosters however, between three to eight months of age, the bump will develop and eventually grow longer and harder (covered in keratin) until it becomes a sharp spur.

Anatomically, a chicken spur is an extension of the bird’s shank bone covered by a sheath, or hard layer of keratin (the same protein material that makes up fingernails and hair). Like a fingernail, the keratin sheath is only supplied by blood at its base, thus allowing for trimming or the removal of the spur tip without causing injury to the bird. Remember however that the base is made of bone, so proper techniques should be followed to avoid permanent injury to the bird’s leg.

Adolescent Marsh Daisy rooster in Spring. Spurs are short and manageable. This rooster does not need to have his spurs removed.
Young Marsh Daisy rooster in Spring. Spurs are short and manageable.

Why do roosters have spurs?

Roosters develop spurs for several reasons. As mentioned above, the first reason is for defense and protection. Roosters are instinctively territorial, and protective of their hens. A rooster will use its spurs to fight with any creature it perceives is a threat to its territory or harem. For many flock owners, this is precisely the reason for keeping a rooster or two with the flock. The rooster is a good line of defense, or watchdog against unwanted predators. If a rooster perceives a threat, on the ground or in the sky, he will often flap his wings, squawk, or crow, and if necessary attack the predator with his spurs. Roosters will often fight to the death to protect their flock.

Second, a rooster uses his spurs during mating. As a rooster mates with a hen, he climbs onto her back, grasping for balance with his claws and spur, and her neck feathers with his beak. If a rooster’s spurs are excessively long or curved, they can cause harm to the hen’s back and wings during mating. This is another good reason to keep your roosters spurs in check.

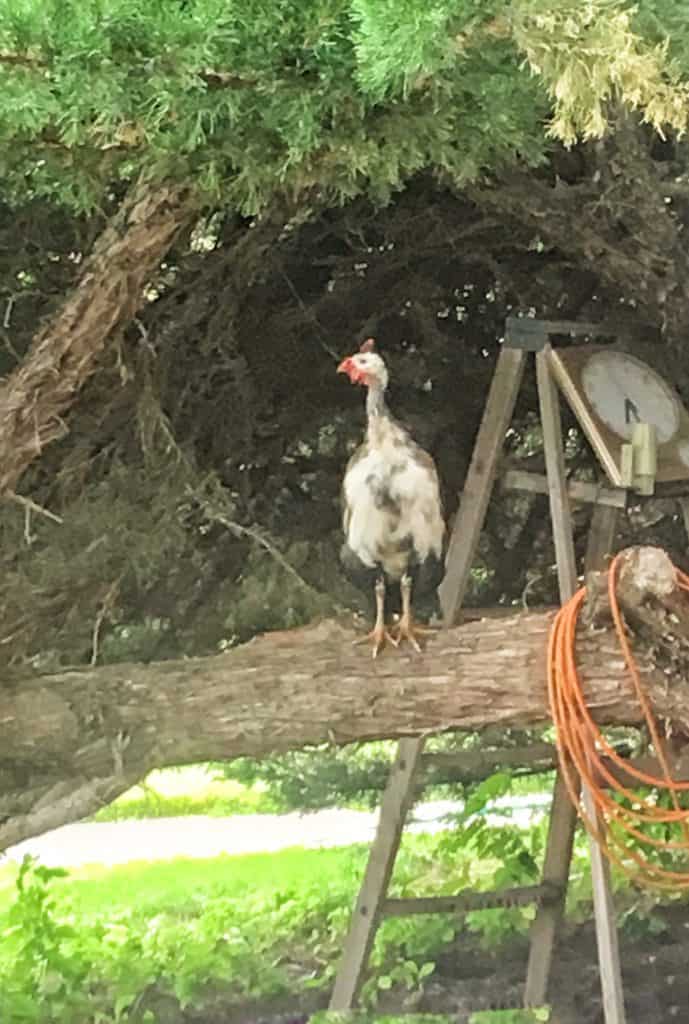
Unlike guinea hens or other monogamous birds, roosters are known to be rather aggressive philanderers. It therefore is wise to keep your hen to rooster ratio at about 12 to 1 to prevent over-mating. That being said, some roosters are simply rougher than others any may cause damage to his hens during mating. Keep an eye out for these types of injuries in your flock, as there are other measures (such as saddling) that can further protect your hens.

Third, a rooster will use his spurs to develop dominance within the flock. If a flock consists of more than one rooster, the two will likely face off from time to time to establish dominance and maintain a “pecking order”. Typically, the more aggressive rooster, or the rooster who best uses his sharp spurs will win the place of dominance. For this reason, if you choose to have more than one rooster in your flock, you will want to keep their spurs manageable so as to prevent them from seriously injuring or killing each other.

Buff Orpington rooster with long spur

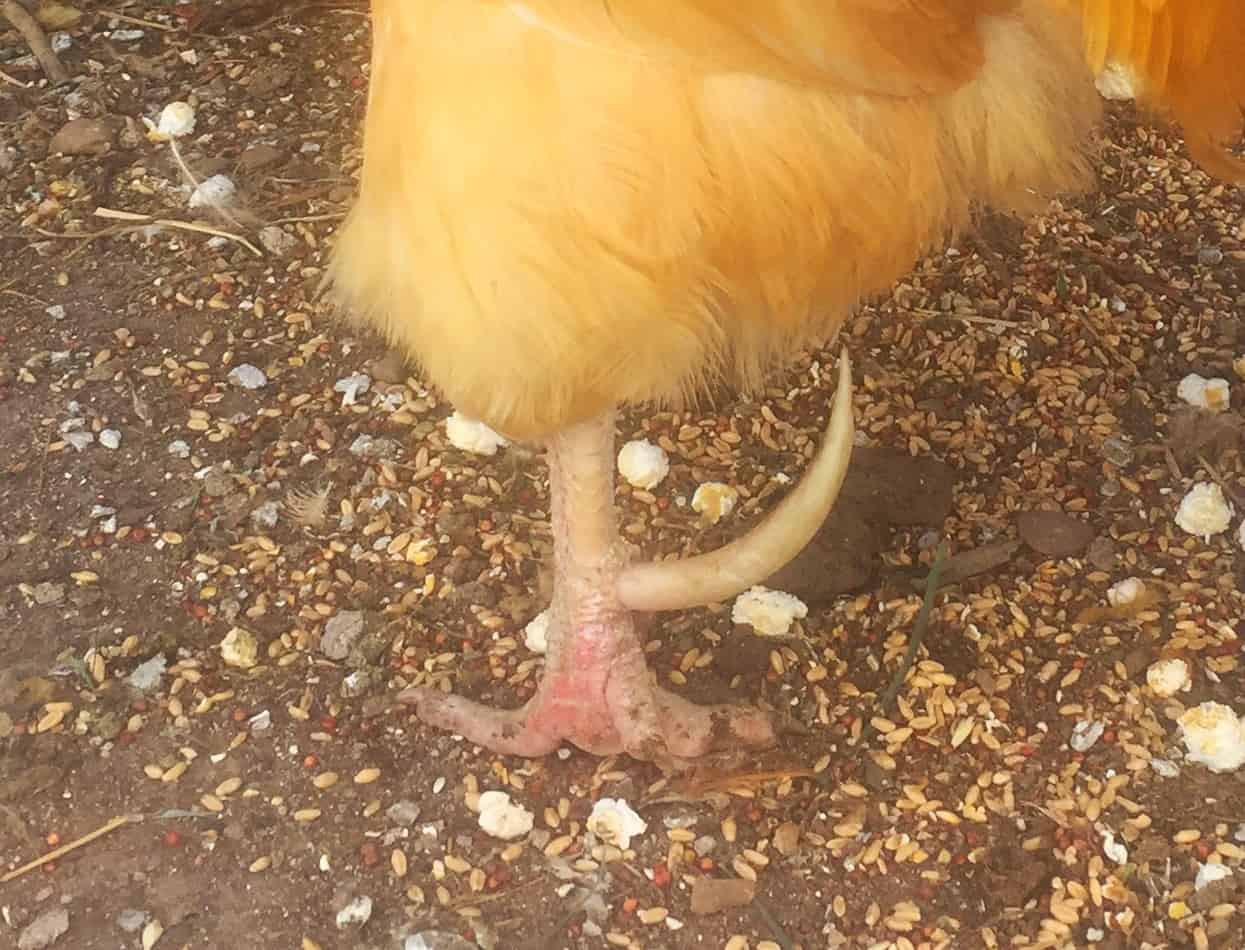
Finally, sometimes a rooster’s spurs will grow too long, and curl into such an angle, that the spur will cause damage to the rooster itself. We had a leghorn a few years back, whose right spur grew so long it curled and began to cut into his own leg, and effected his gait. This is rather common, and easily corrected. A simple trim had him back to normal in no time.

Sometimes, after displaying necessary aggression to fend off predators or to establish a place of dominance within a flock, a rooster may become overly aggressive. So, in order to protect yourself, your family, your hens, and even the less dominant rooster, it will be necessary to trim or remove the rooster’s spurs.

Should I trim or remove the spur? Or, should I leave it alone?

Some rooster’s spurs will not require any maintenance. They will grow to an appropriate length for him to be a threat to predators without causing harm or alarm to himself, you, or the flock. If however, you decide that your rooster’s spurs require maintenance, you will have a choice between filing, clipping, or removing the sheath. Most rooster’s spurs will grow back after removal, so spur maintenance and/or removal will need to be done annually. Most often however each time a spur grows back, it is smaller than the time before.

1. Filing: If you prefer to take the edge off or blunt your rooster’s spurs, filing may be the method you prefer. Simply use a metal file (purchased at any hardware or ranch store) and file the spur down as you would a fingernail. Many people prefer to use an automatic filer, grinder, or dremel tool, usually found in dog or pet supply stores. When filing with any type of tool, be careful to hold the rooster’s leg and spur steady, and not to file too much, as you may reach the “quick” of the spur and cause bleeding.

2. Clipping: Another method of maintaining a rooster’s spurs is simply clipping them when they grow too long. I have done this by using a set of sharp guillotine-style dog nail clippers. The trick is to make certain not to cut too far. You will want to do this in good lighting, so you will be able to determine where the inner bone which has a darker and whiter appearance begins. (similar to avoiding the quick when clipping a dog’s nails). If you clip too far, you risk cutting the bone and causing excessive or permanent damage. Many bird owners, use a combination of clipping and filing to ensure a good blunt edge to the spur.

Removing rooster spurs can be a bit intimidating, but don;t let that stop you. It is a necessary procedure when spurs become long, and may injure a rooster.

3. Removal of Sheath: Because the spur is made up of a keratin sheath which surrounds bone, you can also maintain the spur by simply removing the sheath. There are various methods to remove the sheath, including twisting and pulling it off, using a hot potato to steam it off, or using oils to soften it until it is ready for removal.

Twist and pull spur removal method with needle nose pliers. Just take it slow, and only twist or wiggle a bit at a time.
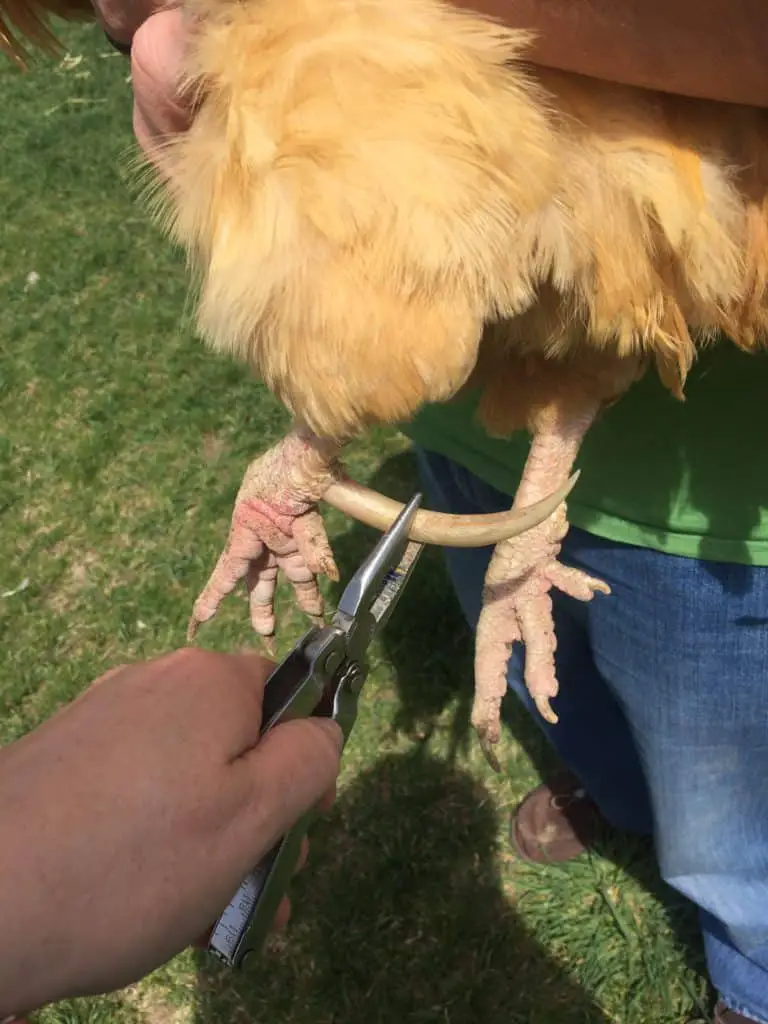
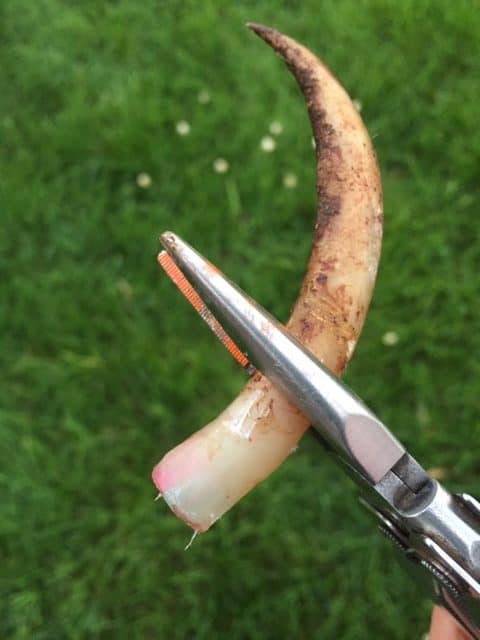
  • The simple twist and pull method is my preferred method, but may not work for all rooster spurs, as some are more securely attached than others. To attempt this method, it is best to use a pair of pliers to grasp the spur. (I use a pair of needle nose pliers). Then, once you have grasped the spur, gently twist it in a round-type motion until the spur sheath pops off. Exercise caution not to twist the rooster’s leg when attempting this method.
  • The second method for spur removal involves a steamed potato. Simply microwave a potato until it is cooked through. Depending on the size of potato, this typically takes 3-5 minutes. (Do not puncture the potato with a fork as you might do when baking for consumption). Then, maneuver the spur onto the potato, so the entire spur is embedded inside of the baked potato and leave it for several minutes. (CAUTION: be careful not to touch the rooster’s leg with the potato as this will burn him). The steam from the heat and moisture inside of the potato will soften the spur, making it more pliable and ready for removal. After allowing the potato to work for several minutes, remove the potato, and then use the twist and pop method described above. You will find the spur easily slides off of the inner bone without causing pain or discomfort for the rooster.
  • The third method also causes the spur to soften by using oil. This is done by coating the spur with olive oil especially at the base of the spur so the casing, or sheath connection will soften. We have done this by first, pouring the olive oil over the spur, and then covering the sheath with tinfoil and letting it sit for several minutes. The oil will soften the spur sheath enough that the grip and twist method is much easier.

How to catch, hold, and handle the rooster

Despuring your rooster may actually prove much easier than catching him! Many people have asked me how we catch our roosters when it is time to trim their spurs. Because our chickens are a free range flock, we wait until evening when the birds have roosted. Then, always using two people, we catch the rooster by approaching him from behind and from above, (with thumbs forming a “W”) certain to cover his wings with both hands (securing the wings will help you avoid causing undue harm to the rooster). He never likes being caught, and at times will try to claw or get away. Once caught, the second person wraps the rooster in a towel, so his wings are covered and his body secured.

A more docile rooster (in his case an old rooster) is easier to catch and handle. He doesn’t mind being held under one arm.

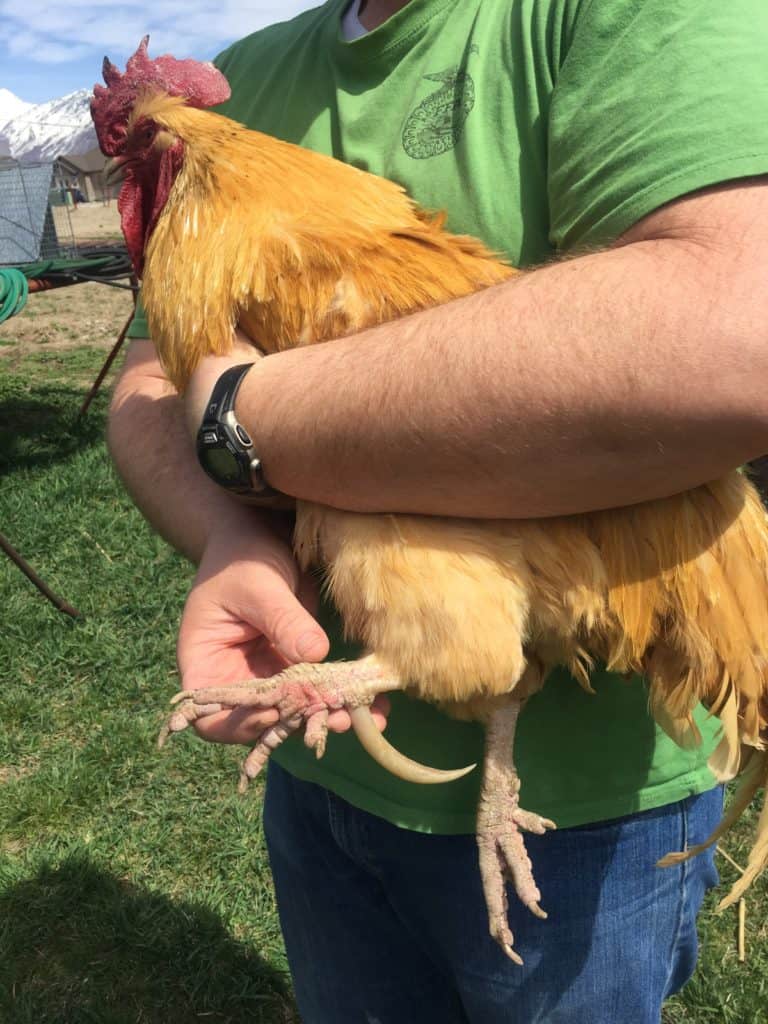
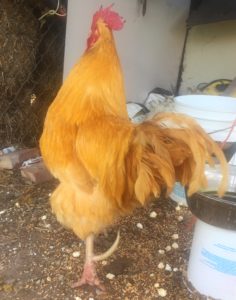
If you have a more docile rooster, you can hold him under one arm. We have one Buff Orpington rooster (“Cogburn”) who lets us pick him up and hold him for the procedure, and anther one, a Marsh Daisy (“Ichabod”) that we have to work to catch. With the buff, we are able to perform the procedure rather easily and quickly, with the Marsh it’s a little more difficult.

How to Control Bleeding:

Regardless of the method you use to remove the rooster’s spurs, you may cause the bird to bleed. Though typically, (if performed correctly) the wound should not bleed much. The bleeding is caused because the spur sheath is connected to the flesh. The best method to control bleeding is to sprinkle blood stop powder or cornstarch over the wound, then spray the weeping flesh with blu kote or another form of vetericyn or anticeptic poultry spray, you can also use teramyacin powder on top of the blood slop or cornstarch to help stop bleeding.

Is there a way to remove spurs permanently?

If the idea of removing your rooster’s spurs each year seems daunting, it is possible to have a veterinarian remove the spur permanently. In chicks, it is possible to perform a cauterizing procedure. This essentially involves locating the chick’s spur bud, and cauterizing it. I do not recommend this procedure however, as I have heard stories of birds that have had this procedure performed growing misshapen or partial spurs, and of birds whose cauterization led to leg deformities and problems. In adult birds, the spur may be permanently removed by a veterinarian, who will put the bird under anesthesia (causing it to fall asleep), and use a bone saw to remove the spur bone and stitch over the remaining wound. Neither of these procedures should be performed as a DIY project, as the spur bone is directly connected to the bird’s leg bone, and if performed incorrectly, may lead to problems with the underlying leg bone, or infection.

How long will it take the rooster to recover?

It shouldn’t take long for your rooster to recover. After a day or two, the remaining spur bone will be coated over and protected. Typically, within only a few hours of removing his spurs, he will be back to his old self, clucking and strutting around the yard.

Can Mushrooms help Cure Colony Collapse disorder?

Beneficial Reishi Mushroom

Colony Collapse disorder is wreaking havoc on honey bees worldwide. One of the components to this collapse is believed to be the effect of the Varroa Mite parasite and the viruses it brings. 

Several studies have revealed bee behavior wherein portions of mushrooms are brought back to a bee’s respective hive, creating beneficial effects.  Studies are ongoing, but the initial observations are that mushrooms are helping the health of beehives and are another weapon in the fight against Colony Collapse disorder.

This article explores the beneficial mushroom/bee phenomenon and how even inexperienced backyard beekeepers can use mushrooms to help out their bees.

Honey Bee Parasite Varroa Mite
A Varroa Mite. Contributor to Colony Collapse Disorder.

What’s the deal with the Varroa Mite anyway?

Varroa mites are a plague to bees and beekeepers.  These mites are thought to be one of the major causes of the decline in honey bee health and a major contributor to Colony Collapse Disorder.

Varroa Mites are pericytes. They will ride on a honey bee and constantly ingest the hemolymph, or blood of the bee.  They act like mosquitoes or vampires that just don’t quit. Because their mouths pierce into the body of the honey bee these pests also spread viruses that they have acquired from other bees.

Additionally, varroa mites don’t just attach to one host bee, they hop from one bee to another, and can infect several bees with viruses as they go from bee to bee.  This can weaken a bee colony quickly if the bees are not able to combat the viruses or rid their colony of the mites.

During the colder times of the year, honey bees slow down and go into their winter mode.  They cluster around the queen and vibrate to keep her alive for the next season.  In this state not much is happening other than minimal feeding and vibrating of the workers.  The workers vibrate to keep the queen warm.  When the worker bees are in such close proximity the varroa mites have a heyday. The mites will hop from one bee to another infecting as they go.

As temperatures warm up again, beekeepers are finding that a hive with plenty of honey and beebread (pollen stores) has died. The confusion of what they did wrong leads to an investigation.  Much of the time the death of the colony is due to a varroa mite infestation.  The bees have fall victim to the little vampire pericytes and the viruses they bring.

Generally, viruses are found in the digestive tract and taken into the individual bee through eating and drinking. Typically the cells in the bee’s digestive tract will be able to handle the virus and destroy it before infection. However, the varroa mite directly pierces into the bee’s circulatory system and infects the bee directly into the “hemolymph” or the blood of the bee.

What viruses do Varroa Mites bring?

The varroa mite has been linked to about 20 different viruses that infect bees.  This is still an ongoing study and more information is constantly being added.  Viruses were first detected in honey bee colonies in the 1930s.  Initially, these viruses were considered rather harmless and just part of the honey bee world.  Scientists began to become concerned in the 1980s when the population of varroa mites became more widespread.

Biologists are still in the dark regarding many aspects of bee viruses.  A lot of research is being conducted to understand these viruses and their role in how bee colonies function or cease to function. For most of us smaller, or hobby beekeepers it means we lose our prized bees.

Varroa Mate infected Honey bee
Honey Bee Worker Infected by a Varroa Mite.

Some of the viruses that are being transmitted into the hives are:

Sacbrood:

Sacbrood is a virus that directly affects the brood. The bee larvae are unable to shed their final skin before the pupation stage.  Fluid builds up and kills the larva.  Every larva that dies from sacbrood has enough virus in it to infect 1000 other colonies (Bailey 1981).  Nurse bees generally remove the infected larva in the initial stages of the disease.

Deformed Wing Virus (DWV):

Deformed Wing Virus displays with withered, deformed, and/or shortened wings.  Transmission of the virus can be in all stages of development. It will kill pupae.  It is strongly associated with varroa mite infestation, and will eventually result in the colony to collapse.

Black Queen Cell Virus:

Black queen cell virus is similar to sacbrood, resulting in the death of the larva.  It will leave the queen pupae in a yellow sac like sacbrood that will turn the walls of the queen cell black.  This virus is most active and at its high point in the spring when many hives are trying to rear new queens.  The evidence of varroa mite infestation is limited, but it can be transmitted by injection from the mite into the host bee.

Chronic Bee Paralysis Virus (CBPV):

CBPV will often affect some of the healthiest colonies in the apiary.  This virus can demonstrate in two ways.  One is where adult bees tremble and are unable to fly or crawl up the stems of plants.  Often, they will cluster, and it will result in death within a few days. 

The other way CBPV demonstrates is with adult bees looking greasy, black, and hairless.  They will sometimes have a bloated abdomen and dysentery. It will also result in death within a few days as well.

Acute Bee Paralysis Virus Complex (ABPV):

This is a complex of associated viruses that includes Acute bee paralysis (ABPV), Kashmir bee virus (KBV), and Israeli acute paralysis virus (IAPV).  These viruses all have similar transmission routes and affect bees in similar life stages.  Generally, infected hosts show symptoms in the pupae and adult stages.  These viruses are often associated with the deadly varroa mite, and resulting in total colony death.

Acute Bee Paralysis Virus (ABPV):

This virus is directly associated with varroa mite infestation.  The virus is transmitted into the jelly of the larva.  It is also rapidly transmitted by the piercing bite of the varroa mite to the hemolymph (blood) of the bee.  It only takes a small amount of the virus to infect the bee.  The colony will dwindle and die within the year.

Kashmir Bee Virus (KBV):

This is the most virulent honey bee virus.  When infected through the hemolymph system it results in death within 3 days.  When the varroa mite transmits the virus, it is deadly in all parts of the bee lifecycle.  Even with smaller infestations of varroa mites this virus will kill the entire colony.

Israeli Acute Paralysis Virus (IAPV):

The IAPV will show symptoms such as darkened hairless adults, shivering wings, progressing to paralysis and death.  The virus is deadly even with a small amount of the virus when varroa mites are present in the colony.

Slow Bee Paralysis Virus: 

Not found in the United States, but found in Fiji, Western Samoa, England and Switzerland.  This virus shows up after about 12 days after infection.  It slows the two anterior or fore legs of the bee.  It will be deadly to all bees and is transmitted by the varroa mite.

With all of these viruses, ingestion to the digestive tract can result in a smaller attack of the virus.  The gut of the bee can either break down the virus, or the cells of the bee gut get replaced quickly resulting in the virus becoming less effective.  When the varroa mite pierces the bee and injects the virus directly to the hemolymph system however the bee isn’t able to engage it’s gastrointestinal defense.  In these cases, the virus has a direct free reign to the bee and results in full infection.

A great article about these viruses and the varroa mite aspect of them is here.

Where did the idea of Mushrooms and beehives come from?

Some years ago, a mycologist named Paul Stamets was watching his bees gathering drops of liquid from mushrooms. He had an epiphany when he postulated that the bees were not gathering sugary fungus drops, but that they were medicating themselves with something found in the mushrooms.  

Stamets involved Walter Sheppard, the chair of the Entomology Department at Washington State University. Since that time the two have been testing various mushrooms and their effect on honey bees.

Stamets and Sheppard have found an 800-fold decrease in the amount of viruses present in controlled experiments.  That’s amazingly good news to hear in the battle against the varroa mite and the infection of viruses from them.

Stamets is still researching the effects of this on honey bees throughout the winter and in other conditions.  He also needs to get the ok from the U.S. Department of Agriculture.  His findings are exciting and show some very good promise.

Stamets has been keeping the public apprised of his research efforts.  He has had 3 updates to his research.  The most recent update can be found here.

Beneficial Reishi Mushroom
Reishi Mushroom

Will mushrooms help the small apiary and backyard beekeeper?

Though to date, no commercial mushroom product has been made available for beekeepers to use, there are several ongoing research projects with this end in mind.

It is of interest that there are two varieties of mushroom that have shown good results.  These are the Amadou and the Reishi mushrooms. Perhaps it could be helpful to have some of these mushrooms available to your honey bees.  You may even observe the similar behavior of bees gathering mushroom juice for the hive. 

Where can I get these mushrooms?

Growing mushrooms is an entire other blogpost.  I will address it in a post soon.  I have grown mushrooms in the past and loved them.  They are easily propagated and if you raise them correctly you can keep them reproducing well.  I will add resources and sources for these mushrooms when I get our resource page up and running on our website.

Summary

In summary, the devastation of the varroa mite on the honey bee is immense.  Varroa mites are extremely effective at spreading deadly viruses directly into the bee’s bloodstream resulting in high infection and death of honey bee colonies.  There are many people working to slow and stop the death of all these honey bee colonies. Colony collapse disorder is affecting the food supply of the entire world and could have some rather drastic results.  

The use of mushrooms specifically the mycelium, or vegetative part of the mushroom, could help. As research is still forthcoming, I suggest growing some Amadou and Reishi mushrooms near your bees.  The mushrooms have been seen to have a very beneficial effect on viruses found in honey bee colonies.  When I hear of a product made from the mycelium of the Amadou and/or Reishi mushroom I will for sure post it and make it available through my resource page.

How to make money at a farmers market

Farmers Market jams and jellies

When operating a homestead, farm, small farm, backyard garden, or greenhouse, you have likely had the idea of trying to generate income by selling some of your produce.  Whether it be just to earn a few dollars on the side, or to set up a highly profitable cash income, we are strong proponents of doing this through participation in local or regional farmers markets.

The idea of selling your product can be a bit intimidating and confusing at first, but don’t give up. The benefits of being involved on the farmers market scene are highly worth it, both economically, and socially.  This article will walk you through the initial steps to get into the farmers market business and begin making money from your farm grown produce and commodities.

Reasons for Farmers Markets

Farmers markets have been around since there have been farmers to market products.  Though the market concept has morphed over the years from street and store front vendors to traveling delivery services, the basic idea has remained in tact — the farmer or his agent still brings his produce or wares to a general location where it is distributed or sold to a consumer.

Similarly, the support of local farmers markets has ebbed and flowed throughout time but has had a steady increase in popularity in recent years.  Many people are finding that fresh, locally produced fruits, vegetables, eggs, and honey are higher in quality, taste, and nutrient level.  Buying locally produced fruits and veggies also allows the consumer to meet and build relationships with those who are providing food for them.

With locally grown and produced fruits, vegetables, eggs, meat, or honey, the buyer knows what they are getting is fresh.  They know the degree to which it has been processed, and know who grew and produced it.  Perhaps the greatest advantage to buying locally harvested produce is that the flavor is better because it was picked or harvested at the best time.

The farmers market provides a convenient and efficient opportunity for both farmer and consumer to exchange commodities.  Most farmers markets are scheduled biweekly at a set time and location which allows people to purchase efficiently, without wasting the harvester’s valuable time.  The schedule and consistency of a farmers marker aids in the sales for farmers, and the availability of produce for consumers.

Types of farmers markets

There are many types of farmers markets showing up.  Most have a component of farmers renting a booth space and selling their produce directly to the consumer.  This model has been a tried and true method that works well to the present day. 

Small Neighborhood or Community Farmers Market

Some farmers markets are more ad-hoc or impromptu community markets where a public space is set aside for a market and is free to sell locally sourced produce.  The quality can vary at these but is still a good place to market your produce.  Community markets are generally less fancy, and your display of produce can be simple.  There is no guarantee of people coming to the market, and sales can be boom or bust.

These smaller farmers markets are sometimes an impromptu happening. Sometimes they are in support of a local 4-H group. Sometimes they are a group of backyard gardeners that have too much produce for them to handle and want to sell it more than let it go to waste.

Local smaller farmers markets have a less formal or bohemian feel and can be really fun. By shopping at these community markets you end up supporting your local folks and encouraging them to keep growing good produce.

Larger City Farmers Markets

Larger city farmers markets are a bit different than the smaller community ones.  The booth space rental is usually more costly.  The competition from other farmers is greater, and you usually need to apply to be allowed to sell there.  When you apply for admission to the farmers market you will need to apply early.  Some cities require a year or more in advance to apply.  

Larger city farmers markets have a few advantages.  Many will have advertising and an established reputation that guarantees that people will come.  There is no guarantee of people buying your stuff, but they will be there. 

Many of the larger farmers markets have allowed crafts and other things to be sold there as well. This has been a mixed benefit. Some have found that the more variety of goods available brings in more people and more opportunity to sell their produce.  Others have found that the consumers get overwhelmed by all the vendors and that affects sales negatively.  There are discussions of having only those who actually farm be at farmers markets and giving that a designation.  Similar to calling organically raised food the designation organic. 

Some entrepreneurial craft sellers have found that they can bring in crafts made in bulk from a cheap factory source and make a ton of money quickly.  This tends to downgrade the quality of the market.  Eventually other sellers adopt the quick and cheap method and the market can really feel different than the original intent.  I would recommend looking and visiting a farmers market before you join one to see if you are a good fit.  

Larger farmers markets can be very competitive.  You need to think about your booth and how it is displayed.  You will want to make it look attractive and inviting.  You will also need to have your best produce available.  You may want to think about branding or at least, how your homestead, farm, or garden is perceived.

apples at the farmers market
Apples for sale at the Farmers Market.

What farmers market do you want to be a part of?

There are more and more farmers markets popping up all over.  With the increase of social media advertising sources, local markets are getting supported well.  There has been a big movement to support and utilize locally produced food and products.  Deciding on what farmers market you want to participate in is critically important.

Maybe you want to start with a smaller community market where you test the waters and see what you can come up with as far as produce and products.  Many 4-H clubs will have a smaller local community or neighborhood farmers markets during the summer.  Perhaps you can be a part of one of those smaller ones to begin with.

Maybe you are a larger grower or producer and need a better outlet.  Look at some larger opportunities available.  Many larger cities have more than one farmers market.  With a little research you could be able to break into a great market.   

Business plan

It is a great idea to have a business plan in place when you transition into a selling standpoint from your homestead. Once you decide to try making money from your produce, you will need to determine what you will grow and vend commercially. Things to consider are:  

  • What to grow or produce?
  • When to plant?
  • Dates and deadlines
  • Costs
  • Pricing
  • Offer samples
  • Packaging
  • Branding
  • Advertising
  • Transportation
  • Manning the booth
  • Taxes
  • Business license
  • Insurance

What to grow or produce?

When planning to sell at a farmers market you need to plan ahead to produce something that is marketable. Perhaps planting 300 zucchini plants isn’t a great option unless you know that you can sell a boatload of zucchini squash when everyone else has a backyard zucchini plant producing a boatload of zucchini.  Grow things or produce things that there is a good market for and something that you are able grow or produce well.

For instance, you may have a green thumb for growing peppers.  Just take a look at Pinterest or Facebook or social media and see what peppers that people are liking and wanting.  You can tailor your crop to the peppers that people want.

You may be a rutabaga man through and through and will only grow rutabagas.  Well, then you better grow the best rutabagas and package them the best way possible for people to buy them.  

I have found that I have a good results with chickens and egg production.  I have focused on eggs to be a good cash product for our homestead. The market for free pasture range eggs is great where I live.  This has made a great opportunity for our farm to sell every egg that we can produce.

When planning what you want to produce to sell at a farmers market, just plan ahead and do a little research.  If you do your homework you will be able to plant the right tomatoes, or provide the right honey, or grow the best garlic that everyone wants and make money while doing it.

When to plant, or timing of your produce?

Timing is very important to consider in your business plan.  You need to know when you can have your produce or products available and timed when the farmers market begins and ends.  In the more competitive farmers markets they want you to be there from beginning to ending with good quality produce and products.  

Be prepared to fill the agreement for the full season.  Generally the farmers market seasons in my area begin at the end of May or mid-June, and end at the end of October or early November.  Your area may differ, but it can be a challenge to provide good quality produce the entire season.  

Perhaps planting different plantings throughout the season will give you fresh peak produce as the season goes on.  Perhaps investing into a greenhouse to get crops growing earlier will pay off. Another idea would be to provide a good variety of crops that come into season as the year progresses.  If you are a honey provider perhaps you can provide raw honey from last season, or provide bee products along with honey.  

Again, just plan ahead to plant, or provide consistent produce and products throughout the season.

Honey at a farmers market
Farmers Market honey

Dates and deadlines

When it comes to dates and deadlines on the homestead, the weather really determines a lot of what goes on and when.  If it’s a cold spring your plants grow slower.  If it’s a warm spring your lettuce will bolt sooner than you may have expected.  You don’t have the luxury of letting the weather determine everything with the farmers market.

Some key deadlines will be the application to get into the market.  Paying the booth rental fee will need to be done on time.  You will need to have all your licenses, tax number, and payment options in order before you start.  

Having produce or products available for the beginning of the farmers market may require you to have specific planting deadlines.  

My irrigation system is on a drainage ditch system.  We get a specific time to have the irrigation water and we need to plan accordingly for that. Often the irrigation will conflict with other obligations, so I need to plan for someone else to handle the water or to handle the market.

Costs

As part of your business plan you need to consider costs.  Some basic costs to consider and keep in mind are:

  • Seeds and plants
  • Livestock- feed, equipment, housing, fencing
  • Processing- washing, bottling, packaging, preserving, refrigeration
  • Licensing
  • Booth fees
  • Booth equipment- tables, bins, coolers, table cloths, tarps, baskets, boxes
  • Signage 
  • Transportation
  • Manning the booth if you can’t be there
  • Taxes

Pricing

This can be a tough one for a lot of people.  You want to charge enough so you are actually making money.  You also don’t want to charge too much to drive people away.  It’s an interesting balance. 

I have been to markets where a guy charged next to nothing and people wouldn’t buy from him because they thought something was wrong with his produce.  He changed his process to be about the same as others were charging and he got sales.  

Pricing is a finicky business.  A rule of thumb if you are new to the business is to see what others are charging and charge similarly.  You can adjust as you think you need to.  If your asparagus is some super cool fancy best tasting stuff in the world, then charge for it, and let people know it’s the best ever and why.  You will probably get people to pay what you think you need.

Be fare in your pricing and you will get a good response.  As you grow a customer base and get a good reputation you will be able to charge what you feel is right.  Keep in mind that supply and demand is important to keep in mind.  You might need to adjust your prices on the fly and needed. 

Offer Samples

One good thing to remember is to offer samples of you can.  People love to get free stuff.  They also will love being able to try the produce before they buy.  Plan in your inventory some samples that you can make available.  Be careful not to sample out your whole supply, but if you can give some samples you will get more folks to stop by and try.  When they find out how great your produce is they may purchase.  

Produce available at a Farmers Market
Booth at a Farmers Market

Branding

Branding is becoming more and more important.  You need to be attractive to customers and memorable.  This doesn’t mean you need to look like a super slick fancy pants, unless that’s your style.  

The branding I am talking about is the overall look and feel of your booth.  If you show up with everything jumbled together in dirty shopping bags sitting on the ground and hoping that people will spend top dollar for your hard-earned produce, you may want to rethink.  If you show up with neatly presented produce or products on a table with clear signs showing the varieties and costs you will have upped your chances of sales.

Showing up clean and orderly with great produce is a must.  Fun signage with descriptions of the produce and prices will help.  Have some things that will engage the customer such as good photos of the homestead, descriptions of the benefits and nutrition of your produce, fun facts about your homestead or farm.  Have your own containers or sacks for people to use or purchase with your logo or unique look.

Good branding can often sway people to like you, trust you, and become good customers of yours for years. 

If you do a good job on your branding you can expand your sales to other items besides produce. You could have your own branded line of products that would fit into a farmers market.  Some of these products to consider are:

  • Reusable grocery bags
  • Stickers
  • Mugs
  • Coolers
  • Shirts
  • Hats
  • Aprons
  • Calendars
  • Hoodies
  • Jackets
  • Yoga mats
  • Water bottles
  • Draw string backpacks
  • Etc. 

Depending on the room you have available you could bring in items of interest to attract people to your booth.  I have seen some bring old farm trucks or tractors that make a big draw.  Some people will bring animals like chickens, donkeys, mules, or cows with them to draw attention.  A goat dairy brought a female goat and let people milk her if they wanted to. One guy even charged $.50 to milk his cow and have your picture taken.

With good branding you can create quite an experience for people and they will want to support you and your homestead, farm, and garden efforts.

Advertising

Cost of advertising is up to you and what you are willing to pay.  Many local options are available from local newspapers, banners at high school football and baseball games, or sponsor local events such as city parades and celebrations.  This will show that you are a community supporter and can get people to support you back.

There are many ways that are free for advertising your efforts in a farmers market.  Many of the larger farmers markets will advertise the entire market and you can trust in their efforts.  The larger farmers markets use part of your booth rental fee for advertising. 

You can also use social media very effectively.  Facebook has many options of groups to join the locally grown farmers market focus. As you interact in the groups you will gain supporters and possible customers.  Built in audiences are in Facebook groups and online community forums.  Pinterest groups are very effective.  Instagram is also an effective tool for advertising, but perhaps not as locally targeted. 

Make sure you have your information correct online if you have a website.  You need to have everything in order and have your local information optimized, meaning correct on all accounts like google and yelp etc. You can get a lot of people searching online for local options.  Try to get folks to follow you on Facebook and leave reviews on yelp.  These reviews really matter and help out.

Transportation

 Another thing to incorporate into your business plan is transportation of you and your goods to the farmers market.  A small neighborhood farmers market could be handled with a wagon or wheel barrel.  You could use the trunk of a car or a pick-up truck.  If you need to transport your produce or products for a longer distance transportation is something to really think about.  

Some people will go in together on renting a van or U-Haul type trailer.  If you pool your resources with some other participants in the farmers market you can spread out the cost of transportation a bit.  If you have a van or truck that can haul stuff for other participants in the farmers market you could help haul their stuff for a fee or do it for free to get some good will going with your fellow sellers.

Employees

You may need to have someone cover your booth if you are not able to be there.  With the smaller community farmers market, you can probably skip out when you need to without much consequence.  You may even be able to work out a system with some fellow participants to cover for each other when needed.  

If you ditch out on the larger farmers markets you may have some repercussions, perhaps even being kicked out.  It would be a good idea to have someone cover your booth for you if you need to be absent. This is where a good employee could help out, but that will add to cost and you need to consider this in your business plan. 

Taxes

Taxes are a part of all monetary transactions in the United States.  Perhaps on other countries this doesn’t factor in, but in the U.S., you need to keep good records and be ready to pay taxes.  Some people choose to add tax to the sales at the time of purchase, others will just put the sales tax into the amount they initially charge.  This makes it a lot easier when making cash transactions on the spot.  

If you can keep your prices at a simple round number, then it is a simple transaction for the customer. Keeping the customer happy is a good idea.  You can figure out how much the taxes will cost after the day is done.  I recommend keeping it easier for the customer and doing your accounting later.  Be sure to actually do your accounting and pay your taxes.  The repercussions of not paying taxes may haunt you for years

Getting a license

Some towns and farmers markets don’t need you to have a license to sell.   Some farmers markets will require a business license or permit to sell produce and products at a farmers market.  

Getting a license isn’t difficult.  It will take a little time to research what your county or municipality requires. Most of the time it will require filling out a form, paying a fee and waiting for your paperwork to get processed. Not a big deal, but something that should be done in advance of opening day at the market.

Some of the larger markets will issue a temporary license or permit as part of your admission to their market. As with getting your own license you will probably just need to fill out the proper form and pay a fee.

Insurance

Insurance is something to consider.  Chances are you won’t need any insurance to sell produce and products at a farmers market. You will need to consider having insurance, but most larger farmers markets will have insurance as part of your booth rental or admission fee.  However, some may not, so look into the contract.  

By and large most people shopping at a farmers market know that they take some risk of locally grown produce. Most have had experience with farmers markets  and will take the precautions of properly cleaning and if needs be cooking  the produce. 

You will need to have proper insurance on any vehicles that you will be using to transport your produce and products to the farmers market.  So if you have a farm truck that you haven’t kept up with insurance on because you just use it on the farm, you will need to get insurance on the truck if you are going to drive it on pubic highways and roads.  Not that complex of an idea, but some of us forget to do stuff like that when we are in a rush. 

Farmers market jams and jellies
Jams and jellies available at a Farmers Market

Starting your own farmers market

Another option is to begin your own farmers market.  This could be a fun challenging thing to try.  I will follow up this post with one about starting your own farmers market, but it could be a great opportunity.  With a little research you could get one going easily and create a good avenue for you and your friends to market your produce and products.

Make it simple, easy, enjoyable, and sustainable to do

If you can make the process of selling at a farmers market simple, easy, and enjoyable.  You will probably make it sustainable as a byproduct. Especially at first keep it simple and add more as you gain experience and knowledge.  The learning curve will be different for everyone, just do what feels right and grow or stop as you feel you need to. 

One major key that help is to plan ahead.  Plan ahead and keep it realistic.  Don’t over or under estimate what needs to be done and when it needs to be done by.  

Have a plan B or contingency plan if problems arise.  Problems always arise on a homestead and farm. If you have a bumper crop of radishes and lettuce and the weather gets hot where you could lose the quality of your radishes and lettuce, then a plan B would be to lower your prices, or perhaps contact local restaurants to purchase what you don’t sell at the market. 

Involve family, friends, and partners in the process.  You can have some great time together getting the produce and products ready for the market. You can teach valuable lessons to your family sorting vegetables or marketing to friendly folks.  If you know you are not alone in this endeavor, you can relax a little more and have fun which will make people want to purchase form you because you are enjoyable to be around.

A collection of pasture raised eggs from various breeds, with bloom.

Summary

To make money at a farmers market is very doable.  You need to plan ahead on what you are going to produce.  You will need to research what options of farmers markets are available for you to be a part of, and choose which one or ones you want to participate in.  Be organized and have a business plan.  When working the farmers market have high quality produce and products.  Be organized, clean, and friendly.  With the popularity of locally grown produce and product from farms and homesteads the farmers markets are doing well and are a great option to make money from your labor.

Can I add a Guinea Fowl to my Backyard Chicken Flock?

I’d like to introduce you to Lecile, that’s right, Lecile, named after the Pro Rodeo Hall of Fame and hometown rodeo favorite Lecile Harris who you can read about here.

Which backyard animal deserves to be named after such a unique looking and comedic genius, you ask? Well, that would be our adopted, strange looking, rather loud and comedic feathered friend the guinea hen. Just over two years ago, a guinea hen was left on our chicken coop doorstep by a neighbor who must have thought there was no real difference between backyard fowl of varying species. We decided we would attempt to integrate her with our chicken flock and see how things went.

Not hard to see why we named her Lecile, is it?

I tell you, the differences became readily apparent, and quickly! In no time at all, Lecile was running the roost, and had appointed herself the head of the pecking order, in spite of her clown like appearance and rather awkward cries. Though it took a few weeks, the chickens came to accept Lecile’s role in the flock, and have allowed her her place in the roost quite naturally.

We have learned a lot about guinea fowl since adopting Lecile, and have come to appreciate her unique policing, quirky habits, voracious appetite, and her intensely protective characteristics. It turns out that her modus operandi is rather typical of all guinea fowl, and that adding one or more guineas to your backyard chicken flock can be quite helpful; although, we would recommend a few caveats.

Basic Characteristics of Guinea Fowl

Like turkeys, guinea fowl are Galliformes, a group encompassing all heavy bodied ground-feeding (and chicken-like) birds, but from a different family than the chicken. The Guinea fowl belong to the Numida family. They originate from Africa, where they free range in large flocks, hunting as a team, and were brought to Europe in the 15th century by Portuguese explorers. They were later integrated into North American poultry habitats by the early American settlers.

There are seven species of guinea fowl, however the helmeted pearl is the most common, and almost exclusive species found in North America. The helmeted pearl is identified by an odd vulturine or clownlike appearance that includes a spear shaped “helmet”or knob on the skull, a white (often bluish in hue) featherless face, grey polka-dotted feathers, and bright red wattles. The guinea hen is about the size of a large chicken, and when fully grown, may weigh more than 4 lbs.

Guinea fowl do not reach sexual maturity until almost two years of age, thus making it difficult to distinguish sex when raising them. Sex is important however, as male guinea fowl are known to be extremely territorial and when mixed with chickens or other fowl, will fight with, or run off the roosters. Though bossiness is typical of guineas in general, males are particularly dominant, and can become quite brutal when it comes to establishing their place at the top of the pecking order.

Behavior and Temperament of Guinea Fowl:

As stated above, guinea fowl are bossy, when compared to the docile and domesticated nature of most backyard chicken breeds. Because of this, they will likely dominate the flock. This isn’t typically a problem, and most chicken breeds do not have any qualms with allowing the guinea hen a place of dominance.

Remember that the guinea fowl is not a fully domesticated bird, and will need a little extra space in the coop, or choose to roost separate from the flock, in a tree or other high place come dusk. Some folks are able to coax their guineas into the coop at night with fresh water and regular feed. It is suggested that keeping a low watt bulb in the coop for the first few weeks of confinement may also help the guinea fowl to settle in and become familiar with the coop.

Guinea fowl are fantastic foragers and relentless hunters. Given free range, the guinea fowl will spend the entire day hunting your property for bugs, including potato beetles, ticks, mites, locusts, spiders, termites, cutworms, grubs, snails, ants and any other garden or yard bugs they can locate. In some farming or orchard areas, guinea fowl are used to scare off marauding wild birds, snakes, and other predators. When several guineas are present, they will hunt as a team, marching together and devouring anything they startle. When they encounter a larger target such as a mouse or snake, they will encircle it, and take turns to peck and scratch to move in and kill/devour the feast together.

An additional unique characteristic of the guinea fowl is their policing ability. Often a first defense against predators from the ground or air, the guinea fowl, both male and female, have a distinguishing cry of warning. Though this loud cry of alarm has been helpful in protecting our chicken flock from hawks and other predators, it has also been a source of much laughter, as visiting friends who don’t know we are raising a guinea will hear Lecile’s loud call from the backyard and wonder if we are raising a pack of wild monkeys or other rain forest creatures.

The call of a guinea hen is unique. If you’ve got an extra 5 minutes and are curious about the different calls made by both female and male guineas, check out these youtube videos from Guinea Fowl TV here, (for males), and here (for females). Because of the loud nature of guinea fowl, you will certainly want to consider the proximity of neighbors if you are thinking of adding one or more to your backyard flock, or raising your own flock of guineas. They certainly can’t be kept mum the way chicken hens can. Imagine trying to keep a rooster quiet in a close quartered urban neighborhood. Impossible.

Egg Laying and Mating Characteristics

Guinea fowl aren’t necessarily known for their egg production abilities. The typical guinea hen will lay eggs seasonally, between March/April through September/October depending on where you live, beginning when she is 26-28 weeks old. The average hen will lay about 100 eggs per laying season.

Guinea hen eggs are smaller than chicken eggs, and are typically a light pink or brown color, sometimes with speckles. The shell itself is much harder than a typical chicken egg shell. Our guinea, Lecile’s eggs are a bit longer and more tapered than chicken eggs, and appear to have a shinier surface. She also likes to find odd places to lay her eggs. Though we have found her eggs in the regular nesting boxes with the chicken eggs, we have also found them on the floor in the coop, and in the long grass under our antique horse-drawn seeder and hay rake, in the yard. She seems to enjoy making us hunt for her eggs.

If you are raising a group of guineas, they have been known to engage in the practice of “communal laying”, where all hens will lay their eggs in a communal nest until there are upwards of 30-40 eggs. Additionally, the hens may act as communal brooders, taking turns to sit on the large collection of eggs until hatching.

As far as mating and family relationships go, people are often surprised to learn that guinea fowl cocks form a strong attachment with their hens. When a hen becomes broody and decides to sit on a nest of eggs you will almost always find her mate, the cock, guarding nearby. He will create quite the clatter if he sees what he perceives to be a threat approaching. In the wild, guinea hens are monogamous and mate for life, however, in a small farm setting, the typical mating ratio will rise to 1:5. Contrary to rooster behavior, a philandering guinea hen is the exception, and not the norm.

So there you have it. Some of the pro’s and con’s of raising a guinea hen or two with your backyard chicken flock. Having experienced this on our farm firsthand, we have definitely become fans of this breed. Lecile is a unique and quirky addition to our yard, and though bossy and even unruly at times, she does a great job of clearing the yard and garden of pesky insects, as well as providing a protective alarm and safeguard from would be predators.

So, all in all, I guess the name fits. Not only does Lecile’s appearance remind us of the great rodeo clown, Lecile Harris, but her imperious antics, like the clown’s witty banter, have brought us to tears of laughter on many occasions.

What is the Saskatraz Honey Bee Temperament, are They Gentle?

I purchased some honey bees with a funny name a year ago.  They were called Saskatraz honey bees.  People are asking about them and what they are like.  Many folks have wanted to know their temperament and specifically if they are a gentle bee to work with?  

My experience with Saskatraz bees has been great.  They act very similarly to Russian and Italian honey bees.  They have been gentle and great to work with, not as gentle as some Carniolan bees that I have had, but gentle.  This article will describe my subjective experiences and observations regarding the temperament of our Sasktraz bee hives.

What are Saskatraz bees?

Saskatraz bees have become available rather recently.  They are a new variety of bee that has gone through some major breeding programs to be developed.  Basically, the best attributes from selected honey bee colonies from Russia, Germany, Canada, and the United States were selectively bred into one race of honey bee. It took place in the Saskatchewan province of Canada.  

The location was chosen for its ideal climate and remoteness.  The place became similar to Alcatraz, the once high security prison off of the Coast of California, surrounded by fences, and kept free from contaminates, or other bee breeds.  Though I have no proof the Saskatraz name derives from the famous prison facility, I’m sticking to the story, especially considering the conditions from which the Saskatraz breed came about.  I wrote an earlier article about Saskatraz bees here, and have enjoyed the questions and feedback readers have given.   The official Saskatraz Honey Bee project site is here. It’s pretty technical, but full of some great information.

saskatraz honey bee hive in mid June
Saskatraz bee hive in June.

Saskatraz honey bee characteristics

The Saskatraz honey bee was developed to have gentleness as one of its characteristics.  Colonies that exhibited the specific trait of being gentle were chosen.  This was a challenge.  You need the honey bee to be somewhat aggressive to work to get honey and pollen as well as fend off robbers. 

This is where the Africanized honey bee was headed.  It was supposed to be a super aggressive honey bee that would build up honey fast and increase production and be a boon to the beekeeping industry. Well, they do work fast and hard, but they will also attack and sting in-mass.  The Africanized honey bee has even killed people, including experienced beekeepers.

The Saskatraz honey bee is nothing like the Africanized bee at all.  The selective breeding program has worked well.  They have been able to get a gentle honey bee that works hard and produces well.

The main traits that were sought after in the Sakatraz bee project were a Honey bee that was:

  • Gentle
  • Good honey producer
  • Good pollinator
  • Hygienic 
  • Resistant to varroa mites
  • Resistant to trachea mites
  • Resistant to fungal issues such American Foul Brood
  • Winter well in colder climates

To achieve getting these traits in a bee colony, beekeepers chose colonies that already exhibited one or more of these traits.  These colonies as I wrote before were from premium apiaries all over the world.  

By bringing these genetic qualities together the beekeepers, doctors, and biologists, were able to meticulously control the colonies queens and drones.  They were able to eventually come up with the Saskatraz bee. They are proving to be a great bee to work with.  

The Saskatraz bee is showing traits of being very hygienic.  This is thought to be a contributor to the varroa and trachea mite resistance.  The legs of the bees are longer than other bee varieties. Due to the longer legs the bees are more able to reach the mites on their bodies and get rid of them.  Varroa mites and tracheal mites are thought to be linked to colony collapse disorder.  The resistance to these parasites are a huge benefit to keeping bees alive and healthy.

My practical experience with Saskaraz Honey Bees

My experience with the Saskatraz bees has been very positive.  I installed a package of Saskatraz bees in the spring, at the end of April. The installation was rather typical of other installations.  The bees were interested in the queen and were well fed, so they showed no aggression and were very gentle.  

The queen was released in a timely manner and began laying eggs quickly.  The laying pattern was tight and even. The hive did normally well.  I did feed them some nectar of 1-part sugar to 2-parts water with some added essential oils.  We experienced a cold wet spring, so the bees spent most of the time in the hive itself.

As the summer went on my region experienced dry drought conditions.  The third driest in recorded history.  I was very concerned about the bees and kept a water source near the hives.  There were few flowers and the alfalfa fields were stunted without many flowers showing up.  Many grasses and weeds seemed to survive, just stunted a little. I believe this is where the nectar and pollen sources came from.  

The bees seemed to be a little slow at starting, but by the end of June, the Sakatraz bees were doing great.  When I opened the hive, they were not overly aggressive at all.  I could have inspected the hives without a veil but chose not to risk it and wore my veil anyway.  The bees were gentle and seemed to act similarly to the Russian bees that I have. 

I generally pull honey on or around Labor Day.  I was a week and half late due to the drought and heat of the long summer.  I opened the hive and inspected it to see if I should take any honey at all.  I have often not pulled any honey from a first-year hive.  Most of the first-year resources are needed just to establish the hive.  To my surprise they had filled up the 2 supers of the hive body and filled a super and a half beyond.  They really produced well.

When I took the honey from the Saskatraz bees, they were not super excited about that.  They didn’t swarm for attack, but they were agitated. It wasn’t anything out of the ordinary, but they were not happy with me taking their summer season’s work.  Again, they acted similarly to Russian bees.  

I was prepared for angry bees when I went to check on the hives again in a week after I pulled honey form them.  They were back to their normal temperament.  The Saskatraz bees were rather mellow and working hard to get nectar and pollen. They were fine and gentle again. 

I left them with plenty of honey to winter over with. They are doing well this winter.  I am looking forward to this upcoming season.  My Saskatraz bees have their hives set up and I am hoping for a great harvest. 

I have been warned by others who have kept Saskatraz bees that they are prone to swarming.  I am going to take precautions to prevent that. I will swap the upper and lower supers of the main hive body.  I may also stagger the frames like a checkerboard.  That has helped in the past.  I will also not let them get honey bound at all and give them plenty of room to grow and add honey and nectar. 

Summary

When it comes to the temperament of the Saskatraz honey bee they are really great to work with.  I have found them to be good workers and pollinators.  They are gentle to work with and are similar to Russian bees in my experience.  They aren’t as gentle and mellow as some Carniolan bees that I have, but they aren’t too aggressive or mean. 

The Saskatraz bees also have great traits to fend off several challenges that beekeepers are finding. They are resistant to Varroa and Tracheal mites and fungal issues.  They could be a good step forward in the battle with colony collapse disorder.

(Featured image credit Donna Silva)

Are Weed and Feed Fed Grass Clippings Bad for my Garden?

Lawn mower collecting clippings

As spring comes around many people see their lawn emerge from under the snow and want to get it spruced up and looking good for the warmer weather.  This can take them to the local nursery, farm/ranch store, or big box store where from they return home with a weed and feed commercial fertilizer.  They apply the fertilizer just as the container informs them to, and viola, in a few weeks they have a dark green lawn with no weeds.  Mowing the dark green lawn produces some attractive dark green lawn clippings, and the thought often occurs to use these lawn clippings for something else, such as compost, mulch or perhaps even feed for livestock.

The quick answer to whether you should use lawn clippings that have been treated by a weed and feed chemical for use as compost, mulch or animal feed is NO, unless you treat it.  (What you may not know however, is that you can treat it in a compost pile with fungi to make it beneficial for secondary use).  

This article discusses the effects of weed and feed fertilizer on grass clippings, and the fungi treatment that can aid in making those grass clippings beneficial again.

What are these weed and feed type fertilizers?

Weed and feed fertilizers are readily available at your local farm/ranch stores, local nurseries, and big box nurseries.  They are often part of a season long system of treatment for your lawn.  You begin with the weed and feed, then supplement for summer feeding and usually there is a fall treatment.  

The concept of most of these weed and feed fertilizers is that they contain a pre-emergent herbicide to stop other plants/weeds from germinating.  This herbicide remains in the soil for quite a while and keeps plants like dandelions and crabgrass from growing.  It also has nutrients like nitrogen and iron supplements to feed the turf.

These pre-emergent chemicals are long-lasting and quite effective. Many of these pre-emergent chemicals have been developed over time to be more and more effective.  The effectiveness has also made these chemicals long lasting, often remaining in the soil and turf grass for years.  

Are pre-emergent herbicides good or bad?

There is much controversy about the use of pre-emergent chemicals.  Many focus on the argument that pre-emergent chemicals are harmful to the environment, while others believe that they are the best answer to a great looking lawn free of dandelions and crab grass. 

Weed and feed fertilizers have proven to be effective in stopping unwanted weeds to germinate in conjunction with providing your grass a good nutrient mix that leads to a great looking and healthy lawn.  Additionally, these weed and feed fertilizers are easy to use. Often, an individual with little to no lawn care experience can get excellent results simply by following the procedures listed on the package.

The downside of these weed and feed fertilizers comes from what the pre-emergent herbicides do beyond making the lawn look great.  As stated above, the herbicides will remain in the soil and turf grass for years.  When you compost the clippings, the herbicide remains in the compost.  If you feed the grass clippings to livestock or animals the herbicide will remain in the animal’s droppings even after the clippings have gone through the animal’s digestion process.  These pre-emergent herbicides are pretty tough and strong. 

When you try to use compost from grass clippings treated with pre-emergent herbicides in your garden, these herbicides will work to hamper your garden plants from germinating in the same way they work to hamper weed growth in your lawn.

If you incorporate manure from animals that have been fed pre-emergent herbicide treated clippings into your garden you will yield the the same results.  If you feed those grass clippings to the animal, the herbicide goes through to the manure and gets incorporated into your garden.

Many gardeners have lost their entire garden when they used manure from animals that had been fed from a source treated with a pre-emergent herbicide.  Similarly, using compost from weed and feed treated grass clippings has produced the same result…. loss of the entire garden.  

So, as far as good and bad, the debate will go on.  If you want a great looking lawn and don’t care about much else, you can sleep soundly using the weed and feed fertilizer.  

If you are concerned about growing a garden beyond your lawn, and you want to use the benefit of grass clippings, you really need to consider the long-term effect of the weed and feed fertilizer.

Many green waste and composting facilities have banned grass clippings.  One of the major reasons is the effects of the herbicides being used on the grass.  These herbicides are contaminating the compost, and killing plants instead of helping plants.

Push manual lawn mower on lawn
Push lawn mower half done with lawn.

How can I treat the lawn clippings?

What do you do if you have used weed and feed in the past, or you have purchased a home where they have used weed and feed fertilizer before you got there?  This is assuming that you want to use your grass clippings for compost or garden mulch.  

There is an option available to treat the grass clippings.  It isn’t all that different from composting the grass clippings as you normally would. You will need to use a fugus instead of bacteria to break down the herbicide.  Fungus is being researched to aid in the transformation of toxic ground into usable ground. This bioremediation process is currently being used and researched across the globe; here is and interesting article describing it.

Most compost piles will use a bacterial action to process the organic matter into compost.  When composting grass clippings that have been treated with weed and feed the bacteria will break down the fiber of the grass leaving the herbicide intact and ready to stop plants from germinating. You will get great looking compost but the pre-emergent herbicide will still be intact and viable to stop germination of you plants.

When using a particular fungus, the fungus will eat the herbicide.  The fungus sees the herbicide as just another piece of food. Fungus consumes its food by spreading the digestive enzymes on the desired food then absorbing the nutrients after the food has been broken down. This is the method it uses to break down the herbicide that it treats as a food source.

This process breaks down the herbicide into smaller particles.  This will stop the herbicide from being an herbicide and making the grass clippings ok to use.  The majical fungus that works to break down the herbicide is white rot fungus.

Compost bin
Compost bin

The process of creating a fungal compost pile.

Creating a compost pile that utilizes fungus is similar to creating a regular compost pile.  Here is an 8 step process.

  1. You will want to begin with mulch that has a lot of tannin in it.  You will want to focus more on leaves and bark, not wood logs, chips, or newspaper. Oak leaves are recommended.
  2. Stir in the grass clippings
  3. Get some white rot fungus. To get some of this fungus you will need to take a walk in the woods.  Similar to a mushroom hunt, you can find white rot in decayed logs.
  4. Chop or blend up the fungus and add water.  You will want about a quarter cup of fungal material to a quart of water.
  5. Spray the mixture over the entire pile.
  6. Water the pile well.
  7. Keep it watered every day. You want to grow this fungus.
  8. In a few weeks the fungus will be growing and eating the herbicide and detoxifying the grass clippings.
Fallen Rotten Log
Rotten log with fungal growth.

You can detoxify your lawn by spreading the fungal compost over the lawn and water in as well.  You will need to keep the lawn and mixture wet for the fungus to grow and eat the herbicide.  This process can invigorate your lawn and create a good source of non-toxic grass clippings to use in the future.

Lawn mower with clippings flying
Lawn Mower clippings flying in the wind.

You do not really need to compost grass clippings in the first place.

I believe that cutting grass long (meaning, using a “taller” setting on your mower) and just letting the clippings go back into the grass is the best method of dealing with grass clippings.  The nutrient is added back to where it is needed.  The extra grass clippings will help in water retention of the lawn.  Additionally, it is just a cheaper and more ecological method of taking care of grass clippings.

If you cut your grass longer it will more than likely crowd out the other weeds.  Allowing your lawn to grow a bit taller will eliminate the need for a treatment of weed and feed fertilizer.  I personally have used the method of cutting the grass long and letting the clippings be incorporated directly back into the lawn for years.  The result has been great, with less need of fertilization and less water usage. 

Summary

You can use grass clippings from grass that has had an application of weed and feed fertilizer. It will require some steps of composting and introduction of white rot fungus.  The fungus will eat and break down the herbicide making it less toxic to use on your garden.  

However the best thing to do would be to incorporate the lawn clippings back into the lawn and create a healthy lawn where you wouldn’t have to use a weed and feed fertilizer, or commercial treatments.