Helpful Hints for Growing Homesteads

Recent Posts

How can I create good loamy soil?

Raking garden soil.

When agriculturalists refer to the loam of their soil, they are referring to the basic structure or makeup of the soil.  A good loam is what any grower (whether it be a garden enthusiast, or large crop farmer) desires for plants to flourish and produce.  This article will discuss the three basic components of soil, (sand, clay, and silt), and how the proper ratio of these three components work together to make up the loam of your soil. It will also discuss how you can increase the quality of a soil’s loam.

The simple answer to creating better soil loam is to add organic matter.  The first step to increase your soil’s loaminess is to examine what your soil is generally made up of, and determine if you have a good balance of sand, clay, and silt. Once you know what your soil’s characteristics are, you will want to add a proper amount of organic matter.  This article will explore some great tried and true methods of improving your soil’s loam.

Definition of loamy soil vs fertile soil

The loam of the soil is not to be confused with the fertility of the soil.  The fertility if the soil refers to the ingredients in the soil that allow for plant and tree growth.  Things like nitrogen, potassium, phosphorous, etc.

The loam of the soil is the actual physical structure of the dirt itself.  The physical structure can really affect the growth of your plants. The better the loam, or structure of your soil, the better your plants will grow.  

So, what is soil loam?

The loam of the soil as I said before, is the structure of the soil.  Soil is comprised of sand, clay, and silt.  The combination of these elements is what comprises all soils.  All parts have advantages and disadvantages. 
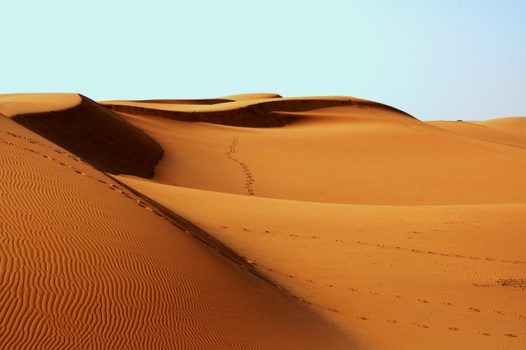
Sand dune, sandy soil.
Sand dunes showing sandy soil.

Sand

Sand is comprised of larger particles.

Advantages:

  • Sandy soil is easily broken down and worked.  
  • Sand is easily penetrated by water, and allows water to drain through to keep your plant roots from sitting in water and rotting or drowning.  
  • Sandy soil is great for airflow to the roots of plants.  
  • Sand will also allow roots to grow without much hinderance. Roots typically need the ability to stretch and roam.  

Disadvantages:

  • Excess sand allows nutrients to be taken away from the root zone of plants as water drains through the soil. Almost all sandy soils have nutrient deficiencies.  
  • Nitrogen is one of the most soluble nutrients, so sandy soil is often deficient in nitrogen.
  • Sandy soil can have problems with retaining enough water for plants to grow.    
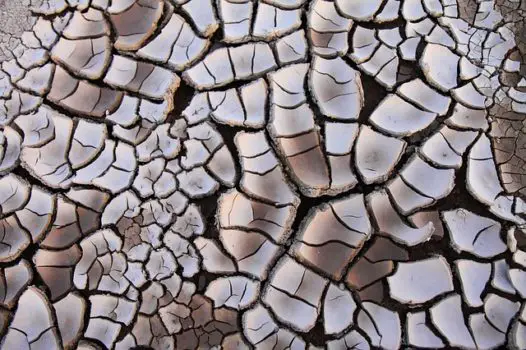
Clay soil drying out and cracking.
Clay soil

Clay

Comprised of smaller particles, almost the opposite of sand.

Advantages:

  • Clay soil has great water retention.
  • Nutrient levels in clay soils are generally high because nutrients (and especially nitrogen) aren’t leached away via excess water drainage.

Disadvantages:

  • Clay soil has smaller particles, making the the soil compact tightly, which precludes water from penetrating.  This can hamper drainage and retard roots from growing freely.
  • Low air supply in the soil due to the small and compacted particles.
  • Clay soil can become waterlogged and create standing water which can cause plants and trees to die.
Silty soil
Silty soil

Silt

Silt is kind of the in-between soil.  It’s not as small particle dense as clay, or as larger particle loose as sand.  

Advantages:

  • Silt retains water well.
  • Silt can retain nutrients well.
  • Silt does compact but can allow for root growth and some air to be available to plants.

 Disadvantages:

  • Silt can be the consistency of fine flour, which allows it to be easily blown away in the wind or washed away with water drainage.
  • Silt can become sticky when wet.
  • Silt can create hardened, almost brittle areas after it dries.

What you really want is to have a good balance of all 3 soil components for good loam.  This can be done on a small scale by bringing in the proper amount of sand, clay, and silt and mixing it together.  However, depending upon the size of the ground you are hoping to improve, this method can be outlandishly expensive, and there are other methods of improving loam that are less expensive, and work well.

How can you create a good loam soil?  ADD ORGANIC MATTER!

Most any soil can be made good by adding organic matter!  Adding organic matter will improve water drainage and retention, nutrient retention, and aeration in soil.

Sandy soil will be able to hold onto nutrients and water with the addition of organic matter.

In clay soil the smaller particles will be separated by the organic matter creating a crumblier soil. It’s less likely to harden and make a crusty surface.  

Ways to add organic matter to your soil.

1-Use what your garden has already made.

There are many ways to add organic matter to your soil with resources you already have available. Perhaps the easiest method is simply to return everything you don’t consume back to your garden.  Bring back the carrot tops and peelings, watermelon rinds, pea pod shells, potato peels, corn cobs and stalks.  Bring everything back to your garden that was grown there, break it up however you can, and mix it directly into the ground. You will be surprised with the nutrient levels and loam production that will follow.   

The one exception to this rule is diseased plants.  Diseased plants need to be discarded.  Some diseases will perpetuate in the soil and reinfect your plants the next season.

2-Use all the yard waste.

Grass clippings are a great source of organic matter as well.  Get you own grass clippings, and maybe even a neighbor’s supply, which are typically found in abundance.  You can often get a nitrogen boost with grass clippings, grass really is a high nitrogen user.  Caution should be used if the grass has had a weed and feed fertilizer put on it.  Some gardeners have reported that the herbicidal fertilizer stays with the grass clippings and can poison your garden.

Leaves are also outstanding to put into your garden.  Tree roots go deep down into the subsoil and bring up nutrients from deep in the ground. The leaves of those trees contain those nutrients and will add them to your soil.  Additionally, many leaves have a paraffin like substance in them that can slow them from breaking down. This is great to add structure to your soil.  Some leaves take several years to break down.  Walnut tree leaves should be avoided however.  Walnut tree leaves contain a chemical (called juglone) that can prove toxic for growing plants.

Pine needles are particularly good to add to soil that is more alkaline.  Pine needles have the effect of raising the acidity of the soil while adding structure.  Pine needles will add good structure to your soil for years because it takes them a long time to break down.

Sawdust and woodchips are great to add as well.  If you have a wood chipper, the resultant product can be fantastic to add to your soil. 

3-Commercial sources for organic matter

Your local farm and ranch store, or nursery will have soil amendment available.  This can be a great source for organic material.  It however can be really expensive.  If you have a smaller plot this may be a good way to go, but you can get plenty of organic matter from more reasonable sources.  

Mulches with redwood compost and or evergreen compost will remain in the soil for years. This will add a good organic structural element to your soil allowing for aeration and water drainage.   

In my area there is a green waste plant where you take yard waste, branches, bushes, etc.  They will grind up the green waste and turn it into a mulch compost.  It is relatively inexpensive and adds some great organic matter to the soil.

4-Local farmer, rancher, large animal owner.

A local farmer might be a great place to get organic matter to add to your soil.  Often farms will have a stray bale or two that has gone bad. An old hay or straw bale is great to spread out on your garden.  Some hay crop will get rained on in the processing of hay.  You can sometimes get these bales for cheap or free.  

Many local farmers, ranchers, or large animal owners will have piles of bedding hauled out from the stalls, stables, cages, or pens.  This can be an excellent source for organic material to add to your soil.  It can often have the added benefit of adding good nutrient to your soil as well.  You will need to check on what kind of bedding material they use.  Cedar shavings can be detrimental to some gardens. 

5-Green Manure.

A great method of adding organic material to your soil is by growing your own on the ground itself.  This method is known as green manure.  I wrote an extensive article on it here.  Basically, you grow a whole section or the entire garden with one type of plant and till it back into the soil.  

Some of the crops to grow as green manure are:

  • Peas
  • Annual Rye Grass
  • Alfalfa
  • Winter Vetch
  • Yellow Blossom Sweet Clover
  • White Clover
  • Sudan Grass
  • Oats
  • Barley
  • Wheat

Planting legumes are a great option for a green manure crop.  As a legume they are a nitrogen fixer, meaning they bring nitrogen into the soil as well as organic matter.

Organic matter loamy soil
Spading in organic matter into the garden soil.

Best methods of incorporating organic material into your soil

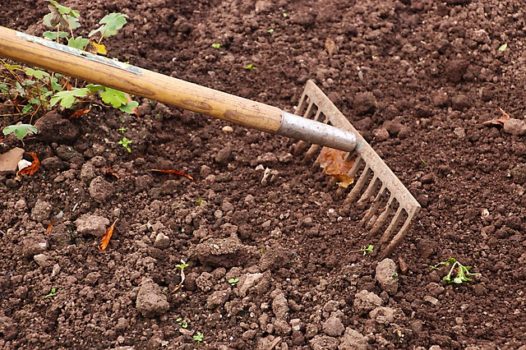
The best methods of incorporating organic matter into the soil is by spading it in, tilling it in, or plowing it under.  

If you don’t have a large area, or you are wanting to have a little exercise you can spade the organic matter in. Just dig and turn the soil over on top of the organic matter you are trying to mix in.

Using a roto tiller is an effective way to incorporate organic matter.   A roto tiller will also aid in chopping up the organic matter to smaller particles.  This method can add good aeration to the soil as well. 

If you have a larger area you can plow the organic matter in with a tractor.  This is the primary method we use.  We have found that plowing in the fall gives the soil time to decompose the organic matter through the winter.  

Summary

The loam of your soil can really help your garden grow properly and successfully.  All soil is comprised of sand, clay, and silt.  The combination of these soils is what creates loam.  The best way to aid your soil whether is it higher in sand or clay or silt is to add organic matter.  The addition of organic matter will give your soil the loam you need. Organic matter is the magic stuff that will create good soil for gardens.

What’s the Poop on Manure in the Winter?

Cow by a feeder in the field in the winter.

Can I put animal manure on my garden in the winter?

Wheelbarrow for hauling in the winter.
Wheelbarrow in the winter.

During the winter season, animal pens and coops can become saturated with excess manure.  The manure will need to be cleaned from the pens and coops, which raises the question of whether you can simply relocate it directly to your fields or gardens?  The simple answer is yes, you can spread manure on your frozen cold ground, but to get the best results there are some things you will want to consider.

  • The first Issue when spreading manure on frozen or snow-covered ground.

There are a few issues to consider when spreading animal manure on frozen and snow-covered ground. One is the problem of the manure moving from where you spread it to where it can end up as the ground thaws, or the snow melts.

With the thawing of frozen ground there shouldn’t be much movement of the manure.  If you get no snow or rain, the manure should stay put. Though it will depend on the climate in which you live, here we will assume that your homestead or farm will receive some snow or rain throughout the winter.  

When it rains and snows, the manure can be washed and pushed to the lowest elevated portion of the patch or be washed away.  This will result in areas that will have a stronger concentration of manure and other areas with no manure.  This can also happen if you live in an area of high wind, which can cause “drifting” or the accumulation of snow in specific areas. You won’t be able to have consistent coverage of the manure due to the run off of the snow melt and rain. The fertilization will be haphazard and you will need to keep a close watch on the plants. The plants may need additional side dressing of fertilizer as the season goes on. Other plants may have too high of a concentration of fertilizer and hamper growth.

Another problem with run off or drift accumulation is that your manure will lose its efficacy. Nitrates and other positive organic matter is washed away as the snow melts and runs off.

  • The second issue is air and water pollution resulting from the off gassing and runoff of melted snow and rain.

If the manure is washed off with rain run-off or snow melt run-off, the manure can be washed into streams, rivers, ponds, or lakes.  This can result in contamination of water and waterways.  When manure contaminates water, it increases the number of nitrates in the water.  This may result in health issues for young livestock and humans (particularly infants).

You may have noticed signage indicating warnings of “watershed” contamination on hiking trails forbidding dogs or other pets from usage. This is for the same reason. Any type of animal waste can cause major issues with water consumption and contamination. 

  • The third issue that can arise with spreading manure on frozen ground, or snow-covered ground.

One of the major benefits of putting manure on your gardens or fields comes from the nitrogen that is added to the soil.  If you chose to spread your manure onto frozen snow or ice, it may remain exposed to air for longer periods of time as opposed to spring or summer broadcasting. By spreading the manure on frozen or snow-covered ground you begin the nitrogen utilization process. 

Ammonium nitrogen is one type of nitrogen found in animal manure.  Ammonium nitrogen will react or volatize as it is exposed to air.  What this means is that the nitrogen will be lost into the air as ammonia gas.  You may end up losing the nitrogen that you want in your soil, and actually be adding to air pollution levels as well.  

One good thing about winter manure broadcasting is that the colder temperatures will slow down this reaction or volatization.  So, you might be able to buy some time if you really need to get the manure out of the coop, pen, or stall if the temperature remains cold or freezing.

  • A fourth issue to consider when spreading manure in the winter time effects the potency. 

One of the most important reasons for adding manure to soil is an attempt to create “fixed” nitrogen (in other words, having the nitrogen transformed chemically in order to be beneficial to the plants in the soil). Frozen temperatures may retard or even eliminate the process by which nitrogen is made available for plant use. 

Getting nitrogen “fixed” into the soil to be used by plants is part of the nitrogen cycle.  In the nitrogen cycle bacteria is key.  Different bacteria create the availability of nitrogen in the soil for plants to use.  Some bacteria are found in the nodules of legume plant roots that will fix nitrogen into the soil.  Other bacteria often found present in the soil itself, will work with the ammonium nitrogen in the manure to fix the nitrogen into the soil.  

Still other environmental bacteria and fungi will participate in the decomposition process to fix nitrogen into soil.  Bacteria has a vital role in the utilization of nitrogen from animal manure. 

In frozen or snow-covered ground, the activity level of different bacteria can be paused, or slowed down. The slower reaction of the bacteria can also cause a reduction of the effectiveness of the nitrogen from the manure.  

  • A fifth problem with spreading manure on frozen or snow-covered ground is that it’s a mess and smells terrible.

I’ve had occasion to spread manure in the winter over snow-covered ground.  It’s left an aroma that stenches the air for days on end.  If the sun comes out and warms up the surface a little the stench is reignited for another round until the manure can get tilled in or if it freezes or snows again.  

We have dogs.  For some reason manure is an attractant to our K-9 friends.  Our dogs will run, roll, and have a great time in the manure.  This leaves us with a super smelly pet and member of the family. Often that means dog baths in the middle of winter. 

If you have neighbors, they may complain.  Some may even file a formal complaint to the city or governing body.  You may get a warning or even a citation depending on city ordinances or Home Owners Association policies. 

If you have a larger piece of ground you’re working, you’re probably out of town and it won’t matter that much.  You probably will only need to worry about the loss of nutrients.

Keeping livestock creates challenges for manure in the winer
Keeping animals in the winter creates challenges with manure disposal.

Storing manure might work better than spreading manure on frozen or snow-covered ground.

After looking into the different complications, you may decide that you would rather store the manure instead of spreading it all over frozen or snow-covered ground.  Sometimes you need to clear out the manure from a coop, pen, or stall for the health of your animals.  

One method of storage is just to stockpile the manure.  You can just put it into a pile out of the way and wait until you have a good day to spread and plow in the manure. You need to plan for possible run-off from snow and run-off. 

Another method of manure storage is to just put some bedding over the manure.  This may work if you have enough space, and the health of the animals doesn’t become compromised.  Sometimes the decomposition of the manure will create heat and can keep some animals warm throughout the colder months.  Caution should be used if you are going to go with this deep pile method of just stacking up bedding on the manure.  The same ammonia gas that helps with nitrogen fertilization can build up in coops, pens, and stalls.  This can be really bad for your animals and may make them sick and even cause death.

Storage bins are another option.  Sometimes you can create an area or bin for storing manure.  On many farms there will be an area with a concrete pad with a wall or 3 sides to store manure in.  It is a variation of the stockpile storage, but aids in containment.  Smaller options can be crafted with pallets and tarps. Tarps spread out with some kind of structure, like a pallet or plywood can be a great option.  If your tarp is large enough you can cove the manure pile.

One more method of storage can actually create an energy source.  You can use an anaerobic digester.  This basically holds the manure and captures the methane gas that comes off of the pile.  The methane gas is flammable and can be controlled to burn as a fuel.  There are many people who have made their own home-made digester, and there are some commercially available.  Most anaerobic digesters are large and for use in industrial applications, but smaller home and backyard versions have been produced.  This is an exciting option that I will look into and write an article about.

Summary of spreading manure on frozen or snow-covered ground.

The simple answer to the question, “Can I put manure on frozen or snow-covered ground?”.  Is yes.  If you need to get the manure out of your coop, pen, or stall, you can spread it on frozen or snow-covered ground.  

You do need to consider what the pros and cons of that will be.  The pro is that you get the manure out and it will fertilize you ground eventually.  The cons of spreading manure on snow-covered or frozen ground are many.  Including loss of nitrogen, creating air and water pollution, uneven distribution of fertilizer, and the smell and mess of having manure sitting on the surface until it can be tilled or plowed under.  

There are various methods of storing the manure until it can be more easily handled.  I would absolutely encourage anyone to look into storage before just spreading manure on frozen or snow-covered ground.  I did work on a dairy farm for many years, and there were times that spreading manure was our only and best option.  We did just fine, but with a little better planning, you can avoid being put into a bind where you don’t really have a choice.

You may want to also search for benefits of using manure as fertilizer, the nitrogen cycle, and pollution from manure. 

Garden Pests: How to Get Rid of Cutworms in my Garden

Anyone who has spent time planting and caring for an outdoor vegetable garden has likely encountered the dreaded pest the cutworm. Though very common, and potentially quite devastating, there are numerous methods for controlling and curtailing the presence of cutworms in your garden. We will discuss the best methods here.

Cutworms are found worldwide, and are actually the larvae (or caterpillars) of numerous species of night flying moths from the Noctuide family. They were given the moniker “cutworm” because of their voracious appetite and subsequently, their ability to cut down young plants as they feed at the stem or below the surface. Typically, a young cutworm will begin feeding on the first part of a plant they encounter (usually the stem) and devour until the stem is felled or cut in half. Some cutworms will cut off a plant from underneath the soil, causing the rest of the plant to shrivel and die. Though some cutworms will remain eating the remaining fallen plant, most often the cutworm will move on to another stem rather quickly, thus causing a rather disproportionate amount of damage to crops when compared to the actual size of the pest or infestation.

Identification of cutworms:

Cutworms may vary in appearance, ranging in color from tan or green to even pink, gray or black, yet most often appear green, brown or gray. Like the moth they will eventually morph into, cutworms, may appear uniform in color, or spotted and striped. They are a soft bodied caterpillar, most often dull or greasy in appearance, (though they may appear in more bright and vivid forms as well). At it greatest length, a cut worm will reach up to two inches (40 mm) in length, and are most readily identified for their characteristic of curling into a “C” when disturbed.

In many climates, cutworms will winter just under the soil (typically within 1-2 inches of the surface) either as a final instar larvae, or as a pupae.

Damage caused by cutworms:

As mentioned above, because of its feeding habits, the cutworm is especially deadly for young crops.

Cutworms feed on a variety of plants, including asparagus, beans, cabbage, kale, rutabaga and other crucifers, as well as corn, celery, lettuce, peas, peppers, and tomatoes. Some species even feed on turfgrass.

Adult moths are nocturnal and will lay their eggs on vegetation, or on moist ground surrounding plants, and the cut worm caterpillar larvae will hatch anywhere from 3-24 days after being laid and begin feeding almost immediately on vegetation near the ground. After 10-14 days, the larvae will become noctural feeders, staying underground during the day, and feeding only at night.

Methods of control:

There are several methods that can be utilized to control cutworm populations or to effectively eliminate their threat to ones crop.

1. Tilling: In some climates, as mentioned above, cutworms will winter under the soil. If this is the case, a farmer may control the pests by winter plowing or tilling. (or by tilling the soil 2-3 weeks before planting). Most farming sources recommend deep plowing or tilling in the fall, and again in early spring.

A winter plow will kill many of the cutworms in either the pupae/larvae or instar state, or bring them to the surface where they become subject to predators (chickens, moles, shrews, blackbirds, wasps, and parasitic nematodes). This method works exceptionally well for grain fields. (We utilize this method in our garden, and our chickens absolutely love this time of year, often spending hours eating the caterpillars that are turned over by the tiller).

2. Starvation and good weeding practices: Another less commonly used method of controlling cutworm populations is that of starving the caterpillars. If it is practical to keep weeds at a minimum before your planting and growing season, you can discourage cutworm moths from laying their eggs where your plants will be growing, and also depriving what larvae are present, the food they will need to grow. Along with this idea, many farmers make efforts to remove plant residue in their gardens, to reduce egg-laying sites.

3. Baits and poison: Secondary to successful starvation strategies, baits can also be utilized rather successfully. This is done by following up starvation methods with providing a sweetened bran mash containing a suitable stomach poison against the cutworm. Remember to use very small amounts, too crumbly and thinly scattered to be ingested by domestic animals or desirable wildlife.

4. Plant Collars or barriers: Perhaps the most widely known treatment for cutworms is the use of plant collars. This should be done right at the time of transplanting. It is a bit time consuming, but definitely works. You can use aluminum foil, plastic soda bottles, tuna fish cans, or a cardboard collar around the plant stem approximately 4 inches tall. The collar should fully encircle the the plant stem, and be pressed at least a壯陽藥 n inch deep into the soil. This creates a barrier to keep cutworm larvae from feeding on plants. Some growers use toilet paper or paper towel tubes cut at 3 inch intervals filled with potting soil, and standing in a tray for planting seeds, and when the seeds have matured sufficient for transplanting, plant them together, with the tube, in your garden.

5. Hand picking: Nothing beats an excuse to roll up your sleeves and get on your hands and knees in the garden, and the existence of cutworms is a great excuse. It is best to go looking for cut worms at night, or in early evening, with a flashlight while they are out and actively feeding. You will find the cutworms on the stems and foliage of your plants eating away. Simply pluck them off of the plant, and crush them, or drop them into a bucket of soapy water. Personally, we place them in a ziplock or sealable bag and feed them to our chickens the next day.

6. Capsaicin sprays and powders, extracts of pineapple weed or sagebrush: There are various organic treatments that are recommended for use against cutworms, including sprays or powders made from either ground red pepper (cayanne) or red pepper spray. These types of sprays are recommended by “Rodale’s Ultimate Encyclopedia of Organic Gradening” as a repellent for numerous garden pests, including the cutworm. To repel cutworms, it is suggested that cayanne pepper be dusted around the base of the plant stems. It is also suggested by numerous sources, that coffee grounds, extracts of pineapple weed, and sagebrush may act as a deterrent to the cutworm larvae.

7. Oak leaves, vulcanite sand, damp wood ash, egg shells, or diatomaceous earth: Some folks choose to mulch their plants with oak leaves, vulcanite sand, damp wood ash, egg shells, or diatomaceous earth to deter cutworms. These components may act as irritating physical barriers against the cut worm larvae. Personally, we do not use diatomaceous earth because we also raise bees, and some studies suggest that diatomaceous earth can be harmful to bees.

8. Bacillus Thuringiensis: Bacillus thuringiensis (Bt) is a naturally occurring soil borne bacteria that is widely available and has been used since the 1950’s for caterpillar and insect control. It can be applied via spray to young plants, (and in other ways), and is a very effective control against climbing cutworms or stem eaters. Beware however that Bacillus thuringiensis is also harmful to butterflies, which are powerful and important pollinators.

9. Cornmeal: Another effective method for killing cutworms is sprinkling cornmeal around your plants. Though we have not tried this in our own garden, it is reported by the farmers almanac and other sources that the cutworm larvae will eat the cornmeal but not be able to digest it, thus causing them to bloat and die.

As you can see, there are many methods to combat the cutworm, and good reasons to do so. Though there are a large variety of garden pests that can affect the growth of your garden or crop, most (like the cutworm) can be combated rather easily. Do not let the presence of cutworms deter you from growing fantastic plants. You will likely find out that deterrents for one pest may also deter others. For more information regarding garden pests, you may wish to research 1. common garden pests, 2. beneficial insects for gardens, and 3. organic treatment for garden pests.

Chicken Care in the Spring: Getting Ready for Warmer Weather

Chicken coop in spring, making preparations for warmer weather

Springtime is a favorite here on the homestead, as plants, bugs and animals all start to wake from their long winter slumber, but it is also of time that requires a lot of hard work. As the winter months start coming to an end, and the sunrise starts coming earlier each morning, it is time to gear up for the warmer months of spring and start making preparations for your flock to transition towards summer. The most important things to do to prepare your backyard chicken coop and flock during the spring involve:

  • Uncovering the coop for better airflow
  • Cleaning out and repairing the coop
  • Inspect your flock
  • Feed transition
  • Water changes
  • Light adjustment
  • Guarding/protecting against would be predators
  • Guarding against parasites
  • Preparing for or making precautions against new additions (broody hens and hidden nests)
  • Protecting your plants, garden and yard from hungry chickens
  • Watch for flooding, and be ready for a cold snap

1. Uncovering the coop for better airflow

If you winterized your coop for colder temperatures, you took measures to keep your coop dry and draft free during the winter. Now that warmer temperatures are on the way, it is time to unbutton those hatches to allow for good ventilation, and cross air flow. Because the temperature will rise slowly, you will want a system that allows for warmer temperatures gradually. Chickens are susceptible to frostbite, so don’t do this too early or too quickly. If you insulated your coop, it is time to remove the excess insulation. We use a mixture of wooden flaps and plastic coating to prevent drafts during the winter, and as temperatures warm up, we remove the wooden planks from the exterior of the coop one side at a time, and depending on the night time temperature, will roll the plastic coating up partially, to allow for fresh air to enter the coop. This helps the chickens transition into summer gradually, and also helps with their adjustment to the light changes of the season as well. Ideally, (and depending on the size of your flock), during early spring you will want your coop to maintain a nighttime temperature of 30-40 degrees. If you keep a thermometer in your coop you will notice that the chickens do a good job of generating their own heat as they roost. The average resting temperature of a hen is between 105-109 degrees Fahrenheit. During colder temperatures, chickens trap air between their feathers which insulates them and keeps them warm. Some chickens will even tuck their heads beneath their wings while sleeping for added warmth. The most important thing to remember during the spring is to keep the coop dry and ventilated.

Repairing the coop after winter and water rot
Repairing the chicken coop after winter and water rot is vital to protect your flock

2. Cleaning out and repairing the Coop

Spring is a great time to inspect your coop and make repairs if necessary. Remember that your coop is the best line of defense you have to protect your flock against predators and the often unpredictable elements. Winter ice and snow can cause wood to freeze or expand, nails and screws to rust, and wood to rot. We always use early spring as a time to check and patch the roof, reinforce ventilation latches, take a closer look at roosting posts, and even the nesting boxes to make sure everything is in good shape. Any holes to the roof or coop will need to be patched or closed, as predators become more active during springtime months as well.

We also use this as an ideal time to shovel out and remove all of the droppings that have accumulated during the winter months under the roosting posts. If you have a garden, you can read about the benefits of using your chickens’ droppings for fertilizer here. It is a dirty job, but absolutely imperative to keep down the ammonia levels from droppings and the possibility of infections or illnesses from spreading. Springtime is when many chickens experience respiratory illnesses due to the combination rising temperatures, wet conditions, and the closed quarters they have endured during the winter months. (You can read about common respiratory and other illnesses of backyard flocks here).

Spring chickens foraging on the lawn and taking cover under trees.
Chickens in spring, foraging on grass.

3. Inspect your flock

Spring is also a great time to give each of your backyard pals a good once over to ensure they are healthy. I like to check our chickens’ feet for infections including bumblefoot, swelling or lacerations, as well as their feather shafts and vent areas for scabs which may be a sign of mites. It is also a good time to check for eye crust or nasal drip which may be a sign of respiratory infection. If your chickens display any of these signs they will likely need to be separated from the flock and treated. (Read here regarding common chicken illnesses and treatment).

4. Feed transition

During wintertime, a chickens dietary requirements change due to molting, decreased egg production, and enduring cold temperatures. Winter is a time for most chickens to repair and recuperate from the stressful heavy egg-laying months of summer. Most backyard coop owners adjust to these winter needs by feeding their chickens more carbohydrates, as opposed to protein, and increasing the amount by as by much as 50%. Hens eat more during the winter months in order to stay warm. A lot of farmers will feed their chickens an extra helping of cracked corn prior to bedtime to help them stay warm at night as well.

As spring approaches, you will be able to transition back to a heavier protein and lower carbohydrate mix. This is also a great time to allow the chickens to graze your lawn and garden patch before it is prepped. They will find all kind of tender chutes, seeds and bugs in the newly thawed ground. Additionally, you can scale back the amount you are feeding your flock, as they will no longer be needing the large amount of carbohydrates to stay warm, and they will also have more light during the day to keep them outside foraging on their own.

5. Water changes

During the winter, you most likely used some form of heated source to keep water from freezing, and to keep your flock well hydrated during colder temperatures, especially because a chicken’s water intake increases by 50% during winter months. As the temperature outside of the chicken coop increases, so will the temperature inside of the coop, and you will need to remove any heated water source you have utilized to keep water from freezing. This is important, as chickens do not enjoy drinking warm water. Warm water is also a fertile breeding ground for bacteria and algae. Make sure that your chickens have 24 hour access to water, and ensure that the water is clean and fresh. Because springtime is notoriously rainy and muddy, this may require changing the water two to three times per day. Changing the water regularly is also simply the best practice year round to avoid bacteria, algae, and parasites.

6. Light adjustment

As the number of hours of daylight per day approaches 14 hours during the spring, your flock will naturally begin laying more eggs, gradually increasing their egg production as the day length increases. If you have added artificial light for your flock during the winter months to increase winter egg production, you will want to gradually decrease this light so as to correlate with the natural increase of light daily. It is suggested that artificial light is best used in the mornings, as a sudden loss of light at night (as opposed to the gradual decrease that accompanies sunset) may lead to panic and suffocation if chickens pile together from fright. So, as spring approaches, use less and less artificial light each morning, until your flock is using only natural light.

7. Guarding/protecting against would be predators and parasites

Spring is a very busy time for predators such as skunks, fox, hawks, and weasels who are vigorously looking for ways to feed their own new or growing families. It is also a time when other predators will be keenly aware that egg production in your coop is increasing. Thus it is critical that your inspect your coop in early spring to make certain it is predator proof. This will include predators who may dig or climb, squeeze through tight spaces, or even unlatch easy to open doors (think raccoons). Put yourself in the mindset of the predator, imagine how they may attempt to access your flock, and thwart those attempts by adding additional chicken wire, patching holes, or adding better security.

To guard your flock from airborne predators such as hawks as they begin spending more time outside, you should provide shelter they may hide under. If a hawk is sighted in the sky, your flock will need to take cover quickly under bushes, shrubs, trees, or even fences. Be mindful of this as your set up your bird habitat. It is also helpful to maintain at least one rooster with your flock, as he will often keep his eye to sky and sound a warning to his flock if he senses danger. On our farm, we also utilize a guinea hen for this reason. (Though she is quite a force to be reckoned with, and ought to be the subject of her own blog post). Like a rooster, she will sound a loud almost tropical bird sounding alarm that will warn the flock if she sees danger.

Incredibly, you may also want to think about using a lock at night, to protect your coop from over-curious neighbors.

8. Guarding against parasites

Other pests you will want to guard against during springtime are mites and lice. As your clean and repair your coop and inspect your flock, it is the perfect time to check for and guard against vermin such as lice and mites that can become bothersome and even life-threatening for your flock, (and especially new chicks). Mites can become especially rampant in nesting boxes and coops, so if you notice your flock doing extra preening, or showing hesitancy to enter their coop or nesting boxes, you may have a mite infestation.

As the temperature warms, it also brings these unwanted pests. Because mites and lice are often brought by wild birds or rodents, be sure during spring not to leave grain outside of the coop, or in places that will attract wild birds or rodents. Additionally, provide a place where your chickens can take dust baths. Typically, a good dust bath a day will keep the mites away, unfortunately, because spring is notoriously wet, your flock may not have access to a natural source for a dust bath. There are many DIY methods for creating a dust bath for your chickens during the winter and spring, and we highly recommend these. On our homestead, we use a simple plastic bin with several gallons of fine sand and a bit of wood ash and keep it clean and available from October through May. Some people like to add a small amount of diatomaceous earth to their homemade dust bath, but because we also raise bees, we purposely limit our usage of diatomaceous earth.

It can be difficult to get eggs from a broody hen.
Broody hen says “stay away from my eggs lady”

9. Preparing for (or making precautions against) new additions (broody hens and hidden nests).

Because of the increase of natural light, Spring is the ideal time for your hens to turn their thinking towards brooding their own little flock. (It is healthy for new chicks to mature when there is as much light as possible). Enter the broody hen…. If you are looking to increase your flock, then there is no problem with a broody hen, or the addition of some hatchlings. If you are not wanting your brood to propagate, you will need to take precautions.

If you do want to raise a new crop of chicks, then simply get out your brooding pen, and prepare it for a new batch. You may choose to incubate the eggs yourself, or allow your broody hen to do the work. There are many articles out there to help with raising new chicks, so we won’t address that in this article.

If however, you don’t wish to hatch out a new brood, you will likely need to “break” the broody hen. Personally, we do this by gathering the eggs twice a day, and as gently as possible. Though she’ll put up a fuss, and even peck at you, you’ll need to remove the eggs from underneath her regularly, to keep her from hoarding more eggs. You simply have to be more determined than she is. If your broody hen is particularly upset, it may become necessary to use an isolation crate or wire box to keep her from returning to the nesting box. You will want to be careful as your isolate a broody chicken as it can be quite stressful for them.

If your have free range or pastured chickens, you will need to keep a close eye out for hidden nests on your property, as well as keep an accurate head count of your hens at night. A missing hen or two is a sure sign that one is hiding a nest and trying to hatch her own brood in a hidden location. Personally, we enjoy the hunt when we know our hens are hiding a stash of eggs somewhere in the yard, It’s kind of like an early Easter egg hunt. We have found nests in the herb garden, under the bushes on the side of our home, and even in the grass between the teeth of the manure spreader. Those hens can be sneaky when it comes to hiding their eggs.

10. Protecting your plants, garden and yard from hungry chickens

Depending on when you start planting, and how you habitat your chickens, you may need to take precautions to protect your plants and garden from hungry chickens. At our homestead, we allow our chickens to pasture, which means they have free reign to peck and scratch at anything we haven’t fenced off or protected. Because we are also farmers and gardeners, this requires us to protect our crops with fencing. There are numerous methods that can be used for garden and plant protection, including low-voltage electric garden fences, panel fences, or even structures or greenhouses. Personally we use movable panel garden fencing and green steel farm fence T posts. This allows us to open and close off different areas, or to remove the fencing completely as the seasons change. We highly recommend this method, as simply removing a few panels of fencing in the late summer of fall allows the chickens access to areas of the garden we are no longer harvesting. They absolutely relish the opportunity to forage through the remaining plants and dirt for treasures.

Chickens in the snow enjoying scratch

11. Watch for flooding, and be ready for a cold snap

Spring is notoriously wet in many areas of the world, and can throw in an occasional unexpected freezing or cold snap, so you will want to keep a close eye on the weather, and guard your coop from excess moisture, flooding, or freezing. We do this by using a waterproof roof, and repairing it first thing in January or February, as soon as we tend to see warmer days. Additionally, we surround our coop with straw bales, which protects our flock from excess water that may run or accumulate during heavy rains.

Additionally, should the weather turn back to frigid temperatures, we keep our electric water warming bowls readily accessible until May, in case we need to keep water from freezing during a cold snap, and we keep our plastic wall coverings attached (but rolled up) through May as well in case they need to be lowered to protect from drafts.

These simple measures have saved us a great deal of worry and time when it comes to protecting our flock in the event of an unexpected but common cold snap.

That’s All Folks

As you raise your own flock, you will find many tricks of your own to utilize on your own property, and in your own climate. Each backyard flock will have their own needs and you are the best person to determine what works and what doesn’t on your own property. These are just a few tips that we have found that have helped us as we transition our flock each spring. You may also enjoy researching additional topics such as: preparing my chicken coop for winter; how to increase egg production during winter, best uses for artificial light with chickens, and how to break broody hens.

Can You Raise Pheasants with Chickens?

Beautiful male pheasant on the farm at the edge of the fence.

Can pheasants be raised with chickens?  Yes, and anyone who says otherwise is perhaps lazy, or doesn’t know much about pheasants.

Pheasants can be raised with chickens, but it takes some thought and preparation.

When people begin to raise chickens it is often fun and rewarding.  This may spark the idea of raising other birds, and whether or not these other bird varieties can be raised with their chickens.  

This article discusses what needs to be adjusted when adding pheasants to your backyard flock based on our personal experience doing so.

baby pheasant chick in the grass
Baby pheasant chick in the grass.

Characteristics of Pheasants

Pheasants are not a native species to many areas, and actually originate from China.  They have been introduced all over the world and have done particularly well in the United States and Canada.  In fact, the pheasant has become the most popular game bird in the United States.

Due to the popularity of the pheasant being a game bird, it has not been domesticated like the chicken has.  Generally, pheasants have been raised to populate an area for game bird pursuits as opposed to domestic opportunities.

When raising pheasants, perhaps the most important fact to know, is that they need a lot more room than chickens.  If they get too crowded, they can be prone to cannibalism.  Pheasants will also need to have a larger hen per male bird ratio than chickens.  For instance, you would need around 8 hens for each male.

Pheasants can eat almost anything. They love what can be foraged from the homestead, but to begin with, they need a good mix of grain, corn, and high protein game food.  More and more people are raising exotic birds and game birds, so game bird food is becoming more readily available.  

Pheasants also need good shelter that is located low to the ground.  Pheasants naturally try to hide from predators and naturally want to roam far distances to range for food. Having interspersed low to the ground shelters available will keep pheasants happy and safe.

Pheasants are competitive and aggressive.  If pheasants perceive another bird as a threat to their food or territory, they may attack.  They can easily attack and kill smaller birds and chicks, if they view them as a threat.  For that reason, putting a big ring neck pheasant with your favorite little bantam chicken is probably not a good idea.

Pheasants can become cannibalistic when under stress.  Stress factors may include lack of enough room to roam, not enough food, smaller birds in the flock, and too many males per females in the mix.  Not a pretty sight at all.

Pheasants will lay eggs throughout the year, though fewer in quantity than a chicken does.  The eggs are smaller, about half the size of a chicken egg. Pheasant eggs have a richer yolk, and less white to yolk ratio than a chicken egg.  They can be eaten just like chicken eggs, but don’t do as well with baking.

If you are raising pheasants for meat, they dress out fairly well.  The males will be around 4 pounds dressed out, and the females will be around 2-2.5 pounds dressed out.  

Newly hatched chicken chicks
Recently hatched chicks.

Characteristics of Chickens

Chickens have been domesticated for centuries.  Due to this they are easily raised in all kinds of conditions for all kinds of reasons and results.  Many are raised for egg production, meat production, plumage, and as pets.

Many of the more wild characteristics have been bred out of chickens to make them easier to raise and more productive from a consumer point of view.  They are easy to get from many suppliers and backyard raisers.  The supplies to raise them are easily attainable as well. Keep in mind however, that this more docile temperament can make them easy prey to an aggressive pheasant, so again, you will want to exercise caution when raising pheasants with chickens.

Staring up your own backyard chicken flock is relatively simple.  We have an article about starting up chickens here.  

Do chickens and pheasants eat the same thing?

Yes, chickens and pheasants can eat the same things.  It is recommended to use a higher protein feed with pheasants.  Good quality scratch grains and mash are helpful when raising chicks.

Ideally you can feed the pheasants game bird feed.  As mentioned above, game bird feed is becoming more and more available as the popularity of raising exotic and game birds grows.

I have my chickens free ranging around the farm.  Free ranging pheasants would be very beneficial from a diet point of view.  The pheasants can eat bugs, worms, grass, alfalfa, the overlooked tomato, seeds, and weeds.  The greater the variety of their diet, the better.

Sprouted grain and corn also work well, and pheasants and chickens both love it.  Fermented grains are a good idea to encourage good “gut bacteria” within your flock.  Also fodder from sprouted grains and corn are a good source of food for both pheasants and chickens.

What kind of room and shelter are needed?

In the wild pheasants are long ranging birds.  You will need to plan for a lot more room for pheasants to roam than chickens do.  A larger farm, or ranch with plenty of room would be ideal.

In their natural habitat, pheasants seek shelter under bushes, in tall grass, on ditch banks, etc. When raising pheasants, you need to provide low to the ground shelters for the birds to hide and take refuge in. These shelters can be rather simple but are a necessity for the pheasants.

If you don’t have a lot of room for the pheasants to roam, then you will need to provide as much room as possible and close the pheasant/chicken run in.  You will create essentially an aviary for the birds.  This can be accomplished with bird netting overtop of the chicken/pheasant yard.  Without the netting the pheasants can just fly over fences and escape.

If you don’t want to use bird netting over your aviary, you will need to do something to keep the pheasants inside the run.  One method is to brail one wing of the pheasant, this is where tape is wrapped on one wing keeping the wing from opening up.  You will need to switch off to the other wing every other month to four months. You can also clip one wing to keep them off balance so they can’t fly.  You will need to repeat clipping the feathers as feather grow back.

Where do I get pheasant chicks?

Commercially available pheasants used to be pretty rare.  As the popularity of raising pheasants has increased so has the availability.  Many commercial hatcheries and specialty hatcheries have pheasant chicks available.  I have seen game birds such as quail and pheasant, becoming available at farm and ranch stores when they get their chicken chicks in the spring.

Things to consider when raising pheasants with chickens.

Pheasants are much wilder than chickens and can be aggressive.  One way to prevent this aggression and aid in the peace with the flock is to raise pheasant chicks with the chicken chicks.  Being raised together they see the chickens as a normal part of their flock and are less prone to aggression.  

The male pheasants are just as loud as male chickens and crow loudly like roosters.  If you are zoned where roosters are allowed you should be fine.  If you are not zoned where roosters can be kept, you may find some neighbors upset with you and the loud pheasants.

 Both chickens and pheasants need to have predator prevention considered.  Pheasants are susceptible to the same predators as chickens.  You need to account for foxes, coyotes, racoons, hawks, dogs, ferrets, mink, over active neighbors, etc.  Take into account what the predatory threats could be, and plan ahead for them.  For example, of you have hawks around give places for the birds to run and hide under bushes, lower shelters, and grasses.

Cannibalism happens often with game birds.  Precautions need to be taken to prevent cannibalism, or it will be a trait that could decimate your flock.  If you see cannibalism beginning, analyze the stress causing issue and fix or change it quickly.  Often it is the result of not enough room for the pheasants.

Adolescent pheasant chick
Adolescent pheasant chick.

Raising pheasant chicks.

Use a red heat lamp with the chicks.  Pheasant eyes are sensitive, and the red lamp will be easier for their eyes.  A bright light shining in their eyes can stress them out and make them aggressive.

Keep the brooder warm but not too warm.  Either too much heat or too much cold can trigger stress and cannibalism.  The ideal temperature is 95 degrees Fahrenheit to begin with, then taper it down 5 degrees every week or so. 

A game bird starter feed is great if you can get it.  If you don’t have access you can use a chicken starter mash, just have it higher in protein than regular chicken mash.  

The brooder needs to be round or have a circular barrier or ring so that the pheasant chicks won’t cluster and pile into a corner.  This can result in suffocation or aggression. Do not overcrowd the chicks, they will turn to cannibalism if they are too crowded.

Simple waterers are good to use.  Make sure you put marbles in the trough of the waterer.  This will help to keep the little chicks from drowning.  

The bedding is also an important factor.  Chopped straw, burlap, or rough paper is good bedding material, chopped straw being the favorite.  Try not to use newspaper or slick paper where the chicks can’t get good footing.  Do not use cedar bedding, this can kill the chicks. 

Male Golden Pheasant eating in the yard.
Male Golden Pheasant in the yard.

Summary

Can you raise pheasants with chickens?  Yes, you can with a lot of caution.  You need to take the precautions necessary and you can have a beautiful ring neck pheasant with your speckled Sussex.  The main keys being to not stress the pheasants, have enough room for the pheasants, and raise the pheasants with the chickens from the beginning. 

Do Farm Fresh Eggs Make Better Cookies? Yes, Every Time!

Fresh eggs are used to emulsify cookie batter, adding consistency and healthy fat content.

Farm fresh eggs are better than commercially raised eggs in both nutrition level as well as taste and baking structure. Whether it’s the flavor or the nutrition level you are wanting to boost in your kitchen, using farm fresh, (and particularly free-range or pasture raised eggs) will always serve you well.

My husband has been the volunteer cub scout leader for our local pack for the past eleven years, and getting those other parent and neighborhood volunteers to show up to weekend meetings was always a chore, until my mother-in-law began baking her now-famous farm fresh egg chocolate chip and macadamia nut cookies to serve at the meetings. Once she began providing those cookies on a regular basis, we had volunteers showing up on time, and literally salivating by the time the meeting started and the plate of fresh cookies began making the rounds. Notably, (and pay attention here), though we shared the recipe with some neighbors, they have never been able to mimic the end result…… The reason why (besides mama Joan’s love that is baked into every batch), is that she uses a key ingredient that the neighbors weren’t using, and that is free range, fresh eggs. This article will describe why fresh eggs, and particularly why free range eggs are almost always the better choice when it comes to baking.

What is meant by farm fresh or fresh?

Legally, the eggs you buy at the supermarket can be up to two months old before you even bring them home. According to research done by Lisa Steele of Fresh Eggs Daily, eggs can be sold up to 30 days after the date they are placed in the carton, and may take up to 30 days (or longer) after being laid, until they make it to the carton. What is the negative to using older or commercially processed eggs? The answer is somewhat simple:

1. First, older eggs have had more time to allow air to be absorbed through the shell, thus giving the egg a runnier consistency. Ever heard of the float test to determine whether eggs are still good? (If you’re worried about the age of some eggs you may have in your refrigerator, just drop them in a bowl of water. Fresh eggs will sink to the bottom because the porous shell hasn’t allowed much air to penetrate yet. Older eggs on the other hand, have been around longer, and allowed air more time to penetrate through the shell, thus making the eggs float).

2. A second reason fresh eggs are better is that most c犀利士 ommercial egg processors remove the microscopic “bloom” or cuticle from the egg which is a natural coating on the eggshell that seals the shell’s pores, and keeps bacteria out.

A collection of pasture raised eggs from various breeds, with bloom.

3. Another reason fresh eggs are better is because you are less likely to encounter the bacteria Salmonella in fresh eggs. Salmonella can build up over time, (particularly if stored at a temperature above 40 degrees Fahrenheit). This is also true with most other bacteria that may grow on or in eggs. As eggs age, they can grow different kinds of bacteria, called pseudomonas which will eventually cause the egg to turn a bluish-green color and develop that famous “rotten egg” smell or taste.

More Nutritious?

Nutritionally, the USDA considers a large egg weighing about 2 ounces to contain around 70 calories, including 6-7 grams of high quality protein, typically high in essential amino acids and antioxidants that may reduce the risk of age-related macular degeneration and cataracts and protect against heart disease, stroke and some forms of cancer. One egg will typically contain 0 grams of carbohydrates, 5 grams of fat, and 1.6 grams of saturated fat along with iron, vitamins A, B complex, D, E, and K, minerals sodium, potassium, calcium, and phosphorus and various carotenoids.

There is much debate as to whether the taste of farm fresh eggs is better than store bought or commercially produced eggs, (which we will address below), however, it is undeniable that the nutrition level of farm fresh or pasture eggs is often much better than those that are commercially yielded. This is likely due to several factors. First, birds that are kept in a free-range farm or pasture fed, are allowed access to a much wider range of mineral and nutrient rich diet as they forage through dirt and foilage for food. Birds in these types of environment often encounter grass, seed, and plant-based fruit or vegetable scraps, as well as protein rich insects or worms, not available to birds kept in the confines of a commercial egg production plant and typically fed a measured portion of corn, soy, and cottonseed product formulated for egg production. Additionally, it has been argued that the stress levels of commercially raised chickens (often kept in small, stacked, loud cages) are much higher, causing the birds to produce higher concentrations of corticosterone (from the adrenal gland), which has been found to increase the rate of protein breakdown.

Happy hens lay healthier eggs: A Cambridge University Study conducted in 2010 compared Vitamins A, E, and fatty acid compositions of the eggs of caged hens and pastured (or free roaming) hens, and concluded that pastured hens have twice as much Vitamin E, a 38% higher concentration of Vitamin A, twice as much Omega 3 fats, 2.5 times more omega-3 fatty acids, and less than half the ratio of Omega-6 to Omega 3. Another noticeable difference you have likely encountered as you have tried free range or pastured eggs is that pastured eggs tend to have brighter pigmented, or deeper saturated colored yolks. The color of a yolk is dependent upon what a hen eats, or more specifically, what pigments the hen is feeding on. Simply stated, pastured hens tend to eat more food containing pigments, reflected in the yolk’s deeper color. Many of the pigments that are accountable for this deeper color reflect carotenoids and essential nutrients, some of which have antioxidant functions, and some are essential for our bodies, such as beta-carotene, which our body converts to Vitamin A. Additionally, a 2009 study conducted by Mother Earth News Magazine showed that pastured chickens can synthesize vitamin D through sun exposure, and their eggs have been found to have six times the vitamin D content of commercially produced eggs. Another tasty nugget to consider is that natural eggs receive no hormones or antibiotics, and pastured chickens regularly consume a healthier, more natural diet, experience more vitamin D exposure and exercise, thus making them more resistant to infections.

Better tasting?

Opinions regarding the taste of farm fresh and pasture raised eggs versus commercially produced eggs range widely, and are obviously subjective, but take it from this chicken chick, the fresh eggs always make for better baking and flavor. Not only do you get the added flavor from minerals and nutrients mentioned above, but well structured and stable eggs will support a better structure, texture, color and flavor in baked goods. The function and behavior of eggs will vary depending on how they are treated from one recipe to the next. In a batter for instance, eggs will create structure moisture, and stability, in sauces and custards, eggs will thicken and emulsify.

Fresh eggs being used to emulsify cookie batter

The yolk: Recipes that use just the yolk are typically doing so for the yolk’s fat content and emulsifying abilities. The yolk gives baked goods extra rich flavor and a velvety texture, and can also act as a binding agent between fats and liquids that prevents them from separating. A good yolk, with higher omega 3 and vitamin quantity will aid in the distribution of liquids and fats throughout a batter, making it smoother and more consistent throughout.

The whites: When egg whites are used alone, their role is completely different than that of yolks. Typically, egg whites are used for whipping (or the inclusion of millions of tiny air bubbles within the white) to establish a foam that can be formed into a souffle of meringue depending on the structure you desire. Additionally, whipped egg whites can act as a natural leavening agent in delicate cakes or souffle’s. When heated in the oven, the air trapped in the whipped foam will expand, causing the product to rise without the need for additional leavening agents, such as yeast or baking soda. Doesn’t it make sense that an egg with a more solid egg white structure can withstand the addition of additional air bubbles, and thus make for a greater rise? For this very reason, fresher eggs, and more particularly, pasture fresh eggs will almost always whip better, and hold more air.

Side by side pasture egg versus commercially produced egg

One of the favorite tests of foodies or chefs, who want to prove the structure value of farm fresh eggs versus their commercially produced counterparts is to simply crack an egg open on a flat surface such as a counter top, and look at the difference. Not only will one notice that the farm fresh yolks will have a darker and deeper color, it will also stand higher, being better supported by a white that has a more substantial binding content. Knowing the purpose for which eggs are used in most recipes, any experienced cook or chef will choose the better structured, farm fresh egg every time.