Helpful Hints for Growing Homesteads

Recent Posts

Should I Collect Pollen from my Bees, and what is it good for?

Collected bee pollen

When raising and caring for honey bees I am always trying to learn new information and stay educated regarding best beekeeping practices. One idea that keeps surfacing during my research involves the harvesting of pollen from one’s beehives. The first time I read about this I thought it was crazy, and wondered if it could possibly be a good thing to attempt.  The simple answer is that it is possible to collect pollen from bees, and that there is actually a market for bee pollen. Additionally, if done correctly, it will not cause harm to your bee community.

The collection of pollen from your bee hives requires planning, proper equipment, and work.  In this article I will let you know what I have found out about collecting bee pollen and what you will need to consider before you try attempting it.
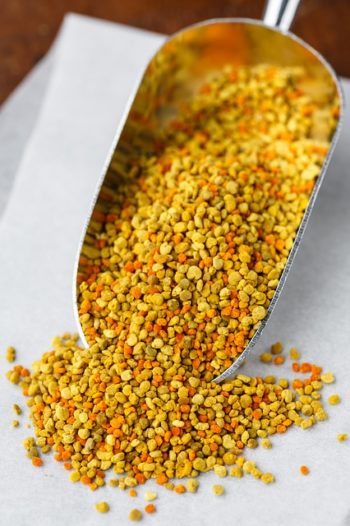
Bee Pollen

As many people know bees are spend their entire lives working and gathering for the benefit of their hive. Bee pollen is a major resource for the bee colony. The pollen is especially important for raising a new brood. It takes a massive amount of protein to create new bees and pollen is the source of that protein.

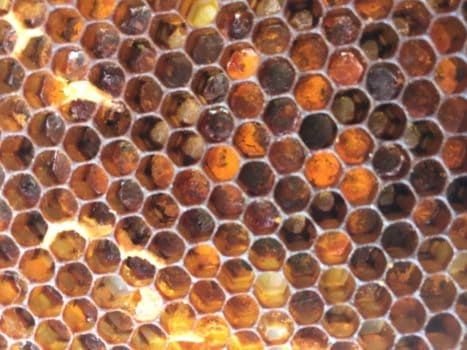
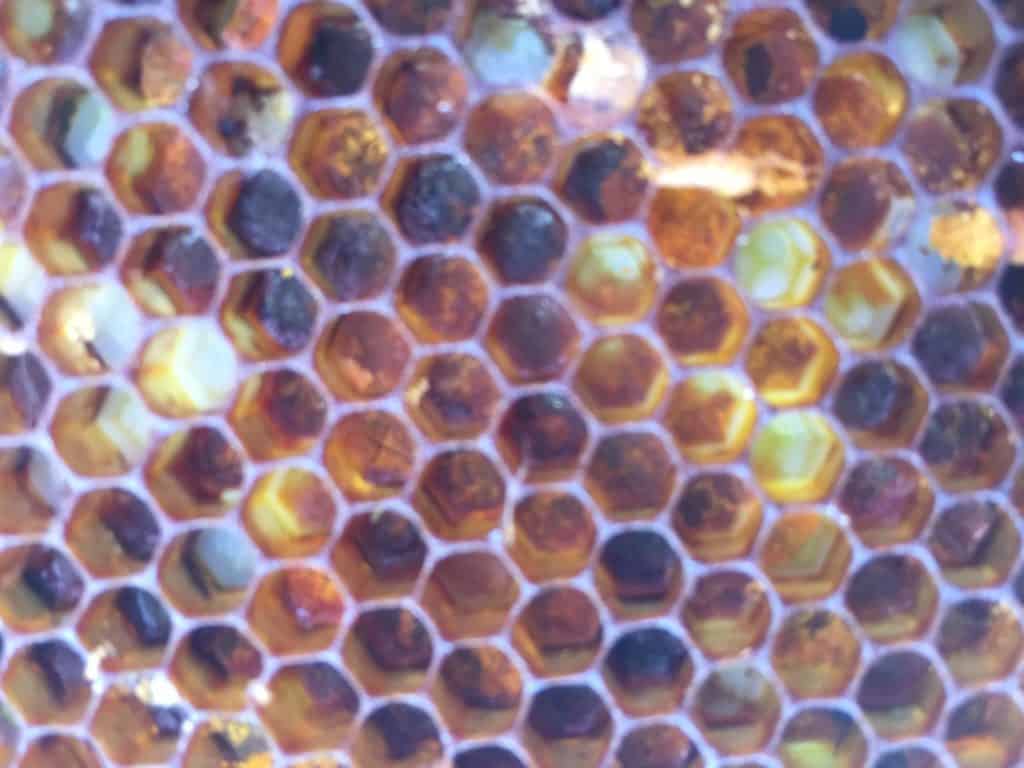
Once gathered by the workers bees, the pollen goes through quite a process after being brought into the hive.  Most simply stated, the bees put the pollen through a packing and storing process that transforms it into bee bread.  I wrote an article about bee bread here.  The entire process of how bees create silos for pollen storage is incredibly fascinating. 

Similar to honey, the pollen is stored in comb cells and used for the food of the colony like honey. Honey is the carbohydrate source, and the pollen is the source of protein, with bee bread being the final product of the pollen.  

Honey has been harvested for centuries with bee colonies doing fine even after their hard earned honey is taken.  This requires the beekeeper to think ahead and plan for nectar flows and dearth, or winter, weather, drought, etc. If managed well a colony can provide plenty of honey for the colony as well as a good beekeeper.  If done poorly harvesting honey can lead to the death of a bee colony.  

It takes a new level of caution when tampering with the protein intake of a hive. More planning, equipment, and observation is needed to have your colony survive and hopefully thrive.

Worker honey bees coming back to the hive with pollen and nectar.

Why would you want to collect bee pollen?

I understand the concept of collecting honey.  Honey is a great natural sweetener. It has a great deal of microbiota properties that are still being discovered as research continues.  The methods and techniques of harvesting honey have been perfected over the years and can be learned fairly easily.

The idea of harvesting pollen however, is still fairly new, and has not been emphasized or developed nearly as much as collecting honey. From what I have gathered, there are good reasons for collecting pollen.

The first reason for bee pollen gathering is for supplementation of a colony in the spring after a winter season. I can see that supplying a struggling colony with plenty of pollen would give a valuable resource to build up brood. Gathering pollen from a strong hive for use in times of need seems fairly plausible. I do know that the bee bread is a better form of pollen, but I would suspect that any struggling colony would welcome pollen even if it hasn’t been processed into bee bread.  

The second reason for collecting pollen is for human consumption. It is reported that bee pollen may be a good health supplement for many aspects of the human condition. However, many of these health claims are yet to be proven scientifically.  It is interesting to note that as research instruments and methods become more precise and better overall, they are able to debunk and prove nutritional benefits of all kinds of things including products of honey bees. 

There have been many holistic practitioners and followers that have been using bee pollen for years.  The claimed holistic uses and benefits of bee pollen are really interesting. 

Some of the reported benefits of bee pollen are:

Allergy Treatment: Bee pollen has been used as an allergy treatment for years. The ingestion of small amounts of pollen over time is similar to the widely accepted treatment of having shots of pollen injected in patients over time.  The effectiveness is when locally gathered pollen can be used to aid in the treatment because the allergen is generally local.  Ingestion of honey is said to have this kind of affect as well.  A study about allergy treatment with bee pollen is linked here

Anti Inflammatory: According to the US National Library of Medicine and National Institutes of Health, the mixing of bee pollen with honey created significant anti-inflammatory activities with induced liver necrosis. Here is a link to the study.  

Another study conducted by the US National Library of Medicine and National Institutes of Health showed some anti inflammatory activity with edema.  Here is the link to the study.  

Wound and burn treatments: Pollen has been shown to aid in wound and burn treatment.  The link for the study is here. 

Anti Depressant: The administration of bee pollen shows gradual mood improvement and desire to live. Study link here

Aid in health and protection of the liver:  The study is here.    It shows that bee pollen is a safe treatment for liver injuries.

Anti-Oxidant:  This study used bee bread instead of bee pollen, but it shows some interesting findings about remarkable anti-oxidant properties that the bee bread has.  

Lowering Cholesterol: Animal studies have shown  that bee pollen lowers cholesterol.  The link to the articles are here and here.

Anti Cancer Properties: Studies have shown that bee pollen inhibits the growth of tumors and aids in treatment of cancer.  The study is here. 

Vitamin and Mineral Supplement: The chemical breakdown of bee pollen does include many vitamins and minerals.  These nutrients can be difficult for the body to break down and use with the tough outer shell of the pollen.  Also, different sources of pollen will have different amounts of nutrients.  Create a uniform measurement of the total nutritional value of pollen is difficult due to all the variables.

Other claims without any scientific studies include:

  • Weight Management and weight loss.
  • Stress Relief 
  • Improved immunity
  • Menopausal Symptom treatment

Reasons to not collect bee pollen.

The major reason for not collecting pollen would be the stress on the bee colony.  It takes a lot of work to collect enough nectar to create honey.  It takes a lot of work to collect pollen and create bee bread.  Whenever a beekeeper takes resources from the bee colony it creates a stress on the colony. 

When a bee colony loses its stores of honey they immediately change their activities to restore the honey lost and prepare for the winter, or a future dearth of nectar.  They will scramble all over and many beekeepers will feed their bees sugar water in the fall after the honey harvest.  This will ensure the supply of food for the winter.

When a bee colony doesn’t have the stores of pollen or bee bread, they change their whole tack and resort to stress mode.  Nurse bees will devour brood utilizing the brood as a protein resource.  An interesting series of articles can be found here about this here.  Randy Oliver takes a scientific approach to beekeeping and has a lot of great information.  

So, the main reason for not collecting pollen for me would be the added stress put on the bee colony. The stress lack of pollen coming in will result in more bees needing to collect pollen instead of nectar resulting in less honey production.  This can be fine if you want pollen more than honey from your hive, you just need to plan ahead for that kind of a result.  I also worry about weakening the hive that already has a lot of challenges to deal with such as:  pesticides, predators, vandals, theft, varroa mites, tracheal mites, viruses, inept beekeeping practices, etc.

How do you collect bee pollen?

The collection of bee pollen is quite different than pulling honey from frames or comb.  The idea is to collect the pollen before it gets into the cells of the hive.  There are a few different devices for the collection of pollen.  They are referred to as pollen traps.  The idea is to trap the pollen and get it as the workers return to the hive.

Fun video showing pollen gathering.

There are several pollen traps available.  I will have a list of pollen traps that are recommended on our resource page.  The one that I am looking at using is the Harvest Lane Honey Plastic Pollen Trap

Care is needed in collecting and storing bee pollen!

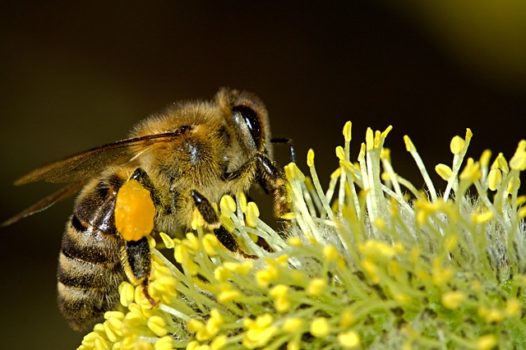
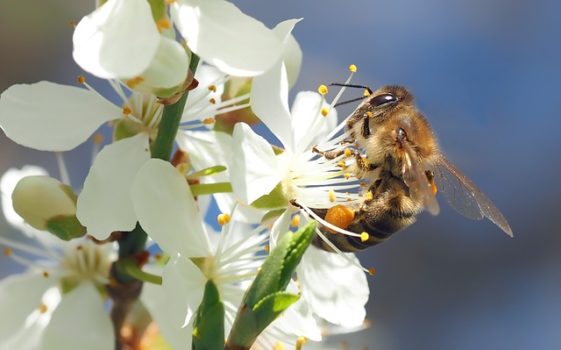
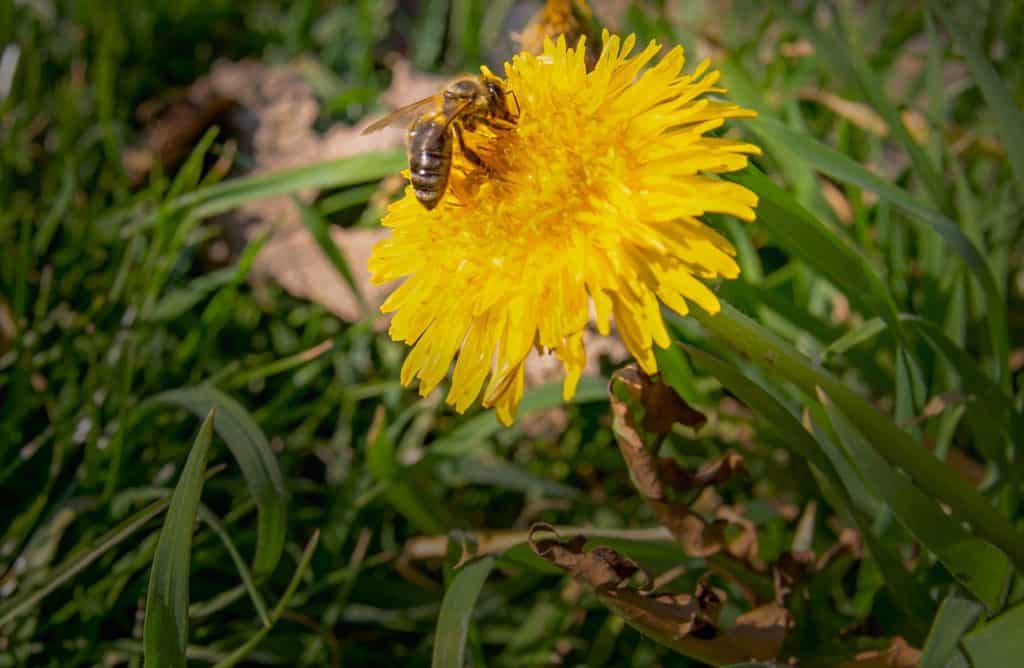
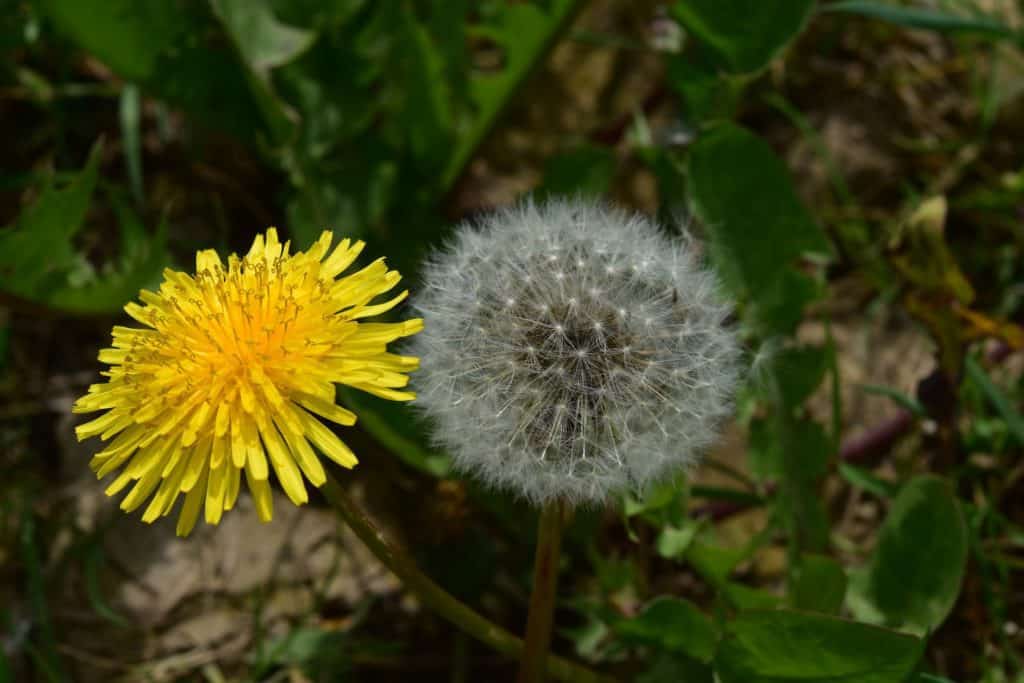
It’s quite a process for bees to collect pollen.  The bee itself becomes positively charged with static electricity when flying through the air. The pollen in the blossoms and flowers is negatively charged and will stick to the small hairs that are all over the bee.  The bee will groom itself and move the pollen from all over its body to the back legs to what is referred to as the pollen baskets.  As they do this the bee will regurgitate some nectar and digestive juices to keep the pollen together.  This aids in keeping the pollen attached and packed tightly.

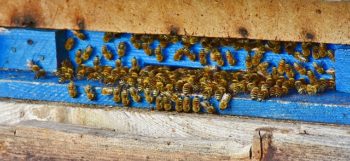
When the bee comes back to the hive the pollen trap will scrape off the pollen as the worker tries to get back in the hive.  The pollen grains will drop to the bottom of the trap for collection.  You need to collect the pollen quickly after it has been taken from the bee.  The pollen will degrade quickly!  You need to act fast to collect the pollen and store it properly or you will lose most of the beneficial attributes that you are looking for.  

The most common method is to freeze the pollen grains and store them frozen.  The method of freezing needs to be where you spread out the pollen to freeze quickly and all at once.  If it is bunched up the moisture in the pollen could grow mold or yeasts that can ruin the pollen.  Care must also be taken to keep the pollen out of the sunlight.  The UV rays quickly degrade the pollen as well.  A common practice is to collect the pollen once or twice daily.

Summary

So, from what I have learned bee pollen is a good consideration for a beekeeper to harvest. I would use a lot of caution and observation when practicing pollen gathering.  It does add more stress to a bee colony and probably should be done with a string hive instead of one that struggles.  As a beekeeper you need to be prepared for a reduction in honey as worker bees get tasked to gather pollen instead of honey.

Honey bee pollen can provide some interesting supplementation for some pretty good health benefits.  There is also a good market for bee pollen.  You can charge a premium for localized pollen and it’s benefit for allergies.  

How to make Apple Juice and Cider using a Fruit Press

[et_pb_section][et_pb_row][et_pb_column type=”4_4″][et_pb_text]

How to Make Apple Juice and Cider with a Fruit Press and Crusher

My family loves autumn more than any time of year because of the crisp evening air and vivid fall foliage, and all of the fun family and neighborhood activities that take place. One of our favorite activities to do together is the apple harvest and cider pressing. My sister’s family bought a mountain cabin property several years ago with several apple trees in their front yard. The first few years they harvested a few apples for consumption, but allowed most of the crop to fall to the grass to be eaten by deer.

Our family has grown to love picking and pressing apples each October and often we invite friends and cousins to join in.
Picking and pressing apples is one of our favorite family traditions. The trees that we pick were planted over 80 years ago and still consistently bear wonderful, large apples from midsummer through late fall.

Then, about six years ago, my brother in law bought a cider press. Since then, our family has loved gathering, crushing and pressing the apples. (not to mention drinking the delicious apple juice). Because it was a new process for us, I thought I would share what we have learned over the years as we have continued this tradition.

In cooler climates, harvest time is generally September through October. In warmer climates, harvest time could be anywhere from late summer through early spring.
Apples ripen earlier in warm areas than in colder climates because the heat helps them ripen. Likewise, south facing fruits will get more sunlight and be ready for picking earlier than apples on the north side of the tree.

1. Gather your Apples

After we harvest our apples, we use a 16 liter, cross beam, beech wood press, but the concept will be the same regardless of the size and style of your apple press. If you have never pressed apples but would like to begin doing so, I recommend buying the Weston 16 quart fruit press found here.

Apples ripen at various times throughout the year, so depending on the type of apple tree you’re dealing with, the weather, and where the apples are located, they will ripen at different times. We are located in grow region 6a and 6b so our apples typically ripen in early October. You can check your grow zone or hardiness zone here.

To gather and pick our apples, we use small step ladders and bushel buckets, but any clean bucket will do. Hint: We like the tall Home Depot buckets because they hold more apples. You can also use apples that have fallen to the ground so long as you gather them quickly.

We use small step ladders and bushel buckets to gather apples.

2. Give the Apples a Good Rinse

Giving your apples a good rinse prior to juicing is especially important if you have sprayed any type of chemical, such as pesticides or herbicides on the fruit. As you gather, keep in mind that 50 regular sized apples (about 8 ounces in size or “large PLU”) will yield about a gallon of juice.

3. Cut out Rotten Parts

Spend some time looking over your apples. Any rotted portions should be removed and discarded. Additionally, if you do not utilize an apple crusher, this is a good time to half or quarter the apples. For larger apples, it helps the processing and juicing if the apples are cut into smaller pieces prior to juicing.

We use whole apples, and leave the crusher to do the work for us. Do not worry about removing the apple seeds. I have seen some folks remove the apple seeds, but this is not necessary, as the seeds will be strained from the juice during the crushing and juicing process, and will take a long time to remove.

4. Cut the Apples into Smaller Pieces

As mentioned above, unless you have a strong crusher, you will want to quarter, half or “bash” the apples before you process them in the juicer. This will allow the teeth of the juicer to grip the pieces a bit better in order to create a pulpy apple pomace and extract the juice. One of the oldest and most traditional methods of breaking up the apples is to use a wooden churn or bash bucket and heavy pole to literally “bash” the apples into smaller pieces prior to juicing. Our grinder has a hand crank, and as you turn the crank, it grinds the apples into a mash that falls into a mesh lined bucket (or straining bag) for juicing.

Apple pomace is a succulent fibrous feed that has been a traditional feed for all kinds of livestock for a long time (Leroy et al., 1955). Apple pomace is used fresh in the vicinity of apple processing plants. Because of its high moisture and high content in fermentable sugars, fresh apple pomace spoils readily and is often ensiled or dehydrated for longer preservation
Apple pomace is the solid residue that remains after milling and pressing apples and contains peel, flesh, stem, core, seeds and juice residues. We save ours to feed the neighbors livestock or place it out beyond our fence for deer.

Next, you will want to connect the crusher to the press, or place the apple pomace into the press. Depending on the type of press you prefer, you can use a straining bag or muslin cloth between the crusher and press. Typically, any porous fabric will do, so long as it has a hole in the middle of the bag for the press gear (or threaded press spindle) to fit through. The purpose of the strainer is to catch any apple pieces and mashed apples and effectively separate them from the juice.

5. Begin Pressing

Once the apple pieces are in the crusher or crush cage, place the pressing plate on top, with the press blocks above (if needed), then add the wooden cross bar or pressure plate on top, then the ratchet screw. Next, screw the clamp pieces tight and level, and crank the press down, guiding it between the bucket beams.

Be sure to use a tool to feed the apples into the grinder. Similarly, (and especially if you have small hands helping) add wooden cross bars above the pressure plate to make ratcheting easier.

Then insert the metal rod into one of the press gear holes and turn the rod (cranking the press down even father) until juice starts coming out of the collection plate and spout. Continue turning the rod until the crushed apple pieces have yielded all of their juice into your catch container. Note, you may need to take breaks in cranking the rod, as the spout can handle only a little bit of juice at a time

6. Strain Again

Finally, we use a second sieve or strainer to catch any remaining apple flesh bits that come through the juicer. We then use a funnel to pour the juice into pre-washed gallon jugs for storage. As noted earlier, a bushel of 50-60 regular sized apples will typically yield a gallon of apple juice. The juice is absolutely fantastic and much sweeter than store bought apple juice varieties.

Making Cider

If you wish, you can use some of your fresh apple juice to make apple cider. To make homemade cider, we use 6 cups of fresh apple juice, mixed with ¼ cup of maple syrup, next, we enclose a combination of (2 cinnamon sticks, 6 whole cloves, 5 allspice berries and 1 orange peel), in a cheesecloth pouch and drop the pouch into the juice and syrup mix and heat it on the stove top for 10 minutes until the cider is very hot but not boiling.

Make Apple Cider Vinegar

You can also use the leftover crushed pieces to make apple cider vinegar. A good friend of ours has a great recipe for apple cider vinegar here.

Drinking unfiltered apple cider vinegar can help lower blood sugar levels. By its very nature, ACV can regulate healthy blood sugar levels in the body, which is great for those with Type Two Diabetes.
Apple cider and apple cider vinegar can aid with weight loss, reduce cholesterol, lower blood sugar levels and improve symptoms of diabetes.

Apple cider vinegar is very popular in the natural health community, and is claimed to aid the human body in numerous ways, including weight loss, reduced cholesterol, and lower blood sugar levels. Apple cider vinegar is also an ancient folk remedy used for various household and cooking purposes.

Overall, whether its for making juice, cider, or vinegar I hope you will enjoy pressing apples as much as our family has over the years. It truly has become one of our favorite fall traditions.

[/et_pb_text][/et_pb_column][/et_pb_row][/et_pb_section]

Do Honey Bees Eat Pollen or Bee Bread?

Honey Bee Bread

Someone asked me specifically, “Do bees eat pollen or bee bread?”  My initial reaction was to just say yes.  I assumed that pollen and bee bread are the same thing.  I was not correct; pollen and bee bread are not the same thing. Bee bread is actually chemically altered and fermented pollen. 

The quick answer to the question if bees eat pollen or bee bread is that bees will eat both pollen and bee bread.  Pollen contains essential protein for the bees.  Bees do digest and utilize fresh pollen especially when establishing a new colony.  Such as when a beekeeper installs a bee package to a new beehive.  

Bee bread is pollen that has been processed by the bees, and has a lot more nutritive properties available to the bees than straight pollen.  A great series of articles about bee bread is here.   They describe some of the nutrition and scientific studies about bee bread.

What do honey bees eat?

Food for the bees consists of a carbohydrate which is nectar gathered from flowers and blossoms that is transformed into honey.  This is a fascinating process that I will address in another article.  

Honey bee bread cells
Here are some honey bee bread cells not quite full and capped off.

Bees cannot live off of carbohydrates alone.  Bees need protein and other nutrients as well.  Pollen is the source of the protein. As the bees are gathering nectar, they also gather pollen.  The pollen grains stick to hairs all over their bodies.  They collect the pollen sticking to their hairs and push it to their back legs and pack it on their hind legs to long hairs there.  Their back legs act as a kind of pollen basket. They have a resemblance to saddle bags of pollen on their legs.  During this process the pollen is moistened with nectar as the bees push the pollen back.  It’s interesting to see the different colors of pollen stuck to their legs as they fly back into the hive.

When the honey bee goes back to the hive they deposit the pollen into cells of the comb.  Mid aged worker bees will pack the pollen with their heads and add nectar with digestive fluids.  The pollen is packed down layer upon layer until the cell is about three quarters full or so.  The packed layered pollen is then topped off with a small amount of honey.  Finally, the cell will be topped off with a cap of wax. 

The pollen baskets are really visible on this worker honey bee.

Pollen grains harvested directly from the flower will have some strong exterior cellulose creating a tough barrier for the bee to break down.  The nectar, digestive fluid, and packed pollen reacts and breaks down the tough cellulose exterior.  With the tough cellulose broken down, and a partial digestion and fermentation some good protein, amino acids, and vital nutrients become available and is called bee bread. 

The process of storing and fermenting food reminds me of a silo on a farm.  A silo is used to store feed and while it is stored it becomes fermented which gives the livestock feed different properties than just straight feed. On the dairy farm where I worked at, we would silo field corn as well as alfalfa.  We would use upright silos as well as silage pits. The protein content remained high as well as a lot of the nutrients.  The cows loved the fermented feed and it was a vital part of the dairy feed regimen.

Through the fermentation and partial digestion of the pollen the proteins become higher quality and more vitamins become available. We humans use fermentation quite a bit for storage of our food.  Some examples that come to mind are sour kraut, kimchi, and pickles.  Some to the enzymes found in bee bread are the same enzymes found in yogurt and kefir.  

Some of the nutrients that become available with the transformation of pollen into bee bread are:

  • Vitamin K
  • Enzyme levels are increased
  • Antioxidants
  • Zink
  • Magnesium
  • Silica

Often the bee bread will be different colors from cell to cell.  The bee bread will also be different colors through the layers of the cell itself.  These different colors are from the different colors of flowers and blossoms that the bees harvest pollen from.  

In one frame of bee bread I have seen white, orange, red, blue, yellow, and purple cells. I love to see all the colors. With all the varied color there will be a good array of different nutrients from the different pollens. As the bee bread process goes on the colors will begin to blend as the outer layer of the pollen breaks down.  The brighter the color the newer the pollen. 

Bee Bread as a health supplement for humans

Some people harvest bee bread along with honey for humans to consume. Bee bread is known also by the name perga or ambrosia.  You may find these different names but they are all referring to the fermented, processed pollen that bees have gathered.

The claims of health benefits from bee bread are interesting and may have some merit.  There hasn’t been a lot of research done in the area of the nutritional and medicinal benefits of bee bread, but there have been a few. Many homeopaths have found bee bread helpful and use it in their work.  Caution and research should be used whenever ingesting something that is purported to be a treatment or cure of an illness or health condition.

Bee bread health benefits for Honey Bees.

In beekeeping the practice of using antibiotics was used for years.  The beginning beekeeping class I took recommended that I mix terramyacin with powdered sugar and dust the hive with the mixture.  

The treatment using antibiotics was recommended in the spring as the temperature began to rise, and in the fall after the fall honey harvest.  I had healthy bees and they seemed to do well. However, there is an idea now that perhaps this practice may have killed beneficial bacteria as well as created stronger strains of harmful bacteria.  

The creation of bee bread also creates beneficial bacteria for the bees.  I haven’t treated my hives with antibiotics for a few years now. Mostly because I can’t buy it off the shelf anymore, but it seems that the use of antibiotics possibly did more harm than good.  

An interesting series of scientific observations and conclusions can be found here.   I really appreciate Randy Oliver’s approach.  He is one who prefers rigid science and facts.  The proposed ideas and the scientific conclusions that are found with his research and collaboration with scientists are interesting and based in controlled experimentation.

The conclusions drawn are informative and can make you question and change your beekeeping practices.  Microbes, yeasts, fungus, and probiotics found in bee bread are just beginning to be identified and understood.  It does prove that bee bread isn’t just a simple storage of pollen.  Bee bread is a complex source of nutrients beyond just protein.  

Honey Bee on a tree blossom.

Summary

So, yes bees do eat pollen and bee bread.  When a hive is being established the colony needs to survive and use the fresh pollen as a protein source.  Bee bread is the processed pollen and has a lot more nutrient available for the use of the bees.   

Are Flowering Bradford Pear trees good for bees? Maybe, but they’re horrible for the environment.

Honey Bee on a tree blossom.

With its recent rise in prevalence and early bloom cycle, many apiarists are asking whether the Bradford Flowering Pear Tree is a good source of nectar and pollen for honey bees.  The short answer is yes, these trees can be a good source of early nectar and pollen for bees, however, only until a better pollen source is available. Additionally, apiarists should be aware that the Bradford Flowering Pear Tree has recently come under heavy attack for its invasive properties and cross pollination mutations.

In some locations the Bradford Pear is one of the first blossoms that show up from which bees collect pollen.  This can be a good boost for a honey bee colony after a long winter. In some areas the Bradford Pear is not the first tree to blossom, so other sources are worked and the Bradford Pear is bypassed.

Ornamental Flowering Bradford Pear Tree
Ornamental Flowering Bradford Pear Tree.

Bradford Pear Trees in the Spring

When Bradford Pear Trees bloom in the spring it is hard not to take note.  They are generally one of the first trees to blossom, and the clusters of blooms are visually stunning and quite spectacular. The large white ornamental blossoms pop like fireworks and often give neighborhoods a perfect fake movie-prop community look.

The smell of these blooms is nothing like the beauty of the flowers.  The smell of the Bradford Pear Tree is sickly sweet, often described as akin to rotten fish. I know it isn’t my favorite, and has led me to wonder if the honey produced from these trees is bad tasting.  From what many have said, the honey produced from Bradford Pear blossoms is not too bad, but certainly doesn’t compare to honey from other sources. (Not what you would call a rousing endorsement).

The Bradford Pear Tree Controversy 

Prior to raising bees, I wasn’t aware that the Bradford Pear had so much controversy behind it.  Though the Bradford Pear was introduced to the United States in the 1960’s, it didn’t become popular in the region where I was raised until recently.  Instead, spring in my hometown was usually decorated with blossoms of the Bartlett Pear, Redhaven or Early Elberta Peach or Golden Delicious Apples, for consumption. Ornamental trees were typically of the evergreen or maple variety.

Once my home region became less agrarian, developers came in and planted copious numbers of ornamental Bradford Pear trees because they were showy, inexpensive, and quick to grow. It didn’t take long for folks to notice however, that these trees were relatively brittle and branches cracked or broke easily.  If folks didn’t prune carefully, they would often break the branches. Additionally, sometimes the trees would grow too fast, causing the bark to burst, and the tree would die as quickly as it had grown.

Ornamental Bradford Pear Tree Blossom
Ornamental Bradford Pear Tree blossom

Because I live at a moderately high elevation the Bradford Pear is one of the earliest plants to bloom each spring. Without fail, each year I have witnessed the local bee population work the blossoms of the Bradford Pear for a few days, only to abandon them as soon as a better source of nectar and pollen comes online. After seeing this behavior, I was led to question the environmental value of these sickly smelling trees that had become so prevalent in my neighboring community.

The further I delved into the agricultural literature and beekeeping forums the deeper the controversy surrounding these trees became. Some sources argue that the Bradford Pear is the best tree ever introduced to the United States, while others contend that the trees don’t produce anything for pollen collectors and are the bane of the environment.

My own research and experience has led me to believe that the Bradford Pear is not a good choice for landscapers or gardeners, as bees find their blossoms second-rate, and its cross-pollinated offspring are too unruly to control.

The Bradford Pear tree is native to Vietnam and China and was cultivated from the Callery tree. It was was introduced into the United States in the 1960’s by the department of Agriculture, which at the time, thought thought it was a perfect and sterile ornamental hybrid tree.

The Bradford Pear was touted for its incredible displays of white blossoms in the spring, its ability to maintain a small footprint and limited height that seemed perfect for burgeoning baby boomer neighborhoods and cities. If conditions were right the autumn foliage produces bright colored leaves ranging from yellow to orange and red.  They are also tolerant of all kinds of soil acidity and soil drainage. According to these descriptors, the Bradford Pear certainly sounds like the perfect ornamental tree. 

The Bradford Pear Tree was not the perfect tree that they had supposed. Originally the seeds of the Bradford Pear were thought of as too hard for birds to eat.  However, this has proven untrue over time. When the trees self-pollinate the seeds are a bit too hard for the birds to digest and the seeds are sterile. When there is cross pollination however, the seeds become viable, and clusters of seedy berries appear that are extremely attractive to birds, who consume them and spread the seeds widely in their feces. From that point, the seeds germinate and become crossed offspring, or advanced and that is where the problems happen. 

The offspring of cross-pollinated Bradford Pear trees are more genetically diverse and prolific, and don’t always have the same characteristics as their parent tree. Rather, the offspring trees will begin to exhibit some of the traits of the original cultivar, the Callery Tree.  Some of the undesirable characteristics that show up are thick and gnarly thorns, root structures that choke out other vegetation, odd shapes, and prolific spreading capacity.

So when people ask whether bees like Bradford Pear trees, the answer is “Yes, the bees do.”  The evidence is seen in the prolific spread of the tree. The bees are part of the cross pollination that creates these genetically advanced/nuisance offspring that are showing up all over the place.

I came across an interesting article here  by Durant Ashmore, who calls his article “the curse of the Bradford Pear.” In the article, Ashmore rants that the Bradford Pear Tree is spreading and becoming a nuisance due to its “impenetrable thorny thickets that choke out the life out of pines, dogwoods, maples, redbuds, oaks, [and] hickories.” 

Ashmore has an interesting and enjoyable writing style, and doesn’t hold back as he describes the Bradford Pear tree as an “Ecological Nightmare” and the landscapers who plant these trees “dimwitted” for doing so. He describes the damage being done by these trees as they spread,
“obliterating our wonderful native trees from the rural landscape.”

Indeed, the Bradford offspring that are showing up in the wild are creating quite a problem.  When the thorns are present in the next generation from the original Bradford Pear, they can only be handled with certain equipment without damaging tires.  These thorns have created a loss of value of forest land to the tune of $3,000 an acre.

The Bradford Pear Tree is one of the worst invasive species.

In many areas of the United States the Bradford Pear has been designated an invasive species.  The Bradford Pear Tree is becoming one of the worst trees to plant and have.  It is proving to be a far cry from the original perfect ornamental tree it was originally touted to be.

Mindful landscapers, home owners, and agricultural designers are now using alternatives to the Bradford Pear.  Some varieties that are suggested are:

  • Japanese Zelkova
  • Red Maple
  • Chinese Pistache
  • Trident Maple
  • Crape Myrtle
  • Peggy Clark Apricot
  • Purple Leaf Plum
  • Chinese Dogwood
  • Redbud, Forest Pansy
  • Columnar English Oak

I personally would suggest you plant a native species.  You can find some great suggestions of native species if you contact your local extension service.  I wrote an article here if you want a quick link to your state’s extension service. When you pick a native species, you are almost guaranteed to have a healthy tree that can handle your climate and environment.  You will also have a lot less maintenance to deal with.

Summary

So, after all that I have found researching the flowering Bradford Pear tree.  From a beekeeper’s point of view the flowering tree is used by bees but is probably not the first choice.  If there is another choice the bees will go elsewhere. 

It was interesting to see what all the controversy was about the Bradford Pear trees.  I had no idea about the history of the trees.  I do like to see the blossoms in the spring and the colorful leaves in the fall.  I don’t like the smell of the things.  Sometimes the smell of the flowers can become overbearing.  I don’t blame a bee if it just steers clear of the things. After my research I think it’s probably a good idea to just stay away from the Bradford Pear Tree and admire it if you go to Vietnam or China.

Are Dandelions Really all that Bad?

The Dandelion is an herbaceous perennial growing from a thick, unbranching tap root.

Are dandelions really all that bad? No. They’re incredible, edible, and nutritious too!

Did you know that dandelions are actually good for your lawn and garden, and especially for you? In fact, the dandelion is most likely healthier for you than any vegetable growing in your garden!

It is also an important source of food for bees and other pollinators, and contains many healing properties known to fight toxins and ailments of the human body. The dandelion is also extremely beneficial for your lawn, providing natural fertilizing agents and aeration.


The dandelion is also known as the “puffball”, “lion’s head” and “monk’s head” and is commonly found growing in areas with good drainage and direct sunlight.

So quit cringing when you see these yellow flowers growing in your yard. Though considered a weed by most homeowners and landscape gardeners, the dandelion was once known as a boon to one’s garden. As a matter of fact, gardeners in Europe used to weed out the grass to allow dandelions more room to grow.

It is also an extremely prolific and eminent plant, known to have been cultivated in ancient Egypt, Greece, Rome, and Japan, the dandelion has been used for millennia in tonics and medicines. Not until the 20th century (with the rise in popularity of lawns) was the dandelion viewed as a weed.

Its scientific name (Taraxascum officinale) is an English corruption of “dent de lion” meaning “lion’s tooth” in reference to the tooth-like serrations on the plant’s leaves. The genus name “Taraxacum” is thought to be derived from Persian “tarashaquq” (the word for plant), and the species name “officinale” is derived from Latin “officina” (the word for office or pharmacy).

The dandelion, is not a native plant to North America, but is originally from Europe. Many historians aver that the first dandelions were brought to North America by the puritan pilgrims, who planted them in their “new world” purposefully as an herb or medicinal crop. Since, the dandelion has become naturalized in all 50 states as well as Canada and Mexico, though it is not considered an invasive species.

Dandelions attract pollinating insects which helps fruits to ripen.
Dandelions are a vitally important element of the diets of many flying and ground insects. Many types of bee and wasp, including the honeybee, bumblebee and bald-faced hornet, use dandelions as a food source.

The dandelion is one of the first plants to sprout and bloom in the spring. So, when new butterflies or other pollinators (including bees) emerge from their winter slumber in the early spring the dandelion flower becomes an important food source, providing essential pollen and nectar.

Actually, dandelions provide nectar for more than 100 different insect species, while its seeds and leaves provide food for more than 30 species of birds, chipmunks, squirrels, and other small critters. Though dandelions do not produce the amino acids (arginine, isoleucine, leucine and valine) that bees need to produce offspring or raise a brood, they do provide what is essentially a “snack food” for the bees to live on until other pollen and nectar sources bloom.

Dandelions are not just good for insects and critters, they’re exceptionally healthy for humans too! This miraculous plant is edible from root to flower, and is actually a perennial herb. Young dandelion leaves are loaded with vitamins, minerals, and fiber. The leaves can be eaten raw or cooked, and are packed with vitamins A, C, K, and E, as well as folates and minerals including iron, calcium, magnesium and potassium.

Dandelions attract pollinating insects which helps fruits to ripen.
The dandelion is a great garden companion plant because it’s long taproot pulls up nutrients to the shallow-rooting plants in the garden adding minerals and nitrogen to the soil.

The dandelion also contains numerous beneficial antioxidants, such as beta-carotene and polyphenols which inhibit oxidation, help neutralize the negative effects of free radicals in the human body (believed to be the culprits of diseases such as cancer, diabetes and heart disease), and aid in minimizing aging and cellular damage. From numerous studies conducted on animals, it is also believed that dandelions can aid in reducing blood sugar levels and improve insulin sensitivity due to the presence of bioactive compounds chicoric and chlorogeic acid. Similarly, dandelions have been found to reduce blood pressure and act as an effective diuretic. Additionally, dandelions are high in the carotenoid Lutein (known as “the eye vitamin”) which is used to prevent eye diseases including macular degeneration, cataracts, and retinitis pigmentosa. In fact, dandelions have seven times as many Luteins as carrots! (and you thought carrots were the best veggie for your eyes).

The root of the dandelion is high in fiber and can be eaten dried or raw, but is most commonly used to make tea or other drinks. Ever heard of dandelion wine? The roots can also be dried or baked and ground to make a coffee substitute.

The strong tap root of the dandelion helps it to push through hard and rugged ground conditions.

Not convinced yet that the dandelion is worth keeping around? It may not matter, as they are near impossible to eradicate, and are masters of survival. Dandelions are known to take root in extremely arid and harsh environments, and can push their way through gravel, sandstone, and even cement. While doing this, they create channels for air and water to penetrate, and loosen the soil structure. The tap root of the dandelion can sink as deep as 15 feet, and unless pulled up root and all, can sprout a new flowering plant from just one inch of remaining root.

Though you may feel chagrin to see new dandelions appear in your nice green lawn each spring, take heart, because the dandelion is actually making your lawn stronger. The sprawling roots of that yellow “weed” are working hard to loosen hard-packed soil, aerate the ground, reduce erosion, and pull up nutrients found deeper in the earth than your Kentucky blue grass can reach. The deep taproot of a dandelion mines for calcium, iron, and potassium which is disseminated to the leaves. When the leaves of the dandelion die, they decompose and spread mineral-rich organic matter to the surrounding soil.

Dandelion seeds are perfectly engineered to create a pocket of air (or separated vortex ring) directly above the floating seed that slows its decent.
We’ve all made a wish upon a dandelion, scattering the parachute-like seeds off into the wind, which can travel for miles before setting down.

An individual dandelion plant can grow for 5-10 years and reach considerable size (up to 50 centimeters across). Dandelions grow from seeds, and are capable of reproducing without a need for cross-fertilization. We are all familiar with the flowering seeds of the dandelion (technically called cypselae) which are produced on each flower stock, and contain a set of feather bristles (pappus) that act as a sail or parachute to assist in the seed’s distribution to a new location when caught by the wind. (or the excited breath of a small child). When the seed germinates in new soil, it produces a rosette of small basal leaves on the ground’s surface and concentrates on growing its strong tap root.

Dandelions are often considered a pesky weed in Canada and the U.S. yet European and Asian nations have greatly benefited for years from the incredible nutritional value that this weed contains.
The dandelion plant grows year round but goes dormant in areas that experience a cold winter. It is readily identifiable by its rosette base that produces flowering stems, and yellow flower and multiple basal leaves.

By the time you see a dandelion growing in your yard, the plant itself is already well established, which is why it may seem you can never be rid of them in your lawn and garden. There is always a new generation of dandelions already in the soil waiting to grow.

Want to try adding some dandelions to your diet but aren’t certain how? Here are a few tips. First and foremost, do not just pick any roadside or yard dandelion for consumption unless you are certain that the plant has not been contaminated by environmental chemicals. Make sure that the dandelions you choose to consume are pesticide and herbicide free. You will also want to make sure that the dandelions you pick are not in an area that is used by pets for their “bathroom”.

For anyone just starting to eat dandelions, know that they are quite strong, and bitter tasting when eaten raw. They can also have somewhat of a peppery undertone. Therefore, as with chicory, artichoke, chamomile, cinnamon, or mugwart, it is recommended that you mix the leaves with other greens, and balance the taste with sweet flavors. For example, if eating dandelion greens in a salad, try using a sweet vinaigrette dressing or adding some toasted mustard seed to round out the flavor. Another trick to dismantle bitterness is to add an acidic element such as lemon juice. The natural bitterness of dandelion greens can also be muted by coarse fats, such as bacon fat, unrefined olive oil, or butter.

Dandelions are a rich source of vitamins, minerals and it even has antioxidants. For example, one cup of raw dandelion greens contains 112% of your daily required intake of vitamin A and 535% of vitamin K.
The common yellow dandelion has a long list of powerful healing abilities as well as other health benefits.

As mentioned above, some folks use the yellow petals of the dandelion flower (not the green base) to make a dandelion wine, and others use the petals to make a syrup for pancakes and waffles. The syrup recipe can be found here. Some folks even use dandelion petals to make cookies.

What if I still don’t like dandelions? If you still don’t want to see those little yellow flowers in your lawn, but also don’t want to use a pesticide, you’re in luck. One healthy method of controlling dandelion growth is simply to let your lawn grow a bit longer. The next time you mow your grass, only take off the top 1/3 of the grass blades. Grass cut too short allows weed seeds to make their way to the soil more quickly and provides them with sunlight. Leaving longer grass will help the lawn to thicken, keep new seeds from getting needed sunlight, and choke out potential weeds. Do this before the dandelions go to seed, and you will prevent the problem from growing. This method will not eradicate the problem, but will certainly help.

Overall, the dandelion is quite a punch packing little plant, so before you throw your hands up in frustration, or go out and broadcast a potentially toxic weedkiller to your lawn, consider enjoying them instead.

How to Keep your Bees Alive With Propolis!

bee propolis

Bee propolis is a new/old weapon in the fight against Varroa and Tracheal Mites!  The antibiotic and antimicrobial properties of bee propolis are showing that it is a major benefit to a bee hive.  This could be a game changer in the fight against colony collapse disorder.

All beekeepers have had issues with Varroa and Tracheal mites and the viruses and bacteria they infest a hive with.  These pericytes are responsible for the death of honey bee colonies worldwide.  They are also considered a big part of colony collapse disorder.

What can I use to fight viral, bacterial, and mite infections?

I wrote an article about the benefits of mushrooms in the fight against the infections that varroa and tracheal mites bring to a bee and a beehive. There are exciting new advances in the research.  A link to that article is here.

Another thing that is being done to fight the collapse of honey bee colonies is new bee breeds.  I have written article about one of these new bee breeds that is showing some great promise, the Saskatraz bee.  I have some colonies of Saskatraz bees and have had great results so far. 

Another incredible tool in the natural arsenal against mites and the viruses and bacteria they spread is bee propolis.  Bee propolis is a natural product that is already produced in the hive by the bees themselves.  

Propolis has been thought of as a problem to deal with in the hive.  I remember speaking to a few beekeepers and having them tell me to scrape as much of the propolis out as you can.  They instructed me that you need to leave more room for honey and have a neat and tidy hive without all the pesky sticky propolis that is only good to seal off cracks and holes.

It’s looking like the opposite is true for the health of the bee colony.  Extensive research is proving that bee propolis is a major tool in the fight against the infections of bacteria, viruses, varroa, and tracheal mites.  

The research is ongoing with great results from the University of Minnesota.  Dr. Marla Spivak Leads the Spivak Honey Bee Lab at the University of Minnesota.  She has a great team doing ongoing research on honey bees and has been making some great progress.  The link to the Bee Lab is here.  

Varroa Mite on Honey Bee
Honey Bee with a nasty Varroa Mite on its back.

What in the world is bee propolis?

Bee propolis is a natural occurring substance in the beehive.  It’s the sticky stuff in the corners and cracks of the hive.  Propolis is made by bees when they gather resins from trees, mix it with bees wax and bee saliva.  It stays tacky and malleable until the temperature gets cold where it becomes stiff and brittle.

With the resins in the propolis comes some strong flavonoids and aromatic acids according to the excellent research from the University of Minnesota. These substances are toxic to many organisms. The propolis becomes a strong antibiotic and antimicrobial glue.  

For a natural bee colony in a tree or cavern they will cover the entire inner surface and entrance of the hive with propolis.  It creates a safe antibacterial surface surrounding the hive.  

In commercial hives the bees use the propolis to seal cracks.  Sometimes the bees will seal part of the entrances of the hive with propolis.  This is thought to keep intruders and robbers out. But due to the smooth surface of the lumber, the bees don’t spread much propolis inside the hive like a natural hive. 

What is Propolis historically thought of?

Many beekeepers think propolis is used to seal cracks in a hive body and a method of waterproofing the hive.  This doesn’t seem to be the case.  According to the research from the Spivak bee lab.  Many hives have open bottoms and are not sealed at all and thrive.  

There are some people trying to find health benefits for humans in propolis.  There are theories, but not much definitive proof of the health benefits for humans.  Many health food stores have bee propolis available.

The benefits that many claim bee propolis to have is:

  • Cancer fighter
  • Treats Candida Symptoms
  • Stops Herpes Reproduction
  • Stops and Prevents Colds
  • Fights Parasites
  • Improves Fertility for Women with Endometriosis

What research is showing Propolis does.

A natural occurring hive in a tree or cavern, bees will spread a lot of propolis around all over the interior and entrance of the hive.  The larva in these natural hives are healthy with less disease. The research is showing that propolis is an effective prevention of infection in a bee colony.

A commercial manufactured hive  has smooth sides and the bees don’t spread propolis all over.  The bees only put propolis in the cracks so there is far less propolis around the bees themselves.  With less propolis, this leaves the bees less protected from infection.

According to the research done at the University of Minnesota, bee propolis is some powerful stuff.  A natural occurring hive will have the propolis all over the place creating a sanitary environment and a barrier for intruders.  Both benefits are a powerful tool for the health of a bee colony.

Techniques for beekeepers to use propolis.

So, most beekeepers don’t have a ton of natural occurring bee colonies at their disposal.  Most of us are using commercially-made or home-made equipment for our hives.  Most of our hives have smooth lumber and the bees don’t spread much propolis in the interior of the hive.  We see some at the top or in the cracks here and there.  Sometimes thy will reduce an entrance with propolis, but that’s a far cry less than a natural hive.

There are some strategies you can use to help encourage your bees to create more propolis and spread it throughout the interior of the hive.  

  • You can rough up the interior of your hive bodies.  Some beekeepers and using a wire brush or rough sand paper to rough up the interior of the hive.  The result is that the bees will try to cover the rough spots with propolis.  
  • Many beekeepers are manufacturing their beehives with unfinished or rough lumber.  The rough unsanded or unplaned lumber is pretty rough.  This really encourages propolis placement in the hive. 
  • Another method is to put plastic film with holes inside the hive.  The holes in the plastic promotes the bees to put propolis in the holes of the surface of the plastic.  
  • A non-recommended procedure of thinning some propolis and painting the inside of the hive body. This does not have the same result of the bees creating their own propolis and distributing it themselves.  
  • Trying to feed propolis to a bee colony.  This is not recommended and does not produce the same result as the bees creating their own propolis.

A great video produced by the University of Minnesota illustrated this whole concept well:

Summary

What I have found is that bee propolis is very beneficial to a bee colony.  The propolis itself has antibacterial and antimicrobial properties.  These properties aid in the health of the new bee larva.  This results in a healthier hive than those hives without much propolis.  

Bee propolis occurs naturally in abundance in natural hives found in trees or natural crevasses.  Bee propolis is not found in abundance in smooth commercially made beehives.  

You can encourage bee propolis production in your own beehives is by making the hives with unfinished rough lumber. You can also rough up the inside of your hives with sandpaper or a wire brush.  Another method is to stick some plastic film with holes on the interior walls of your hive. The bees want to fill the holes or cover the rough spots with propolis.

This is an excellent technique to use in your beehives.  It is a natural way to combat the negative effects of unhealthy microbes, viruses, and bacteria. You may lose a small amount of honey production, but the benefits of a healthy hive will outweigh any time and nectar spent of the production of propolis.