Helpful Hints for Growing Homesteads

Recent Posts

Seven Essentials for Starting Your own Backyard Chicken Flock

So you’ve decided you’d like to increase the size of your household by adding a few foul friends in the backyard. Perhaps your interest was peaked by the wonderful eggs you’ve seen your next door neighbors gathering, or the sound of the rooster around the corner crowing at sunrise. Surprisingly, the number of American households raising chickens has grown profoundly in the last ten years. According to US Department of Agriculture studies in 2013, nearly one percent of all U.S. households own backyard foul, with numbers expected to increase to five percent in 2018.

Our Rooster “Cogburn” patrolling the yard.

Whether you grew up with chickens, or are a beginner to the poultry scene, there are several things to consider before beginning your own coop. Here are the top 7 things you should consider before starting your own flock.

  1. Are you zoned for backyard poultry?
  2. How many chickens can your backyard support?
  3. Choosing a breed of chicken appropriate for your family.
  4. Determining the sex of your chicks.
  5. How many chickens should I start with?
  6. Decide on a watering system
  7. Prepare the proper habitat.

1. Are you Zoned for Backyard poultry?

Make certain that your rural, urban, or suburban housing zone allows for backyard foul. In a study of U.S. urban poultry ordinances conducted by Boston University in 2015, over 93% of the nation’s largest cities permit poultry ownership.

2. How many chickens can your backyard support?

Choose a number of feathered friends that will be supported by the space available. Healthy chickens require space, feed, care, and solutions for waste removal.

Baby Chicks are the best!

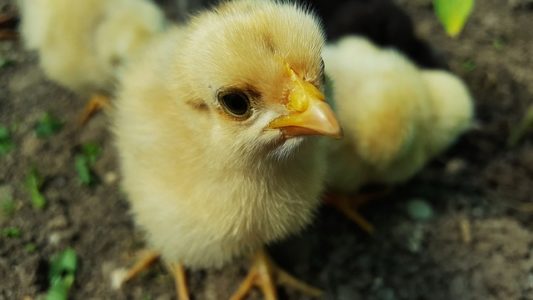
SThough most of us have seen chickens hatched from eggs in an elementary school class incubator, or perhaps in grandma or grandpa’s backyard, presently the most common place to acquire baby chicks is at a local farm supply store such as IFA, Cal Ranch, Tractor Supply Company, or a local hatchery, feed store, or poultry association. There are even options available to buy chicks online and have them delivered.

Personally, unless raising a new generation from our own coop, our family always enjoys visiting the local feed store in the early spring (or again in early winter) to view the variety of little peepers and choose a new crew to bring home and raise. There is nothing on earth as delightful as the sound of those little “cheep cheeps” accompanied by the laughter of small children as they hold their newfound friends on the way home from the store.

3. Choosing a Breed of Chicken Appropriate for Your Family.

There are several things to keep in mind when choosing which breed of chicken will be joining your family.

  • Take weather into account. Will you need a breed that is hardy in winter, or that can survive in extreme heat conditions.
  • Do you want a breed that is typically small, rare, or unusual?
  • Do you want a breed that is a good egg producer, or that will rear chicks, do you care if your chickens lay white eggs, green eggs, brown eggs, or speckled eggs?
  • Do you want a bird that lays eggs daily?
  • Do you want a breed that is friendly and docile, or do you want a breed that is more skittish and protective?
  • Do you want a breed that is known for their meat for butchering, or a breed that is recognizable for decorative plumage?

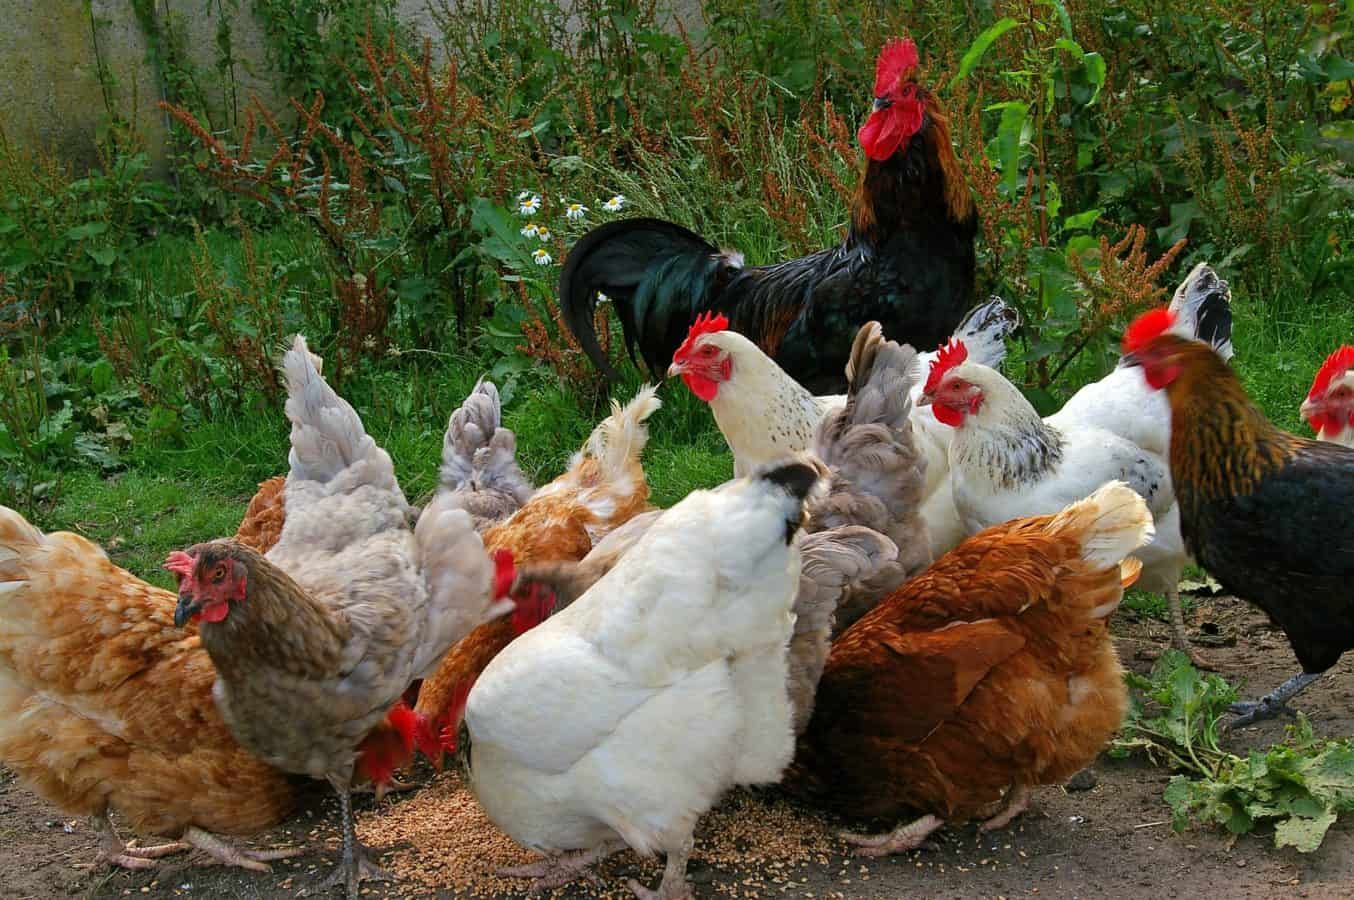
There are various breeds of chickens. Take the time in selecting the right breed for your needs.

4. Determining the Sex of a Baby Chick

Though large poultry hatcheries employ “chicken sexers” to distinguish male and female chicks before shipping or selling to retailers, there is always a chance that the chicks you may have to select from could contain a few that squeaked through the initial selection process. Typically, commercial sexers are only correct 75% of the time. For this reason, it will be important to conduct your own inspection of the chicks you will bring home.

Venting:

Typically, the easiest way to determine sex is to “vent” the chick. Simply turn the chick upside down in the palm of your hand and while closely examining the sex organ, gently squeeze its body using all fingers to hold firmly. Simultaneously, apply a gentle amount of pressure on either side of the chick’s vent, exercising extreme care not to squeeze too hard or cause injury.

Observe the vent closely, and if you see a small bump, resembling a pimple, this is the male chicken’s sex organ. Female chickens do not have this small bump. Additionally, certain breeds of chicken will develop feathering patterns based on sex.

Rooster Chick Characteristics:

Continue to monitor your chicks as they grow. Typically male chicks will exhibit rooster characteristics such as pointed feathers around their necks, back and tail.

Additionally, male chickens will develop larger combs and wattles, as well as large spurs on the back of their legs. Because most of these characteristics will not show up until the chicks are several weeks old, your best bet in determining the sex of baby chicks is venting, (described above).

5. How Many Chickens Should I Start with?

When deciding how many chickens to bring home there are several things you will want to consider. Keep in mind that chickens are social birds, so you will want to bring home at least three. Though technically two hens could keep each other company, it is recommended that three or more in a coop will better support the chickens’ “flock mentality”. (Yes, pecking order is a real thing).

How many eggs do chickens lay?

If you are considering egg-use, many farmers recommend three hens per two members of your household. So, a family of four would likely want six hens to meet their egg consumption needs. Typical laying hens will produce an egg approximately every 25 hours, roughly six eggs per week under ideal circumstances.

Consider your family’s typical egg consumption needs on a weekly basis and do the math. A coop with three to five hens could produce between eighteen to thirty eggs per week.

Space:

The next thing you will need to consider is how much space you have available for the chickens. The number of chickens you have and the amount of time you plan for them to feed “free range” or in a run will determine the space you should make available for them.
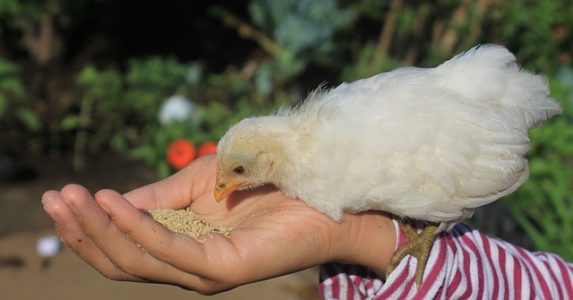
Feed:

You’ll want to provide your ladies with a good source of vitamins, minerals, and nutrients to support their growth and egg production. In addition to a pellet or mash mixture, many poultry owners will find that adding grains, such as wheat, barley, or corn to the chickens’ diet will add variety and nutrition, as well as keep your chicken friends happy.

Another factor to consider is the cost of feeding your fouls. Feeding your new brood is one of the most important tasks in raising backyard chickens. If you want a good healthy flock, choosing the right pellet, mash, and scratch mixture will make a big a difference in the health, growth and production of your flock.

We also love to give our feathered pals vegetable or fruit scraps or peels from the kitchen. Our backyard pals go absolutely nuts for popcorn, bananas, apple cores, celery leaves, orange peels, peanut shells, squash, zucchini, melon rinds, cucumbers, or even pumpkins.

One important thing that is recommended and that we have had great success with, is adding a Calcite supplement to our chickens’ diet, especially in the fall. In addition to simply crushing up and feeding the chickens their own egg shells, we buy Calcite, in the form of oyster shell or limestone supplements at the local feed store. Many chickens, though they will spend most of the day foraging for food, may develop a calcium deficiency, which is critical in egg shell production and bone growth. Some chickens who are deficient in calcium may begin producing weak or irregularly shaped (or even shellless) eggs.

If your hens are laying eggs, the recommended ratio for food is 1.5 lb of feed per chicken per week. Depending on the type of feed you choose and the breed of chicken, the amounts can add up. If you have a coop of five chickens, you should be giving them about 7.5 lbs of feed per week.

6. Decide on a Watering System

Be sure not to overlook how you will keep your flock hydrated. Hens require a great deal of water to produce eggs. Most mature chickens will drink approximately .5 liters of water per day in mild weather, which can reach as high as 1 full liter of water per day in warmer weather. It is
 also important to keep the water your hens are consuming clean and free of fecal matter, algae, and other contaminates. Your chickens will be healthy and happy drinking any water source that is healthy for human consumption. There are numerous delivery methods available, such as water troughs, canisters, founts, fountains, or dispensers. It is important that these have an opening small enough to keep the chickens from wading through, but large enough to drink from. It is also important that the water source be covered so as to protect from algae growth. If you live in an area where temperatures reach freezing levels, a heat source (such as heated font, or warming plate) to keep water from freezing is also critical.

7. Prepare the Proper Habitat

Initially, you will want to keep your new baby chicks in a safe and well monitored location. Baby chicks are vulnerable to temperature extremes, and potential predators such as house cats (or barn cats), raccoons, and even larger chickens.

At our house, we have a special bin we call “the infirmary” near our garage that is used to house our growing baby chicks. At other times of the year injured or recovering furry and feathered friends use “the infirmary“. It is important to sequester any bleeding or injured chicken from the rest of the flock during the healing process, both to avoid infecting other members of the flock, and to avoid further injury or even death to the injured chicken at the hands of her fellow flock members. For a good treatise regarding common chicken illness and treatment, click here.

The infirmarybin we use is roughly 2 feet by three feet, and has a grated and locked lid to keep out curious other creatures, or even over-zealous friendly toddlers. (When we have been in a bind, we have found that a large plastic storage bin purchased at a Wal-Mart or Target, lined with pine shavings or newspaper, will also work just fine).

Above the cage, or bin, we suspend a heat lamp to keep the chicks’ brooding area nice and warm. Though there are numerous types and styles of lamps, we typically use a 250 watt incandescent bulb style. The lamp is suspended about 8 inches from the top of the brooding pen.

It is recommended that the temperature near the bottom of the pen be between 95-100 degrees for the first few weeks and then reduced by about 5 degrees per week until the chicks begin to grow their feathers (about one month to 6 weeks).

Some folks choose to use a “red light” which is believed to interfere less with chicken sleeping patterns, and may prevent issues with pecking. We have always used an incandescent heat bulb however, and have never had a problem. We even leave a radio playing near the new chicks, to keep them company, and hopefully cultivate a healthy interest in classic country or bluegrass 🙂

Transition:

When adding new chickens to an already existing flock you will need a transitioning strategy. The chicks will need to be kept in the brooding pen until they have grown most of their juvenile feathers. This will typically take about six weeks.

After that, depending upon the temperature outside, we move out chicks to a transition pen. The transition pen is located in the coop with the other adult chickens, but is separated with chicken wire, to keep the chicks safe from the adults who may begin harassment or pecking before the chicks are fully ready for the transition.

We sometimes get new chicks in the fall. this requires a transition period during the winter months. We keep a heat lamp in the coop, over the transition pen in the winter, to assist with the little juvenile’s transition into the big world of full grown chickens.

After a few weeks of getting acquainted with the other chickens, we allow them to wander in the “free range area” with the others, but keep the transition area open for them to use until they are ready to begin roosting.

Typically, new female chickens, called “pullets”, will begin laying eggs at approximately six months of age, depending on the breed. Lighter and smaller breeds may being laying eggs as early as 20 weeks. The eggs from young pullets will be small at first, and grow in size as the chicken matures.

Female chickens, or pullets will lay eggs without a rooster in the flock. Many people who are new to raising chickens think that there needs to be a rooster for egg production. There is no need for a rooster to have your hens lay eggs. If you want some of those eggs to hatch out little chicks then you will need a rooster, but if you are only wanting eggs you do not need a rooster.

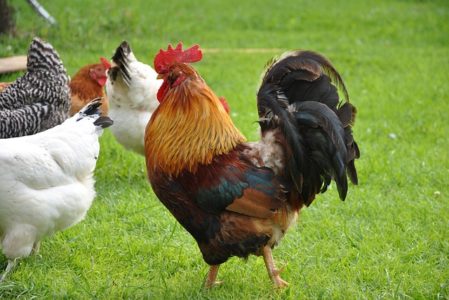
Roosters however do add some interest to a flock. They can be aggressive and protective of the hens. They also watch out for predators for the flock. Adding a rooster to the flock is something to really consider. Do some research before you go ahead and add a rooster to your flock.

Summary

There are a lot of issues to consider when starting a new backyard chicken family. Whether it’s for egg production or simply to bring some personality to your backyard, we hope you will enjoy the variety and joy that chickens can bring to your life. We have enjoyed the differing personalities of our ever growing chicken family, and even have names for most of them. Don’t be surprised if you find that some of your new feathered friends nestle right into your heart, along with that nesting box in the coop.

What’s wrong? Why are my Trees and Garden Plants Growing Yellow Leaves?

Many farmers or property owners face the problem of yellowing leaves in their trees, plants, and crops. This problem is seen most often in areas of low precipitation, and signifies a lack of nutrients. There are numerous causes for this yellowing color, as well as numerous methods to correct the problem and potentially deliver nutrients back to the plants.

One sign of trees that are lacking in nutrient content is a yellow appearance with green veins in the leaves, often causing the leaf or plant itself to appear sick and yellowed.  

The cause of this yellowing can be a number of things but is typically a lack of the plant getting nutrients.  This yellowing is called chlorosis. There are a few clues to look for when diagnosing possible nutrient deficiencies.  

A common nutrient deficiency for my area is the lack of iron getting to the plant. However, there is a more to it than just adding iron to the soil to fix the issue.  I’m going to let you know what I found about this issue and some possible solutions.

Nutrients are mobile and immobile

Nutrients are taken from the soil through the roots.  The nutrients that are used by the plant can be mobile or can be transported from one part of the plant to another depending on need and stresses.  

Some nutrients are not mobile throughout the plant. These nutrients can be brought into the plant through the roots and into the plant the same as mobile nutrients.  Once these immobile nutrients are brought into the plant they stay in that part of the plant.  

Here is a great article on the nutrients that plants need.  It also explains the mobile and immobile nutrients.

You can determine if the nutrient deficiency is a mobile nutrient or an immobile nutrient by where the chlorosis occurs.  A quick observation of whether the chlorosis is on new leaves, or old leaves is very informative.  If the older leaves have the chlorosis, then the nutrient deficiency is mobile nutrient deficiency.  If the newer leaves show the chlorosis, then it’s an immobile nutrient deficiency.

Should I just dump on a bunch more fertilizer to fix my plants?  NO!

Many people will just keep adding fertilizer to their gardens and orchards and expect that to take care of their chlorosis issues.  This can be exactly what the plants do not need.  When you add too much fertilizer nitrogen and potassium buildup can harm the roots of your plants with too much salt build up.  Phosphorous can also build up and keep iron, manganese, and zinc from being absorbed. 

The best thing to do is to get your soil tested.  There are some soil test kits available that you can do yourself.  These kits do a fairly good job at finding the pH of your soil. This is the acidity or alkalinity of your soil.  This may be all you need, but I would recommend getting a more thorough test through your local extension service. This will give better and more complete information for you to use.  

DIY Soil Ph tests.

Test your soil.

There is a more fun home-grown method of testing soil pH if you don’t want to purchase a kit.  What you do is:

  • Gather 1 cup ofsoil from different parts of your garden.
  • Put 2 spoonfuls into separate containers. 
  • Add 1/2 cup of vinegar to the soil.
  • Watch the reaction.
  • If it fizzes, you have alkaline soil, with a pH between 7 and 8.  
  • If it doesn’t fizz after doing the vinegar test, then add distilled water to the other container until 2 teaspoons of soil are muddy. Add 1/2 cup baking soda. If it fizzes you have acidic soil, most likely with a pH between 5 and 6.
  • If your soil doesn’t react at all it is neutral with a pH of 7.  A neutral Ph would be awesome for a garden but is seldom found wherever I have gardened.

Another homemade test is to use red cabbage water.  It’s a fun test to try, here is what you do:

  • Measure 2 cups of distilled water into pan. 
  • Cut up and add 1 cup of red cabbage. 
  • Simmer for 5 minutes.
  • Remove from heat and allow it to sit for up to 30 minutes.
  • Strain off the liquid. The color will be a purple/blue. This indicates a neutral Ph  
  • Add 2 teaspoons of garden soil to a jar.
  • Add a few inches of cabbage water. 
  • Stir and let sit for 30 minutes. 
  • Observe the color. If it turns pink, your soil is acidic.  If it is blue/green, your soil is alkaline.

Often the soil testing will give you the needed information to fix your plants.  You can see the nutrient you need to add, or the pH of your soil that is affecting how your plants are getting the nutrients from the soil.

The information I found out about my soil was that it’s more alkali and could use some more acidity.  As a general rule, areas that receive a lot of rain have acidic soil.  Areas that have less rain will have more alkali soil.  

How do I fix the problem?

The easiest way to fix the problem is to not have the problem in the first place.  Often trees, shrubs, and plants are chosen that just are not adapted to the pH of the soil.  Choosing plants that are already adapted to the area is the best way to avoid all nutrient deficiencies.  So, if you can, choose varieties that can handle the soil where you live.  Many native species are available that will do what you want or need.

I found that the plants and trees that have this chlorosis problem that I have is from an iron deficiency. Iron chlorosis is rather common where I live and can be treated in a variety of ways.  

Treat the soil, tree the plant.

1-Soil Treatment

Do a soil application of elemental sulfur and ferrous (iron) sulfate to treat individual trees and shrubs, or small areas in your garden or landscape. It’s most effective in the fall or early spring. A mixture of equal parts ferrous (iron) sulfate and elemental sulfur can produce good lasting results.  It is one of the least expensive ways to go.  

What you need to do is get an inorganic iron source with a high concentration of iron and one that is derived from iron or ferrous sulfate. Read labels to determine iron concentrations and forms in different products.  There are a lot of iron fertilizer products, so read a little before you purchase.

You probably can’t, or don’t want to cover an entire landscape with the elemental sulfur-ferrous sulfate. Instead, treat small areas by making holes 1 to 2 inches in diameter and 12 to 18 inches deep. Space the holes 18 to 24 inches apart around the area within the drip line of affected trees and shrubs. Fill each hole with the iron sulfate-elemental sulfur mixture to within 4 inches of the soil surface. Make holes with an auger or soil probe that removes soil to reduce compaction that can affect the absorption of the nutrients. Steer clear of the damaging large roots when making holes. You may also want to get the blue stake guys to come out and post where the gas lines, power lines, cable lines, etc. to avoid damaging stuff.

Shrubs in a garden also can be treated with equal parts ferrous (iron) sulfate and elemental sulfur.  You can use a shovel or hoe to excavate a small trench about 4 inches deep, 12 to 24 inches away from the base of the plants. Then add one inch of the ferrous (iron) sulfate-elemental sulfur combination to the bottom of the trench.   Then fill in the remainder of the trench with soil.

The concentrated sulfur in the holes or trenches reacts over time to form acid which neutralizes lime and lowers soil pH in a small zone around the treated areas. The acidification of soil in combination with the iron sulfate maintains iron in a form that can be absorbed by plants as roots grow into the treated areas. One soil treatment with iron sulfate-elemental sulfur may last 2 to 4 years.

Soil work is good work.

2-Iron Chelate soil treatment.

Iron chelates can be used as a soil treatment as well.  The effect is temporary, maybe a year or less.  Chelates are fairly expensive as well. It may not be the way to go.  The only chelate that works well under high pH soil conditions is one containing the FeEDDHA molecule. All other chelates currently on the market don’t work well at pH greater than 7.2.  So, a precise pH test should be used if you are considering iron chelate treatment.

Apply chelates in spring before growth begins. Sprinkle dry chelate on the soil surface and irrigate in, or dissolve in water and apply to soil around the base of plants.  I know of people who even sprinkle the chelated iron in the snow around the drip line of the tree or bush that they are treating.  They have great results and have just made it part of their garden maintenance.  You can also put iron chelates in holes drilled around the drip line of affected vegetation instead of sprinkling it.

3-Foliar Treatment

Foliar treatments are applications made directly on the leaves of affected plants during the growing season. These direct foliar treatments produce a fast response, often in a matter of days. The downfall to foliar sprays is often incomplete and temporary. You will probably need repeated applications of foliar sprays if iron chlorosis symptoms persist.  Another thing to consider is that it’s difficult to spray large trees.

You can use iron chelates as your foliar sprays.  You can use a 0.5% solution of ferrous sulfate applied to the leaves.  This can be a less expensive way to go.  An iron chelate spray recipe is to dissolve 2 ounces of ferrous sulfate (20-22% iron) in 3 gallons of water. The trees or bushes or plants should be sprayed in the evening or on a cool, cloudy day to prevent the leaves from burning. It’s a good idea to add a few drops of liquid soap or wetting agent to help the solution adhere to the leaves. You will probably need to repeat spraying if the iron chlorosis symptoms persist or as you see it on new leaves.

Trunk Injection treatment

There is also a trunk injection treatment where you basically put an IV into the trunk of the tree and feed it.  You can drill small holes and put in dry nutrients.  You can also use a hypodermic method where you can inject the iron. All the methods need to be done with caution.  You are injuring the tree and you need to be careful.  When getting the injectable solutions, look for product that contain ferric ammonium citrate (iron citrate) or ferrous sulfate. 

The holes should be made with a sharp bit to ensure quick uptake and reduce injury to the tree. Pay close attention to manufacturer recommendations on the hole placement, angle, depth, and diameter. The absorption is better and more evenly distributed if holes are drilled near the soil surface on the outside of root flares. 

If you decide to give your tree some Injection treatments, it’s most effective in the early spring during bud break.  Some individual products may vary on this, so follow the label directions. Sometimes treatments later in the year will not work as well and may not last as long. The effects of an injection can last for two years or more.  Be careful to avoid injecting trees on hot, dry, windy days because this might blacken or burn leaves. Water the tree well before and after the injection, this will help with the distribution of the treatment.

Summary

The problem of yellow leaves is an interesting one that can be solved.  It does take a little more investigation and diagnosis than just adding more fertilizer. In fact adding more fertilizer might be the exact wrong thing to do.

I strongly recommend having your soil tested and maybe do some of the DIY soil tests.  I know that a lot can be taught and learned by doing the DIY projects with your family. Then you can find out what your soil is lacking, or what your pH is.  With that information you can follow several treatment options.

Like most things, it will take some planning, but the issue of yellow leaves can be treated.  

Can I get my Amaryllis Plants to double bloom? YES, and here’s how to do it.

During the Christmas holiday it is a delight to have beautiful living flowers in our homes.  Their bright flowers and stunning green foliage brings a source of pleasure during the dreary days of winter.  So we actively go out and obtain some of these beauties, and enjoy them through the holidays, but afterwards, now what?

  THE FIRST “WHAT”

You went out and bought a brown (not too pretty) Amaryllis bulb at a local garden store or nursery.  Usually the bulbs come with directions for planting, but for those who may have lost the directions, just put the bulb in a pot, preferably one with drainage holes, and only about 1 to 2 inches bigger than the circumference of the bulb.  

The soil you use should be made up of two parts loam, one part perlite and one part well-rotted manure.  If you are not close to a pasture, another good mix is one part loam, one part sand, and one part compost.  This mixture makes for a loose soil that drains well and allows the Amaryllis plant to take in nutrients.

Once you have the soil mixture in your pot, it is time to plant the small treasure.  Put the bulb in the center of the selected pot allowing at least an inch of soil around the bulb, but not more than two inches.  Amaryllis bulbs do not like to be crowded. 

 Selecting the bulb you are adopting is important.  Make sure it is big, not blemished in any way and free from mold.  Place about 2 inches of soil in the bottom of your pot.  The pointy end goes up and the bulb goes into the soil, root down. Nestle the bulb into its new home, pointy side up, and put soil around the bulb. Allow about 1/3 of the bulb to be above any soil.  

Putting a bamboo stick along side the bulb will allow support as the shoots start to grow.  If you end up with too much potting soil, save it.  Put it in a plastic bag, seal it tight and be ready for the next time you need to pot a friend for your new plant.

THE SECOND “WHAT”

Patience is a virtue, it has been said, but is sorely taxed while waiting for the next step in this process.  The next step is watering and waiting for it to begin growing. Water the bulb until the soil is saturated, and water runs out of the holes in the bottom of the pot.  After that, do not water again until you begin to see shoots of green coming from the bulb.  Then water evenly, but just enough to keep the soil moist.  

The new member of your family will enjoy a temperature of 70 degrees or so during the growing process.  Bright, indirect light will also be an encouragement for the flowers to come.  Enjoy the amazing growth process of this delightful bulb.  Some bulbs can be forced to grow with just a damp bit of moss to nestle in.  This medium must be keep moist, but not wet and the bulbs will respond.  Remember, PATIENCE.

THE THIRD “WHAT”

As you tend to your new project, you will want to rotate the pot a little bit every few days so that the bulb will have “equal opportunity” to receive sunlight on all sides.  The magic that is brewing will effervesce in about 6 to 8 weeks.  (Mine happened faster, about 4 weeks.  Of course I talked to the plant every day and made it feel welcome).

When the glorious flowers begin to appear, move the plant to a source of indirect light.  This will make the flowers last longer and the bulb will have more chance to store up nutrients.  Then grab a camera and memorialize this special occasion.  

Hopefully you have given this awesome flower a name and a page in the photo album.  The bulb needs to be fed every 2 to 3 weeks with a soluble plant fertilizer diluted with ½ water. Enjoy!!!!!

BUT THEN “WHAT” #4

You wake up and go to check on your new and beautiful Amaryllis –and you can’t believe your eyes.  The tall stalks that had held those beautiful blooms now sport wilted, brown, almost ugly blossoms that make you want to weep.  

Now what.  Toss your friend and family member in the garbage?  OH NO YOU DON’T!  Take heart, this plant shall rise again with the proper care.  

First, realize that a lot of these strong, hearty bulbs will send up another shoot to gladden your days.  Look at your bulb and see if it is making an attempt to send another shoot up.  While you are waiting, cut back the stocks that have spent blooms on them.  Cut them to about ½ inch above the bulb.  Don’t cut anything else.  PATIENCE!!!  

ANOTHER “WHAT”

So you enjoy the bonus blooms from your wonderful bulb. Going through an encore performance and after you clap and cut the spent stock, you cut it down to ½ inch from the bulb. Now What??? Please leave the leaves on. They collect energy for the next year. 

You can now make a choice – leave the bulb in the pot and take it outside, but put it where it can get sun. This dormant period is what will allow the bulb to rebloom. Don’t let rain, snow or water build up because it will cause the bulb to rot.  The temperature should be no colder than 50 deg.  You can even transplant the bulb into a spot in your flower garden after the danger of frost.  You can leave it outside during the summer but at the first sign of colder weather (50 degrees) and when the foliage dies back naturally, cut the leaves back 1 to 2 inches from the bulb.  Dig up the bulb, clean the dirt off and put it in a cool, dry, dark place (like a basement).  The bulb will go dormant at this time so it does not need light or water.  This should be for a period of from 4 to 12 weeks. After this time you may desire the company of your Amaryllis, just follow the directions at the beginning of this article and repeat the excitement of having your old friend back.

A QUICK REVIEW OF WHAT YOU WILL NEED TO DO:

  1.  Select an amaryllis bulb that is large, with no damage, no mold
  2. Obtain a pot that is between 1 and 2 inches larger around than the bulb
  3. Make sure the pot has drainage holes
  4. Prepare the correct soil that will drain well (see above)
  5. Feed the plant every 2-3 weeks with a water soluable fertilizer.
  6. Enjoy
  7. Follow directions to save the bulb for next year
  8.  Cut back stocks
  9. Put in sunlight 
  10. Cut back leaves when brown
  11. Put bulb to rest in a dark, dry place

Should I Use an Electric Fence?

I have experienced issues with animals getting into crops for years.  I have contemplated using different types of fencing, but need a simple solution that can be taken down or removed, as well as put back up quickly, easily, and effectively.  An electric fence might just be the answer.

An electric fence is a portable fencing option that uses an electrical pulse through the fencing fabric and deters animals from crossing the fence. An electric fence is a good option for temporary fencing of livestock, or keeping animals out of areas.

Electric fences have been used for years on ranches, homesteads and gardens with great success.  Let’s look into some basic electric fences and see if it they really are the answer for those who may be seeking a solution to keep large and small animals from entering or destroying pastures, fields, gardens, orchards, and crops.

What is an electric fence?

An electric fence is a relatively simple concept.  It is a fence that creates a boundary with an electric current that passes through it. The electric current causes a minor shock upon anything that makes contact with it.  

Electric fences can be a very effective deterrent for large (cattle, horses, sheep, or goats) or small animals (raccoons, skunks, rabbits etc.) and have been used for years in a variety of methods.  Because of the use of electric current however, caution must be used in both installation and use.  Injury and death may occur depending on what kind of fence, and how powerful of an electric current is used.  

How does an electric fence work?

An agricultural electric fence is typically composed of an electrical conducting wire or wires alone, or wires interwoven with synthetic cord and connected to a plastic, or nonconductive insulator.  A high voltage electric pulse is passed through the wire by an energizer at about 1 second intervals.  

Most electric fences utilize grounding rods pounded into the ground at various intervals (for larger pastures typically suggested every 18 feet) along the fence line.  The grounding rods are hooked back to the energizer with an insulated wire.  When an animal or person touches the fence, they are standing on the ground.  With the charged wire, the energizer, grounding rod, and wire in place, when the animal or person touches the electrified wire, they complete the circuit and experience an electric shocked.  

Though electric fences have historically been designed to bring lethal force, (see 1905 Russo-Japanese War or 1915 German “Wire of Death”), beginning in the 1930’s, electric fences have been more commonly used in the United States and New Zealand for agricultural use in non-lethal forces.  Since the invention of the electric fence at the turn of the 20th century, public safety concerns, legislation, and better materials have improved both the safety and effectiveness of electric fences worldwide.

The components of an electric fence include:

  • Electrical wire, wires, ribbon, or netting
  • Fence posts, flexible plastic posts are recommended
  • Insulators for wires if metal fence posts are used
  • Energizer to put current through the wires
  • Grounding rods
  • Insulated grounding wire
  • Grounding wire clamps
  • Cutoff switches

Electrical fence wires are usually made out of galvanized wire.  The wire is sometimes woven into a synthetic or poly tape, creating a wider contact surface. Electrical fence netting has galvanized wires woven into the fence fabric.

Visibility of these wires is key to the success of the electric fence.  If the animal or person sees the wire and has been shocked before, they are more apt to avoid it when they see it in the future.

Electrical fence wires can be arranged in one single strand, multiple strands, or netting.  If the need is to keep larger animals out of an area, then perhaps one wire 3-4 feet off the ground would be fine.  If you need to keep sheep corralled then perhaps a 2-wire set up will be more effective, one about 4-6 inches off the ground and one more 12 inches up from that wire.  You can tailor your fence based upon your needs.  Netting is extremely useful when trying to keep raccoons, skunks, or even rabbits and chickens out of an area, like a garden or corn patch.  

The electric wire is suspended with fence posts that don’t conduct electricity.  You can use metal or wood posts, but you will need to use insulators to keep the current from getting grounded.  

The insulators work well but can be fragile and break often.   Many people will use plastic fence posts or plastic-wood composite fence posts to bypass the insulator issue.  It’s recommended to use highly flexible fence posts when using an electric fence where there is a concern about harming wildlife.

An energizer is the power source of the electric fence.  The energizer is designed to emit a high voltage electric jolt about every second. Energizers have been designed to be plugged into an outlet, use a battery, or some are even solar powered. 

Grounding rods are used to create the circuit from the wires to the ground.  Grounding posts are made of steel or copper.  Copper grounding rods are a better conductor, however they are more expensive and corrode faster.  Galvanized steel is what is generally used for grounding rods.  These rods are driven into the ground typically at 18 foot intervals. 

Grounding wire is an insulated wire that is attached to the grounding rods.  The wire is also attached to the energizer.  This grounding wire is attached with grounding wire clamps. They need to be attached tightly to create a good connection.

Cutoff switches are switches that can be installed at strategic locations that allow a fence owner to discontinue the fence current without needing to disconnect the energizer. For example, cutoff switches are a good choice on either side of a gate.  These switches make getting into and out of the area a bit easier. 

Different types and uses of electric fences.

There are a few different types of electrical fences.  Some have been used as a lethal defense in the past.  During World War II they were used in concentration camps and prison camps. These fences had a constant lethal electric charge in the wire intended to kill anything that touched it.  

Another type of electric fence is called a stun-lethal electric fence.  These fences have been and are still being used to guard prisons and correctional facilities.  These fences have been designed to stun on the first shock then be lethal on the second shock.

The kind of electric fence used in agriculture is a non-lethal fence.  You can turn the fence down to be a deterrent, but not a killing shock.  This is the type that most people use for agricultural applications.  Farmers, gardeners, and folks who want to protect their crops, or to coral their animals to a particular area can use an electric fence with great effect. 

Another electric fence that is being used is a buried electric fence.  This is where the wire is buried around an area and a collar is put on a pet or livestock.  When the pet goes across the wire it receives a shock from its collar.  This is generally used as a method of keeping animals inside a yard or particular area.

The pros of electric fences

Electric fences have a lot of positive benefits.  These fences are portable and can fence off an area simply and easily.  They can be effective and non-lethal.  They have worked in applications where nothing else has. For instance, keeping racoons out of a corn patch.

Electric fences are relatively simple to construct and easily maintained. Once an animal has experienced a shock from the fence, they often will avoid it even if it is turned off. 

The cons of electric fences

There are some downfalls to an electric fence.  The electric field from the fence can interfere with telephone, radio, TV, and dial up signals. Some people have their pacemakers affected by the electrical field as well.

The electric fences may not work quite as effectively in dryer areas.  Moister soil is a better conductor of electricity.  If you are in a dryer climate you may need to modify your system with more grounding rods.

The electrical circuit may be compromised by pipes or wires in the ground near the grounding rods.  For instance, water pipes, gas pipes, electric power wires, cable tv wire, etc. 

Animals with thick fur or hair can push through a fence without feeling a shock.  Some animals learn the pulse pattern and can time it to break through the fence.  Some animals have learned to push another animal into the fence and use them as a buffer to break the fence.

Diagnostics of a fence that isn’t working can be frustrating and difficult to determine.

Electric fences can be detrimental to animals, particularly wildlife.  Some electrified barbed wire fences have been lethal to animals.  

How to put up an electric fence

Installation of an electric fence is relatively simple.  You first need to determine how long your fence needs to be.  The longer the fence, the bigger the energizer needs to be.  

Decide on what kind of wire you need.  One wire to keep a large animal like horses in or out?  A two or three wire stack to keep a smaller animal such as sheep under control?  Netting to keep raccoons or chickens out?  

You also need to consider where to locate the bottom of the fence.  The more your fence wire touches grass or weeds and bushes the less effective it will be.  The fence wire will need to be off the ground to stop it from grounding out and loosing voltage.

Once you decide what kind of fence you want then you pound the fence posts in.  Space the fence posts about a rod length or 16.5 feet. The fence posts don’t need to be as frequent as barbed wire fence posts.  

Stretch the fence wire or netting around the desired area and hook it to the fence posts.  Plastic or plastic-wood composite flexible fence posts are recommended.  These posts will be effective without insulator installed. They will also help to avoid problems with wildlife.  

If you are using metal fence posts, make sure you use good insulators.  This will keep the current from being directed down the metal post.

Pound in the grounding rods. The grounding rods need to be spaced 80-100 feet apart.  This may need to increase if you have dry soil and you need to have better conductivity. 

Locate and put the energizer where it needs to be.  If it’s a solar charged one, then put it where it can receive sunlight.  If you need to plug your energizer in, locate it close to an outlet.

Install any cutoff switches that you have in mind.  For a smaller area you may not need any cutoff switches.  You can simply turn off the energizer.  However, if you have a long fence and are using a gate you may find cutoff switches to be helpful.

Attach the insulated grounding rod wire to the grounding rods with the grounding rod clamps.  Make sure these clamps are tight and secure.  This will create a better tighter circuit.  Then attach the insulated wire to the energizer terminal.

Attach the electric fence wire to the energizer terminal.  Make sure your energizer is large enough to service the area you have fenced.  It’s generally 1 joule of output per mile of fence.

You should inspect your whole fence and double check to see if it’s hooked up correctly.  If is looks good, apply the current and see if everything is ok.  You should be able to see a light on the energizer that flashes in conjunction with the electric pulse.    

Is an electric fence for your farm, garden or homestead?

An electric fence is a great tool.  It can keep your crop safe.  It can help manage livestock and keep them in a prescribed area allowing it to fairly portable.  

An electric fence is a deterrent to many pests including raccoons, deer and foxes.  It surely can be an answer to a lot of issues to the farmer, homesteader, and backyarder.  

Some smaller gardens or backyards may not want to use an electric fence due to pipes in the ground. The interference with modem, radio, telephone, and TV signals can be problematic as well.   a little due diligence is needed here. 

With a little analysis you can determine if an electric fence is something to use for your plot. It is a great tool of you have livestock or are trying to protect a crop or garden from animals. 

What are Mason Bees, Are They Good for Your Garden?

Mason bees are a hard-working variety of bee that don’t require very much work or effort.  Mason bees are excellent pollinators that require minimal management and effort.  Mason bees have been used by farmers for centuries with great benefits.

Mason bees don’t sting, are easily cultivated, are naturally occurring, and don’t require much maintenance. They can be a powerhouse for pollination in your garden.  They are easily introduced to your garden, homestead, or farm.  You can even cultivate them fairly easily to have them working for you for years.

What is a Mason Bee?

Photo of a Mason Bee
Nice photo of a little red mason bee.

A mason bee is a small solitary bee.  Unlike honey bees where only one queen is fertile, all female mason bees are fertile and lay eggs.  Mason bees don’t have a social structure like honey bees.  Some may form a loose social structure with mother and daughter bees for a while, but they are mostly solitary. 

 Different species of mason bees are found worldwide. Mason bees are smaller than bumble bees or honey bees.  They are generally a different color then a honey bee.  Mason bees can be a metallic green or blue, rusty red, and black. One great thing about mason bees is that they do not sting!  A great benefit, especially for those who are allergic to bee stings.  

Mason bees are great pollinators and occur naturally throughout the world.  They are easily cultivated and are not susceptible to varroa mites, the parasites that are decimating honey bees.    

Life Cycle of the Mason Bee

Mason bees will hatch out in the spring.  Generally March or April depending on your climate.  The males will hatch out first, waiting for the females to hatch.  The mason bees will mate and the male bees will die within a few days.  The females will then get ready to lay their eggs.

When the females are ready to lay eggs, they find a suitable place to make their nest. They will use anything that is small and hollow.  Nests have been found in holes from carpenter bees, empty snail shells, hollow sticks, cracks in rocks, etc.  

The mason bees then create cells.  These cells are made from dabs of mud and/or chewed up leaves.  This is where they get the name of mason from the mud masonry in their cells and nests.  

They begin the cell and go on a pollen and nectar run.  They will pack the cell end with nectar and pollen and lay an egg on top of the food supply.  Then the mason bee will seal the cell off and begin another cell.  This process will continue until they fill the nest site.  

The female eggs will be in the bottom or inner part of the nest and the males will be laid towards the entrance.  Once all the space has been filled, they seal off the nest and go find another nest site and do it again. 

Are Mason Bees Better than Honey Bees?

If you want an easy almost carefree pollinator, mason bees are difficult to beat.  They don’t swarm or sting, and are mostly just a small docile little helper.  However, they do not offer any products that a honey bee does. 

Honey bees offer pollination, honey, wax, propolis, and a possible income.  Honey bees require investment of time, energy, and equipment. Honey bees will swarm and do need maintenance.  Honey bee stings can be painful, and cause big problems if you are allergic to their stings. 

It’s a difficult question to answer, whether mason bees are better than honey bees?  Both types of bees have their good points.  I would say try honey bees if you are interested, have the time, and are not allergic to them.  If you just want to have some good pollinators without all the work of honey bees then try the mason bees. 

I have worked with both kinds of bees.  I like all the products you get from honey bees.  I do like the idea of low maintenance with the mason bees however.  I guess I lean more towards honey bees, just for all the cool stuff you get from them.

How Do You Use Mason Bees?

Mason bees are really simple to use in your garden.  You get the nests and hang them in a suitable part of your garden.  You will want to have them close to the garden, but probably not right in the middle of garden and yard operations.

Once you have the collection of mason bee nests located you just let them do their thing.  The male bees will hatch out first and wait at the entrance for the female bees to hatch out.  Once the females emerge, they mate with the males, and the male bees will soon die.  The female bees will then go through the process of creating their own new nests. This is where the pollination occurs. 

Where Do You Get Mason Bees?

Mason bees have been a popular pollinator for years.  You can get them from various sources.  I will include links on my resource page for mason bees. 

You can also put out mason bee houses.  These houses encourage the mason bees that may be around to build their nests where you want them to.  These houses can be fairly simple or can be constructed to be a decorative addition to your garden.

Growing up many of the local farmers knew the benefit of these small power pollinators. We made several simple mason bee houses and hung them on the outside of the sheds and barns around the place.  The houses we constructed were houses in the technical sense but didn’t really resemble a house at all.  They were boards with holes drilled in them creating the hollow tubes for the bees to make their cells. 

Make Your Own Mason Bee House.

Mason Bee House
Mason Bee House

Making your own mason bee house is pretty easy.  You can do it as simply as drilling 5/16-inch holes into a board.  The deeper the hole the better.  The holes need to be about 6 inches deep or more.  Don’t do more than 25 holes per board.  The bees can sometimes get confused with too many holes to try to figure out.  You can then hang the things all over the place.  You might get a lot of bees attracted to them and they will use them as nesting sites. 

Super Cool Mason Bee House

 You can get a bit more decorative with them by finding nifty pieces of bamboo or hollow sticks and arranging them in a framework.  I have seen simple frames made to look like a house, or an organic shape with the hollow bamboo or sticks inside.  The key is to have the hollow tubes horizontal to the ground, and easy access for the bees. The hollows of the bamboo or sticks need to be around 5/16-inch. They can vary a little, but that is the approximate size.  

A more practical mason bee home is with straws.  Paper straws are effective as cell building homes. You can bunch them up in a can or line the holes you drilled in the boards. This will let you inspect the mason bee nests a little more closely.  With this method they may not be as decorative, but you can inspect and eliminate any pests.  You might be able to create a better population of mason bees in the spring.  If you do pull the straws when they are capped off, you can store them in a covered bucket or tote. Just make sure you drill a 5/16-inch hole in the top.  The bees will fly out of there when they hatch in the spring.

I remember farmers would come and buy the mason bee boards that we made when I was a kid.  It was a fun way to make some extra money.  I know that the bees were really effective in increasing the yield of the farmers crop by quite a bit.

Mason Bees are a Great Pollinator.

Mason bees are great little docile workers.  They will increase your yield with good pollination.  You will probably not want to introduce them if you are already keeping honey bees.  They will compete for the same resources.  That might be fine on a farm or ranch, but in a backyard garden that might be a bit too much competition for the space you have.

If you don’t have honey bees then mason bees are a great option.  They don’t require very much to introduce them, and they are really effective.

Are Pill Bugs, Roly Poly Bugs, or Potato Bugs Bad for My Garden?

A while back, I was out in the garden with my nephew when he found some roly poly bugs and started playing with them.  After a moment, he stated that his Mom had taught him that roly poly bugs are bad, and ruin plants.  Personally, I have always liked these little armored tank looking bugs, and decided to find out for myself if they were indeed a pest for gardens and plants.

The quick answer is that roly poly bugs, potato bugs, or pill bugs are not bad for your garden, actually they are extremely beneficial for gardens and foliage. These small bugs are actually a land crustacean instead of an insect, aid in the decomposition of dead vegetation and fungus and are important to the ecological process.  Let’s take a quick look at roly poly bugs and see what they are all about.

What are Roly Poly Bugs?

Roly Poly bugs are bluish-grey, multi-legged bugs, with two large antennae that most of us have encountered under rocks, in window sills, or in the grass that instinctively roll up into a ball (called conglobation) when they feel threatened. They look like small armadillos with a tough armor (called an exoskeleton) on top and seven pairs of little fuzzy legs underneath that tickle when you let them crawl on your hands and arms.  You find them in dark, damp places, such as small cracks, under rocks, under logs, bark, and leaves.  They love these dark spots when they have enough moisture, and will typically choose these types of places to burrow during the day. Though may venture out beyond their burrow at night to seek more food.

The roly poly’s favorite habitat is under fallen leaves, mulch, logs, bark, rocks, or sticks.

As stated above, when these little bugs feel threatened, they curl up onto a little ball, making them look like small ball bearings or BB’s.  This is indeed a defense mechanism, as their armor can fend off threats and keep them warmer when they roll up.  

One thing you might not know is that roly poly bugs are actually a crustacean.  They are one of a very few number of land crustaceans, or terrestrial crustacians.  They are from the woodlice family and the order isopoda. Their scientific name is armadillidiidae.  Kind of sounds like armadillo, doesn’t it? 

These little bugs can live up to 3 years.  They can have up to 2 batches of young each year producing 30-40 new bugs each time. These amazing bugs can reproduce via parthenogenesis, which is to say, asexually, where an embryo is created without fertilization. The females carry their eggs around for a few weeks until they hatch.  

Roly Poly bugs aren’t actually insects, but are crustaceans

After they hatch, they look like tiny versions of the adults and still hang onto the mother for another 3-7 weeks.  They will molt off their exoskeleton often as they grow from the nymph stage.  When they grow up, the adults will molt about once a month.

What is the Difference between Roly Poly Bugs and Sow Bugs?

Roly poly bugs and sow bugs look very similar.  They are a little different however.  Sow bugs can’t roll up onto a ball like Roly Poly bugs.  Sow bugs also have 2 appendages that look like a tail.  They do however have similar coloration and appearances.

What do they do in my garden?

As it turns out, roly poly bugs are beneficial to the decomposition of dead vegetation.  They spend their time in the dark wet spots eating dead plants.  They can conglomerate under logs and leaves and almost anywhere that they can find high moisture and dead vegetation to eat. They spend their life in these small places taking care of dead and rotting vegetation.   

Are potato bugs dangerous?

Potato bugs, pill bugs, and roly polys are not dangerous.  They are not poisonous.  They don’t bite humans.  They are just a peaceful bug that helps in decomposition.  They can however eat young plant leaves if they can’t find enough dead vegetation.  They don’t eat much of the young growth but can pose a minimal threat to small leaves on your plants.  Some farmers have reported that these little bugs will eat their crop.  This tends to happen when there isn’t enough vegetation in the soil, and there is a lot of moisture available in the environment. 

Most people will benefit from the presence of these little bugs as they eat up old leaves, sticks, and grass.  They are really interesting to watch and fun to look at.  They are not harmful to people, or pets.  I happen to know that chickens love to eat them and add to the variety of diet to your flock.  

Some people may find these little bugs unsightly.  That is the only real threat that they pose.  They can multiply rather quickly in areas that have a lot of rain and vegetation, and you may end up with just too many of the little creature for your comfort.  Other than that, they are beneficial and benign.

Different names for potato bugs

These little land crustaceans have been around for a long time.  They have been the subject of many childrens’ play and discovery.  They also have had some fun monikers. I have heard them called pill bugs, roly polys, potato bugs, woodlice, and doodle bugs.  I remember being in a bit of a heated argument when I was five years old stating that they were in fact potato bugs, and my cousin emphatically arguing that they are roly polys.  Needless to say, they are known by several names across the world.   

Ways to control potato bugs

I really enjoy these little bugs and just love to watch them.  You may however not have the love for them and want them to be controlled. If you want to get rid of the little bugs the the following are some good methods available.

  • Let your chickens loose on them.  Chickens love them and will voraciously devour them.
  • You can use diatomaceous earth.  Diatomaceous earth is composed of ancient diatoms that have been fossilized.  These crusty diatoms have hard sharp edges that get stuck into the armor plates and becomes an irritating barrier to the bugs.
  • Cleaning up your place and getting rid of places for the bugs to live will work.  
  • There are baits available to deter them as well.  Many ant baits will work but be careful not to bait something you don’t want to.
  • Insecticides are also available, but I would caution the use of them.  Insecticides will kill the good bugs as well as the bad bugs.   

Summary

Potato bugs, pill bugs, roly polys, and doodle bugs are not dangerous or bad for your garden.  They actually preform a benefit in decomposition of dead vegetation.  They are super fun to watch and play with.  They are one of very few varieties of land crustaceans.  If you don’t want them around there are some easy things you can do to get rid of them.  

I would encourage you to enjoy them, have fun seeing them curl up, and tickle your hand and arm when they crawl.