Can you grow a vegetable garden in the mountains? Absolutely the answer is an emphatic YES!
Here Bill gives the complete guide to growing your own vegetable garden in the mountains at your cabin or mountain retreat.
The satisfaction of growing your own produce in a quality home garden cannot be matched by commercial edibles in nearly all flavor and nutrition tests. The mountain valleys of North America present a different growing standard than those of coastal or low-land minimal freezing climates.
I have grown and eaten green peas, carrots, tomatoes, potatoes, melons and salad treats from my 40 foot X 40 foot garden that make my salivary glands burst with just the mention of these yummy veggies.
Many other delicious produce items can be added to this list such as: asparagus, raspberries, strawberries, blackberries, corn, currants, lettuce, radishes, cabbage, turnips, broccoli, Brussel sprouts, zucchini, winter squash, cauliflower, and most cold hearty plants.
Challenge of a Mountain Valley Garden
The challenge of growing a mountain valley garden begins with safe season planting temperatures. In my case, the valley I speak of is in Southern Utah with an elevation just over 6,000 feet. Freezing temperatures usually end around May lst.
The 100 day growing season usually concludes as August days slip away. Most garden “yummies” have a growing season around 100 days, so I will use that for a standard. And of course, some vegetables can tolerate a little frost. Many cannot.
Such produce as leafy greens to include, lettuce, arugula, kale, spinach, swiss chard, collards, cabbage, radishes, turnip greens, beet greens, garden cress and endive must be planted when all danger of frost is past.
The leafy greens command a regular and plentiful water supply and grow best when not competing with weeds. These “greens” are incredibly nutritious and when planted in rich and fertile soil have the potential to grow fast and flavorful during summer months.
Mountain Soil
Your soil should be tested for nutrient content, but that is not a necessity. Most mountain valley soils are rich and have not been depleted.We have a great article on soil here.
High elevation soil contains enough potassium, phosphorus, and nitrogen to grow a wonderful and productive garden, but a good mix of either organic or non-organic fertilizer will guarantee maximum results.
Fertilizing your Mountain Garden
Organic fertilizer consists of manure, bone meal, cottonseed or other natural occurring materials. Inorganic fertilizers are man-made, and in my opinion should be secondary to organic fertilizer, even though when properly used, commercial fertilizer can be incredibly effective in growth size and produce development.
The down-side of commercial fertilizer is that if it is not used or mixed and applied properly, it can burn/kill produce. A universal “rule of thumb” guide for commercial fertilizer is to get a 10-20-10 mixture for proper soil application the first year. After a few years of use, I would recommend the commercial fertilizer mixture of 12-24-12 for most gardens.
I also believe it is good to leave a garden alone with no produce for one season every 6-7 years to let the soil regenerate its natural nutrients, including “no weed control.”
The crop rotation cycle of not planting the same plants in the exact same place in a garden for more than two years in a row is also good advice and results in better production.
Favorite Mountain Garden Crops
Root and bush/pole vegetables when grown in a mountain valley are my favorites. Carrots, radishes, potatoes, beets, sweet corn, most squash varieties, peas, some varieties of tomatoes, kohlrabi, rutabaga, turnips, melons, many varieties of beans, pumpkins, and other favorites can be grown with great success in most high mountain valleys.
If you are interested in growing herbs, I suggest you try horse-radish, mint, chives, sage (herbal sage), thyme, oregano, rosemary, bay laurel and tarragon. These herbal “regulars” must also be planted when all danger of frost is gone, and as mentioned above, thrive better when not competing with weeds.
The eradication of weeds, the old nemesis of all gardeners, will maximize plant and produce growth. I strongly suggest weeds be cultivated out or hand pulled. The negative effects of chemically generated commercial weed-killers bring health risk factors into play that may be detrimental to plant growth and personal safety.
Some flower varieties repel animals and insects if planted between rows or on garden margins and can be a good deterrent to predation. One example is marigolds, which will even repel deer.
Irrigation
The beauty of a mountain valley, along with the cool climate and accompanying breezes of higher elevations are conducive to the success of most mountain gardens. A good supply of water is essential and most gardens need their watering supply every two to three days. Regular irrigation cycles can best be maintained by you … as you observe plant growth and productivity.
Rocky soil
I will also recommend the eradication of large rocks for garden plots that are planned where rocks occur. Soil preparation for a mountain valley garden plot means trying to get out as many (fist sized or larger) rocks as possible. And I don’t quite know the geology of this phenomena, but rocky soil seems to grow more rocks and as tilling and soil prep occurs, you will find more rocks seem to surface every year. Just keep the larger ones out of the soil as much as possible.
Garden Pests
Creatures of opportunity can also ruin a wonderful garden. Deer, raccoons, skunks, squirrels and other animals love your gardens as much as you do. They are under the impression that you are growing the delicious vegetables for them. I have always felt it much better to get rid of the “opportunity” than try to get rid of the “marauders.”
I have watched raccoons and squirrels climb a fence and consume a sweet corn crop of nearly a half-acre in one night. Deer can jump fences up to seven feet tall and will do so if your “deer fence” is any lower. Go at least seven feet high.
Do you remember the old movie called “The Yearling?” Jody Baxter’s pet whitetail deer jumped a six-foot fence with ease and ate two acres of produce in a few hours!
In Summary
The work associated with gardening is substantial. The rewards of delicious and nutritious mountain valley garden produce far outweighs the back-aches, and sore muscles of planting, weeding, and harvesting the bounties of a well-maintained and highly productive vegetable garden.
With the Covid-19 Pandemic that has swept the world, the value of a good garden can negate store visits, food shortages, and supply nutritional needs for anyone with a good pair of gloves, a piece of ground (any size) some reliable seeds and a water supply.
A mountain valley garden that can sustain or supplement the nutritional needs of a family with quality produce is an irreplaceable blessing.
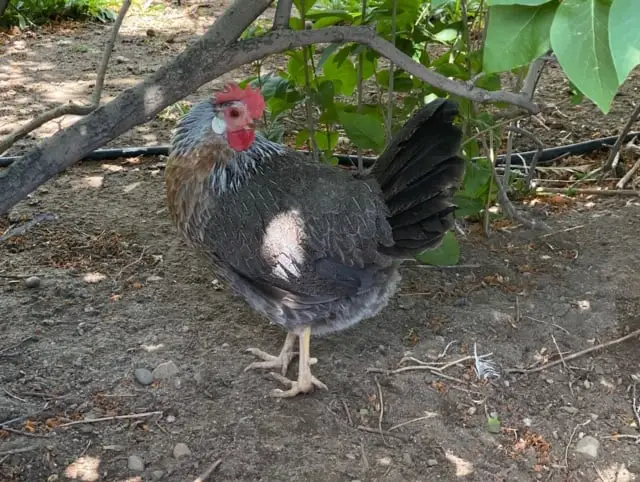
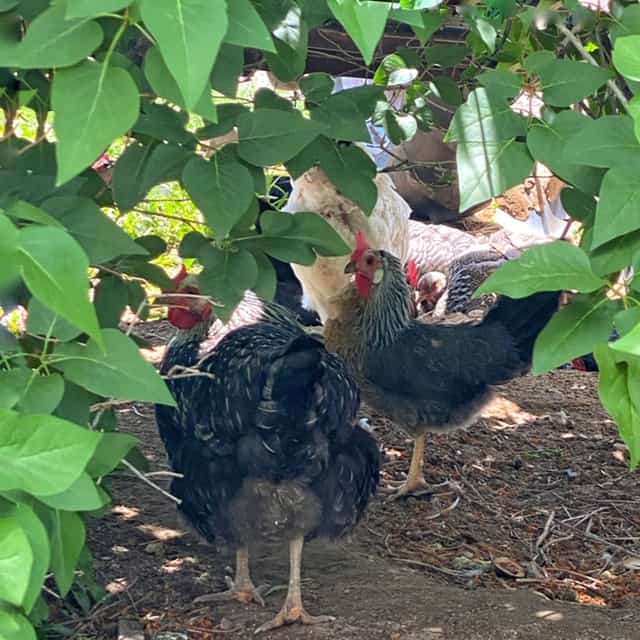
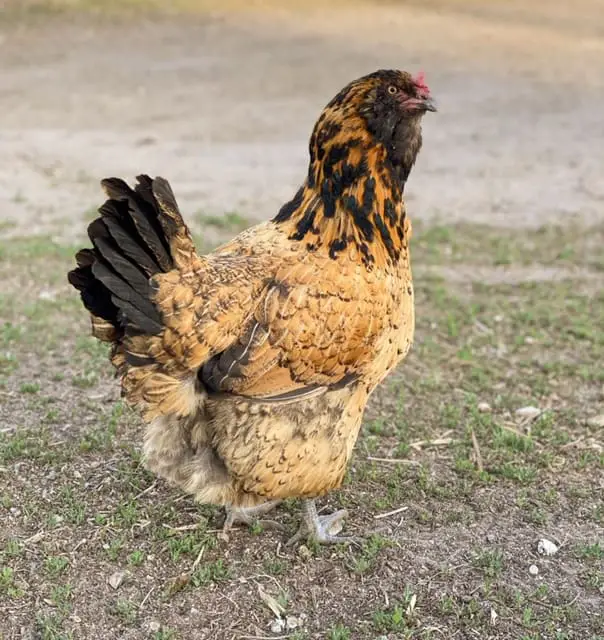
Bantam chickens are very similar to regular chickens, only smaller (1/2 to 2/3 the size of regular birds), and are often much richer in color. Bantams are typically raised as domestic pets and show chickens, rather than for use as egg and meat producers.
Bantam Chickens have a life expectancy of 4-8 years.
Of course, these feathered little friends can die earlier than 4 years due to illness, accident, predators, etc. However; it is not uncommon for bantam birds to live as long as 8 years depending on their breed, environment, and care. The majority of bantam chickens will live from 4-8 years.
These little hens can lay eggs well for 2-3 years. The eggs are smaller than normal sized chickens, but they are great for eating. Most Bantam hens will lay eggs for up to 6 years, but the number of eggs will decrease after 3 years. The eggs are less frequent as they get older, but they are larger.
Factors in life expectancy
There are a few factors in how long a bantam chicken can live. The main factors being:
Breed
Food
Water
Housing
Environment
Diseases and parasites
Breeds
There are about 400 plus different varieties of bantam chickens. It is absolutely amazing how many different colors, feathers, and shapes there are. I think I see more new varieties every year. These little chickens have made their way into the hearts and coops of chicken lovers around the world.
The interest in Bantam chickens began when sailors would stop into Bantan Indonesia. They were intrigued with these small chickens. They were much smaller than the chickens back at their home port. The word Bantan eventually got turned and mangled into the word Bantam over the years.
Bantam chickens are now found all over the world. There are 3 main types of Bantam chickens, true, miniaturized, and developed.
True Bantam chickens are a naturally occurring small chicken. They have not been developed from a larger breed. They have not been developed by mankind for their size, feathers, or colors. These are the small chickens that the sailors found originally in Bantan Indonesia. Some of these breeds include: Rosecomb, Nankin, and Sebright.
Miniaturized Bantams are derived from standard breeds. They have been selectively bred over the years to have the standard breed of larger chickens in a Bantam size. Some successful standard miniaturized breeds are: Cochin, Rhode Island Red, and Orpington.
Developed Bantams are breeds that have been heavily bred and influenced by man. The developed bantam breeds will have some unclear origins. Some bantam breeders will cross several different bantams to come up with a whole new variety. Thus, adding to the 400 plus varieties. Some of these developed breeds include Japanese, Pekin, and Belgian.
The breeds that have proven heartiest are the original true Bantam breeds and the miniaturized breeds. Many of the Bantam chickens will live a long time as long as they are well taken care of.
Food
Bantam chickens will eat a lot less than a regular chicken. They will only eat a pound to a pound and a half a month of food. We feed ours a combination of scratch grains and laying mash to supplement their free-range foraging. We do this to ensure that our feathered friends have the proper nutrition to keep living happy and healthy.
We also have grit available for them. It is also important to have calcite or crushed oyster shells for them especially if they are laying eggs.
Water
Bantam chickens will require a lot less of everything including water. They will require a good clean source of water to keep them healthy. If you ae using a water bottle style waterer you will want to keep it clean and scrub it out once or more a week.
Wild birds will often use these bottle style reservoirs of water. Many of these birds can come from all over the world. Sometimes they can bring bacteria with them. Generally, it isn’t much of a problem if you keep the water clean and fresh.
Housing
Bantam chickens do not need much room. In fact, many Bantam owners just have little cubby’s around the yard for the little birds to live in. If you do set up a coop you will need to make sure it has a cover or netting over the top. Bantams are a lighter bird and can be pretty good flyers. Much better than the larger regular sized chickens. This added step of precaution will help extend the life of your little chickens by not becoming lost or victim to a predator.
Little Bantam chickens can be a good option for a chicken tractor. Especially in smaller yards and gardens.
Just have a good adequate housing option for your little Bantams and they will live for years and years.
Environment
The environment that the Bantam chickens live in can add to their lifespan as well. A nice area where they can free range will make them happier and healthier. You will need to have plenty of places for the little birds to hide away safely from a hawk, falcon, or other predator.
If they are cooped up in a cage their whole life, they will have a shorter lifespan and can be exposed to bacteria that builds up in a cage environment.
If the little birds are exposed to extreme weather conditions, it can shorten their lifespan as well. Bantams just like other chickens will need to be able to get out of the wind, snow, and rain to maintain good health.
Disease and Parasites
Disease and parasites will create havoc on any animal including Bantam chickens. Just as in traditional flocks there are diseases that chicken owners battle. We have a great article here on treating chicken illnesses. You can use the information to treat your Bantam chickens, just adjust the dosage to the size of the Bantam chicken.
Bantam chickens are a great addition to your yard and can live for a long time. Many bantams will live on average from 4-8 years. There are however many Bantam chickens that have been living well beyond 10 years. I have heard that one Bantam chicken was recorded to have lived for 16 years as a house pet.
Anyway, Bantams can live a good long productive life if taken care of and provided for.
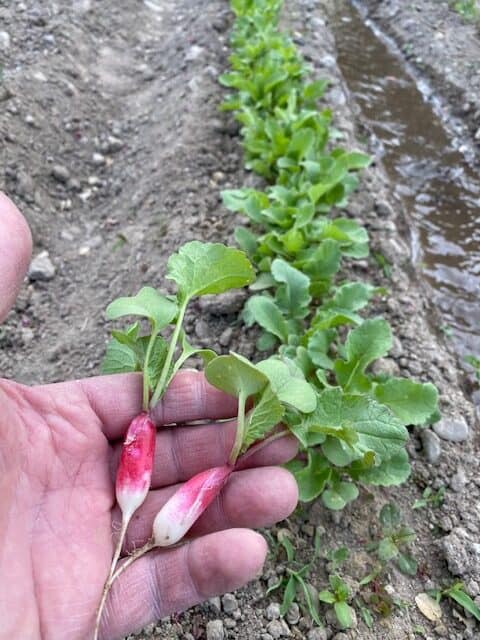
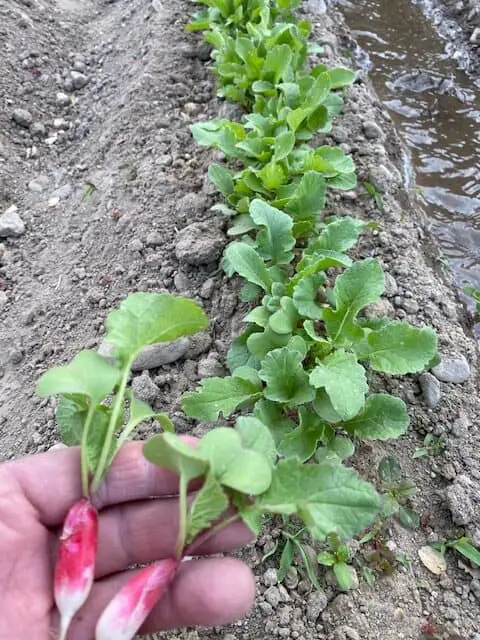
Radishes are one of the first crops from the garden. They can be cultivated and grown early in the growing season, and again in the fall when the temperatures grow cool. One of the best choices for first time gardeners.
This article sets forth several tips and tricks to ensure a great crop of radishes, including:
Differing radish varieties including those that can handle hotter temperatures
When and how to plant radishes
Watering
Fertilization
Harvesting
Preservation and storage
Benefits
Recipes
Radishes are one of the funnest, and simplest plants to grow in the garden. In less than a month you can plant and harvest. These little root crops have been celebrated and eaten for centuries. Radishes have a long colorful history that points to origins in China. Today there are larger radish varieties that are a mainstay for major consumption in China.
You can find the little tasty root vegetable in almost every salad bar, taco stand, and buffet around. Radishes are used for texture, flavor, garnish, and decoration throughout the culinary world.
The humble little root crop has traveled the world and become a favorite for gardeners, especially young impatient gardeners. If you have a child who wants to have a positive experience with gardening, radishes will fit the bill. You can plant and harvest a healthy radish within 21 days. In the gardening world that is light speed.
There is a little more to growing radishes than to toss out some seeds and pick the harvest a day later, but not a whole lot more. Let’s dive into the world of radishes and see how to grow and enjoy them in your garden.
Varieties of radishes
There are three main groups of radishes: spring varieties, summer varieties, and fall/winter varieties.
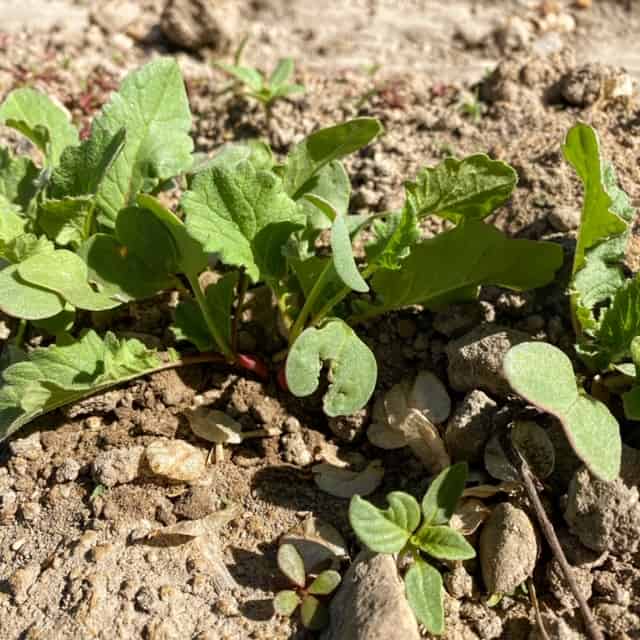
Spring
Spring radish varieties are generally small, short, and round. Spring varieties grow very quickly and need cooler temperature. You can store the spring varieties fresh for a few weeks, but long-term storage will require processing. It’s recommended to enjoy them when they mature and eat them fresh.
Spring radishes are some of the first fruits of the garden. It is exciting to see the spring radishes break through the soil and grow. Radishes are one of my favorite crops to have children grow. If you are a little impatient or your children are a little impatient, spring radishes are the plant for you. You can go from planting to eating in as little as 3 weeks.
Don’t let the radishes go too long before harvesting and eating. They can get fibrous and tough to eat. Some become pithy and really spicy hot. When it does get hotter temperatures the spring radishes have a tendency to bolt and seed. Often the seed pods can be eaten instead of the root when this happens.
The varieties of spring radishes we recommend are:
Champion
Cherry Bell
Cherry Bomb
Crimson Giant
White Icicle
Summer
Summer varieties can be grown in the spring as well but can handle warmer temperatures. Summer varieties will take quite a bit longer to mature than the spring varieties. Summer radishes will generally take from 6-8 weeks to mature to harvest. There are some new varieties being developed to mature quicker and handle warmer temperatures better.
Summer radishes are a little more temperamental to grow. You will need to keep the soil damp and only weed lightly around them. Summer radishes have delicate roots and can be damaged easily. Often a good mulch on top will help to keep the soil moisture consistent as well as keeping the plant cool.
Some summer radish varieties we recommend are:
Rover Hybrid
Crimson Giant
Dragon Hybrid
Black Spanish Round
Giant of Sicily
Rat-tailed Radish (grown for the seed pods instead of the radish root)
Fall/Winter
Winter varieties of radishes are usually a longer root and will take longer to mature. Winter varieties can be grown in the spring and fall garden. Fall/winter radishes can even handle a little warmer temperature. Winter radish varieties can store throughout the winter in the ground or bedded in sand in a cool root cellar.
Winter radishes are a little different flavor than the fast spring radishes. The winter radishes take a little bit longer to mature and are a little different composition. Winter radishes can be grown in a spring garden just fine, but they do well in a fall garden and can store better than the fast-growing spring varieties.
Winter radishes are something fun to try when you want to explore different tastes and textures. Some countries, especially China, will use winter radishes as a staple crop. These winter varieties are sometime known as daikon radishes. They can grow much larger than the spring ones you may be used to. Some grow up to a pound.
Some winter radish varieties we would recommend are:
China Rose
Black Spanish
Watermelon Red
Miyashige Diakon
Minowashe Diakon
Formosa Giant Luo Buo
Young radish plants
When do you plant radishes?
All radish varieties like full sun, 6-8+ hours a day. All radish varieties like consistently moist soil.
When you plant radishes depends on what kind of radish you are planting, spring, summer, or fall/winter radishes. You can plant all spring, summer, and winter varieties in the early spring if you want to. You will just need to allow time for the longer maturing radishes to grow.
Spring radishes will do best planted early in the spring as soon as you can get on the garden plot and work the soil. When growing spring radishes, you can plant them early in the spring when the temperatures are cool. Mild frost doesn’t hurt radishes, and they can even handle a light snow.
When you plant spring radish seeds, you should space them 1/2 inch apart. If you have sandy soil you will need to plant them 1/2 inch deep. If you have heavy clay soil you will need to plant them a little shallower, about 1/4 inch deep. The clay will keep more moisture in the soil and can sometimes create a harder crust for the radish sprout to break through.
Spring radishes are fast growing, so you don’t want to waste a lot of space in the garden. Often radishes can be sown into areas that will get filled in later by other plant foliage. Between carrot rows, or spaces between cucumbers etc.
Many gardeners will plant a few radish seeds along with other root crops like carrots, beets, or parsnips and harvest them out of the row when they mature and leave the space for the later crop to fill in. If you plant a few in your root crops you will want to harvest them early sometimes you can interrupt the roots of the upcoming crop.
Summer radishes can be sown anywhere from early spring to late spring. These varieties to better in the summer heat, but still like to have it on the cooler side.
Winter/fall varieties of radishes should be planted in the early fall. In the United States anytime from mid-August through Septemb壯陽藥er. You can plant them in succession to have a consistent fresh crop.
We have used a manual seed planter to plant radish seeds and done well. You simply select the correct size planting disk, put the seed in the hopper on the top of the planter, set the depth on the foot of the planter and push it down the row. This is a good option if you have a larger garden area to plant. Here is one on Amazon that works great.
We also have found that just opening up a row and placing the seeds by hand then closing up the row burying the seeds works great.
Watering
When watering the radishes, you will need to monitor them. Radishes will need consistent moist soil, but not too wet. Radishes can have problems if you let them dry out, so keep them moist. With the cooler temperatures this isn’t a tough thing to do.
Usually watering them once or twice a week when it is cool works fine. You may want to increase watering when the temperature warms up. This will also depend on the composition of your soil, whether it is sandy or clay.
The radishes can get super spicy hot and pithy if they aren’t properly watered. Radishes that are dry will also bolt into seed flowers quicker.
Radishes are a root vegetable and do not need much nitrogen. Radishes use more potash as far as fertilizer goes. They grow so fast that just using a good general garden mix will be fine. Like a good 16-16-16 garden mix.
Harvesting.
Harvesting radishes is rather simple. You can loosen the soil around the radish with a garden trowel or shovel. You just need to grab the leaves on the top and pull them out. Sometimes wetting the soil can help if the radishes get stuck. The radishes grow so fast and swell up creating compact soil around themselves. Don’t be surprised if they seem to grip the ground a little more than you would expect.
You will want to pick the spring radishes around 3-4 weeks after planting. If you wait too long the radishes will turn fibrous, pithy, and woody. Sometimes the radishes will bolt creating seed pods and the root won’t be very good for table fair. Old radishes have a tendency to become pithy, sort of like eating a cork. So, harvest them on time.
If you have some radishes that bolt, you will want to try to harvest the pods they produce. The pods are often eaten in salads and stir-fries. The rat tail radish is grown exclusively for the seed pods.
With summer radishes you will need to judge them by size. The summer varieties will take a little longer than 3-4 weeks to grow to maturity. The time is takes for summer radishes to mature really depends on the temperature and moisture they are grown at. You will just need to keep an eye on them and pick them when they look mature.
Winter/fall radishes can be left in the ground throughout the winter if needed. Harvesting winter/fall radishes just depends on when you want to eat them or when you need them out of your garden plot.
Problems and issues with growing radishes.
Radishes usually don’t have many issues. Keep them weed free and watered and generally your good to go. There are some issues that you will need to look out for to insure a good crop.
Radishes can attract root maggots as well. This can happen more likely if you plant radishes in the same soil year after year. An old trick used byfarmers for years is tobacco. Tobacco will keep root worms away from your root crops. Just sprinkle a little tobacco along with the radish seeds and the worms will stay away.
Slow growth and an intense flavor. The major cause of this is not enough water. Without enough water the radishes can become downright eye wateringly hot. The best remedy is to keep the soil moist.
Sometimes the radishes can get split or hollow roots as well as a pithy center. They are like eating a piece of cork with a rope down the middle. They way to remedy this is to harvest the roots as soon as possible and keep the soil moist.
Sometimes the radishes will bolt to flowering or seed. The trigger for radishes to do this is when the days get long and the nights are short. The way to remedy this is to plant earlier in the spring or later in the fall. The exception is summer radish varieties.
Preserving and Storing Radishes
Radishes are one of the first, if not the first thing to be harvested from the garden and should be eaten fresh. You can keep spring radishes in the refrigerator for a few weeks and they will be fine. They are a fun treat after those long winter months.
If you do want to store radishes there are a few methods that you can use. You can pickle them, freeze them, dry them, and freeze dry them.
Pickling radishes
Pickling radishes is fairly easy. There are about a million different recipes for pickling radishes. They generally involve vinegar, salt, sugar, hot water, and spices. We will post our favorite radish pickling recipes on our recipe page. For now, here is our simple easy recipe:
What you will need is:
20-25 radishes
1 cup apple cider, or white vinegar (5% acidity)
1/2 cup white sugar
1/2 cup water
4 teaspoons pickling salt, or kosher salt
1 teaspoon yellow mustard seeds
1 teaspoon whole coriander seeds
2 teaspoons whole black peppercorns
2 garlic cloves, peeled, sliced thinly
Prepare the jars by covering in water and boiling for 10 minutes. This will kill any germs or bacteria and sterilize them.
Wash radishes well, scrubbing gently. You will want to do a thorough job with this. Sometimes the pickles can taste like dirt if you don’t clean the radishes well. Cut off the tops and root end. Slice the radishes in thin slices or small chunks.
In a pan add the vinegar, sugar, water and salt. Stir the mixture and bring it to a boil. You need to make sure the sugar and salt are dissolved. You can use whatever vinegar you would like, as long as it has 5% acidity. The acidity helps with the preservation.
Use new canning lids and prepare the lids as you do all canning lids. Put the lids in hot water for a few minutes to heat them up. It’s generally a good idea to put the lids in the water while you are filling up the jars with radishes and pickling juice.
Put the radish slices or chunks into the hot jars. You will need to leave a 1/2 inch of headspace at the top of the jar. Now add the garlic slices and spices. Fill jars with hot pickling juice to 1/2-inch headspace at the top of the jar. Remove bubbles, re-check to see if there is ½ inch spacing at the top of the jar. Wipe the rims with a towel or cloth, put on the lid and screw on the seal ring.
Place each filled jar into the boiling water canner. Jars should be covered by 1-2 inches of water above the lids. Put the lid onto the canner and turn onto high heat. Once the water is back at a full boil, start your timer for 15 minutes (for half-pints and pints). Once the time is up, turn the heat off then remove the lid and wait another 5 minutes before removing the jars.
Let the jars cool overnight out of the canner. Do not tighten the lids of move the jars around. Just let them alone and cool down.
After cooling down check the jars. Look to see if all have sealed. Those that haven’t sealed you will need to refrigerate and eat soon. Those that have sealed can be stored on the shelf for future use. Store them in a cool, dry, dark place. Too much light will blanch out the color of the radishes.
Its best to let the radishes sit in the pickling juice for 4-6 weeks before eating. That way the flavor gets absorbed in the radishes.
Freezing radishes
Freezing radishes is simple and straightforward. The process is blanching the radishes, cooling them down quickly, putting them into containers, and then freezing them. If you don’t do it correctly you can ruin the texture and flavor.
Cut off the tops and roots of the radishes and wash them thoroughly. Slice them thinly or cut them into small chunks. Blanch them in vigorously boiling water.
You need to be aware of the elevation you are living at for how long to blanch radishes. 2 minutes below 5,000 feet, and 3 minutes at 5,000 feet and above.
Cool the radishes in ice water immediately after the time is up for blanching. The cooling process should take about the same amount of time as the blanching process. Drain them once cool.
You can then put them onto containers and put them onto the freezer. One thing you need to be cautious about. If the radishes are left to freeze in a thick bunch or pile, they run the risk of getting spoiled or turning sour. The best method we have found is to put a cup or two of radishes into a gallon freezer bag and spread the bag of radishes flat in the freezer. This allows the radishes to freeze quickly and uniformly.
Drying radishes
Drying radishes is very simple and straight forward. Clean them up, cut them thin and put them in a dehydrator. You can use an oven, but a dehydrator is more efficient.
Cut the tops and roots off the radish and slice them thinly. Place the radish slices on the dehydrator tray and dry them at 125 degrees for 2-6 hours depending on how thin you sliced them.
A trick for slicing them thin is to use a mandolin. It’s easy to use and you can get one on Amazon right here. You can slice them with a knife just fine. A mandolin just makes it a little easier.
After the radishes are dried, they can be stored in a container with stay fresh packets, moisture-vapor-proof containers or bags.
Freeze Drying
Freeze drying radishes has not been readily available for the home user. There is an option available for the home use now and can be used readily for most all vegetables and fruits including radishes.
Freeze drying radishes is very simple. You cut off the tops and roots of the radishes and wash them. Dry them out on a towel or cloth. Put the radishes in the freeze dryer and let the freeze dryer go through its process. The freeze dryer can take anywhere from 30-40 hours to work depending on the moisture and size of the radishes themselves.
Freeze drying tastes great and keeps the nutrients in the process. Freeze drying will keep the food edible and nutrition rich for 25 years. The machine itself is a bit expensive. If you are planning to store a lot of your produce, then you will want to consider a freeze dryer.
If you are working on a more frugal budget, then you might want to consider other methods of preserving your radishes. However, you can use a freeze dryer for almost any food, including leftovers, and most of your garden produce.
What about radish tops?
Radish tops are edible. The radish greens are rather tough, so if you want to eat them in a salad you will want to eat younger more tender leaves. The mature leaves can be cooked like any other green, from boiling to steaming to sautéing. Radish tops add a spicy flavor to whatever they are added to. You can also mash and blend them into soups, sauces, dips, and pesto.
Give radish tops a try. You will want to make sure they are cleaned well. It’s amazing how small pieces of dirt can hide in leaves.
Radish pods
Radish pods are the seed pods that the radish plant produces after it goes to seed and flowers. Many will just give up and till the pretty little plant under, but the radish seed pods are something to try.
The pods will form once the radish plant has flowered. The pods look like little green pea pods. Pick them when they are young and tender. You can use them like you would radishes. They have a similar flavor.
With these radish seed pods you can pickle them, use them in salads, stir-fry, etc. Radish seed pods are something fun to use even when you think the plant is done.
Radish Recipes
Radish recipes are vast and varied. They are often found on most salad bars and in most green salads served. The humble radish has a lot more going for it than just for a green salad alone.
Salads
You can try radishes in almost any vegetable salad that you would like to add a spicy kick to. Raw fresh radishes straight from the garden or farmers market add a crisp spicy flavor and texture that can sparkle in a green salad. They are also a fun addition, diced or shredded, to three bean salad. When shredded they can add a nice spice to carrot salad. If you are daring add some to your coleslaw.
Fish
I often use diced radish to tuna fish for a welcome crunch to a sandwich or salad. Just prepare the tuna fish the same as you normally would and add diced radish to your taste. I like a lot of the fresh radishes right out of the garden. There is nothing better than eating your own first fruits of the garden.
When grilling fish, I like to put some slices of fresh radish on top of the fish for the last few minutes of cooking. Just so the radishes begin to soften. This works well for salmon, trout, tilapia, and most ocean fish. I have not tried it with walleye, bass, or burbot, but I think it would be worth a try.
A nice tartar sauce can be with radishes. Choose what the base of your sauce you would prefer. I have use mayonnaise, sour cream, plain Greek yogurt, and butter milk. My preference is mayonnaise or Greek yogurt. I usually do not use measurements, I just put in what I think would work and adjust to my taste.
Begin with about a cup of the base you are choosing. Add shredded or diced radishes. The amount depends on your taste. I like a lot, so I use about 1/2 to 1 cup of radishes. I then add about a ½-1 tablespoon of honey or sugar. I will then add a dash, or ¼ teaspoon of lemon or apple cider vinegar. Then mix it well. Give it a taste and add a little more this or that to your liking. A variation that I can sometimes use is some fresh dill from the garden. It’s not often we get dill and radishes growing at the same time, but in that rare case it can be a treat.
Garnish
Radishes are often added as a garnish for many foods. Sometimes relegated as a decorative rose or carved artistic creation. They are stunning with their brilliant white flesh and colorful skins. They can range from bright red to purple to white skins as well. The colors add a decorative look that will give a bland looking meal the punch it needs to look good.
Tacos and Mexican food
Radishes are often found on street tacos or at Mexican restaurants as added garnish. The radishes ad a fresh crisp snap to a taco. They are also a milder selection of the hot peppers are a bit too hot and not to your liking.
Grilled
Radishes are great grilled. They will often be tamed down in the spice when cooked. So if you radishes are just a bit too spicy for you grilling them might be just the ticket for you.
You can put them on skewers with shish kabob. You can put slices on top of all kinds of meat such as steak, pork, chicken, turkey, fish, and hamburgers.
Radishes are also great grilled themselves. Just dip them in butter or vegetable oil and lightly salt them. Grill them until tender and eat. Just remember if you are grilling slices they will take almost no time to cook, so keep an eye on them.
Sautéed
A sautéed radish is amazing. I know many people who have told me they do not care for radishes at all. When they taste a sautéed radish, they change their mind completely. The sautéing takes the spicy taste down a few notches and give the radish a more mellow sweet taste. Similar to a mild turnip or kohlrabi flavor. They have a wonderful earthy root flavor when sautéed.
To sauté radishes just get a frying pan and put butter or your favorite vegetable or olive oil in the bottom. Heat the pan and put in sliced or diced radishes. You can add salt to taste. A great variation is to use bacon and sauté the radishes in the bacon grease.
Refrigerator Pickled Radishes
Refrigerator pickled radishes are a fun treat as well. The refrigerator pickled radishes are a little different than the pickled radishes we talked about previously in the article.
The basic idea is to create a pickle solution and store it in the refrigerator and you can eat them for a few weeks. The recipe we use is pretty simple.
We will use 2 cups of water and a cup of vinegar. You can experiment with the vinegar. We have used apple cider vinegar, white vinegar, and rice vinegar. My preference is apple cider vinegar. You will also need about 2 tablespoons of sugar and about 1 tablespoon of salt. It’s better to use kosher or pickling salt. Iodized salt can change the color of the vegetables more than you want.
Put everything in a pan except for the radishes. Slice the radishes thin or shred them and put them in a bowl. Bring the liquid to a boil and stir dissolving the salt and sugar. Pour the liquid over the radishes and make sure they are covered by the liquid. Let it cool and put it in the fridge to chill. You can keep these pickled radishes for a few weeks.
You can add other vegetables to the pickled radishes, but you will want to keep them in separate bowls when you pour the hot liquid over them. The hot pickle juice can make the color of the vegetables bleed and color everything. So just do the same procedure substituting carrots, or onions, or cucumbers, or cauliflower in different bowls. You can a put them into the same container once cooled down without too much color bleeding.
Roasted Radishes
Roasted radishes are a teat all their own. They take on a sweet rich flavor and a tender texture with a little crisp skin. This is pretty simple. To prepare the radishes you will want to cut the bigger ones in half. Coat the radishes with olive or vegetable oil. Add salt to taste and put them onto a baking sheet. You will want the oven to be pretty hot, about 425-450 degrees Fahrenheit. You will want to keep an eye on them and stir them from time to time to keep them from burning and sticking to the baking sheet. It should take about 15-20 minutes and they will be done.
They remind me of a sweet version of oven fried potatoes. You can add roasted radishes to all kinds of dishes, or just eat them on their own.
Fun to eat while irrigating!
Summary
Radishes are a fun first plant of the garden. They grow easy and fast. If you want to have a positive experience with gardening maybe radishes should be on your list.
When you do get them from the garden or farmers market make sure to try them in several different ways. Radishes are fantastic raw on their own and in salads, but you might want to try the several ways to cook them. You might find out that you might be more a of a radish fan than you thought.
We love Chrysanthemums (mums) on our homestead. This article provides a guide to help you grow the wonderful flowers that brighten our lives on Memorial Day and in the autumn.
The How-to’s
In late summer when other plants have called it quits, mums (sure glad they shortened the name) hit their stride. Like poinsettias, they are photoperiodic, meaning that they rely on specific amounts of light to send the signal that it’s time to start putting on the show. That is also the secret that nurserymen have employed to get the mums to show their glory at the end of May.
Mums are easy. Just give them a plot of ground, some fertilizer, and water to wet their thirst, and they will reward you with fantastic color, size, and that ever familiar smell which signals fall, harvest, and football.
But what happens to those hard-working plants that decorate the cemeteries at the end of May? Well if you are frugal (like we are at this homestead) you go out and gather them up before they get thrown away and bring them home. Water them well and leave the blooms on until you have them placed where you want them to grow. This will show you the possibilities for fall with your kaleidoscope of colors.
Place the plants where they will get plenty of sun, plenty of water and have friendly neighbors. Dig a hole bigger than the size of the container, lift the plant out of the pot, score down the sides of the root ball to allow the roots to spread, put in the hole and water, tamp soil around the plant and pack it down. Keep watered for several weeks.
When all your retrieved plants have been given a home and you have welcomed them to the homestead with instructions as to their jobs, then remove the spent blooms, sprinkle a little fertilizer around the base and be ready for another great production in the fall when they will again do their magic.
Where can I get mums to plant?
Mum plantings can be obtained from any place. Send for them from a nursery, get them from a local distributor, share with a friend.
Here is a video of my Niece splitting a mum to share with a neighbor.
Mums set their buds in the fall when the dark of night lasts about 10 hours. Blooms follow in about 6 to 10 weeks. Cool nights do not affect the plants. Chilly weather seems to intensify the colors and the blossoms last longer. Only a killing frost will stop the show. But at my house, if I know the frost is coming, I will invite as many of my friends into my house to savor the last of the beauty of fall. In fact, each room seems to have at least one or two vases full of my favorite fall flowers.
Planting the plant
Soil: while mums thrive in just about any soil type, they do benefit from generous helpings of homemade compost. Dig in a spade-full at planting time and top-dress with more. Soil must be well-drained, however, or the plants will rot.
Sunshine: Mums planted in full sun bloom more profusely than those in partial shade. An optimal site receives six to eight hours of direct light.
Water: Shallow-rooted mums dry out quickly. Be sure to water consistently, especially during dry spells and in fall, when plants are storing up energy for winter survival.
Pinching Back: If you don’t like the leggy look (who does?), remove the tips of stems early in the season to encourage branching. Repeat the process every two weeks until mid-July. Mums purchased as annuals in late summer do not require this treatment.
Though technically mums are considered perennials, they are often grown as annuals owing to shallow root systems. They are inclined to heave right out of the ground during winter’s freeze-thaw cycles.
If you live where winter can be frigid, plant early-blooming varieties – they would be more likely to come back the next year.
When winter looms, apply a mulch of crisscrossed evergreen boughs to help plants make it through the cold weather ahead. I use our dried corn stocks to cover the plants. Then in spring the corn stocks are chopped and tilled back into the garden.
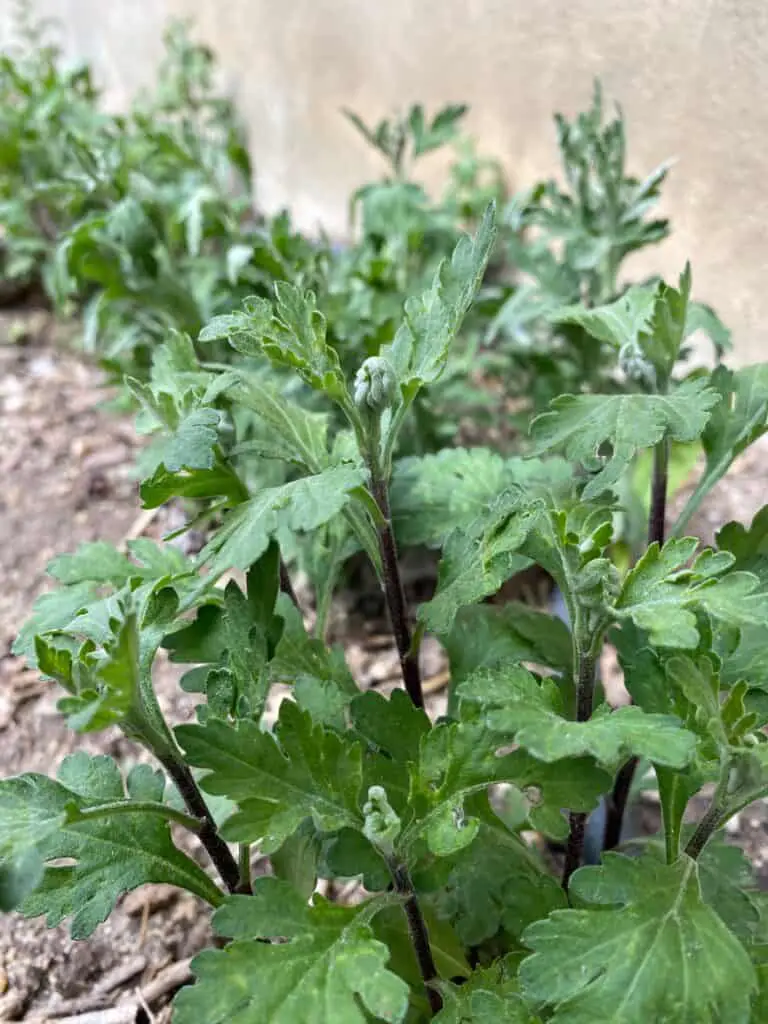
Some people plant mums in the mid to late summer, but do consider inviting these little darlings into your garden earlier. This will give their root systems a longer time to get established. You can also give them more to eat and extra pep talks too.
Young chrysanthemum plants growing in the spring.
Choose Your Variety
For stopping traffic: The spider mum Senkyo Kenshin stands 3 ½ ft. tall and blooms midseason, with about 27 striking, reddish-bronze blossoms per plant
For brilliant color: Jessica has joyful bright yellow blossoms. This midseason decorative mum is from the Prophets Series.
For double duty: An old favorite, French Vanilla has 3 ½ inch white flowers. Grow in a mixed border or cutting garden.
For cold climates: Mannautumn is an extremely cold-hardy – to zone 3 – decorative cushion mum. It’s only 15 inches tall, with vivid orange-red flowers.
For the vase: Carousel, a purple quill mum, is an elegant cut flower, Huge blossoms measure up to 4 inches across.
Several years ago, horticulturists at the University of Minnesota developed a new chrysanthemum hybrid described as a “hardy shrub mum” Dubbed the My Favorite Series. The robust plants were touted as reliably perennial as far north as zone 3b. They have been marketed under the name of Mammoth Series.
True to their new designation, these oversize mums can measure 2 to 3 feet tall and 4 to 5 feet across by their third season. They have a massive canopy of flowers – up to 5000 – per plant. Monarch butterflies adore these shrubby wonders.
Taking Cuttings from Your Neighbor
If you can’t find the mum you want, but you see it in your neighbor’s yard, perhaps you could ask to get a start from their gorgeous plant. All you would need is a pair of scissors to snip off a 4-inch stem with leaves on it. Put that prize stem in a pot filled with a soilless medium (such as vermiculite). Keep it moist and outdoors in a bright spot.
After a couple of weeks, repot the cutting (which has by now sprouted roots) to a small container filled with potting soil. Fertilize once a week. Two to three weeks later, transplant it to the garden and keep fertilizing. You’ll enjoy flowers this very Thanksgiving.
7 possible answers to why chickens cackle so loudly after laying an egg.
There is no definitive scientific answer to this particular behavior; However, there are various hypotheses that have been proposed by poultry experts and breeders.
The chicken is relieved that the egg is no longer inside her body and she’s exclaiming joy.
The chicken is signaling that she is finished with the nest and other members of the flock can use the nest to lay their eggs.
The chicken is bragging about her contribution to the flock with her magnificent egg.
The chicken is signaling the rooster that she has laid an egg and is ready for him to assist in further fertilization.
The chicken is seeking attention to draw predators away from the egg and nest.
The chicken is upset with other chickens wanting to get into her nest.
The chicken has been away from the flock for a while and is signaling to find where the flock has congregated.
The hen is just plain relieved.
One idea that has been projected about why chickens cackle after they lay an egg is that they are just plain relieved to have the egg out.
When you first begin to raise chickens, it is very exciting to see the eggs beginning to show up in the nest. The first eggs are small and have extremely thick shells. It takes a while for the eggs to reach “normal” production sizes, and it takes a while for the hen’s egg producing system to mature as well.
Reaching mature and regular egg production levels can be painful for some hens, and the stresses of daily egg production often become aggravating. As the normal 24 hour day wears on, a hen struggles to produce each egg, which in comparison to human egg production, can be quite cumbersome, and large proportionally. It is quite a process that a hen must go through daily to develop, prepare and pass an egg through her cloaca, or “vent”. As a matter of fact, a portion of uterine tissue actually extends through the vent with the egg, until the egg is completely released. Thus, it is no surprise that once the hen finally passes the egg, it is such a relief that she cackles for joy.
The chicken is signaling that she is finished with the nest and other members of the flock can use the nest to lay their eggs.
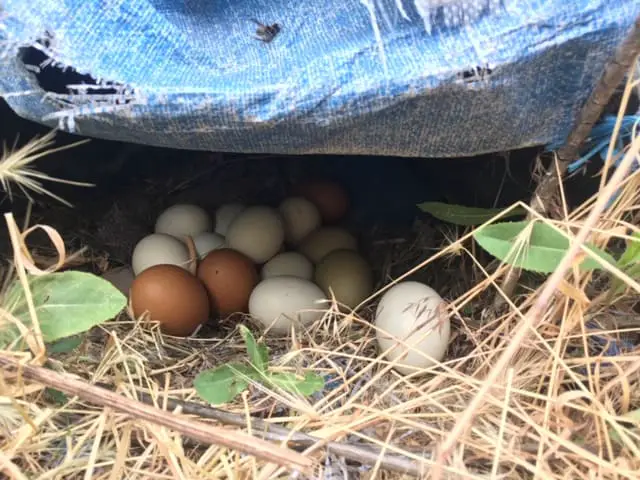
When raising chickens, you will notice that not all nesting spots are popular. Some nest boxes will be favored above others. And, though all of the nesting boxes may look the same, have the same bedding, same design, and structure, the hens will just pick a favored nest for some reason. It’s crazy to see a dozen eggs on one nest and none in the nest right next to it.
So, the competition for the favorite nest can be keen. When a chicken is finished laying an egg in a favored nest, she signals to the rest of the flock that the nifty nest is free to use. We often see hens try to sit on each other in the same nest as they attempt to use the preferred location for egg laying.
Favorite nest.
The chicken is bragging about her contribution to the flock with her magnificent egg.
Some of your hens will be timid and bashful. Most will be fairly confident in their status in the pecking order. They are proud of their accomplishments and who they are as a productive laying hen. Their eggs are a thing to behold and admire.
After they have laid their masterpiece, many hens feel a need to exclaim to the world that they have added yet another wonderful contribution to the flock. They burst with a song of intensity and volume to match their perfect creation.
The chicken is signaling the rooster that she has laid an egg and is ready for him to assist in further fertilization.
One practical idea that breeders have proposed for a hen’s loud exclamation following egg production is the need to communicate to the rooster that she will be creating a new egg. With this new egg comes the opportunity to make it a fertile egg. When the chicken is ready for the next egg to begin processing the cackling could be a signal to the rooster that the hen needs his services to create a fertile egg.
This idea seems fairly plausible. Inherent within the chicken is the idea to reproduce and increase the flock. It seems to make sense that the more fertile eggs laid the greater chance for the flock to grow.
The chicken is getting attention and drawing predators away from the egg and the nest.
This is another plausible, practical idea for the cackling after laying an egg. A major drive of the hen seems to be to increase the flock. When an egg is laid that is a vulnerable time for the egg. The egg will need time to incubate and hatch.
If a hen cackles and gets attention, the attention is on her, not the new egg. A killdeer bird does something similar. The killdeer birds will call while running away from the nest. The chicken similarly cackles as she leaves the nest drawing more attention to her than to the newly hatched egg. The chicken will get more attention from the predator than the egg will.
The chicken is upset with other chickens wanting to get into her nest.
As I stated earlier all nests are not created the same. There are more popular nests in the coop. As such when a hen gets the coveted nest she will want to stay there and use it to her liking as long as she would like. It is irritating when other hens keep pushing their way into the nest.
The idea is that when the chicken finally lays her egg her patience is done. She cackles out of sheer annoyance announcing that she is leaving the nest available for the next irritating hen to take over the coveted nest.
Gathering of the flock
The chicken has been away from the flock for a while and is signaling to find where the flock has congregated to.
Some hens can lay an egg quickly. In and out of the nest fast. Kind of like changing tires on a pit crew at NASCAR. Many are not fast. Many hens will need to take their time and relax. Some will need to ease their minds about possible predators or competing hens. It will take a little time for the chicken to safely lay the egg.
As the flock free ranges, they will naturally move around. The location of the flock can change quickly. Especially if a treasure of worms or new green shoots are discovered to eat. Or a predator is seen, and the flock needs to scatter for cover. The flock being in a new place once a chicken is finished laying an egg is usually what happens.
The cackle of a hen after laying an egg could be a locating cackle. The chicken will cackle to locate where the flock has moved to. Generally, another chicken or the rooster will return the cackle and the hen can easily locate the new position of the flock.
Summary
There is no real scientific proof of any of these theories of why chickens cackle after they lay eggs. From observance of chickens over the years and talking with other poultry owners these theories might hold some truth.
The ones that seem most plausible are locating where the flock has gone, luring predators away from the newly laid egg in the nest, and signaling the rooster that she has laid an egg, and another egg will be in process shortly.
If you can, take some time to observe your hens and see when they cackle after laying an egg. You will see some pretty interesting behavior in your little chickens. I do think they sometimes are just bragging, or are annoyed.
Absolutely! It has been happening successfully for decades.
During times of crisis, or out of convenience, you may not be able to go to your local farm or ranch store to get new chicks to raise. Perhaps the selection of chicks at your local stores just isn’t what you want. Recently, we have seen local stores sell out of chicks as soon as doors open.
Many people are concerned about Corona virus infection or need to stay at home due to high risk health conditions.
There is a great solution to getting chicks without having to enter a store. You can order chicks online, over the phone, or through the mail from hatcheries. It’s simple and easy and is a great way to increase or begin your own flock.
Most poultry chick hatcheries have a mail directly option. There are some caveats to consider when going the mail order route. In this article we will let you know what to consider and what to look out for when getting your chicks in the mail.
Can chicks survive being mailed to you?
The first question that people ask is, “Can the baby chicks survive being shipped in the mail?”. The hatcheries take some precautions and the chicks survive just fine.
When a chick hatches it is still digesting the yolk sac. It takes about two days for the chicks to fully digest the yolk sac. This gives the hatcheries time to mail them out safely. As long as the chicks stay warm and arrive within three days of hatching, they will do great.
To keep the chick’s warm, hatcheries will have a minimum number you will need to make. Having 8-20 chicks in a container will keep them toasty warm and safe. Some hatcheries won’t have a minimum order, but they will add some cockerels or other chicks into the order to keep the desired chicks safe and warm. This will mean that you will need to deal with the extra chicks when they show up in the mail.
Hatcheries have been mailing chicks to customers for decades and have perfected how to do it well. The hatcheries know what they are doing, and the mail system has become very adept at handling and shipping them promptly.
If there are issues with the chicks, most hatcheries have a refund policy and are great to work with.
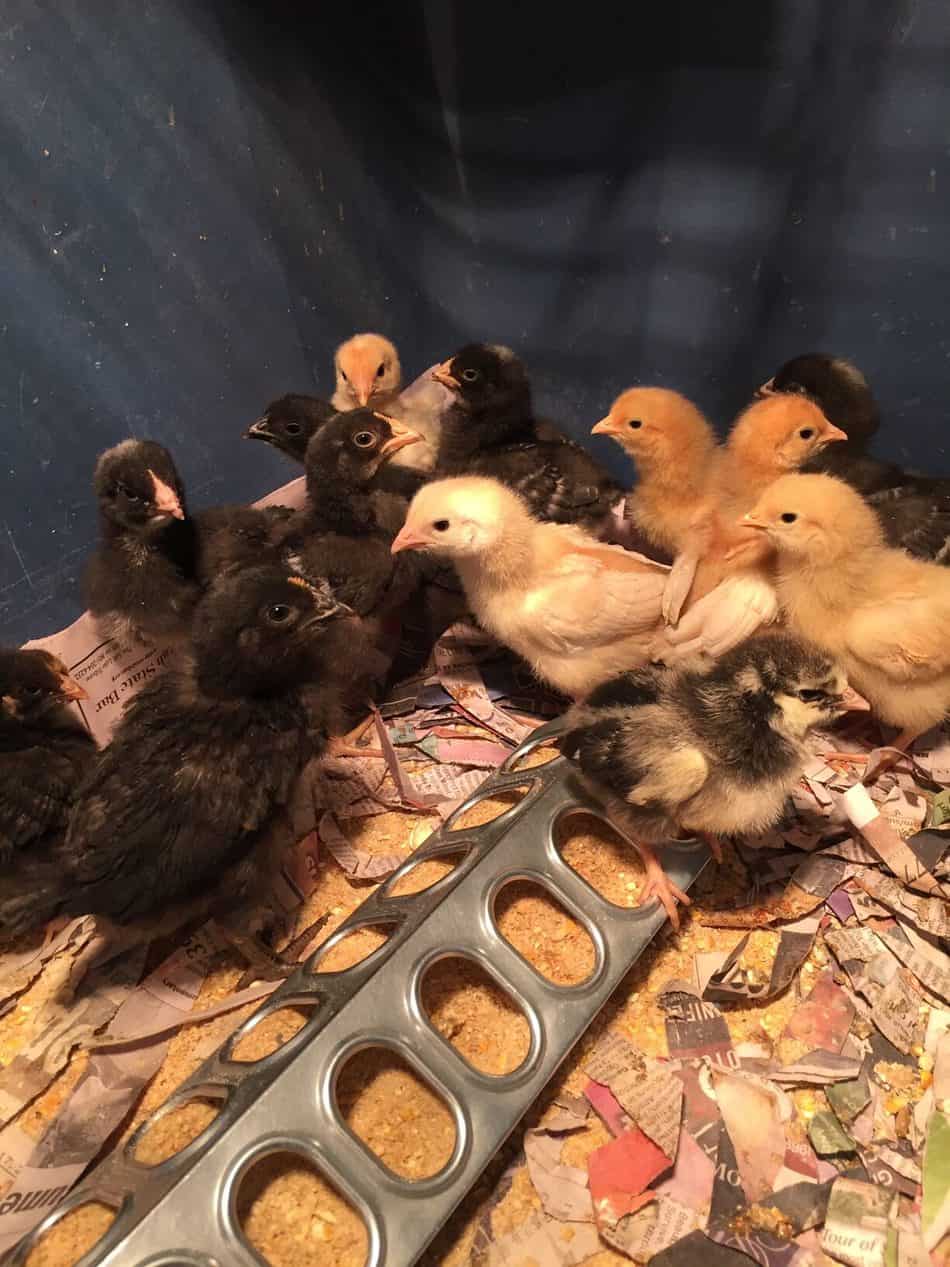
Happy chicks in the brooder.
What kind of chicks should you order?
To begin with you will need to know the terminology of chicks. You may already know this, but just to make things clear.
Pullets are female chickens. Pullets are the ones you want to get if you want to have egg layers.
Cockerels are male chickens. Cockerels will grow up to be roosters. Cockerels can become aggressive and fight each other. There are some city ordinances that will not allow cockerels to be raised in city limits, so you will need to plan accordingly for a cockerel.
Some may wonder if only certain breeds of chicks can be ordered. The answer is no, you can order most any chick available at the hatchery. Most of the time you will be able to get different breeds and even ducks and geese in one order.
The only limitation will be availability. You should order your chicks early if you want them in the spring. With a pandemic scare and order you may need to order the chicks you want and wait for a while for your order to be filled. I have checked one of my favorite hatcheries and they are sold out until next year.
The options will usually be a straight run or pullets. The straight runs are usually cheaper because the hatcheries don’t have to take the step of sexting the chicks. Sexting the chicks is a fairly quick but tedious procedure and takes an educated eye to determine. A good sexter is a valued asset for hatcheries.
The straight run chicks are shipped as they hatch, with no guarantee of how many pullets or cockerels you may get. You may get all pullets, or all cockerels. It just depends on what hatches out that day.
To get guaranteed pullets in your order the chicks will have to go through the process of sexting. This step adds a little more cost per chick.
If you decide to order a straight run there is no guarantee how many of the chicks are pullets and how many are cockerels. It is a bit of a gamble.
Most hatcheries that I have researched and worked with have a 90% guarantee if you order pullets. They will refund the cost difference between cockerels and pullets.
If you are ordering for other than egg layers you may want to go for a straight run. For instance, many people will order broilers or Cornish Rock chicks. These are chickens raised for meat. You will generally harvest these birds within 6-8 weeks and a straight run will work fine.
If you are raising chickens for the feathers. For decorations or fly tying etc. You may want more cockerels than hens. The cockerels will have the more colorful and fancy feathers and plumage.
How to order chicks
Ordering chicks is very easy and straightforward. Most all reputable hatcheries have a website and are online. You can order through their website or call them directly.
You will want to carefully research the breed of chicken you would like to have. Some breeds are strictly laying hens, some are a dual purpose both laying and meat birds. Some are strictly for raising to harvest for meat. Some chickens are raised for pets, companions, or decoration. Still others are raised for their feathers. So, research before you buy.
Generally, you will need to make your orders early in the year. There is always a high demand for chicks in the spring. If you want to raise chicks in the spring and have them laying by the fall you will need to start early. If you don’t really have a deadline for when you want to have the chicks become layers, then many hatcheries will process orders after the big spring rush.
Preparation for the chicks
Once you order the chicks then you will need to prepare for when they arrive. They will need a brooder, brooder lamp or heat lamp, thermometer, grit, waterer, bedding, and feed. If you get these ready ahead of time the chicks will be able to be transferred quickly from the shipping box to their new home. The quicker the transition the healthier the birds will be.
Brooders can be fairly simple. They could be a big box with a heat lamp above. A brooder could be a large trough with a heat lamp. We use a large plastic storage bin with a heat lamp above it and a wire grate on top to keep the family cat out.
The main thing is that the brooder has light, heat, water, food, and bedding. The light and heat can be arranged with a heat lamp. Some lamps will have a red-light bulb. The red light is supposed to be easier on the chick’s eyes and helps to keep chicks from pecking each other. Most ducks and geese the red light is recommended.
You will need to have the brooder warmed up before you put the chicks in it. Chicks will not eat or drink until they have their body warmed up. The brooder temperature at the floor level should be between 100-105 degrees Fahrenheit for the first few days. You can then lower the temperature to 100 degrees Fahrenheit for the rest of the week.
Make sure there is enough room for the chicks to move outside of the heat source if they get too warm.
Water can be a small waterer. The water in the brooder will need to be warm water when you first put the chicks in. 98 degrees Fahrenheit is recommended. The chicks are very dehydrated and will drink like crazy for the first few days. As they drink if the water is too cold it will reduce their body temperature and put them into shock, it could make them sick or even die.
A trick that poultry farmers have used for years to encourage chicks to drink water is marbles. Take some colorful marbles, especially red, and put a few in the waterer. The chicks will try to peck at the bright colors and will be encourages to drink.
The food should be a good chick starter or high protein mash. The mash should be 18% protein or higher to begin with. You can feed them in easy starter feed trays. You will want to have a second small feeder with grit in it. The grit will help the chicks to masticate and digest their food.
The bedding in the brooder can be pine wood shavings, shredded newspaper, or clean straw. Do not use cedar of cypress shavings, they are toxic to poultry. We have used shredded newspaper over the years for chicken chicks. It seems to do well for us. Many like the easy cleanup of the wood shavings. The purpose of the bedding, or litter, is for it to be a cushion for the chicks and absorb the chicks waste.
Do not use fine sawdust or wood shavings. The chicks can get confused and eat it instead of the chicken feed which can result in death. You will need to change the bedding often to keep the chicks clean and healthy.
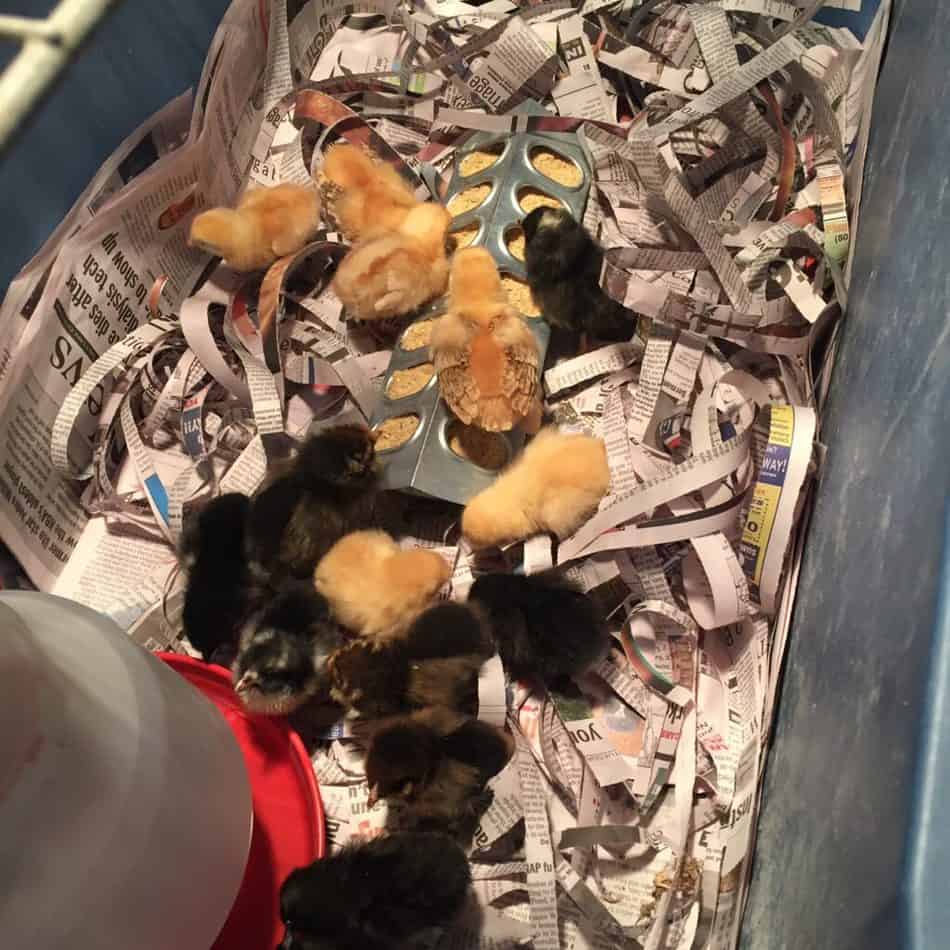
Feeding a baby chick
What to do with the chicks when they arrive
Often times the post office will contact you as soon as the chicks arrive. This way you will be able to get the chicks early instead of waiting for the post carrier to deliver to your home hours later. It might even be a good idea to give the post office a heads up that you have ordered chicks and want to pick them up as early as you can.
As soon as the chicks get into your possession you will need to give them some water. This does not mean put them near a waterer. You will need to manually teach them how to take their first drink.
When you get your chicks as you place them into the brooder. Take each chick one by one and dip their beak in to the water and let them go. The chick should instinctively look up and swallow. Once the chick has understood the technique you don’t need to repeat it. Some people get a little too excited and end up making the chicks sick repeating the drinking training too much.
A simple trick to teach them how to eat is to sprinkle a little food on a paper towel and put it on the floor of the brooder. This will help them to recognize food. After the first day they should recognize food in the feeder. Remove the paper towel as soon as the chicks begin to recognize food in the feeder. They could become imprinted to having the food from a paper towel if you don’t remove the towel after the first day.
You will also need to inspect the chicks to see if they have Pasty Butt.
While chicks are brand new, they can sometimes develop what is referred to as Pasty Butt. This is where the anal vent gets clogged up with fecal matter. This can happen for a variety of reasons. It is fairly common and easily treated. If left untreated the chick will get sick and could die.
Sometimes the new chicks in the mail will arrive with Pasty Butt. As you take each chick out of the box one by one inspect the chick to see if everything looks normal.
If there is a fecal deposit stuck to the rear end of the chick you will need to remove it to get everything moving the way it should. Get a damp warm paper towel or cloth and use it to clean up the little chick. Sometimes it will take a little soaking to get the fecal matter to soften enough to remove it.
I would caution you to take your time with this step. If you simply rip the clog off, you could create an open sore that may show blood. Chickens are easily turned to cannibalism and will pick at blood spots on other birds. If you are not careful you could end up having the rest of the chicks kill the injured chick.
Who should I order my chicks from?
This is a good question. You will find many hatcheries online if you just do an internet search. However, not all hatcheries are created equal. Take a little time to look through some reviews of the hatchery.
Look through the website and see how long the hatchery has been in business. If they have been around for a long time, they will have proven themselves to be quality hatchery.
As I stated earlier, you will want to order your chicks early in the year. There is usually a spring rush and chicks can become scarce. The hatcheries will generally be able to fill orders later in the season, but if you want those spring chicks laying eggs by the autumn then you need to get to ordering early in the year.
Summary
Ordering chickens through the mail is easy and works great. Many good hatcheries have been supplying poultry this way for decades. The mail service is well versed and prepared to handle chicks in the mail.
It’s as simple as researching what kind of chickens you want. Looking up a hatchery that meets your needs well. Ordering and paying for the chicks online or by phone. Then prepare for the chicks with the proper brooder, heat lamp, bedding, waterer, grit, and starter feed.