
Log structures are being used more and more for both a primary residence and second home in the country. Many log homes/cabins are used as hunting/fishing/vacation cabins in remote areas of the U.S., and the care of these rustic beauties is important for long lasting durability. But numerous log homes are becoming primary residences that incorporate historic beauty, rustic charm and efficient heating and cooling advantages. They are also often built where land is much less expensive than urban or suburban residential developments. And, they give greater flexibility to design options, remodel possibilities, and can incorporate solar advantages and aesthetic enhancements with decks, windows, roofs and foundations.
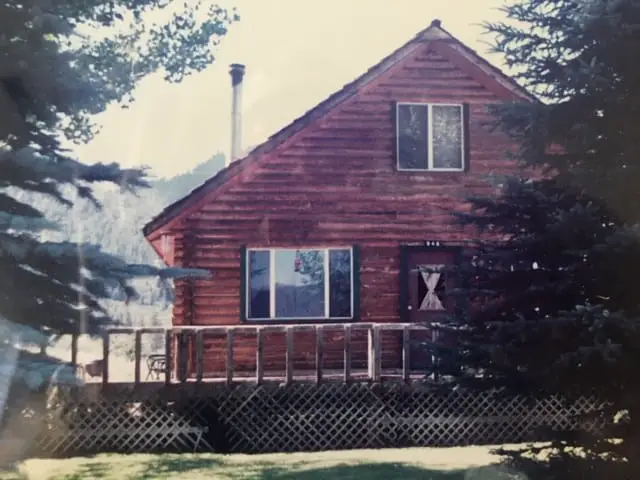
Many log homes call for rescue and restoration. My experience with a log cabin came with my two brothers. We built a 30 foot X 30 foot, two-story log cabin from a “kit” in the mountains of Southern Utah. We built it as a “spec” home to make money for needed living expenses in the late 70’s. We sold it and made a few bucks but wished we could have kept it for ourselves. When the buyers moved to Idaho a few years later, they called my wife and me and asked if we were interested in buying it back from them. “Sure,” I said with enthusiasm, since my wife and I had good jobs with a combined income that gave us the ability to buy a perfect little cabin just 40 miles from our small city residence.
The price was reasonable and we made the purchase, despite the fact that in just a few years, the logs had been neglected and desperately need some attention. When I carefully inspected the little mountain beauty, it had some early signs of sun rot, and there had been “a little” termite damage. I soon took care of all wood restoration issues and put a wood sealing finish on the logs that lasted several years. By sanding the entire cabin again in 1998, and applying a commercial grade sealer, I enjoyed the mountain valley cabin without worrying too much about the maintenance of the pine logs for nearly 20 years, which was too long for the finish to last without damage. Once again, I was faced with some sun rot and termite concerns in 2017.
I will list the steps I took to stabilize the wood, apply textured caulking, eradicate the termites and put a restorative sealant on the 40 – year old logs of my cabin.
Pine (and cedar) logs are often porous. To prevent both water damage and sun damage (rot), joint caulk, and a water repellent/sealing finish must be applied when first constructed or when restoration occurs. My project was a restoration task. I had one grandson to help me, and plenty of advice via the internet, as well as local supply stores with quality products. My caulking material came from Perma Chink Inc. in Rifle, Colorado. My daughter lived in Denver and I passed through Rifle often. When I stopped to purchase the caulk, I was treated with enthusiasm and competent professional advice …. and the prices were fair. I told them the size of my cabin and they calculated the quantity of caulk I needed and recommended a good sealant. They also sold me the tools I needed for application. As I left the store, the sweet cashier said….”I hope you have a good ladder and some strong arms!”
Because the natural beauty of raw, dried and treated logs when first sanded, pealed or scraped is desired, the weather in a harsh environment (where I live) can claim the new beauty look on most south and east facing sides of wood in the northern hemisphere. Such was the case with my cabin. I took a claw hammer to the minimal sun rot on the south side of my cabin then chiseled out about fifteen pounds of rotted wood. I located all the termite damaged areas as well, and had to remove some areas of the logs that had termite issues. I then treated the wood with FiPro Foaming Aerosol (be sure to wear a good mask – N95 or better). I let the aerosol seep into the wood and sprayed liberally around the foundation for ground termites, then waited two days to begin applying some filler caulk (DAP acrylic latex – cedar tan). It took 20 cartridges of caulk to completely fill in the lost wood areas of my logs. The latex caulk costs less than $3 per tube and worked well. I would use 3-4 tubes at a time and let them set-up for 3-4 days before applying more filler until the shape and look of the restored log was achieved.
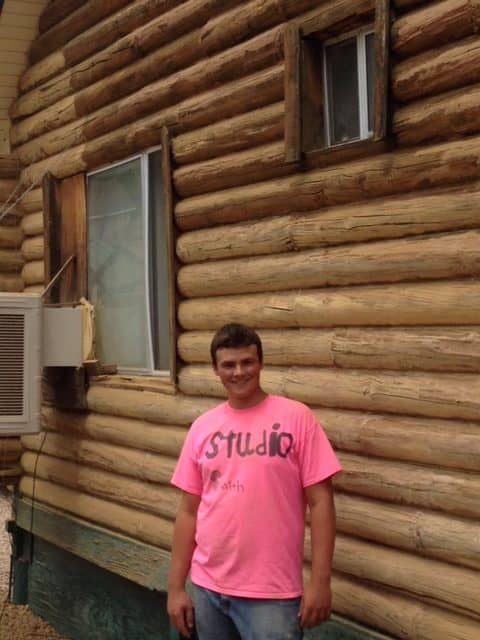
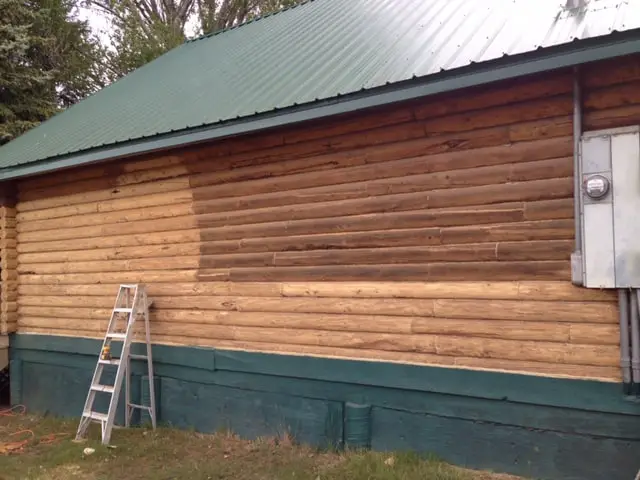
I then hired my grandson to help me sand the entire cabin with Black and Decker Orbital sanders. The curved logs required the versatility of an orbital sander. The manual labor was extensive, but cheaper than having it sand-blasted (yes, I got a bid). The sanding project took three days (two laborers) and cost about $400. We sanded the entire cabin (photo’s attached), and the natural color and texture of the wood was totally restored.
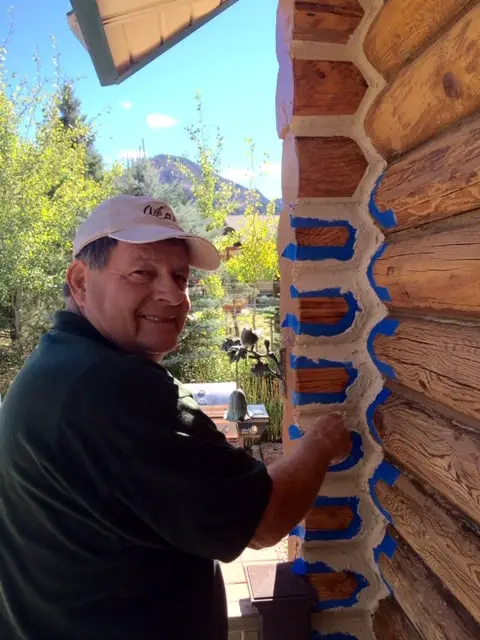
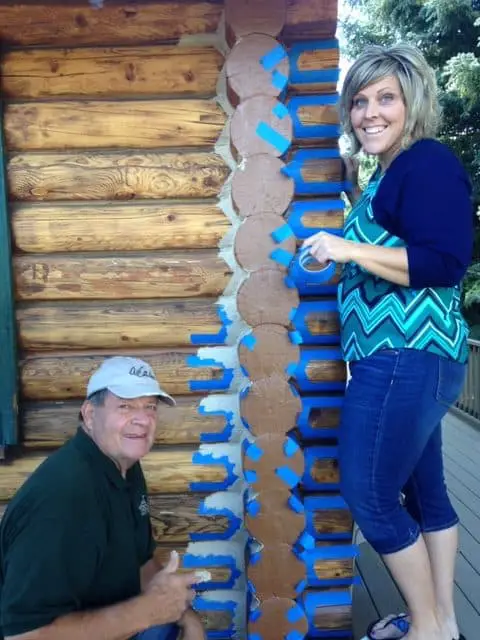
Before applying the joint caulk, I removed the old caulk, which came out in chunks and strips. That took two days and was not a very difficult task as I used a pointed “v” shaped cement trowel, and a sharp knife to slice out the old caulk. I removed all surplus dirt and cleaned the crevices carefully with a wire brush in preparation for new caulk joint compound (Perma-Chink caulk). The color I selected was “Sandstone #215. I used a cake decorating offset wood handled icing kitchen spatula for a trowel (my wife about killed me) and used blue painter’s tape for the notched corners (see photo) to make sure they were symmetrical. My sweet daughter helped with this chore. The caulk has a rubbery texture that binds to the wood and lasts indefinitely. It also has insect resistant properties. Note: This Perma Chink caulk must be applied at a thickness of at least a quarter inch. Otherwise, if thinly applied, it will crack as it dries.
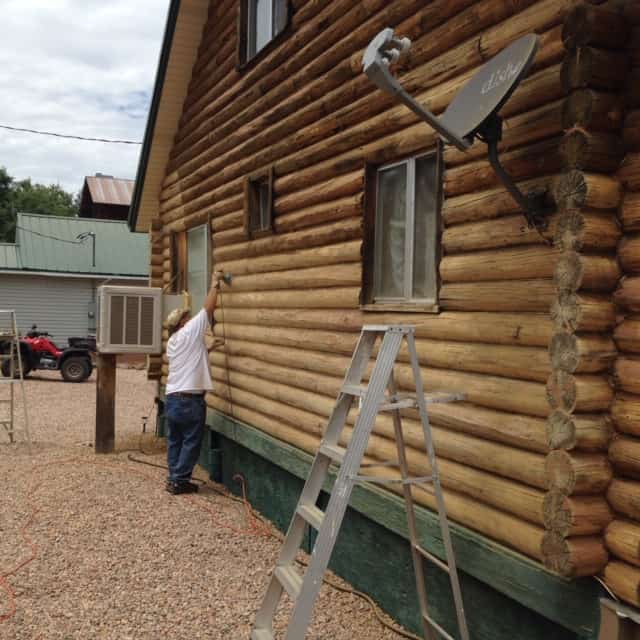
After letting the caulk firm-up for a few days (4), I began to apply the wood sealant to the logs. I decided to use a stiff bristled 5” painter’s brush and do it by hand since my sprayer seemed to be dripping and wasting expensive sealant. I decided on “Messmer’s” Timberflex, Alaskan Log Home Formula (photo). It was somewhat expensive but came highly recommended by a Hurst Ace Hardware wood specialist whose 20 year experience included a testimonial from a cabin owner who told him that his sealant looked great, had UV resistance and had lasted ten years. He suggested I put on two coats, which I did.
I want to explain that I am not a professional log cabin builder nor wood specialist. I am a DIY guy, who does not mind rolling up his sleeves and attacking any job that requires matter over mind. I have discovered that owning a mountain cabin requires regular maintenance, but if I were to match great family gatherings, fireplace chats and yummy BBQ’s, beautiful crisp starry nights with laughter and great memories, the maintenance has been a small chore with lotsa good returns. I have also come to realize that wood preservation practices for logs usually come best with good product usage and the right tools. I also learned what I needed to know and do with log preservation techniques and products on the internet. If you have a homestead worth protecting, this formula, which does call for some hard work with your precious logs, will work for you.