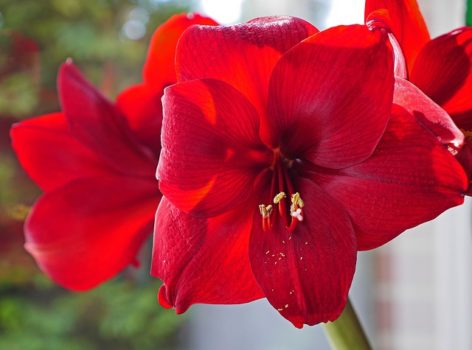
During the Christmas holiday it is a delight to have beautiful living flowers in our homes. Their bright flowers and stunning green foliage brings a source of pleasure during the dreary days of winter. So we actively go out and obtain some of these beauties, and enjoy them through the holidays, but afterwards, now what?
THE FIRST “WHAT”
You went out and bought a brown (not too pretty) Amaryllis bulb at a local garden store or nursery. Usually the bulbs come with directions for planting, but for those who may have lost the directions, just put the bulb in a pot, preferably one with drainage holes, and only about 1 to 2 inches bigger than the circumference of the bulb.
The soil you use should be made up of two parts loam, one part perlite and one part well-rotted manure. If you are not close to a pasture, another good mix is one part loam, one part sand, and one part compost. This mixture makes for a loose soil that drains well and allows the Amaryllis plant to take in nutrients.
Once you have the soil mixture in your pot, it is time to plant the small treasure. Put the bulb in the center of the selected pot allowing at least an inch of soil around the bulb, but not more than two inches. Amaryllis bulbs do not like to be crowded.
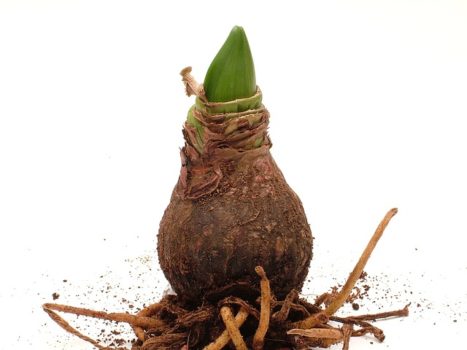
Selecting the bulb you are adopting is important. Make sure it is big, not blemished in any way and free from mold. Place about 2 inches of soil in the bottom of your pot. The pointy end goes up and the bulb goes into the soil, root down. Nestle the bulb into its new home, pointy side up, and put soil around the bulb. Allow about 1/3 of the bulb to be above any soil.
Putting a bamboo stick along side the bulb will allow support as the shoots start to grow. If you end up with too much potting soil, save it. Put it in a plastic bag, seal it tight and be ready for the next time you need to pot a friend for your new plant.
THE SECOND “WHAT”
Patience is a virtue, it has been said, but is sorely taxed while waiting for the next step in this process. The next step is watering and waiting for it to begin growing. Water the bulb until the soil is saturated, and water runs out of the holes in the bottom of the pot. After that, do not water again until you begin to see shoots of green coming from the bulb. Then water evenly, but just enough to keep the soil moist.
The new member of your family will enjoy a temperature of 70 degrees or so during the growing process. Bright, indirect light will also be an encouragement for the flowers to come. Enjoy the amazing growth process of this delightful bulb. Some bulbs can be forced to grow with just a damp bit of moss to nestle in. This medium must be keep moist, but not wet and the bulbs will respond. Remember, PATIENCE.
THE THIRD “WHAT”
As you tend to your new project, you will want to rotate the pot a little bit every few days so that the bulb will have “equal opportunity” to receive sunlight on all sides. The magic that is brewing will effervesce in about 6 to 8 weeks. (Mine happened faster, about 4 weeks. Of course I talked to the plant every day and made it feel welcome).
When the glorious flowers begin to appear, move the plant to a source of indirect light. This will make the flowers last longer and the bulb will have more chance to store up nutrients. Then grab a camera and memorialize this special occasion.
Hopefully you have given this awesome flower a name and a page in the photo album. The bulb needs to be fed every 2 to 3 weeks with a soluble plant fertilizer diluted with ½ water. Enjoy!!!!!
BUT THEN “WHAT” #4
You wake up and go to check on your new and beautiful Amaryllis –and you can’t believe your eyes. The tall stalks that had held those beautiful blooms now sport wilted, brown, almost ugly blossoms that make you want to weep.
Now what. Toss your friend and family member in the garbage? OH NO YOU DON’T! Take heart, this plant shall rise again with the proper care.
First, realize that a lot of these strong, hearty bulbs will send up another shoot to gladden your days. Look at your bulb and see if it is making an attempt to send another shoot up. While you are waiting, cut back the stocks that have spent blooms on them. Cut them to about ½ inch above the bulb. Don’t cut anything else. PATIENCE!!!
ANOTHER “WHAT”

So you enjoy the bonus blooms from your wonderful bulb. Going through an encore performance and after you clap and cut the spent stock, you cut it down to ½ inch from the bulb. Now What??? Please leave the leaves on. They collect energy for the next year.
You can now make a choice – leave the bulb in the pot and take it outside, but put it where it can get sun. This dormant period is what will allow the bulb to rebloom. Don’t let rain, snow or water build up because it will cause the bulb to rot. The temperature should be no colder than 50 deg. You can even transplant the bulb into a spot in your flower garden after the danger of frost. You can leave it outside during the summer but at the first sign of colder weather (50 degrees) and when the foliage dies back naturally, cut the leaves back 1 to 2 inches from the bulb. Dig up the bulb, clean the dirt off and put it in a cool, dry, dark place (like a basement). The bulb will go dormant at this time so it does not need light or water. This should be for a period of from 4 to 12 weeks. After this time you may desire the company of your Amaryllis, just follow the directions at the beginning of this article and repeat the excitement of having your old friend back.
A QUICK REVIEW OF WHAT YOU WILL NEED TO DO:
- Select an amaryllis bulb that is large, with no damage, no mold
- Obtain a pot that is between 1 and 2 inches larger around than the bulb
- Make sure the pot has drainage holes
- Prepare the correct soil that will drain well (see above)
- Feed the plant every 2-3 weeks with a water soluable fertilizer.
- Enjoy
- Follow directions to save the bulb for next year
- Cut back stocks
- Put in sunlight
- Cut back leaves when brown
- Put bulb to rest in a dark, dry place